2023. 3. 30. 10:48ㆍDIY projects
2023.03.26 - [미국 일상] - 화장실 셀프 리모델링 4 DIY Bathroom Vanity Episode 1. Construction
화장실 셀프 리모델링 4 DIY Bathroom Vanity Episode 1. Construction
24인치 화장실 싱크 캐비넷을 만들기 위해, 먼저 나무 합판을 잘랐다. 부엌 캐비넷에 사용하고 남은 메이플과 포플러 나무 합판을 섞어서 사용했다. To build a 24" bathroom vanity, I cut some plywood out of th
akoreaninamerica.tistory.com
지난번 포스팅에서 캐비넷 프라임과 페인팅을 위한 준비 과정을 기록했다.
I wrote about the process before priming and painting the vanity cabinet in the last post.
이번에는 드디어, 캐비넷 제작의 꽃(?)이라고 할 수 있는 페인트 과정을 써보려 한다.
페인트를 바르기 위해서는 먼저 프라임을 발라야하는데, 프라임을 바르기 전, 패치 작업이 있다면 먼저 해야한다.
특히 나의 경우, 캐비넷을 만들면서 문짝의 가장자리 부분은 밴딩 처리하지 않고 스패클로 패치를 한다.
This time, I'm going to write about the priming and painting process which is the best part of cabinet making.
Before priming, if there are some areas to be covered with spackle, you have to patch those first.
I, especially, patch the edge of the wood with spackle instead of the edge band.


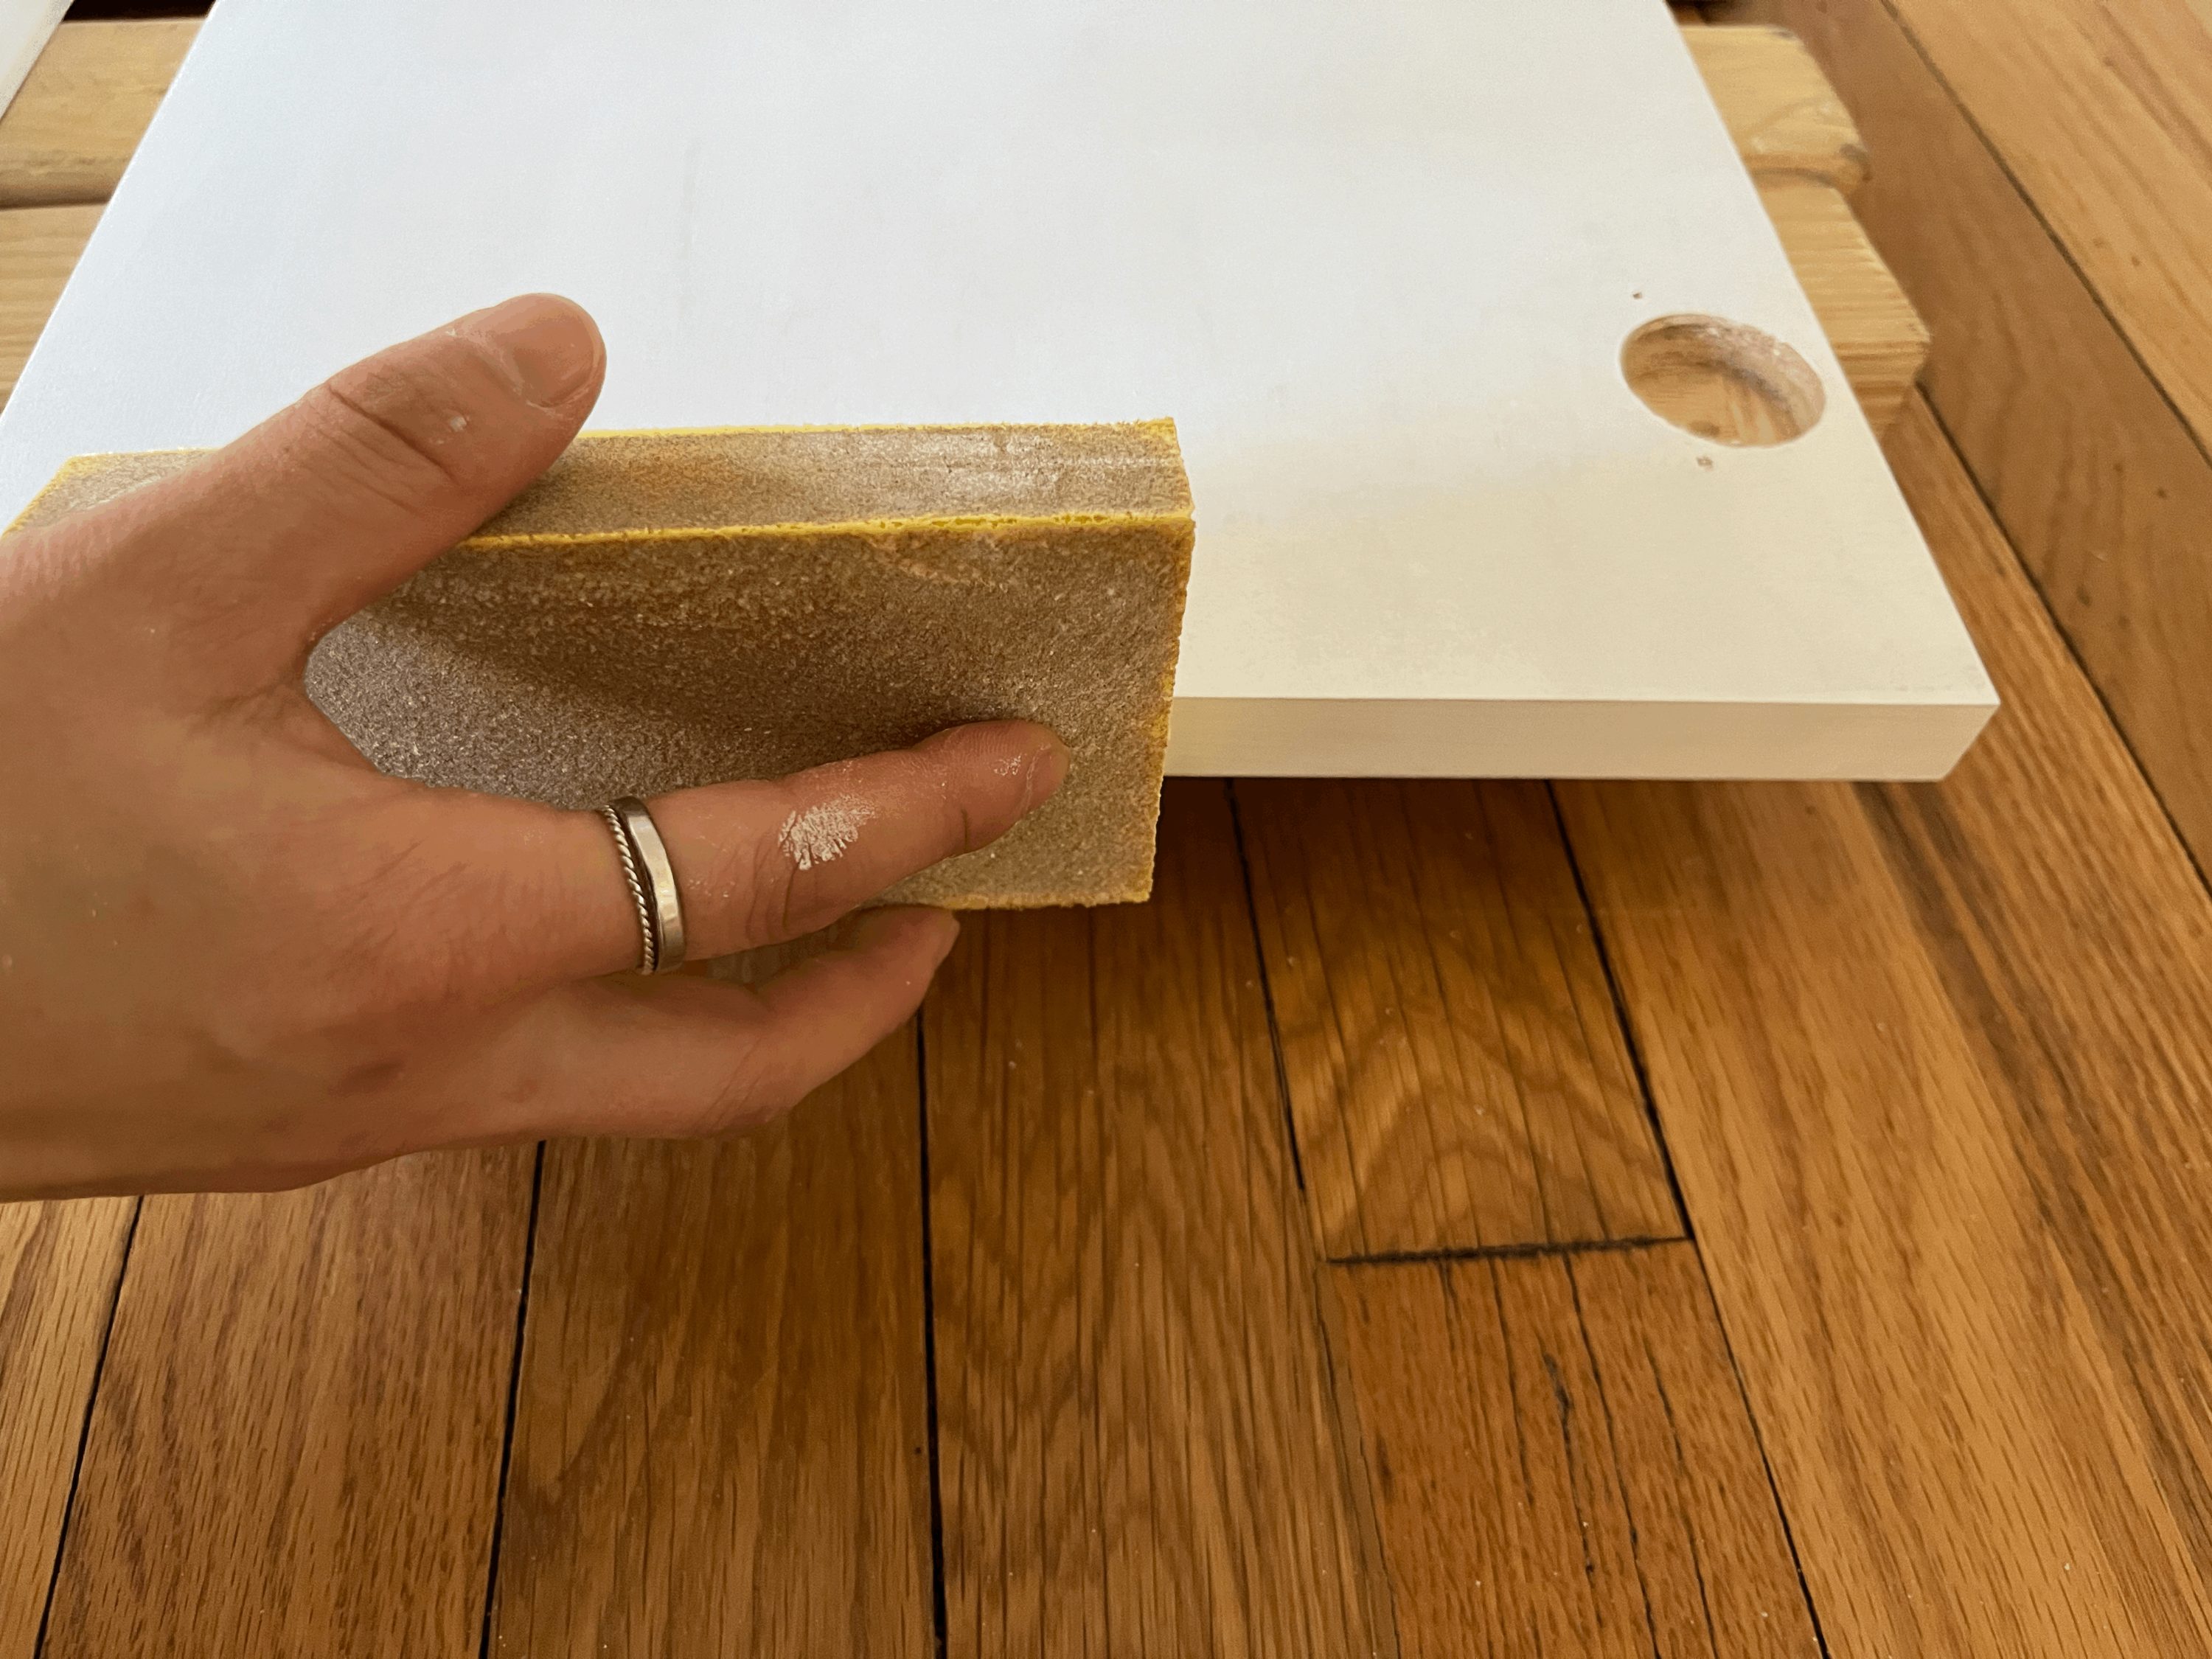
나무 합판의 가장자리를 패치할 때는, 패치 및 패치 샌딩 과정도 중요하지만 패치를 하기 전의 샌딩 과정도 무척 중요하다.
나무를 자르고 나서 가장자리를 부드럽게 잘 샌딩해놔야 나중에 패치도 잘되고, 패치 후에 프라임 및 페인트를 하고나서도 티가 안나기 때문이다.
If you decide to patch the edge of the wood with spackle instead of the edge band like me, it is really important that you make sure the edges are sanded very smooth beforehand. That will make patching the edges easier and will be covered perfectly after prime and paint.


캐비넷 본체부분의 나사못도 패치를 해서 가려줬다.
이것도 패치를 잘만 하면, 나사못이 나중에 티가 나지 않는다. 이런 나사못 패치는 패치를 두번, 세번 정도 해야지 말끔하게 마무리가 된다.
I also patched the cabinet's screw holes.
These screw holes are usually needed to be patched 2 or 3 times and sanded good, so they are perfectly covered by prime and paint.


스패클로 첫 패치를 하고나면, 마르는 과정에서 중간 부분이 약간 움푹 들어가기도 하고, 가장자리가 덜 채워지기도 한다.
With the first spackle coat, it will be a little shrunken in the center and not filled enough around the hole after drying.

말끔히 샌딩하고 나서 손가락으로 만져보면 느껴진다.
You can feel that by touching it after sanding.


그럼 스패클로 다시 한번 덮어주면 된다.
Then, you just patch it with spackle again.

두번째 패치도 마르고나면 또 샌딩을 해준다.
Sand again, after the second patch dries.


손으로 만져봤을 때, 부드럽지 않고 뭔가 울퉁불퉁한게 느껴진다면 패치 & 샌딩 과정을 또 반복하면 된다.
When you touch it, if it still feels rough, you have to repeat the same process until the surface is smooth.

패칭 및 샌딩 작업이 끝나면 드디어 프라임을 바를 시간이다.
It's finally time to prime after the patching and sanding is done.
2023.03.01 - [미국 일상] - 화장실 셀프 리모델링 1 How to Fix Bathroom Ceiling Paint Peeling and Cracking
화장실 셀프 리모델링 1 How to Fix Bathroom Ceiling Paint Peeling and Cracking
부엌 리모델링이 끝나고 화장실 리모델링에 돌입했다. I started working on the bathroom after my kitchen remodeling. 우리집은 1층에 샤워가 달린 화장실이 있고, 2층에 변기와 세면대만 있는 화장실이 있다.
akoreaninamerica.tistory.com
이전에 화장실 천장을 새로 페인트할 때도 설명했었지만, 스팩클이나 조인트 컴파운드로 패치를 했다면 부분 프라임을 반드시 권하고 싶다. 특히 브러쉬로 말이다.
I explained how I always partially prime spackle or joint compound patched areas with a brush in the ceiling paint post. It is really important to do that, so I primed the edge of the wood and screw holes with a brush first.


스팩클로 패치한 모든 부분을 브러쉬로 먼저 얇게 펴발라줬다.
I primed the patched areas very lightly with a brush.
그런 다음, 부분 프라임이 다 마르고나면 가장자리를 포함한 모든 면적을 롤러로 프라임을 발라줬다.
After the partial prime was dry, I did a first coat of prime for the whole cabinet base and doors with a roller.


첫번째 코팅을 하고난 모습인데, 이때만 해도 나사못을 패치한 곳은 여전히 잘 보인다.
After the first coat of prime, the patched screw holes were still visible.

프라임 첫번째 코팅이 다 마르고나서 만져보면 거칠거칠함을 느낄 수 있다. 그래서 두번째 코팅 전에 샌딩을 꼭 해줘야 한다.
Since the surfaces get rough after the prime is dry, you have to sand them before the second coat.


샌딩 후, 먼지를 잘 닦아낸 후에 다시 프라임을 발랐다.
After sanding, I wiped off any dust and primed again.


두번째 프라임 코팅 이후에도 약간 나사못 패치부분이 보이긴 하나, 많이 가려졌다.
I could still see the patched screw holes a little after the second coat of prime, but it was covered much better.


두번째 프라임 코팅이 마르고나서, 본격적으로 페인팅을 하기 전에, 다시 샌딩을 했다.
첫번째 프라임 코팅 이후에 사용한 샌딩 grit보다 더 부드러운 것으로 사용하면 된다. 너무 강하게 할 필요는 없고 약하게 골고루 다듬어만 주면 된다.
After the prime dried, I sanded again before starting to paint.
I used higher grit sanding paper than the one I used after the first coat of prime and sanded all the surfaces very lightly.
페인트는 Sherwin Williams 제품인, Emerald Urethane Trim Enamel을 사용했다.
잘 안되면 어쩌나... 굉장히 걱정했는데 진짜 선택하길 너무너무너무너무너무 잘했다고 생각했다.
마르는 시간, 페인트가 부드럽게 가라앉는 정도, 커버력 모두 너무 좋았다.
For the paint, I used Sherwin Williams Emerald Urethane Trim Enamel.
I was a little nervous before using it because it was my first time using Emerald, but it worked great.
The drying time, leveling, and coverage were all perfect.
색깔은 Rhinestone으로 결정했다.
이거는 캐비넷 뒤에 설치할 백스플래쉬 타일 색깔과 최대한 비슷하게 맞춘 것이다.
The color I picked was Rhinestone.
It was a similar one with the backsplash tile, which will be installed right behind the bathroom vanity.

롤러는 마이크로파이버로 사용할 것을 추천한다.
나는 페인팅할 때 무조건 위 제품만 사용해왔다.
I recommend using a microfiber roller for the paint.
I've always used it for all my paint jobs.


실패없이 잘 바를 수 있는 팁이 있다면 두가지로 말할 수 있을 것 같다.
1. 빨리 2. 한번에
포스팅 가장 하단에 걸어둔 유투브 동영상을 보면 알 수 있겠지만, 에메랄드 페인트는 빨리 마르기 때문에 빠릿하게 발라야하는 건 당연지사다. 그리고 롤러에 페인트를 양껏 묻혀서 약간 힘을 주고 모든 면적을 골고루 발랐다면 마지막에 겉만 살짝 건드린다는 느낌으로 전체적으로 롤러를 굴려준 다음에는, 더이상 건드리면 안된다. 뭔가 덜 발린 것 같아도 두번째 코트에서 해결해야 한다.
I have 2 tips to avoid a bad paint job while using a roller.
First, you have to paint as fast as you can since the Emerald paint dries fast.
Second, you first roll the area firmly with some strength, and then come back to roll the area again, but this time lightly. Even if you feel like you missed some spots, you can fix that with the second coat.
Please watch the video I linked at the end of this post, and you will understand what I'm saying.

위 사진이 마르기 시작한 페인트의 모습이다.
This is when the paint start to dry.

다 마르고나면 이렇게 잘 가라앉는다. 완전 좋다.
Once it dries, you can see how perfectly it levels.


페인트가 덜 발린 부분이 있다면 첫번째 코팅이 다 마르고나서 나타나게 되어있다.
저거는 두번째 코팅에서 해결할 수 있다.
After the first coat completely dries, the imperfections will be visible.
Don't worry, because you can fix it with the second coat of paint.

두번째 코팅 전에 아주 부드럽게 샌딩을 다시 했다.
I sanded very lightly before the second coat.

페인트 두번째 코팅도 첫번째와 같은 방법으로 하면 되는데, 덜 발린 부분을 잘 기억해놨다가 거기를 조금 더 힘을 줘서 말라주면 된다. 그리고 마찬가지로 마무리할 때에 롤러로 전체를 살짝만 굴려주면 된다.
Paint the same way as the first coat, but roll the areas you missed during the first coat with more strength.
After fully filling the surface with paint, come back to the start and lightly roll the whole surface to finish.
두번째 코팅이 완전히 마른 뒤의 모습들이다. 에메랄드 페인트 완전 만족한다.
This is after the second coat is dry. I love how the Emerald paint perfoms.
그리고 나사못 패치 부분도 완전히 커버가 되었다.
The patched screw holes are covered well too.

각각 두번씩의 프라임 및 페인트가 끝난 문짝 세트와 본체이다.
이제 화장실에 설치 후, 문과 손잡이까지 달면 완성이다~~
Now, the priming and painting is done.
One more process left to complete the vanity - I have to mount the cabinet in the bathroom and hang the door with door pulls.
'DIY projects' 카테고리의 다른 글
| 화장실 셀프 리모델링 7 Bathroom Wall Paint and Backsplash Tile (0) | 2023.04.06 |
|---|---|
| 화장실 셀프 리모델링 6 DIY Bathroom Vanity Episode 3. Installation (0) | 2023.04.04 |
| 화장실 셀프 리모델링 4 DIY Bathroom Vanity Episode 1. Construction (0) | 2023.03.26 |
| 화장실 셀프 리모델링 3 Patching and Priming Walls for Bathroom Renovation (0) | 2023.03.20 |
| 화장실 셀프 리모델링 2 DIY Bathroom Vanity Preparation (1) | 2023.03.14 |