2023. 1. 10. 12:16ㆍDIY projects
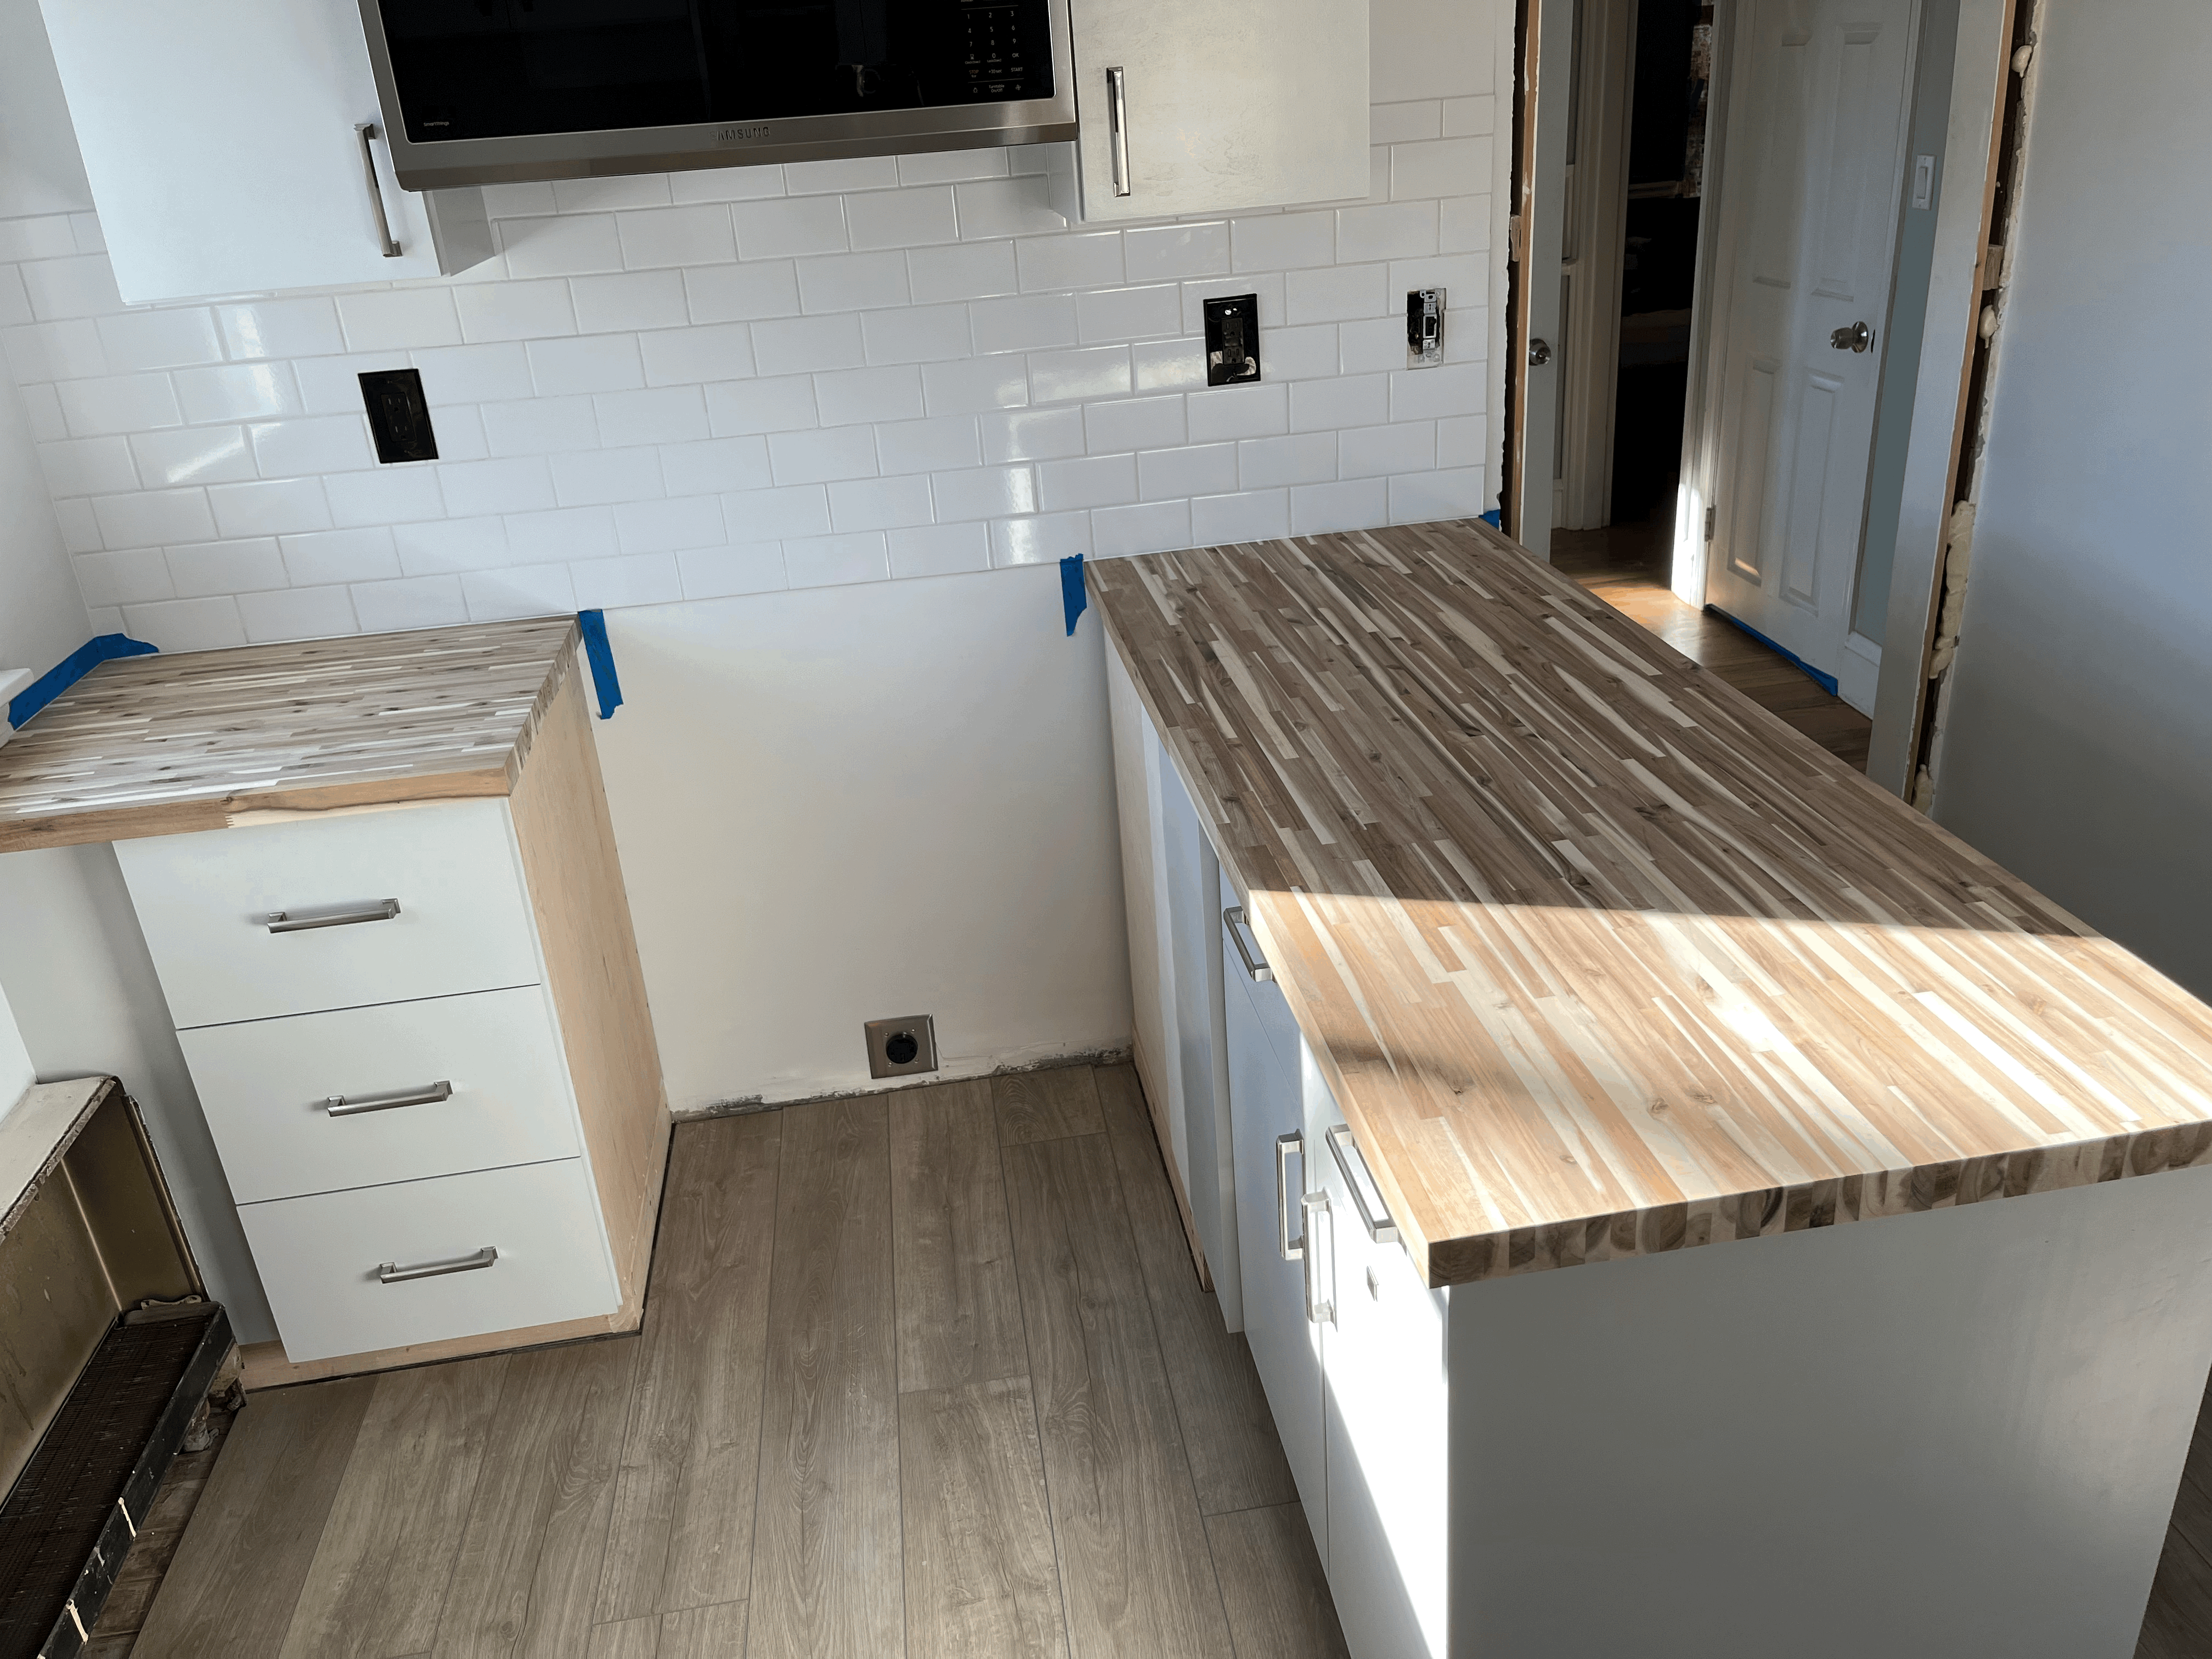
작년 6월에 이사를 온 집의 부엌을 아직도 리모델링 중이다.
지난 주말에는 남편과 내가 가장 기다리고 있었던 butcher block countertop 오일 작업을 한차례 끝냈다.
I'm still working on my kitchen renovation since we moved to our new house last June.
Last weekend, my husband and I finished a first coat of sealing of our butcher block countertop.
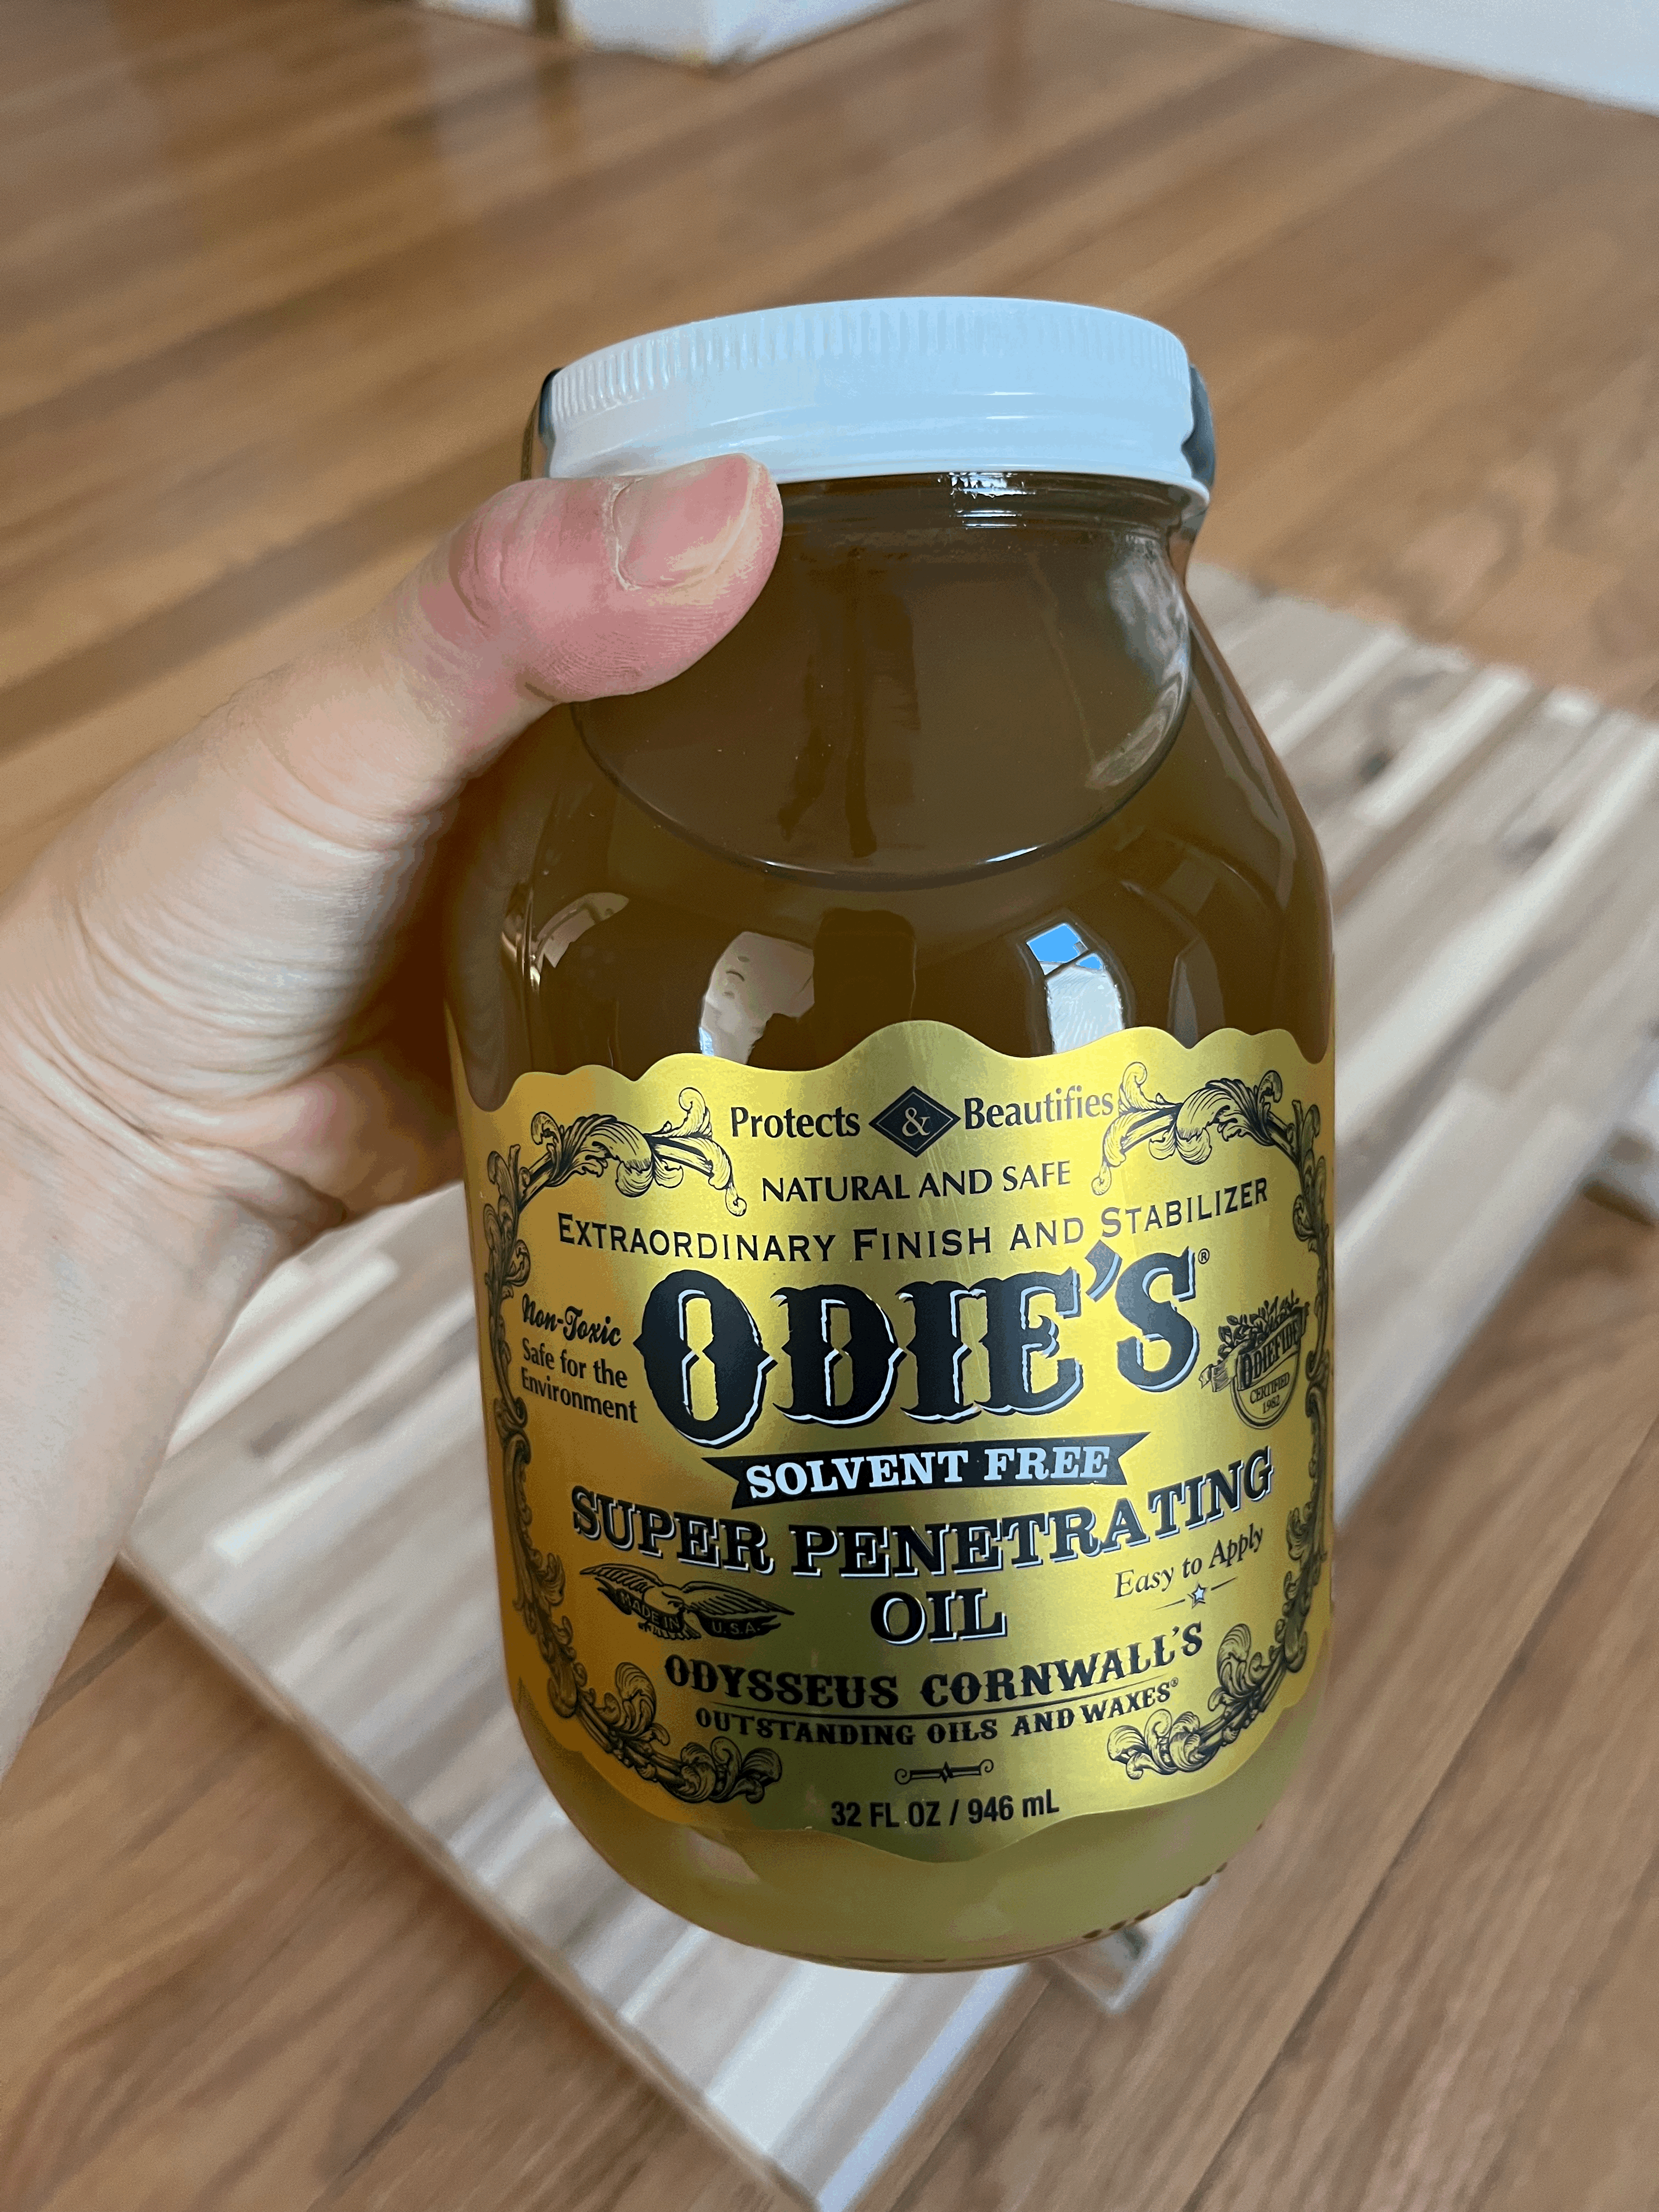
오일 제품을 고심하고 고심하던 끝에 Odie's Oil 제품으로 결정하고, 그 중에서도 super penetrating oil과 universal oil 두가지 모두 구매해 현재 super penetrating oil을 먼저 발라둔 상태이다.
It was really hard to choose which product to use but I ended up buying a super penetrating oil and a universal oil from Odie's.
Odie's oil에서 광고하듯 바르기는 아주 쉽다.
양 조절만 잘해서 골고루 펴발라 주기만 하면되고, 그냥 패드같이 생긴 어플리케이터로 자신감있게(?) 발라대기만 하면 돼서 바르는 기술이 없어서 실패할까 걱정은 안해도 된다.
It's pretty easy to apply as they advertise.
You just need to apply the right amount of oil by spreading it with an applicator pad. You cannot fail to apply Odie's oil.
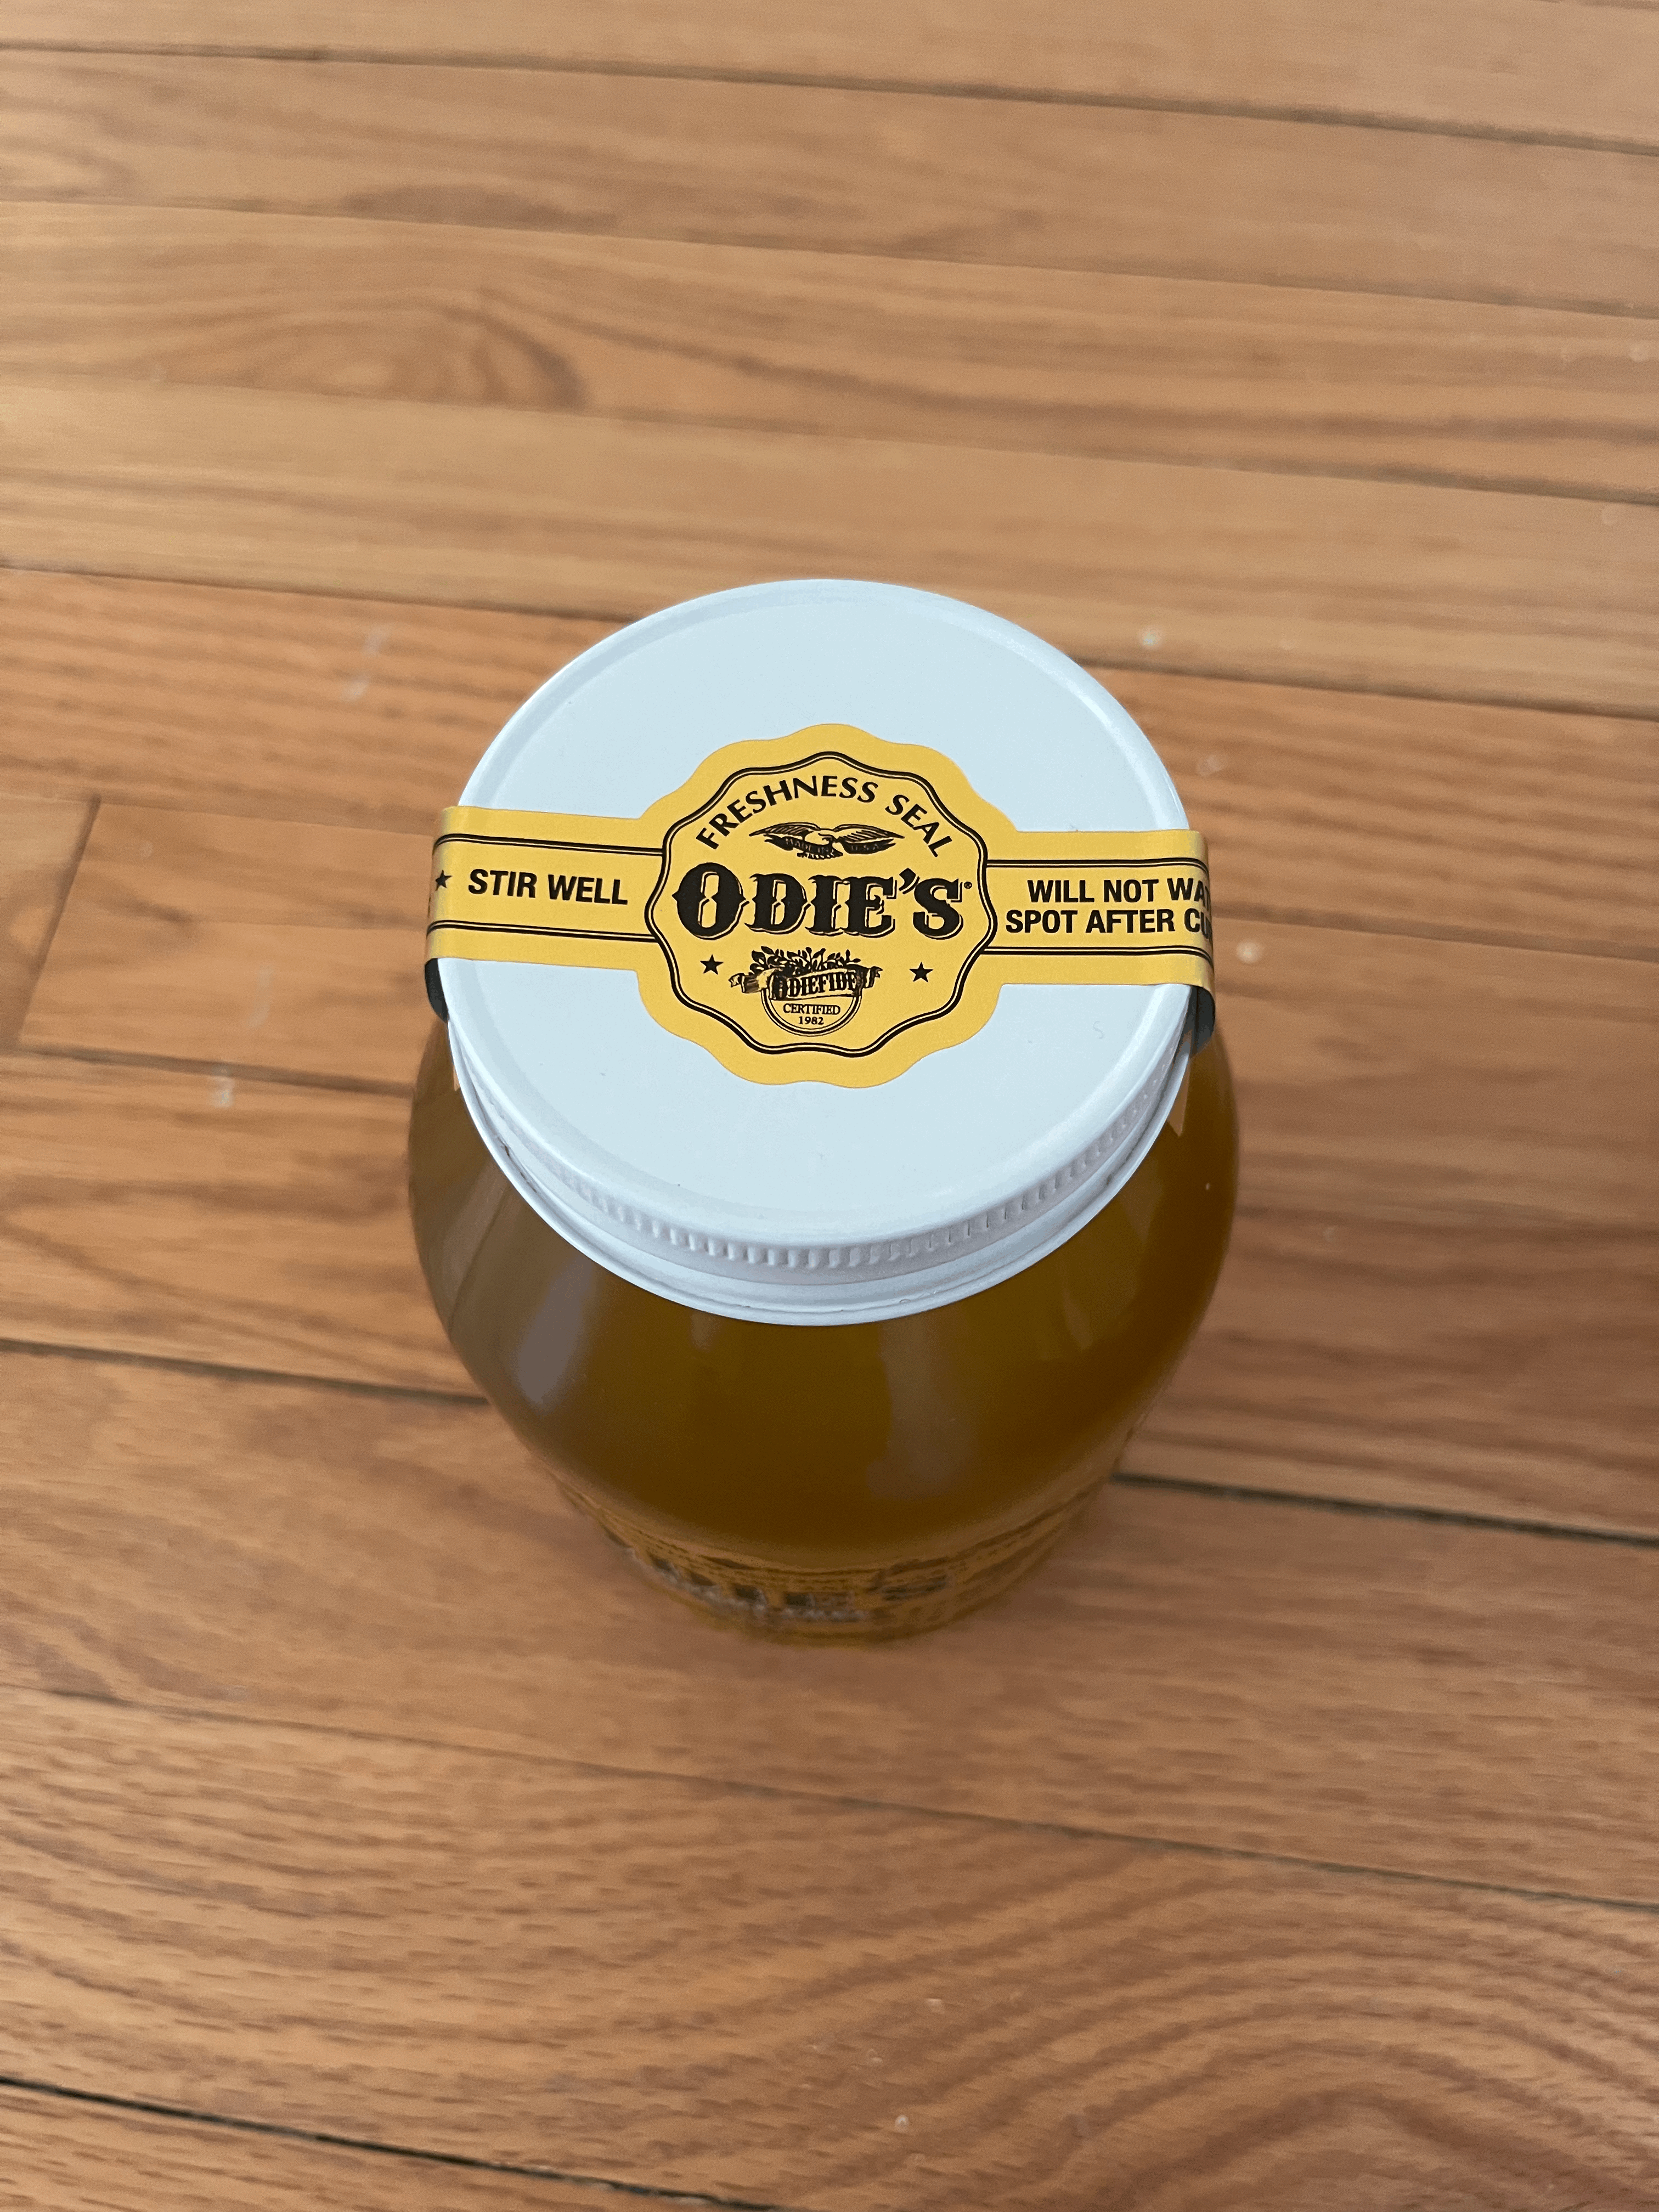
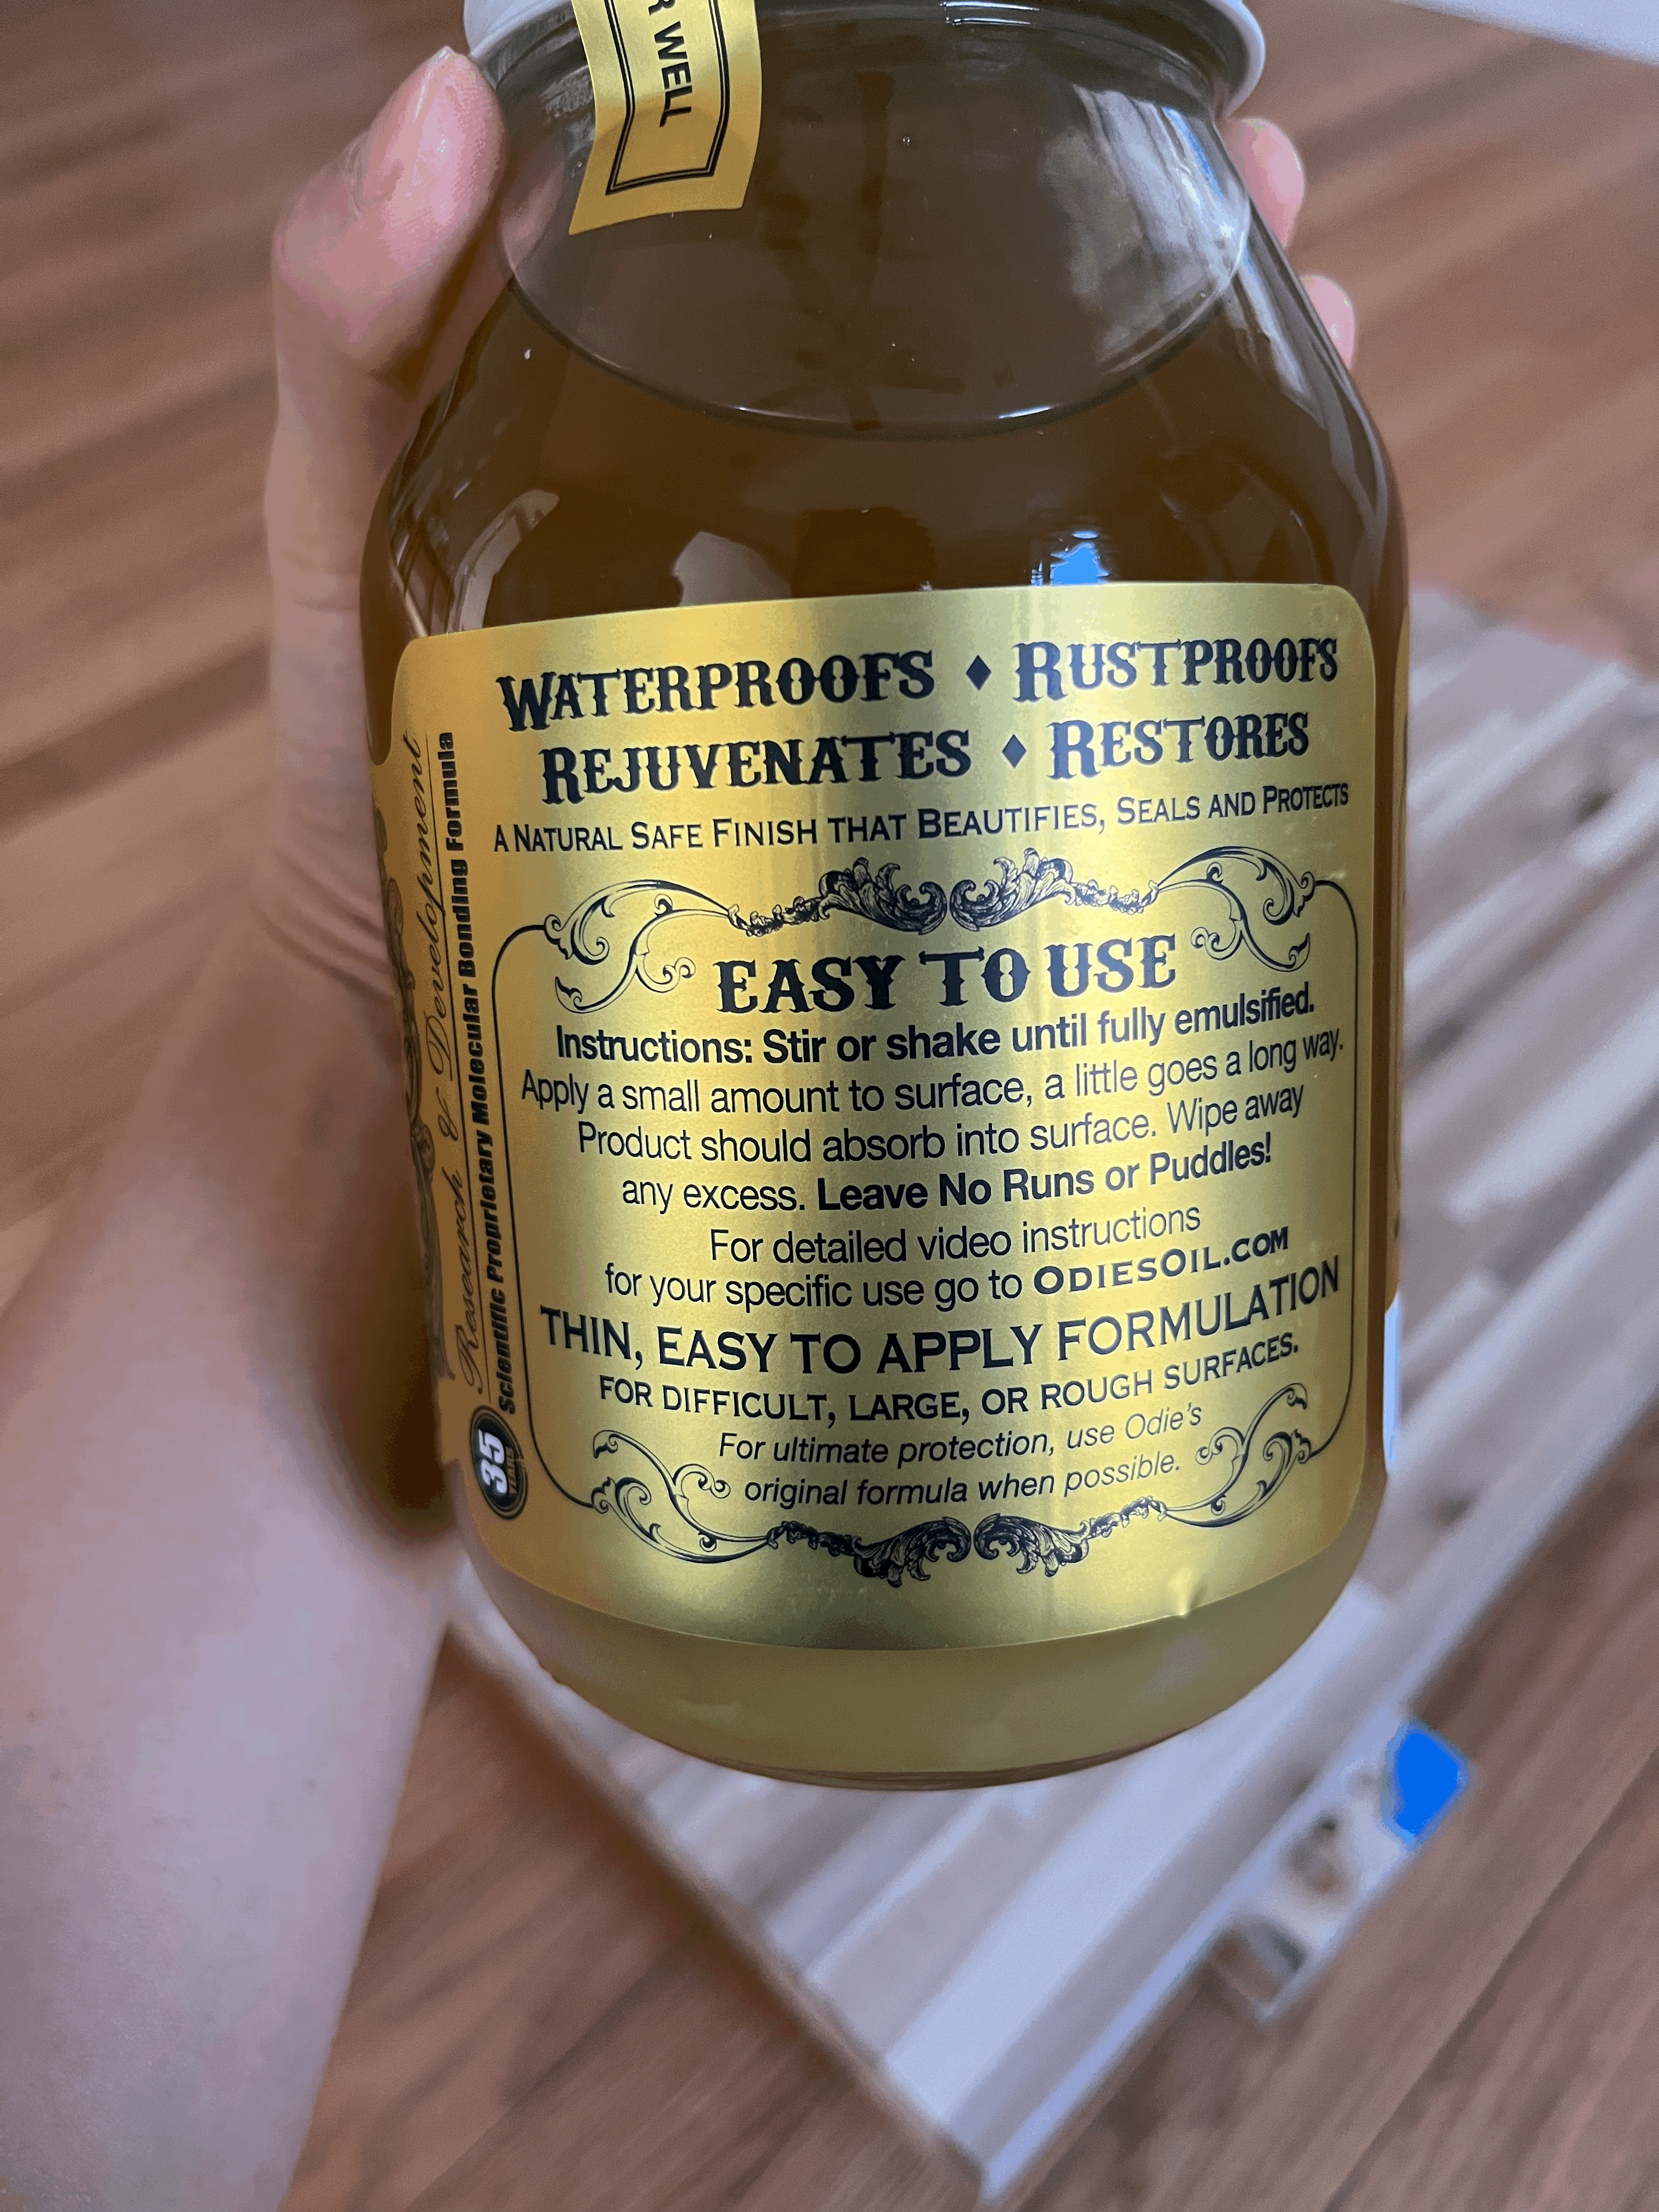
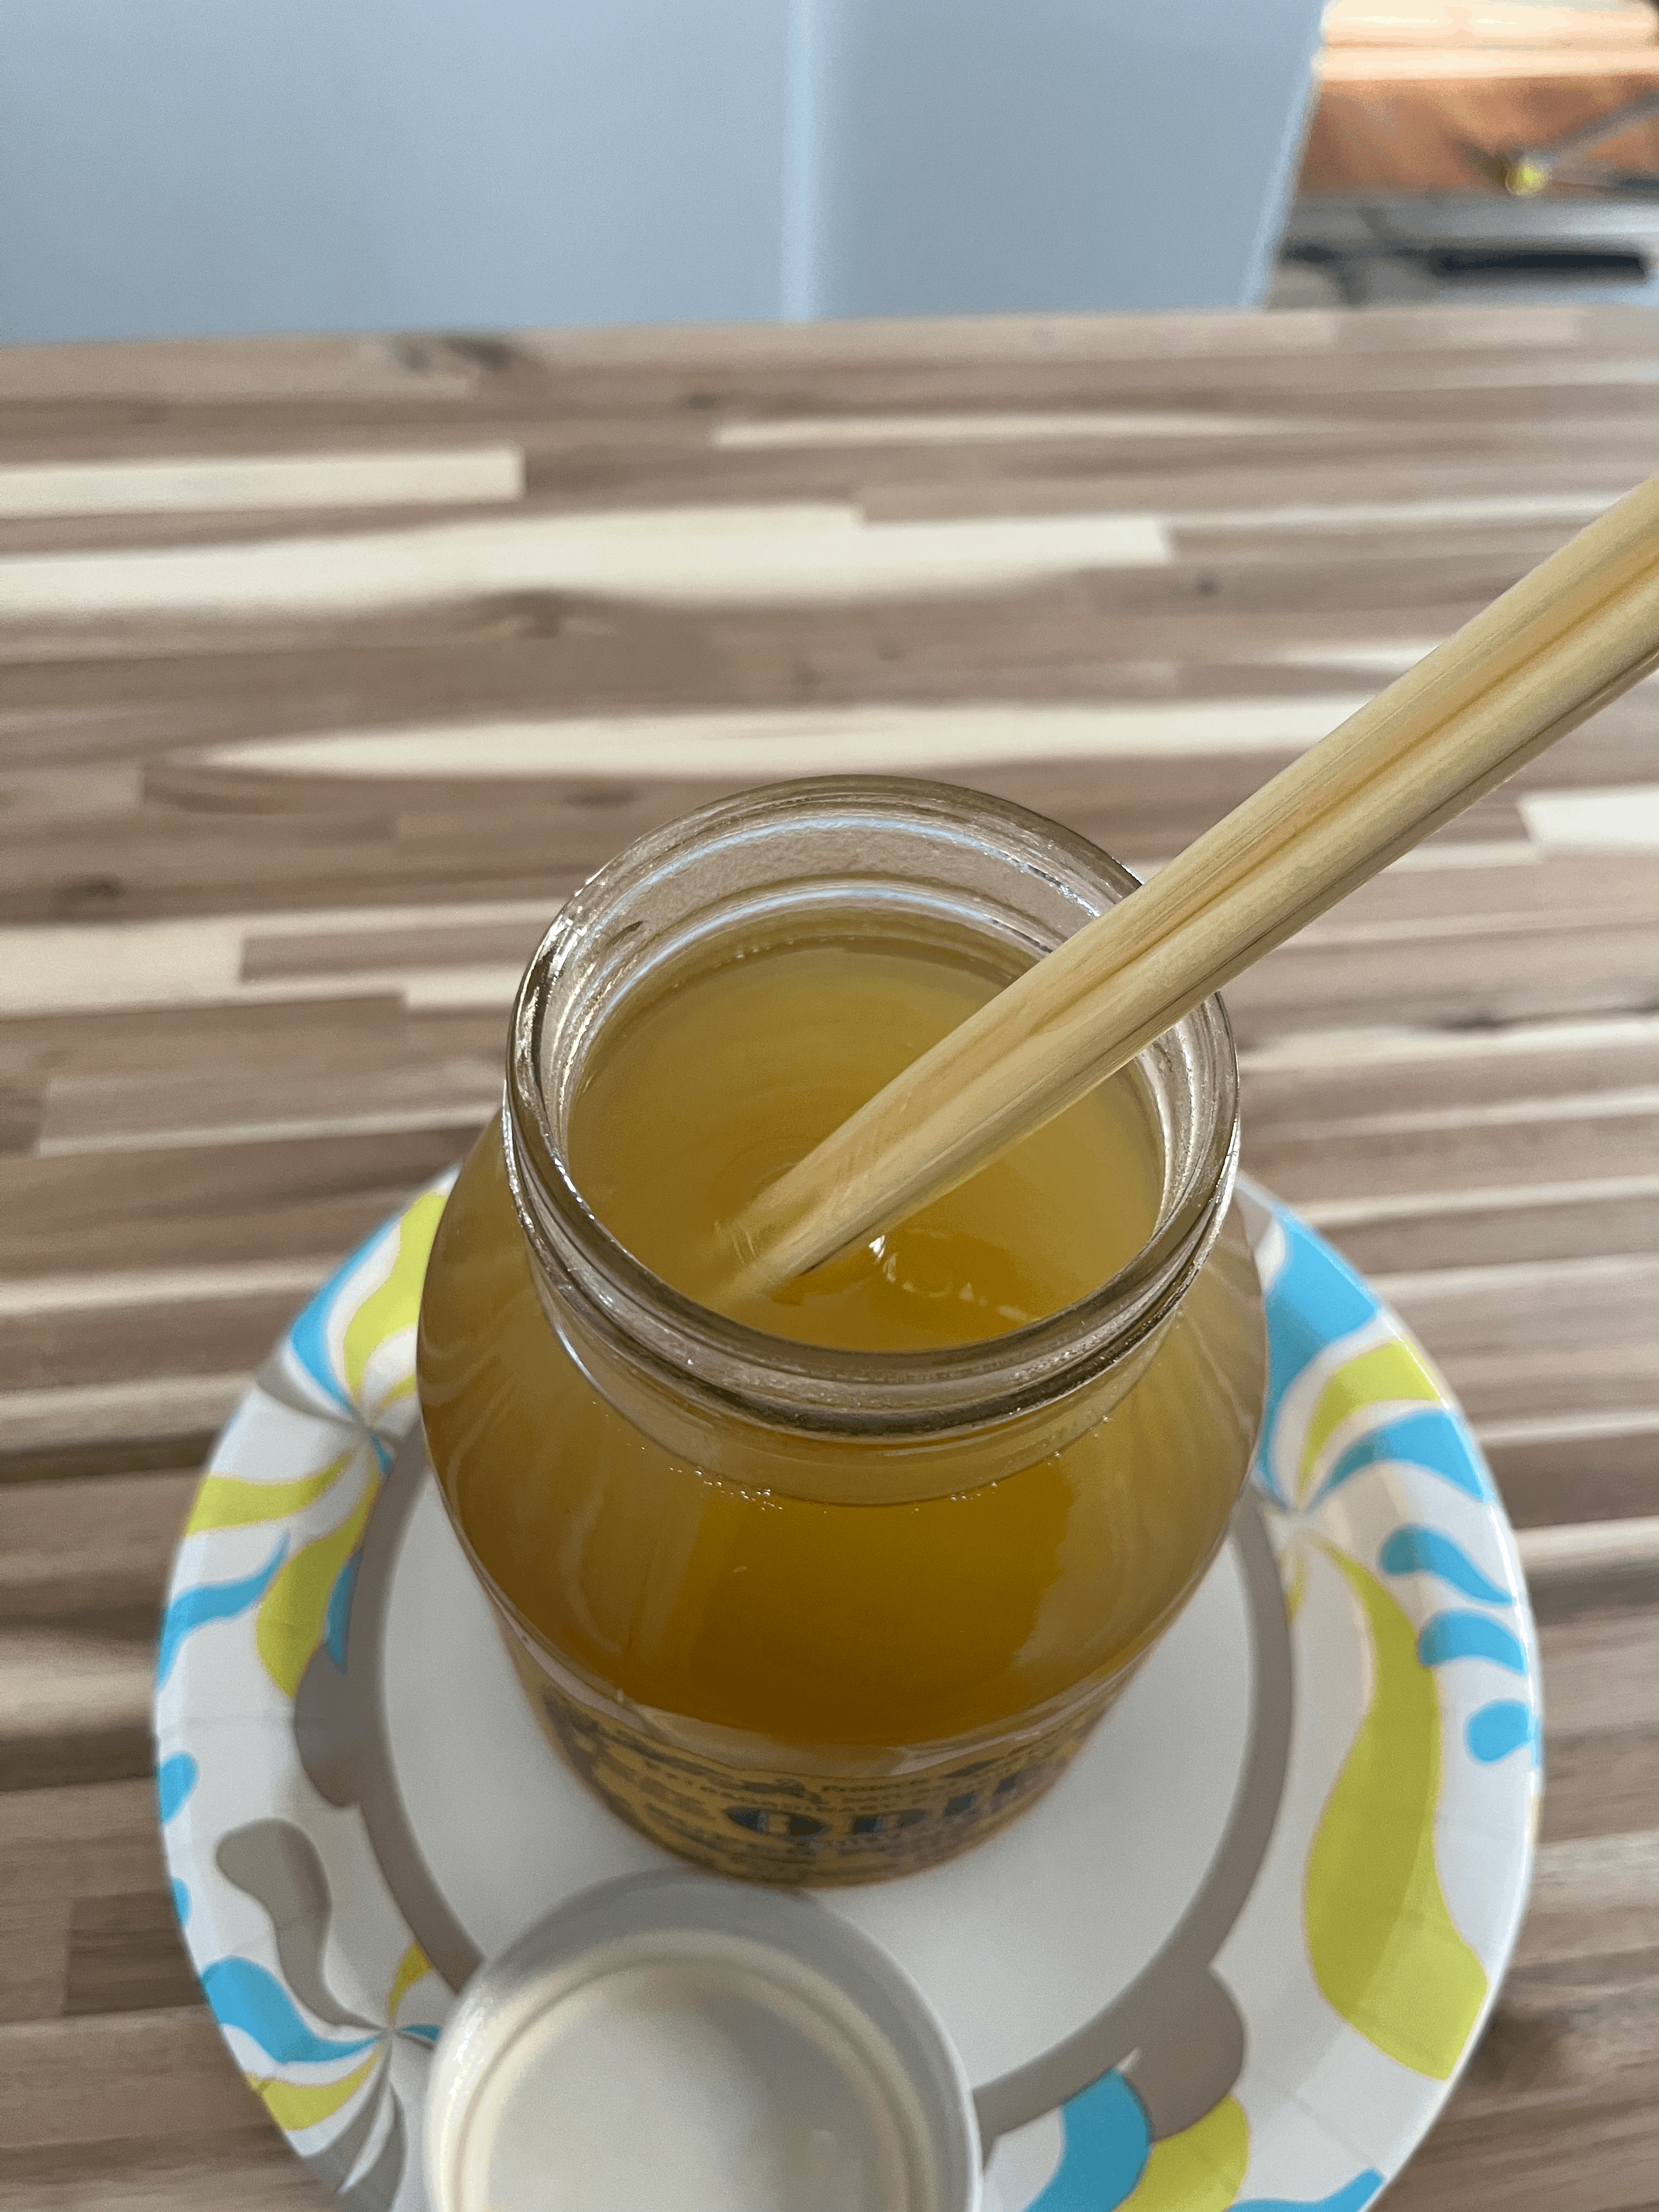
그리고 다른 sealer 제품들과 마찬가지로 잘 섞어주는게 중요하다. 병 표면에도 뚜껑에도 강조하고 있다.
Like other finishing products, it's important to shake it well. It emphasizes this on the label of the jar and the top of the lid.

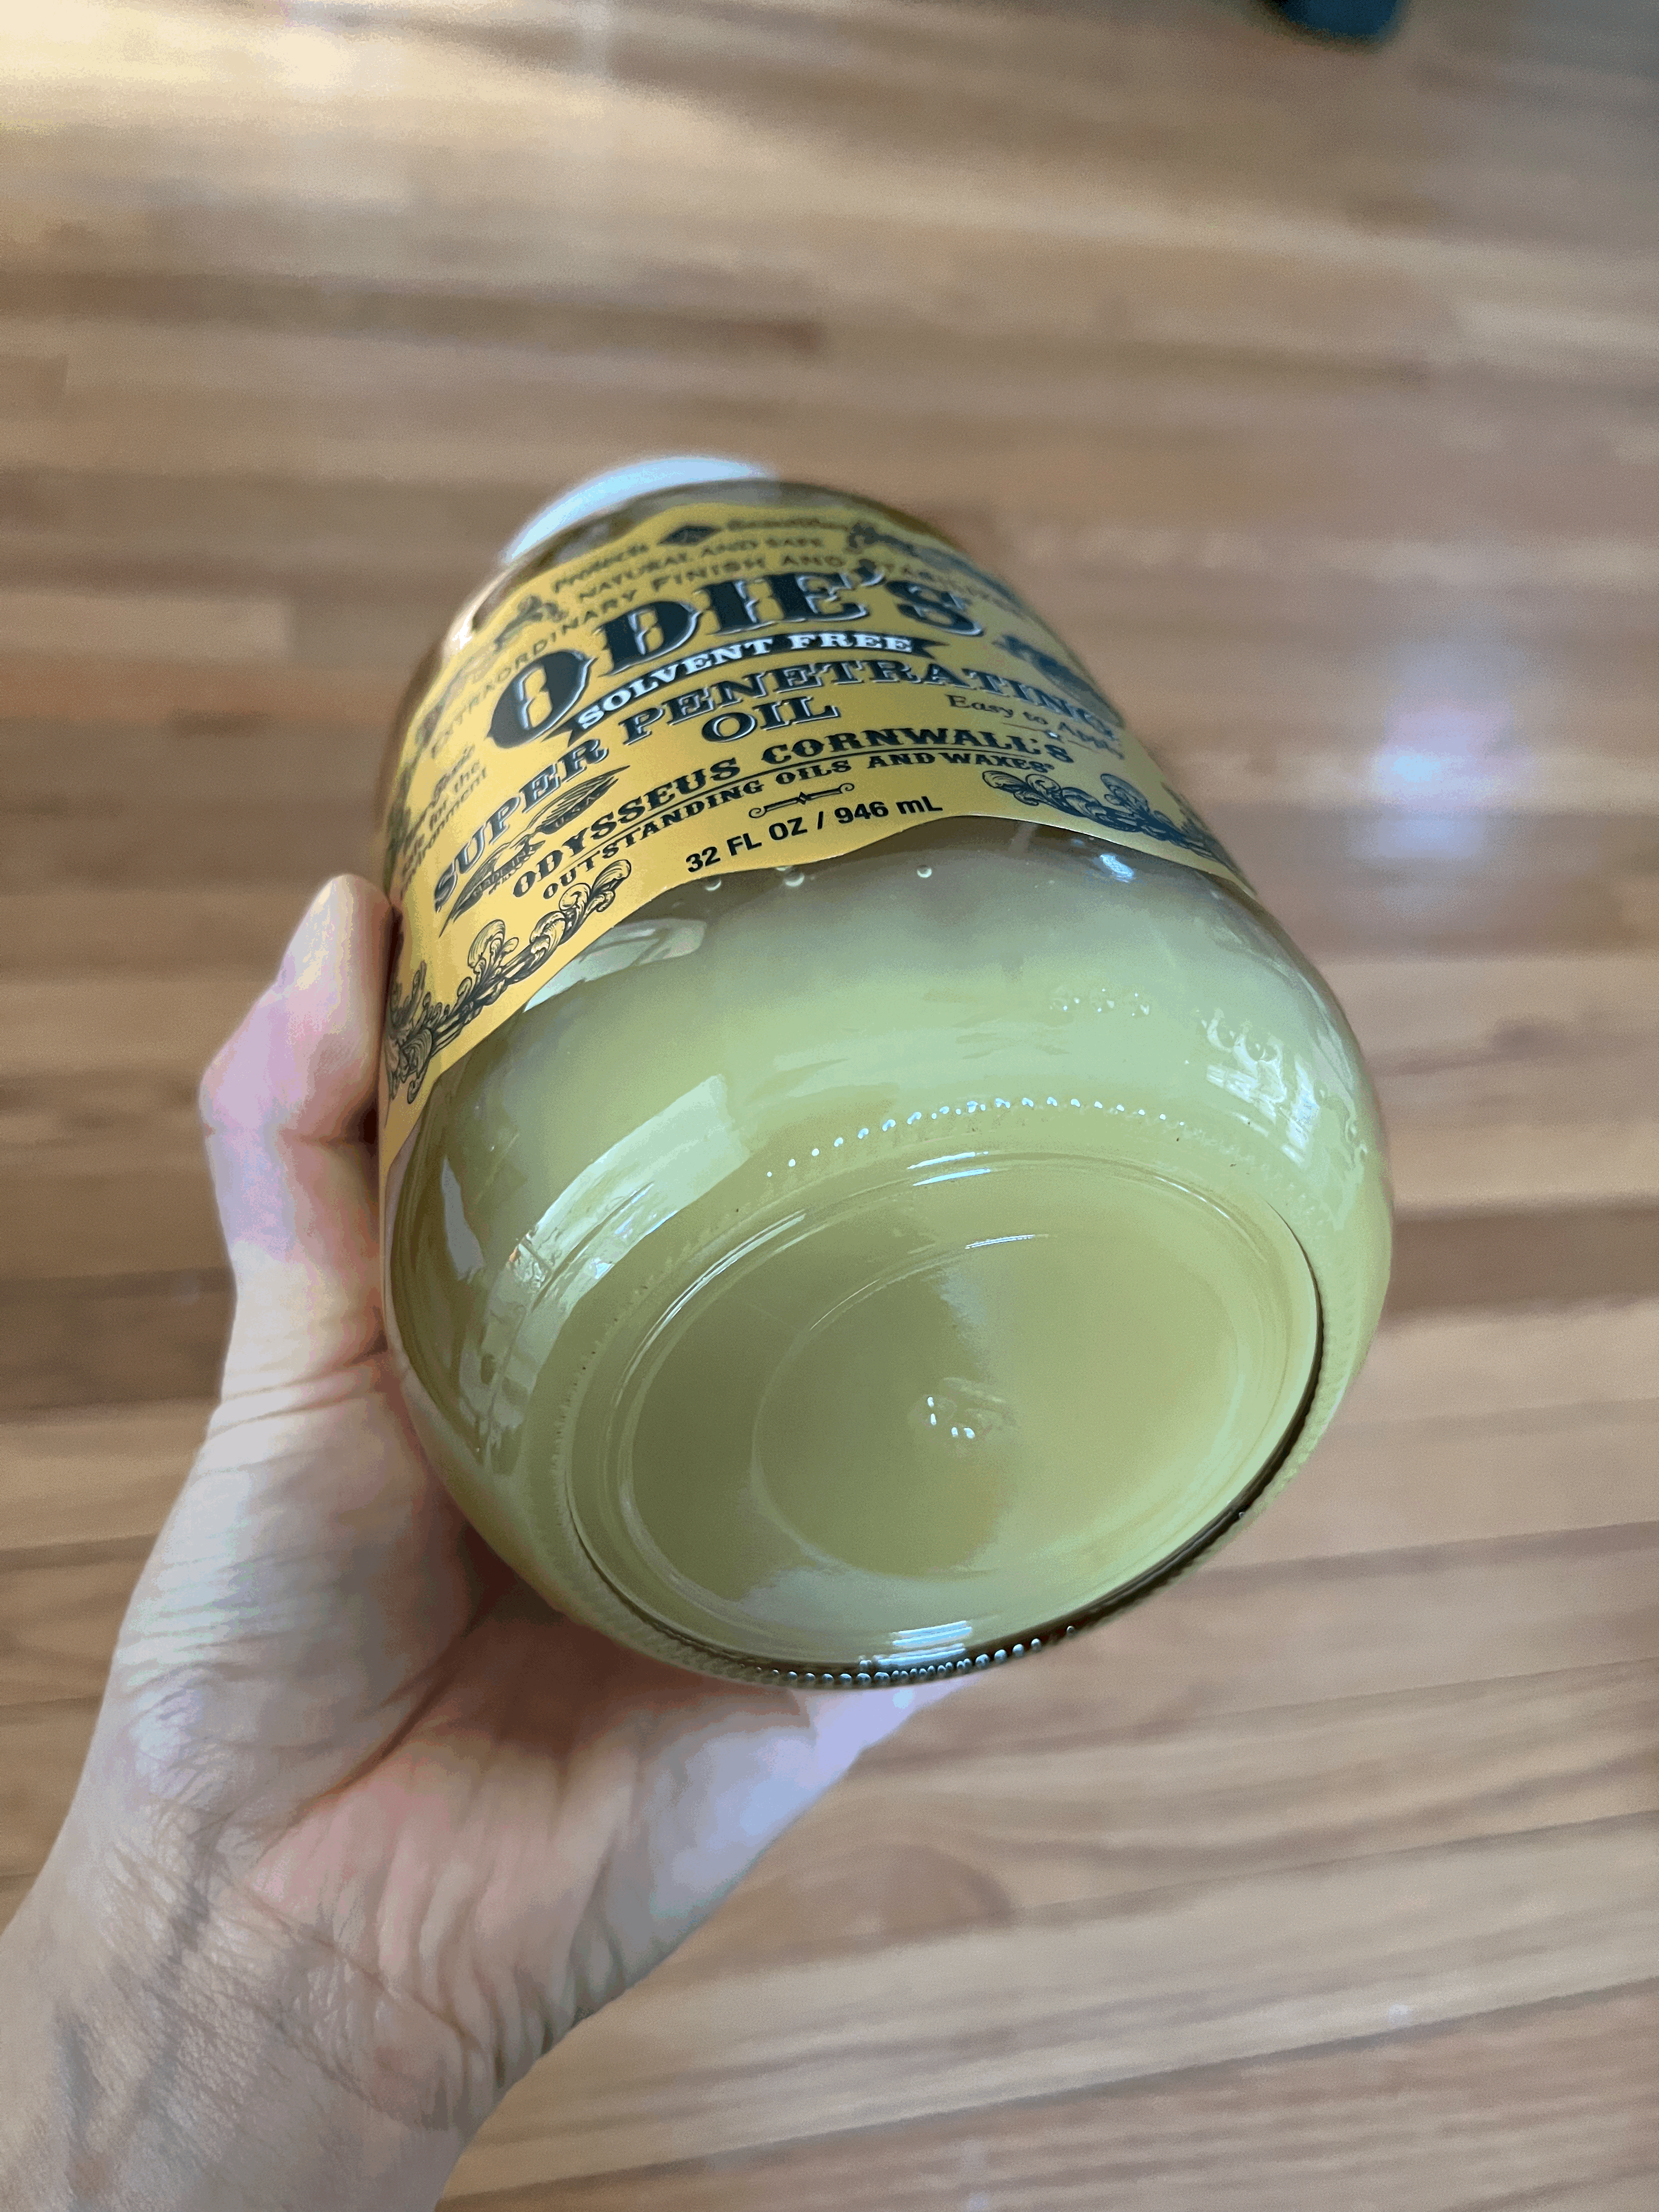
그도 그럴 것이, 배송받은 오일을 몇주간 건드리지 않고 그대로 두었더니 저렇게 윗부분과 아랫부분이 완전히 분리되어있는 것이 보였다.
저거는 그냥 병 자체를 흔드는 것만 가지고는 섞이지 않았다. 뚜껑을 열어 속을 완전히 섞어줘야했다.
I barely touched the jar after it was delivered and you can see the seperation. (can you see the difference from the top to the bottom?) In this case, you can't mix it just by shaking, instead you have to stir it.
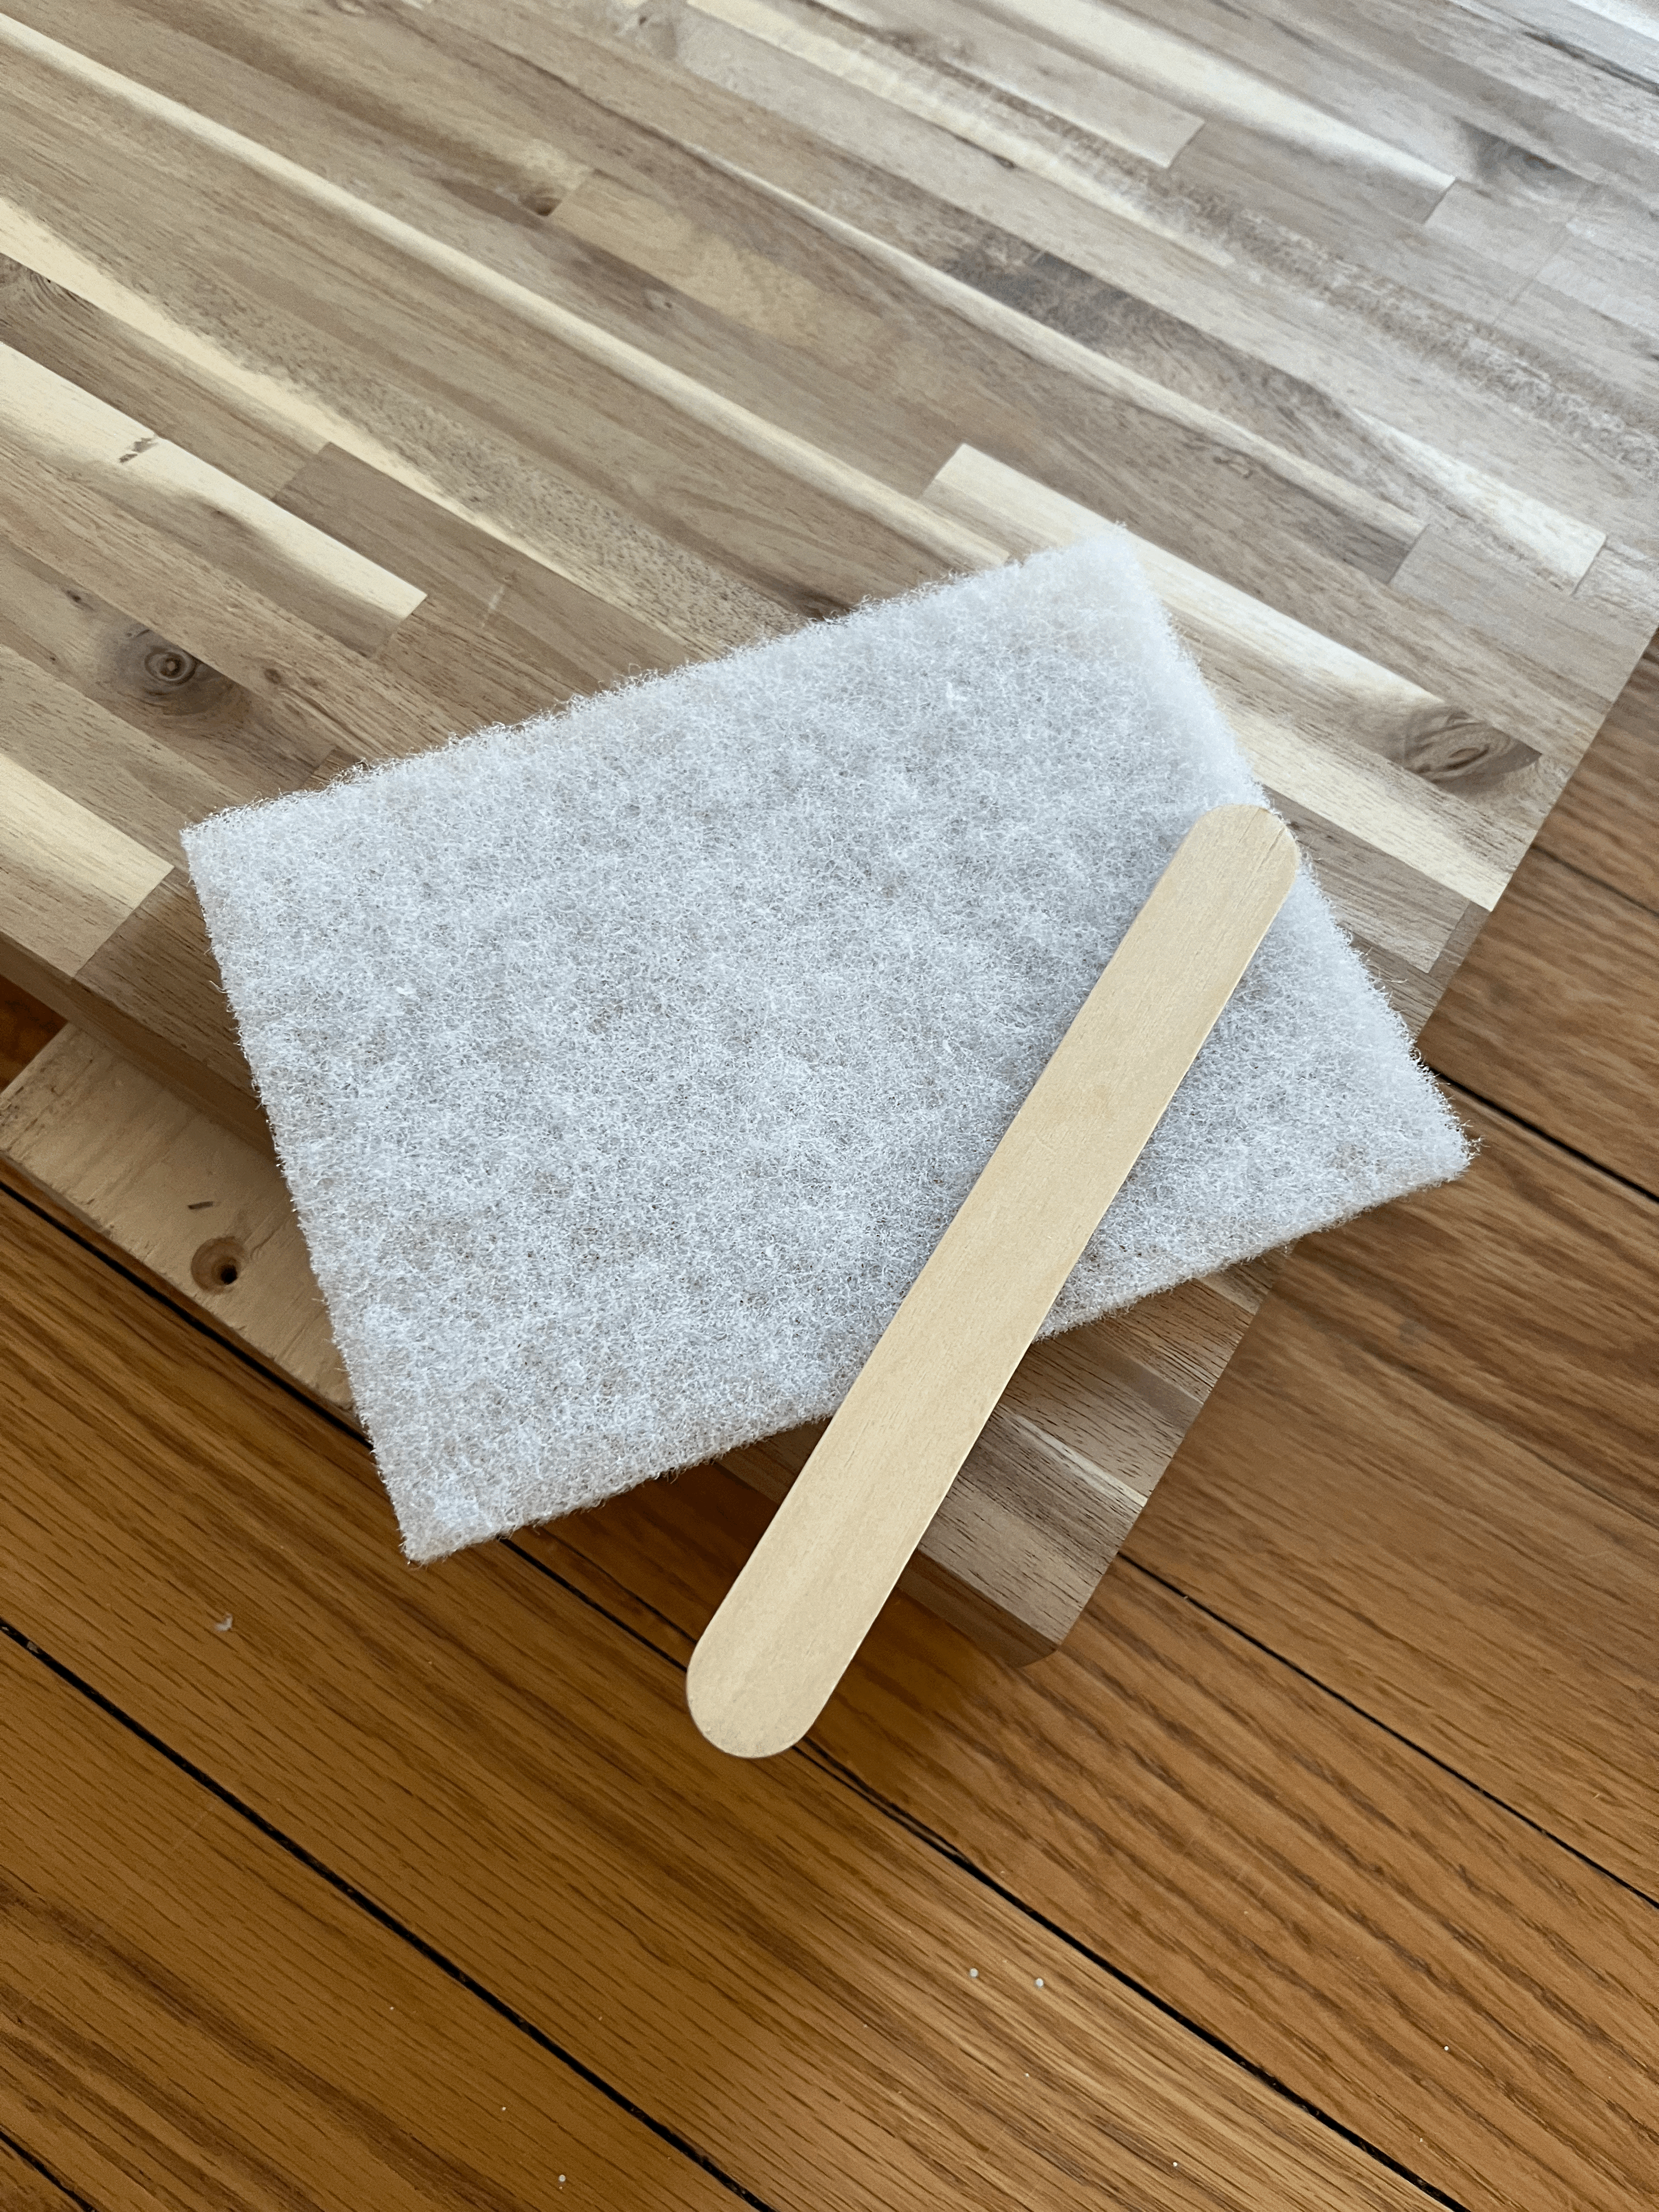
근데 Odie's oil starter kit로 사서 받은 위 wood stick을 이용해 섞으려고 했더니, super penetrating 병은 너무 깊어서 짧은 wood stick으로는 소용이 없었다.
I was going to use the wooden stick which came with the Odie's oil starter kit from Amazon, but the stick was too short for the super penetratig jar.
그래서 나는 집에 남아도는 나무젓가락을 사용했는데, 아주 딱 좋았다. 나무젓가락으로 병의 바닥부분을 싹싹 긁어가며 골고루 섞어주었다.
But I found wooden chopsticks that I already had, and they were perfect! I stirred the oil thoroughly with the chopsticks.

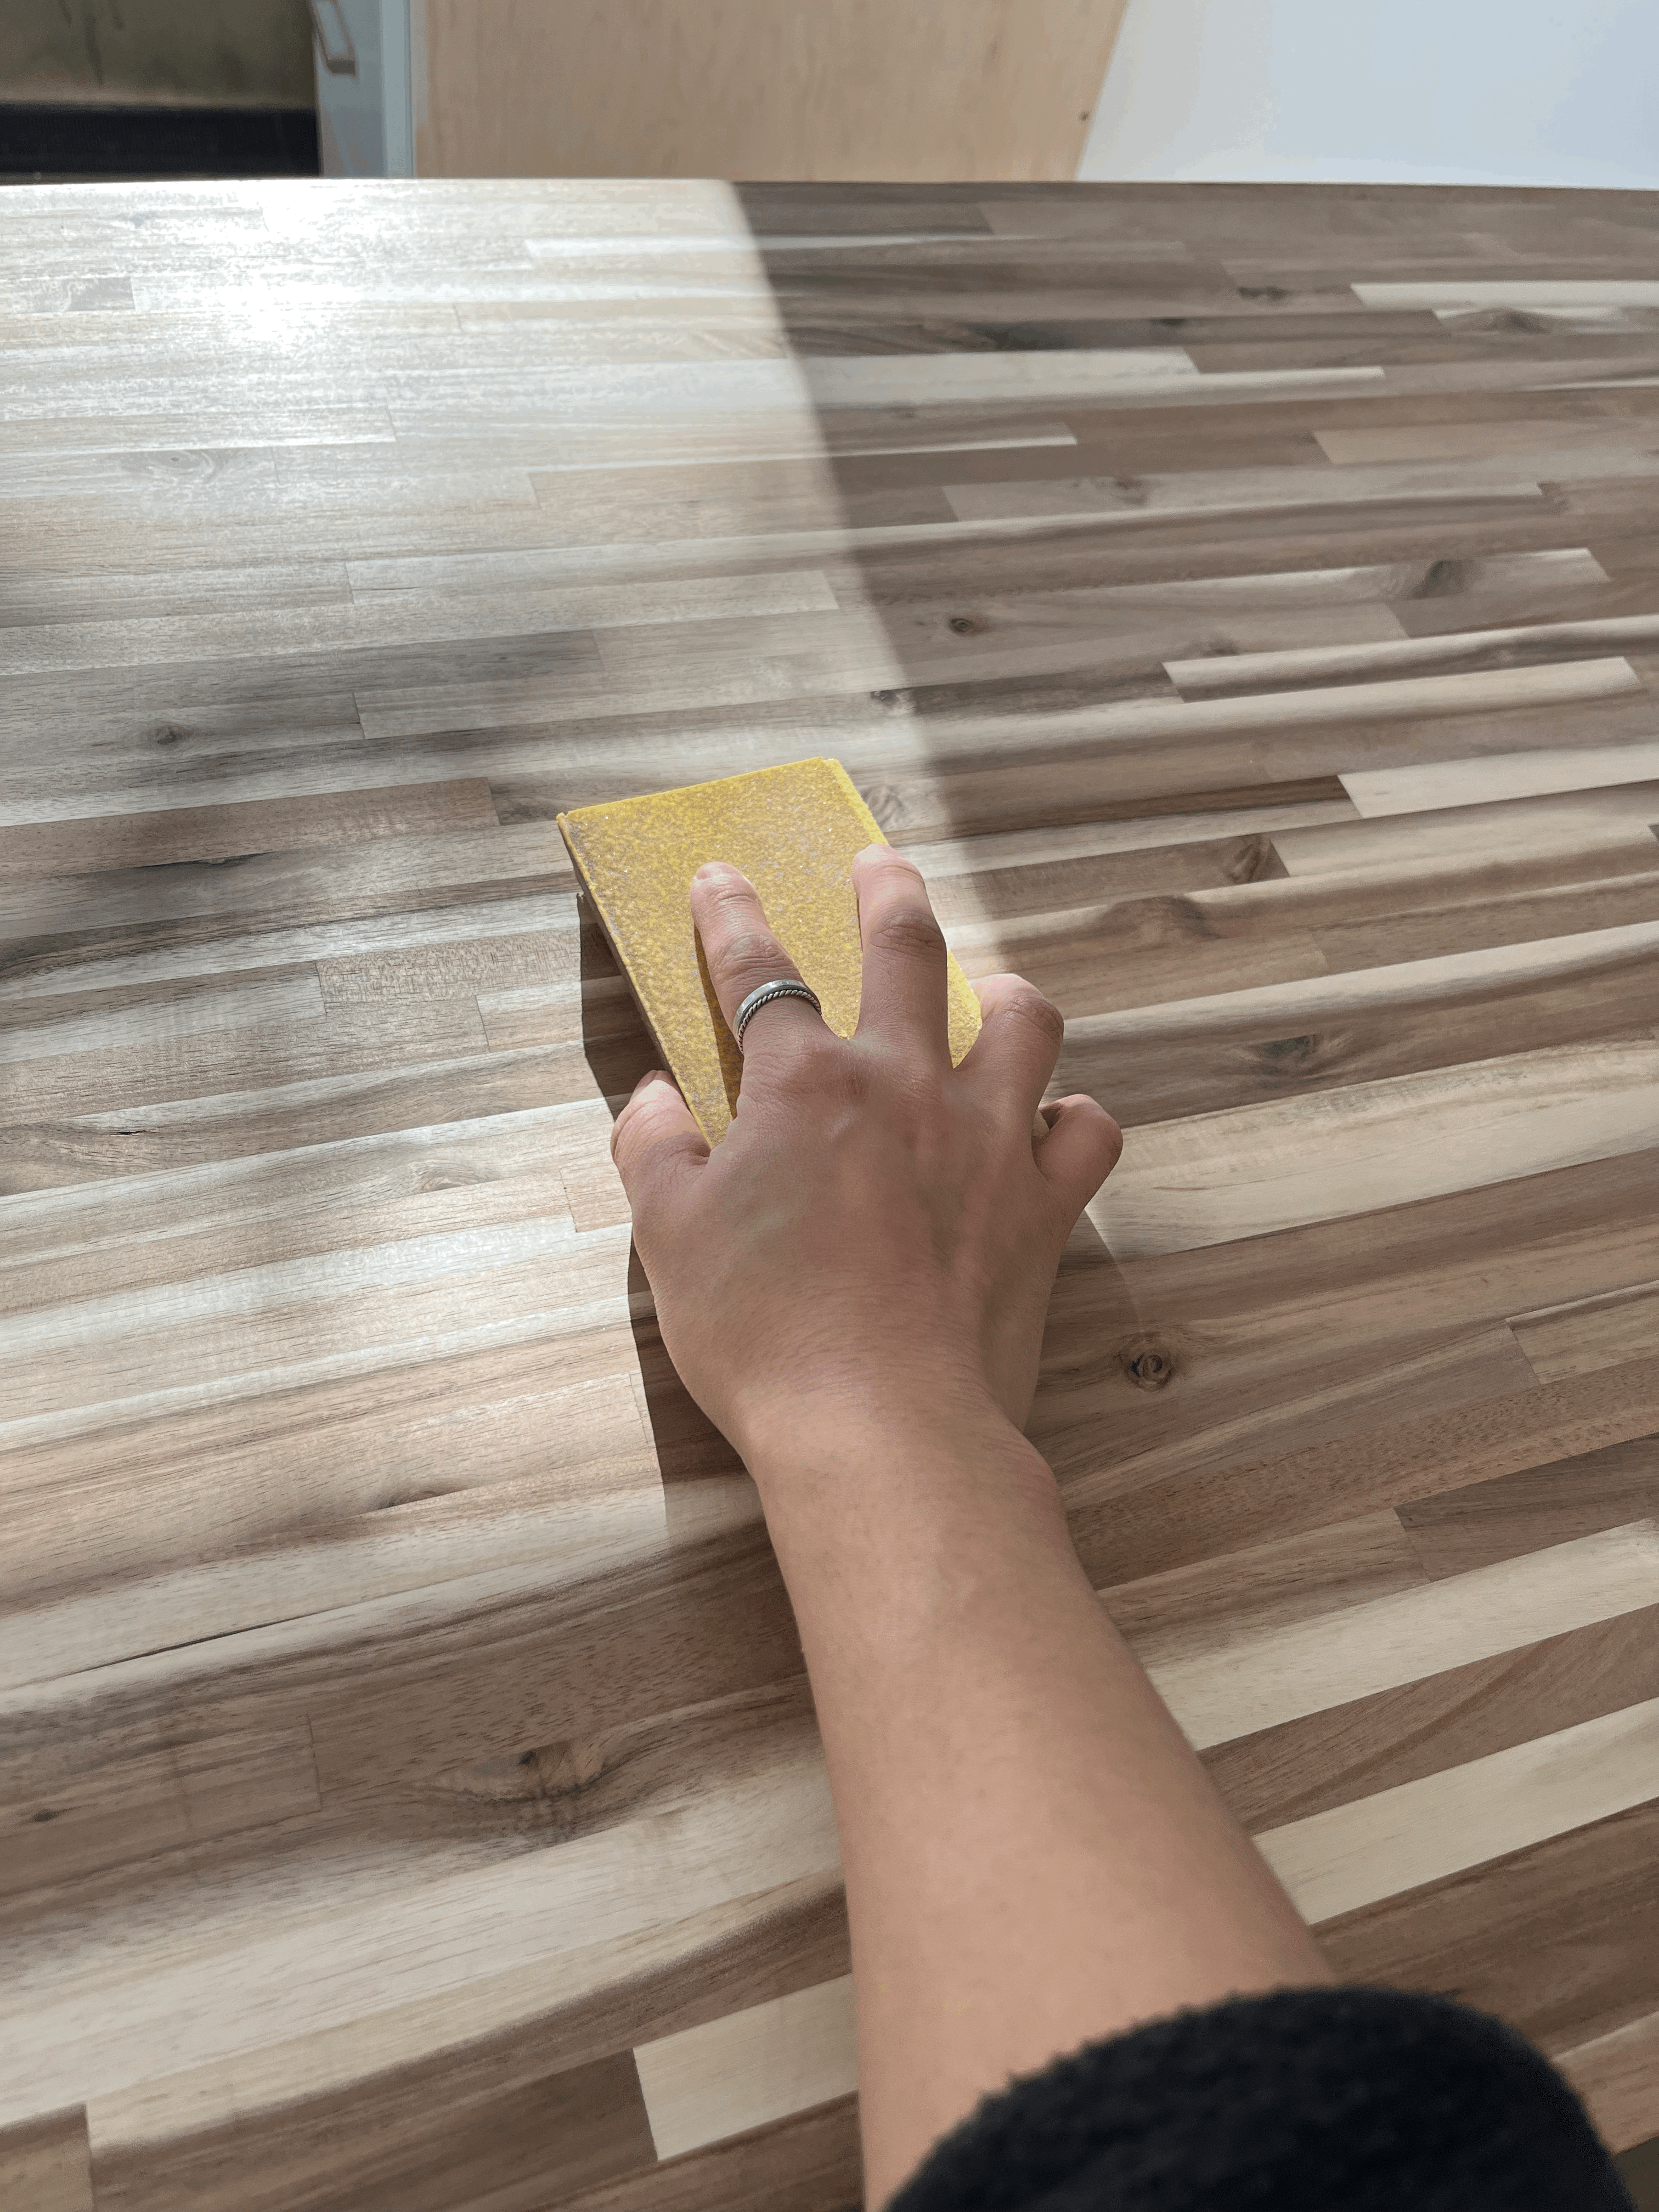

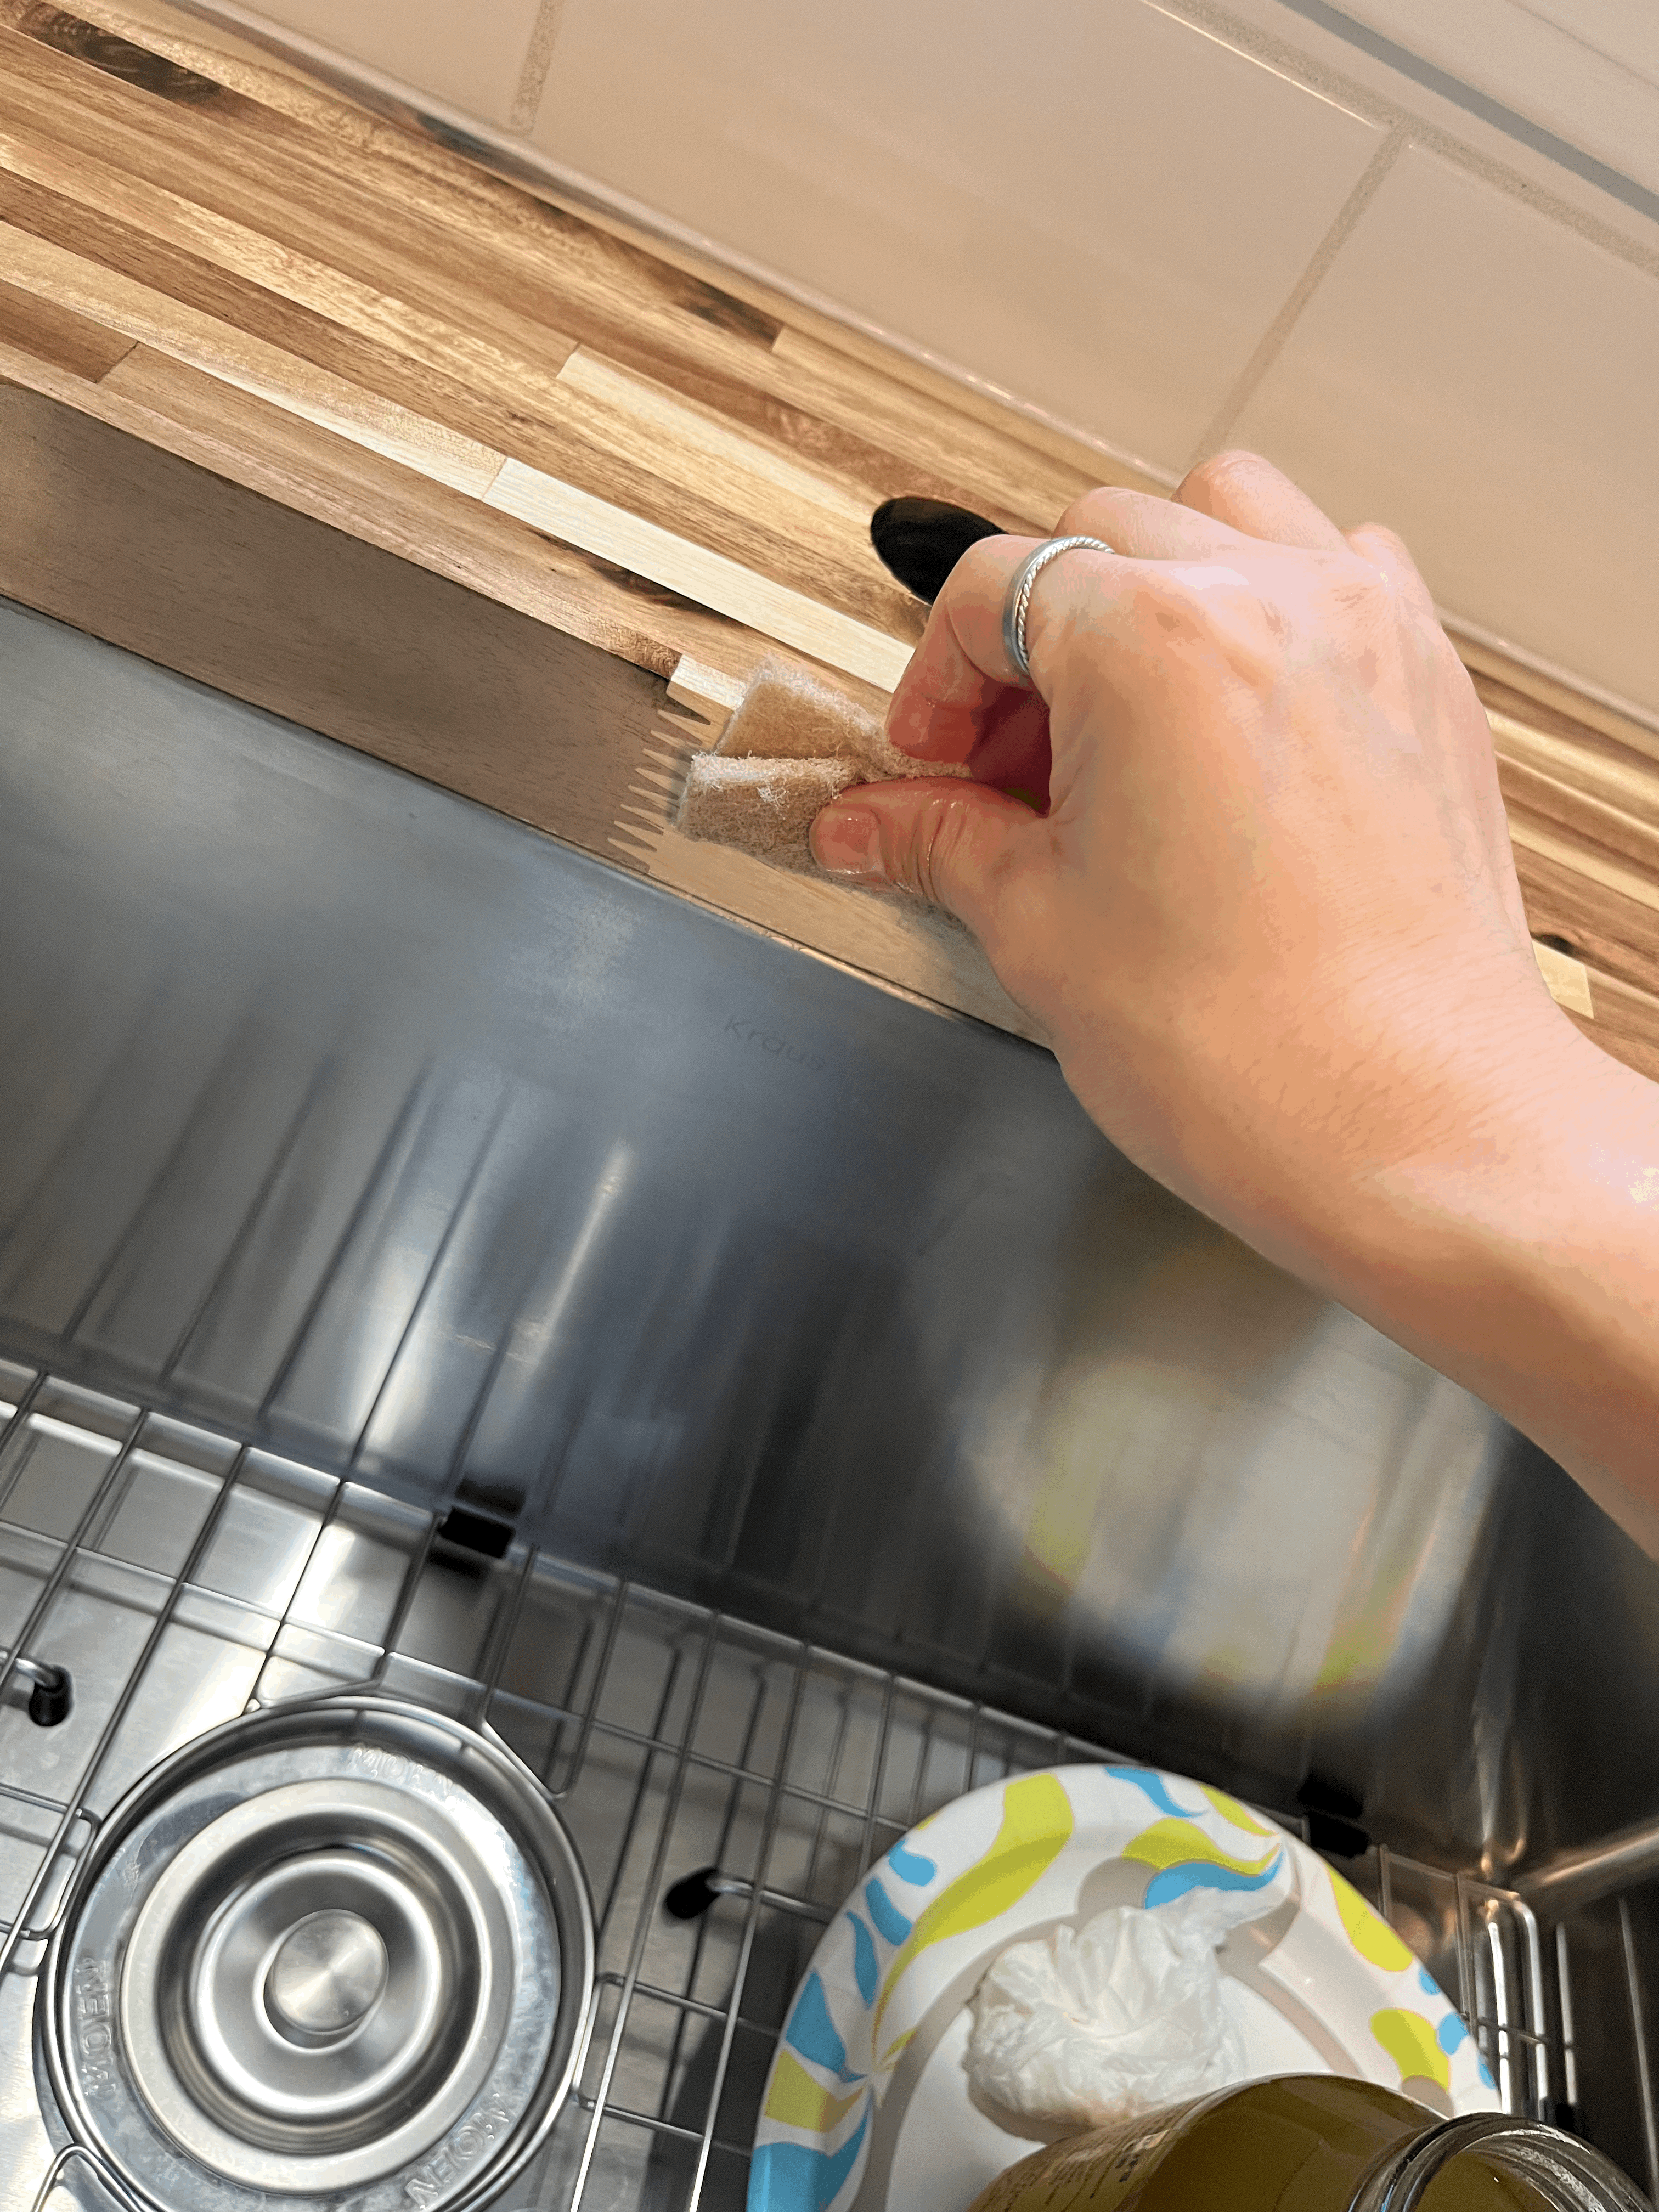
일단 오일을 바르기 전에, 상판 표면을 간단하게 샌딩하고, tack cloth로 싹 닦아줬다.
보통은 원목 상판을 캐비넷 위에 설치하기 전에 seal 작업을 먼저 하지만, 나는 Odie's oil을 선택한 바람에 설치를 먼저 해야했다. 그 이유는 부엌 상판의 경우, 싱크대 주변과 벽 타일과 만나는 곳에 caulking 작업을 꼭 해야하는데, 오일로 처리된 상판의 표면에는 실리콘이 잘 붙지 않는다는 말을 많이 들어서 아에 caulking을 먼저 해버린 것이다. 사실 Odie's oil에 문의해서 들은 답변이기도 하다. (근데 먼저 caulkin을 하기로 결정도 했지만, 혹시 몰라 실리콘이 아닌 lexel이라는 sealant를 사용했다.)
Before appyling the oil, I sanded the butcher block countertop lightly and wiped it off with a tack cloth.
Usually you seal the butcher block countertops before installing them on the top of the cabinets, but I had to install them first. This is because you have to caulk around the sink and between the backsplash and countertop, and I've read a lot about how silicone caulking doesn't stick well to an oiled surface. So, I had to install the butcher block countertop and caulk beforehand. Actually, that's what Odie's oil told me when I asked them. (Even though I decided to caulk before oiling the countertop, I used Lexel sealant not a silicone caulking just in case.)
어쨌든, 처음 원목 상판을 설치하기 전에 미리 샌딩 작업(나의 경우는, 180 grit과 220 grit으로만 샌딩했다)도 하고 먼지도 다 닦아줬지만, 그 이후에 oil을 바르기까지 꽤 긴 시간이 지나서 먼지도 새로 닦을 겸 220 grit 샌딩 블락으로 샌딩도 아주 가볍게 다시 했다.
Anyway, even though I sanded my countertops with 180 grit and 220 grit before installing them, I lightly sanded them with 220 grit again, because the first sanding was a while ago.
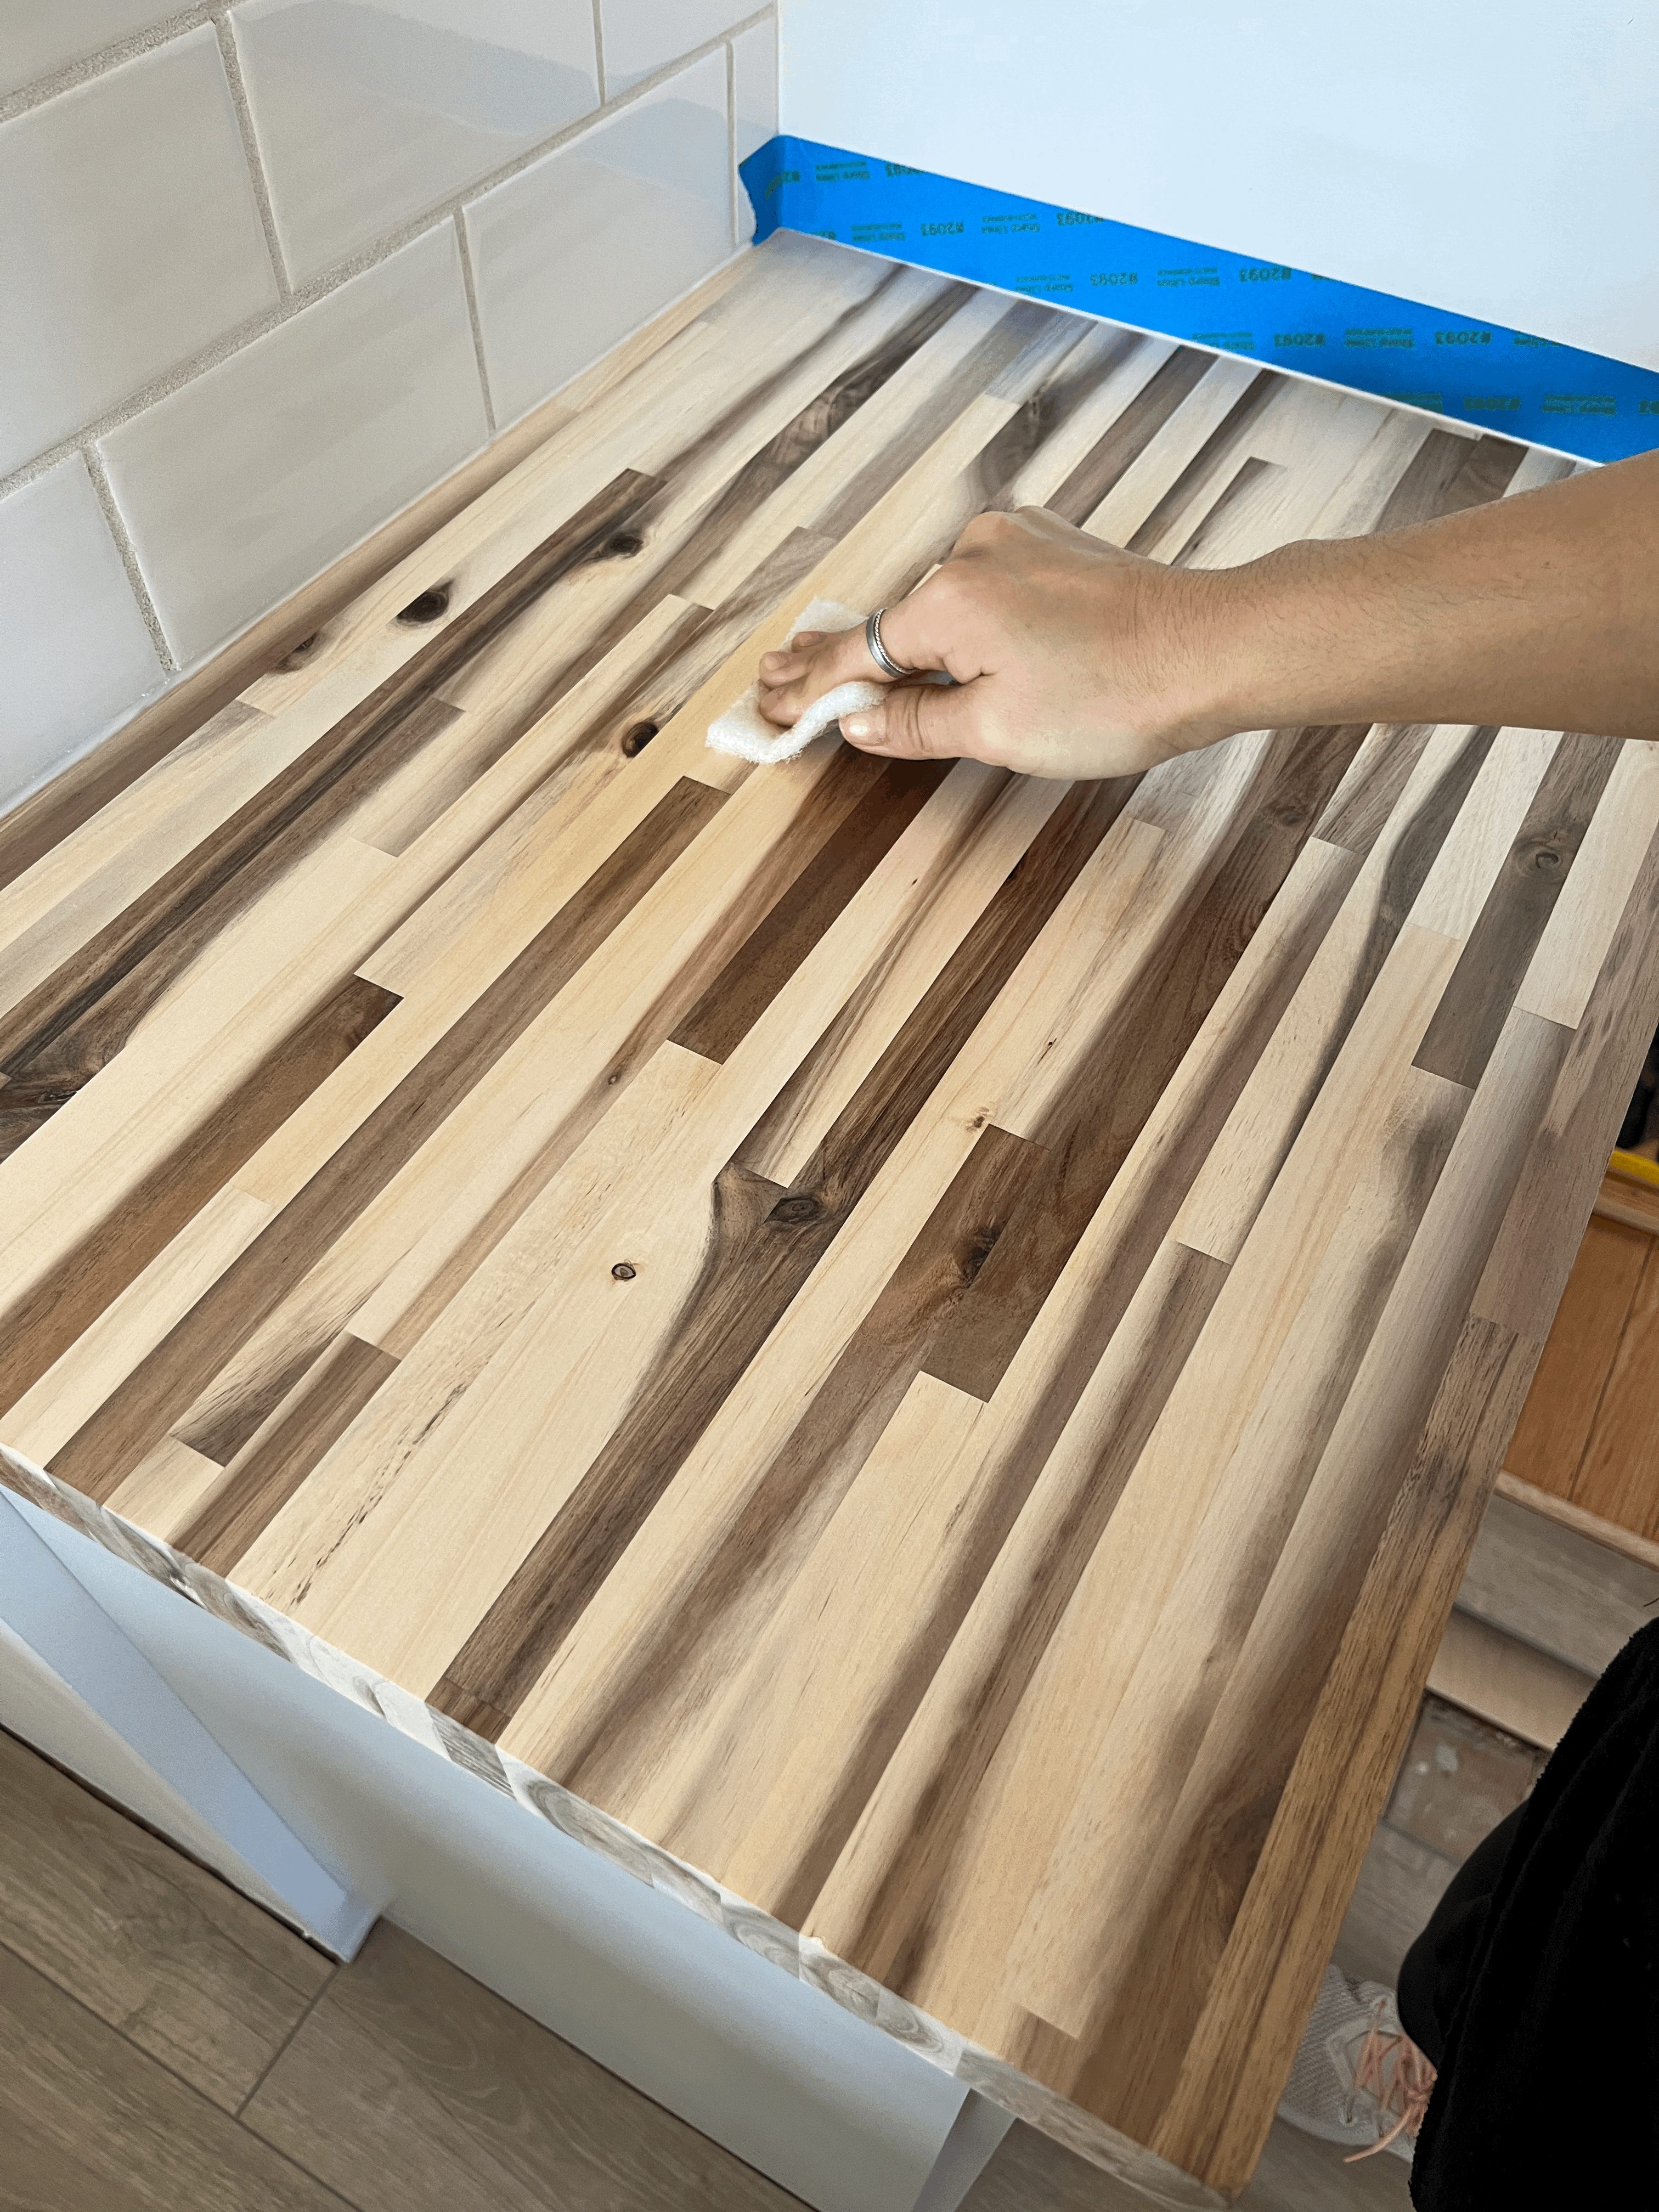


처음에는 너무 많이 바르면 안된다는 긴장감에, 작은 조각으로 작은 어플리케이터 패드에다가 오일을 조금씩 묻혀가며 발랐다. 근데 너무 덜 바르는 느낌이 나서? 유투브 영상에서 다른 사람들이 바르는 것처럼 상판 위에 과감히 뿌려서 바르기 시작했다.
When I first tried appyling the oil, I was kind of nervous that I shouldn't use a lot. So, I started applying the oil on a small piece of the applicator pad and then spread it on the countertop little by little. But it didn't seem like I was using enough so I just drizzled the oil right on the top of the countertop like other people do on Youtube.
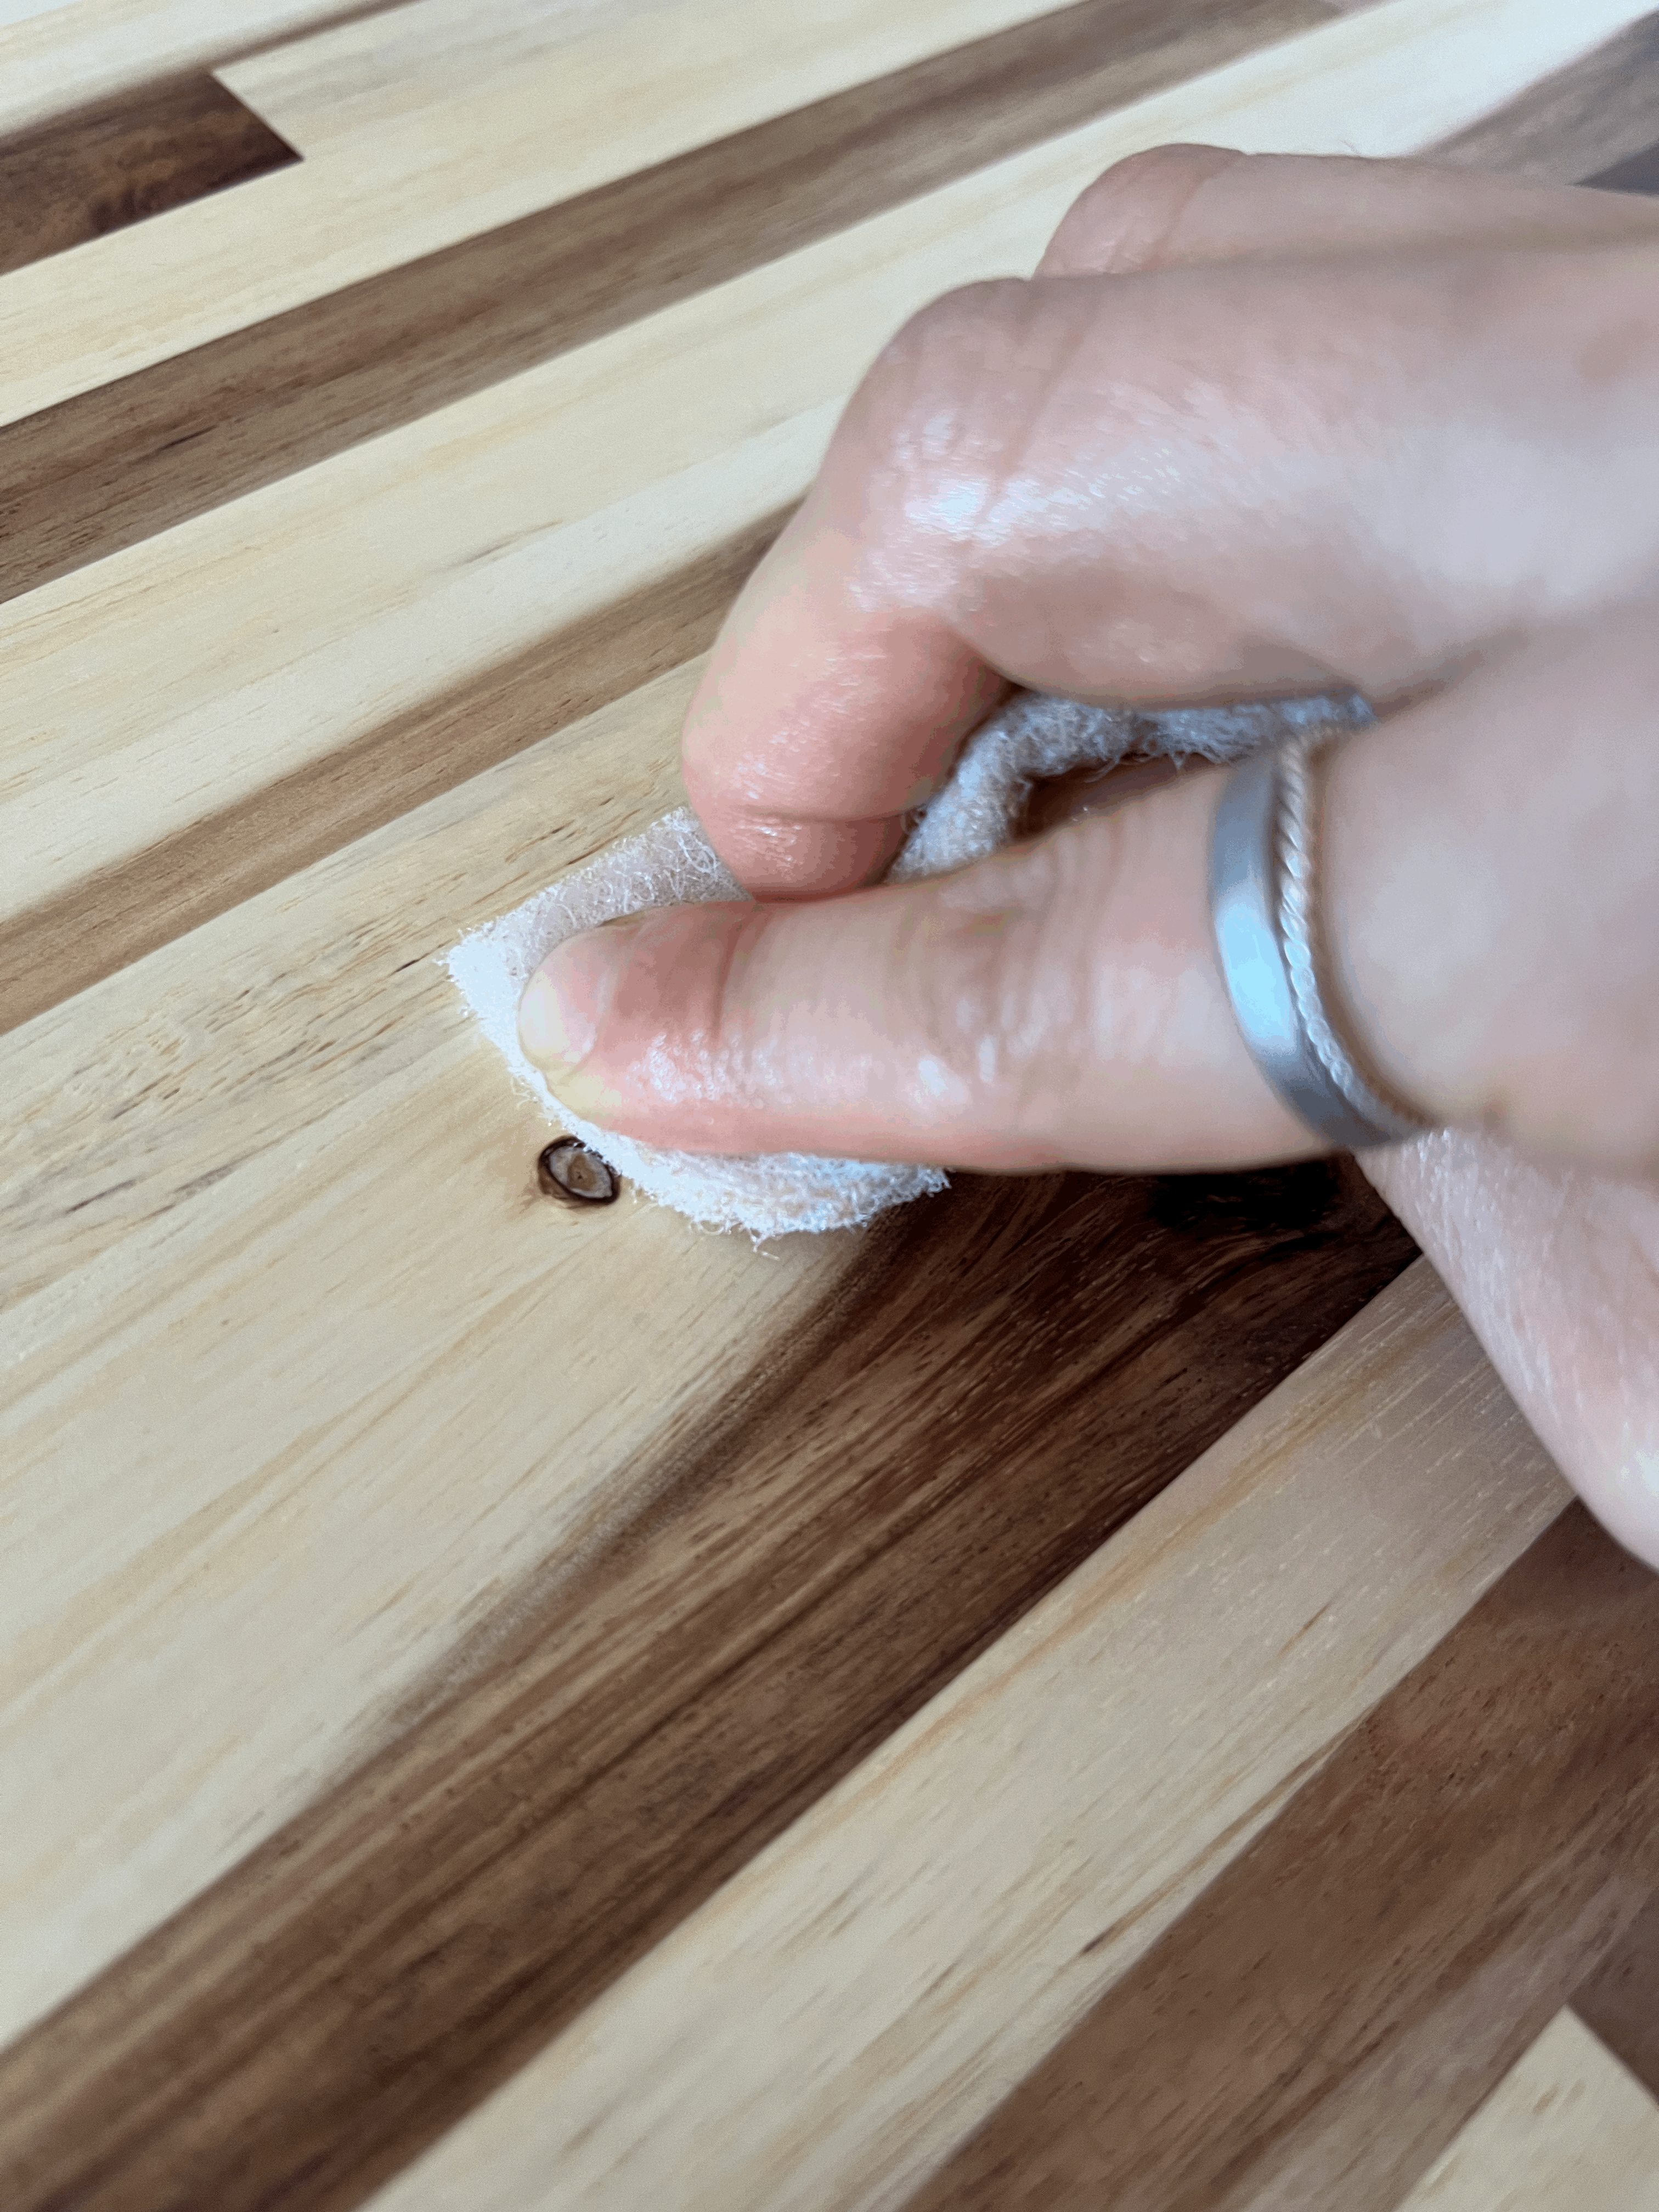
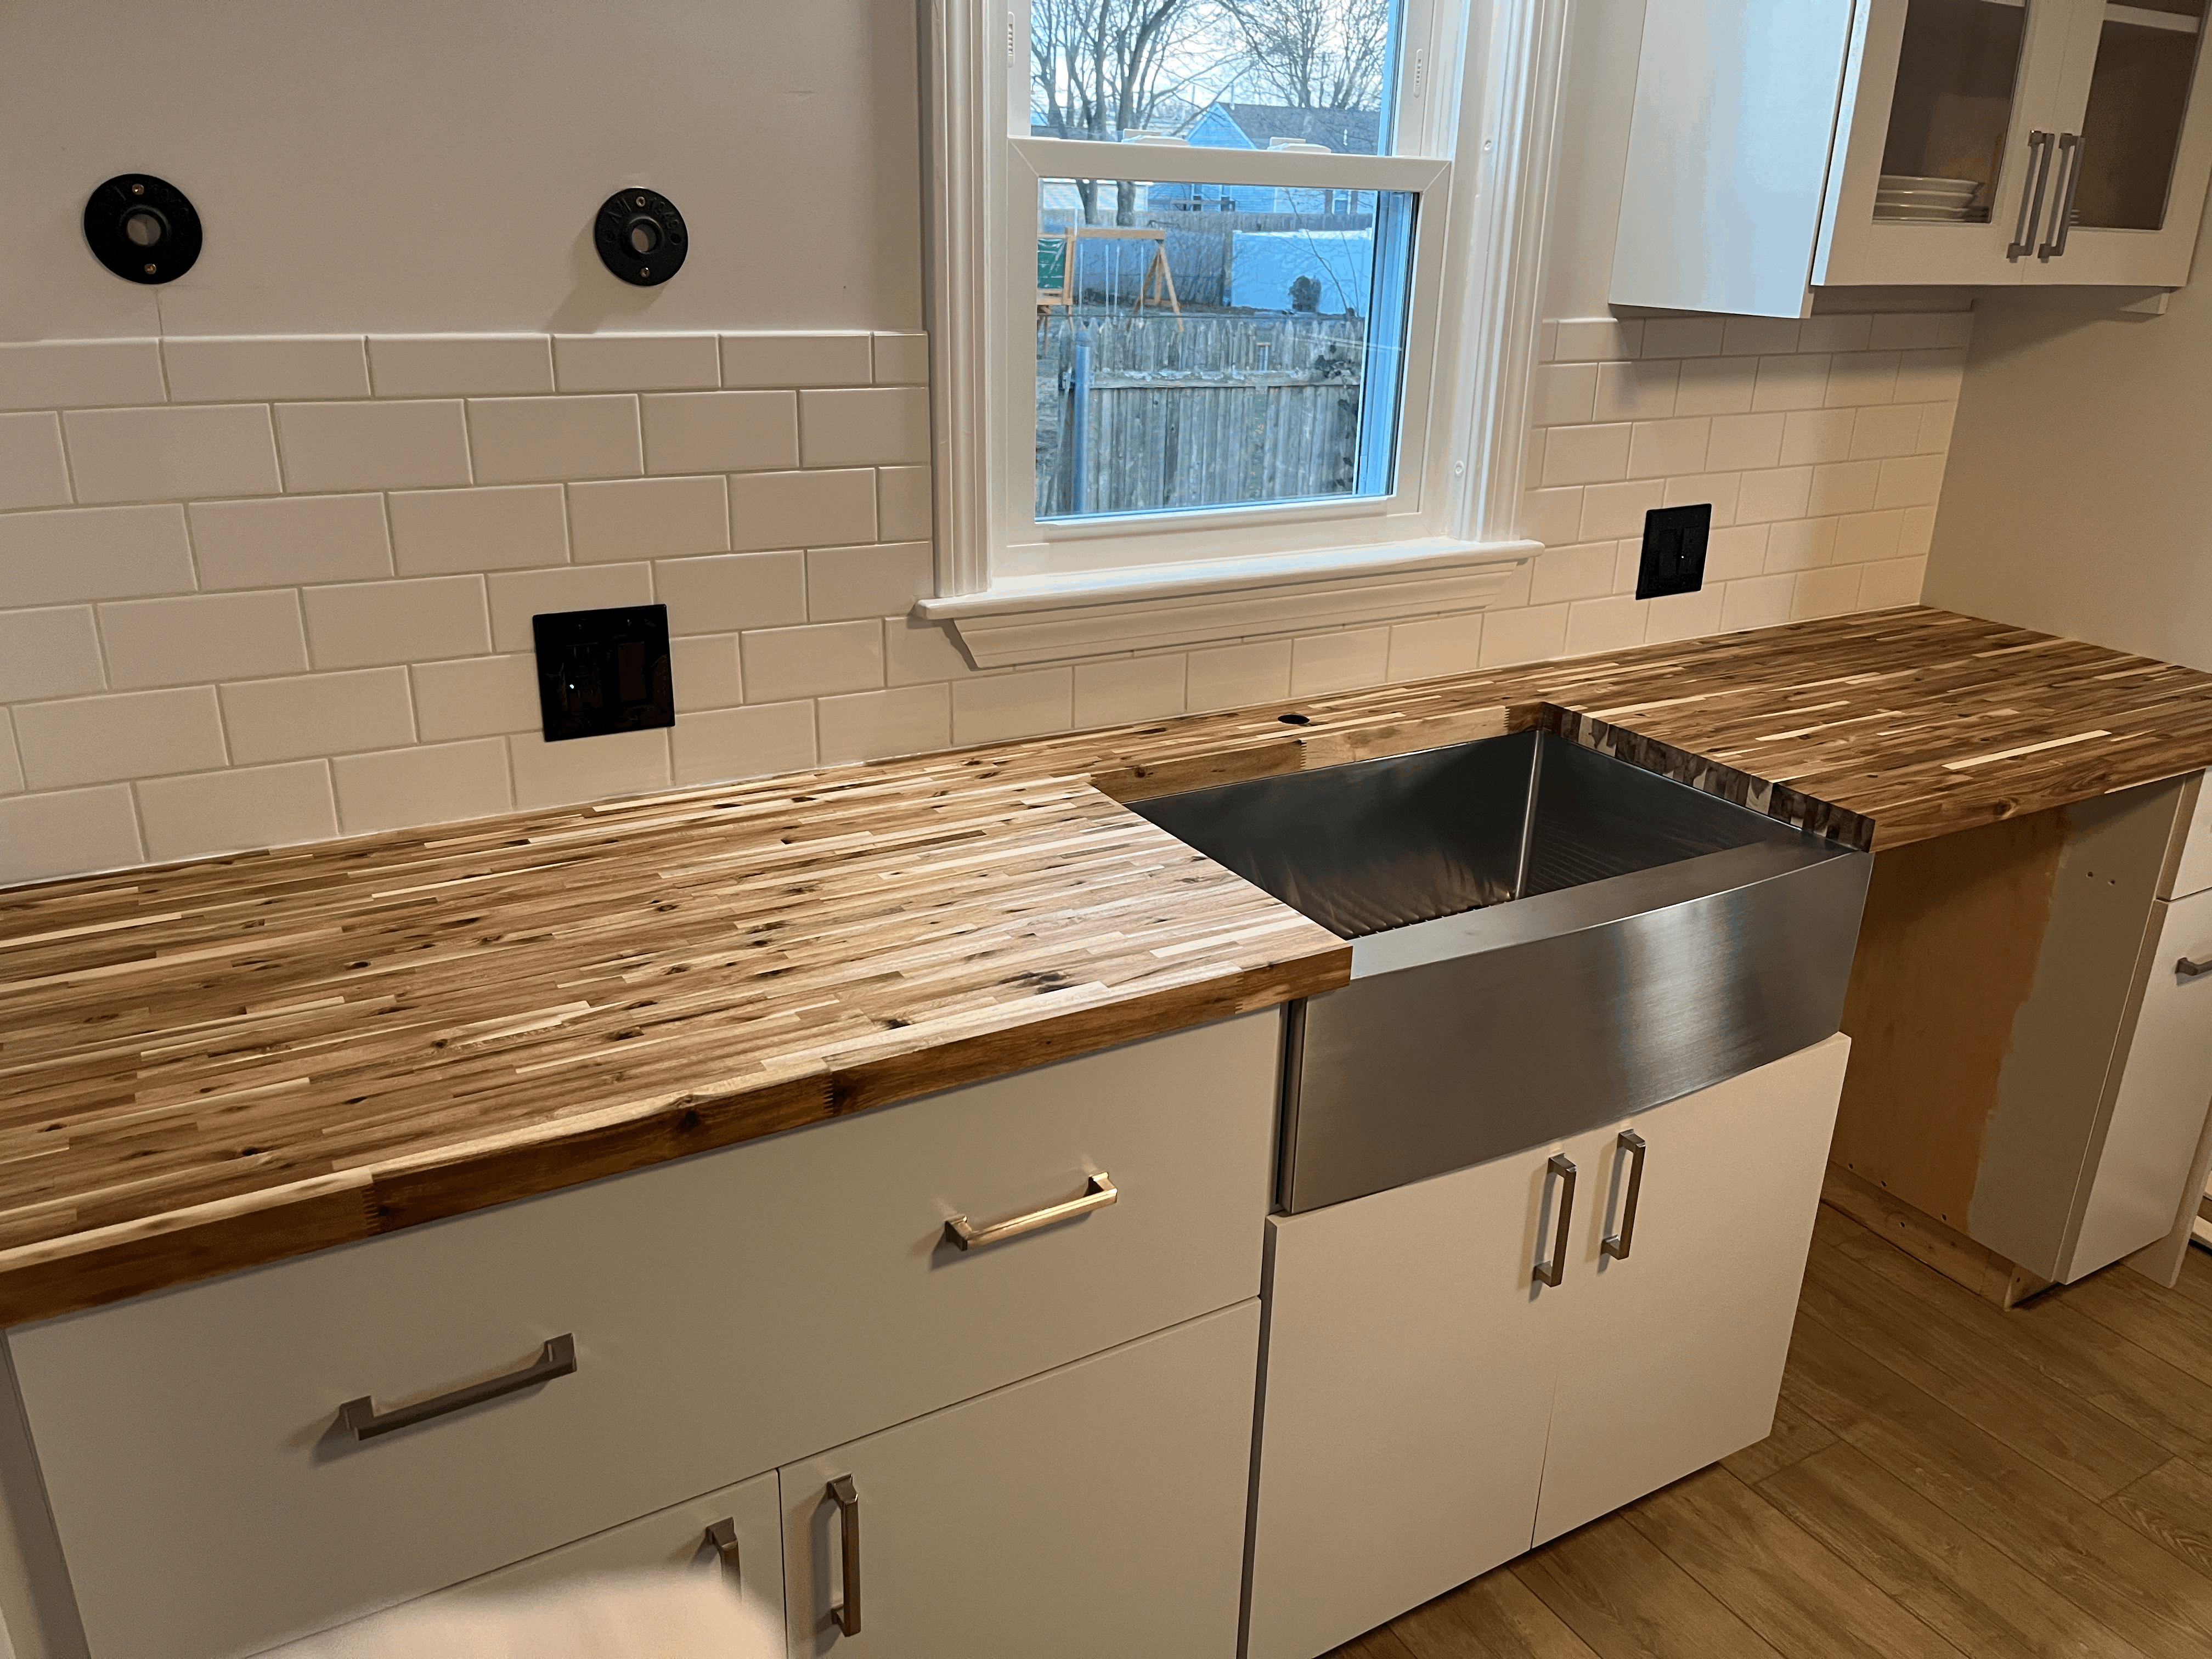
가장 신경을 많이 써서 발라준 부분은 물의 노출이 가장 많을 싱크대 부분과, knot 부분이다.
I, especially focused around the sink and knots.


싱크대 주위는 바르면서도 계속 걱정이었다.. 제발 코팅이 잘 되길 바라면서 꼼꼼히 바르긴 했는데 그래도 불안하다.
(수도꼭지가 들어가는 구멍에도 발라주었다. 그래서 수도꼭지도 아직 설치 못하고 있는 상황...ㅎㅎ)
Even though I applied enough oil around the sink I was so anxtious because it's the most water exposed area. (I also applied the oil in the hole where the faucet goes in.)
아, Odie's oil은 몸에 해롭지 않은 성분이라, 장갑 착용이 필요없다는 말에 나도 장갑 사용하지 않고 그냥 사용했다. 근데 나중에 손을 씻을 때는 그냥 비누로만 사용해서는 잘 씻기지가 않기 때문에 얼굴에 쓰는 클렌징 오일을 사용했더니 아주 말끔하게 씻겼다. 얼굴에 사용하듯 같은 방법으로, 클렌징 오일을 손에 꼼꼼히 발라 물로 1차례 씻은 후, 다시 비누로 씻으면 뽀송뽀송한 손으로 돌아온다.
By the way, you can use Odie's oil with your bare hands because it's not harmful. But, it doesn't wash off very easily with only hand soap. So, I used a facial cleansing oil and it worked very well. By using the same process as with your face, you rub your oily hands with a cleansing oil, rinse off with water first, and then wash your hands again with a regular hand soap.
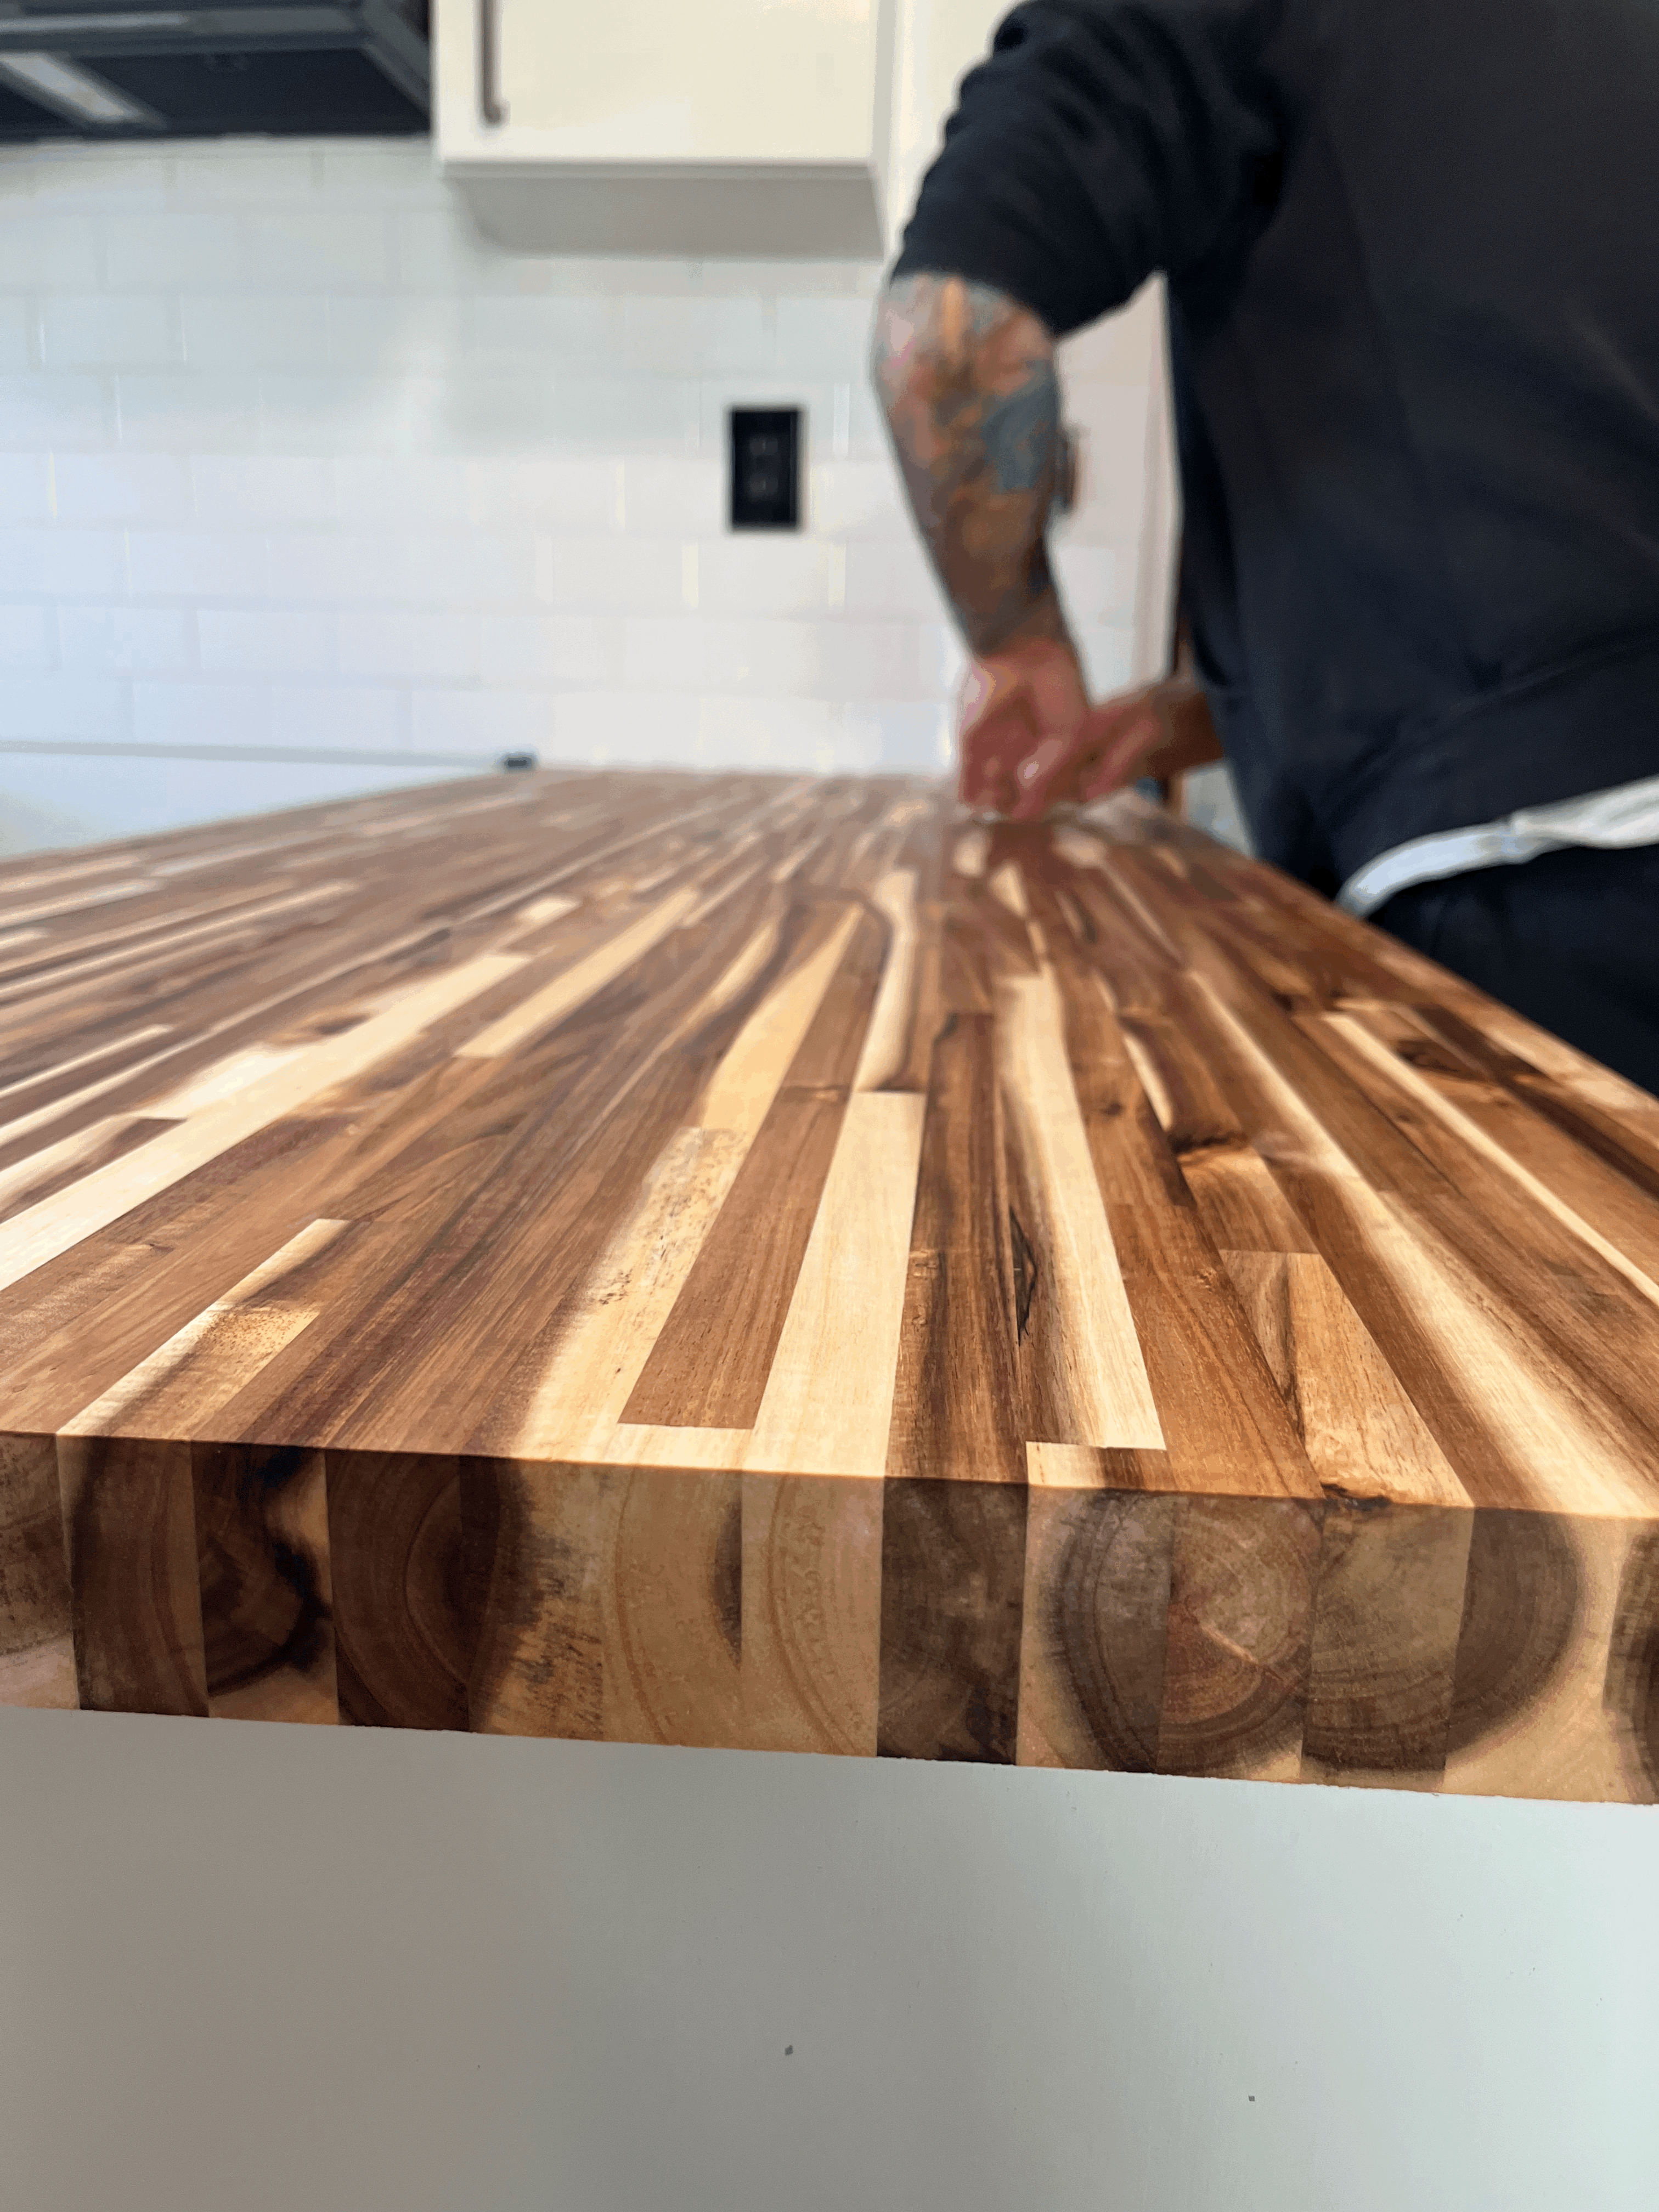
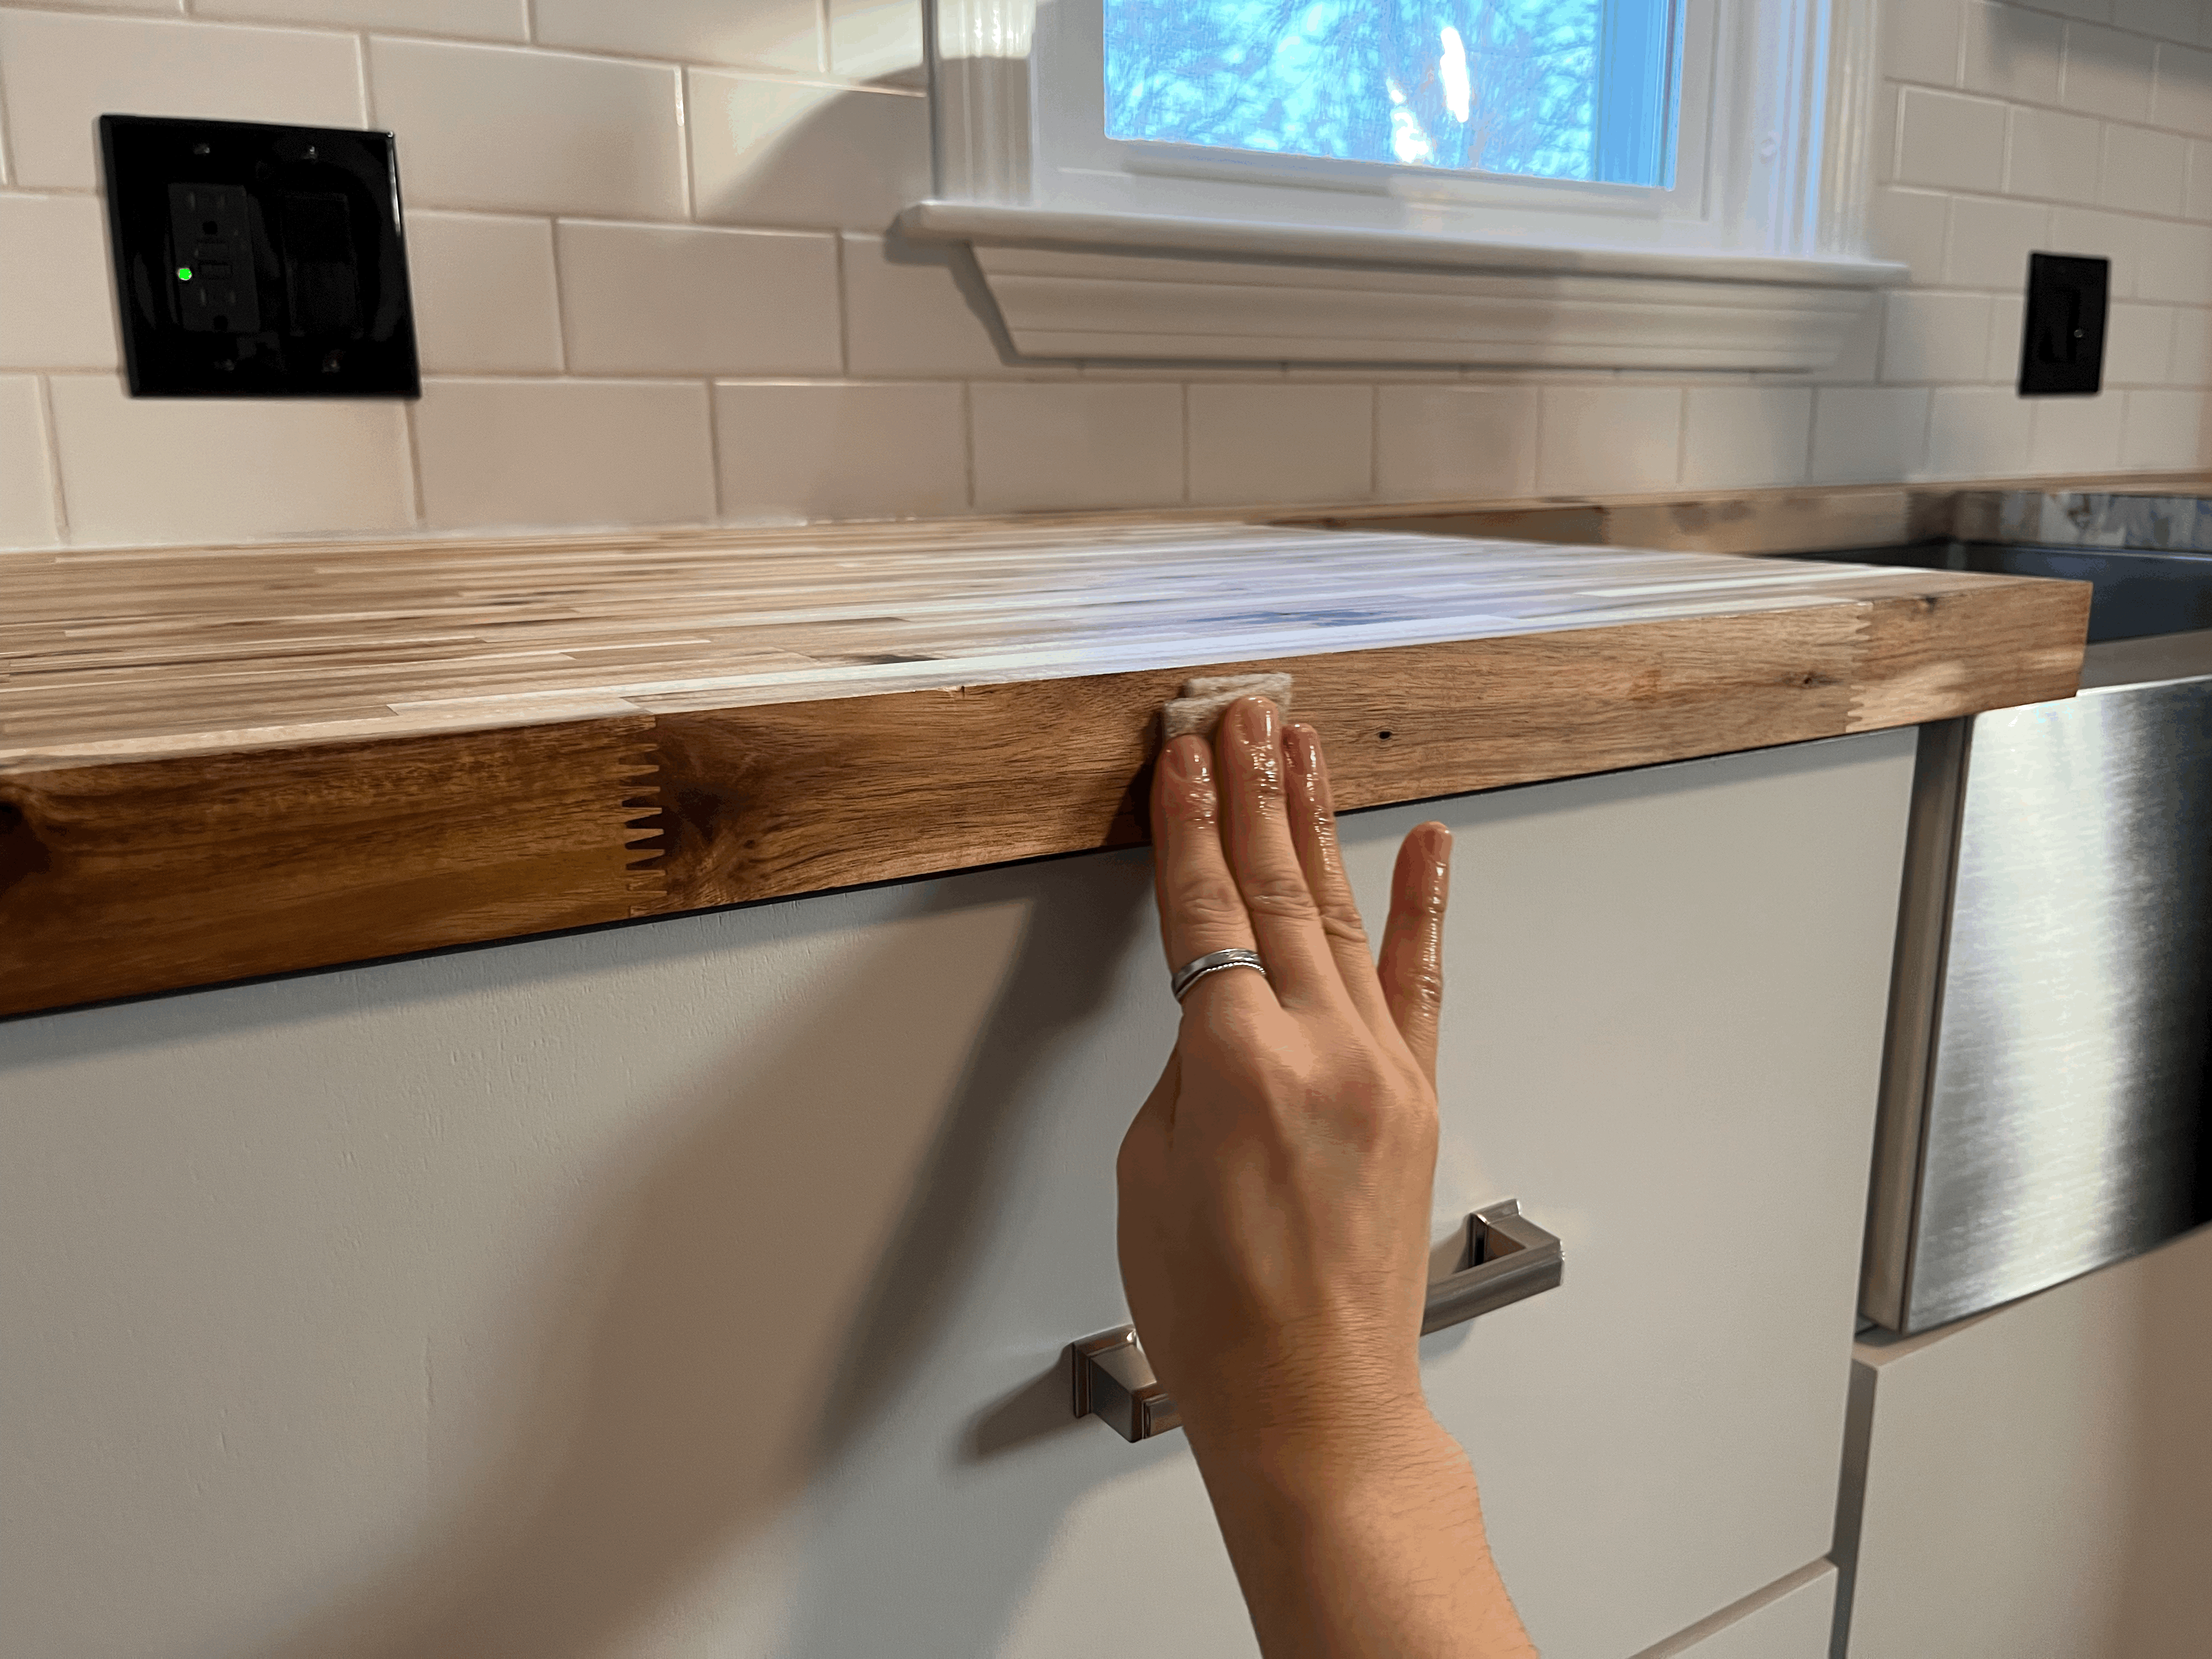
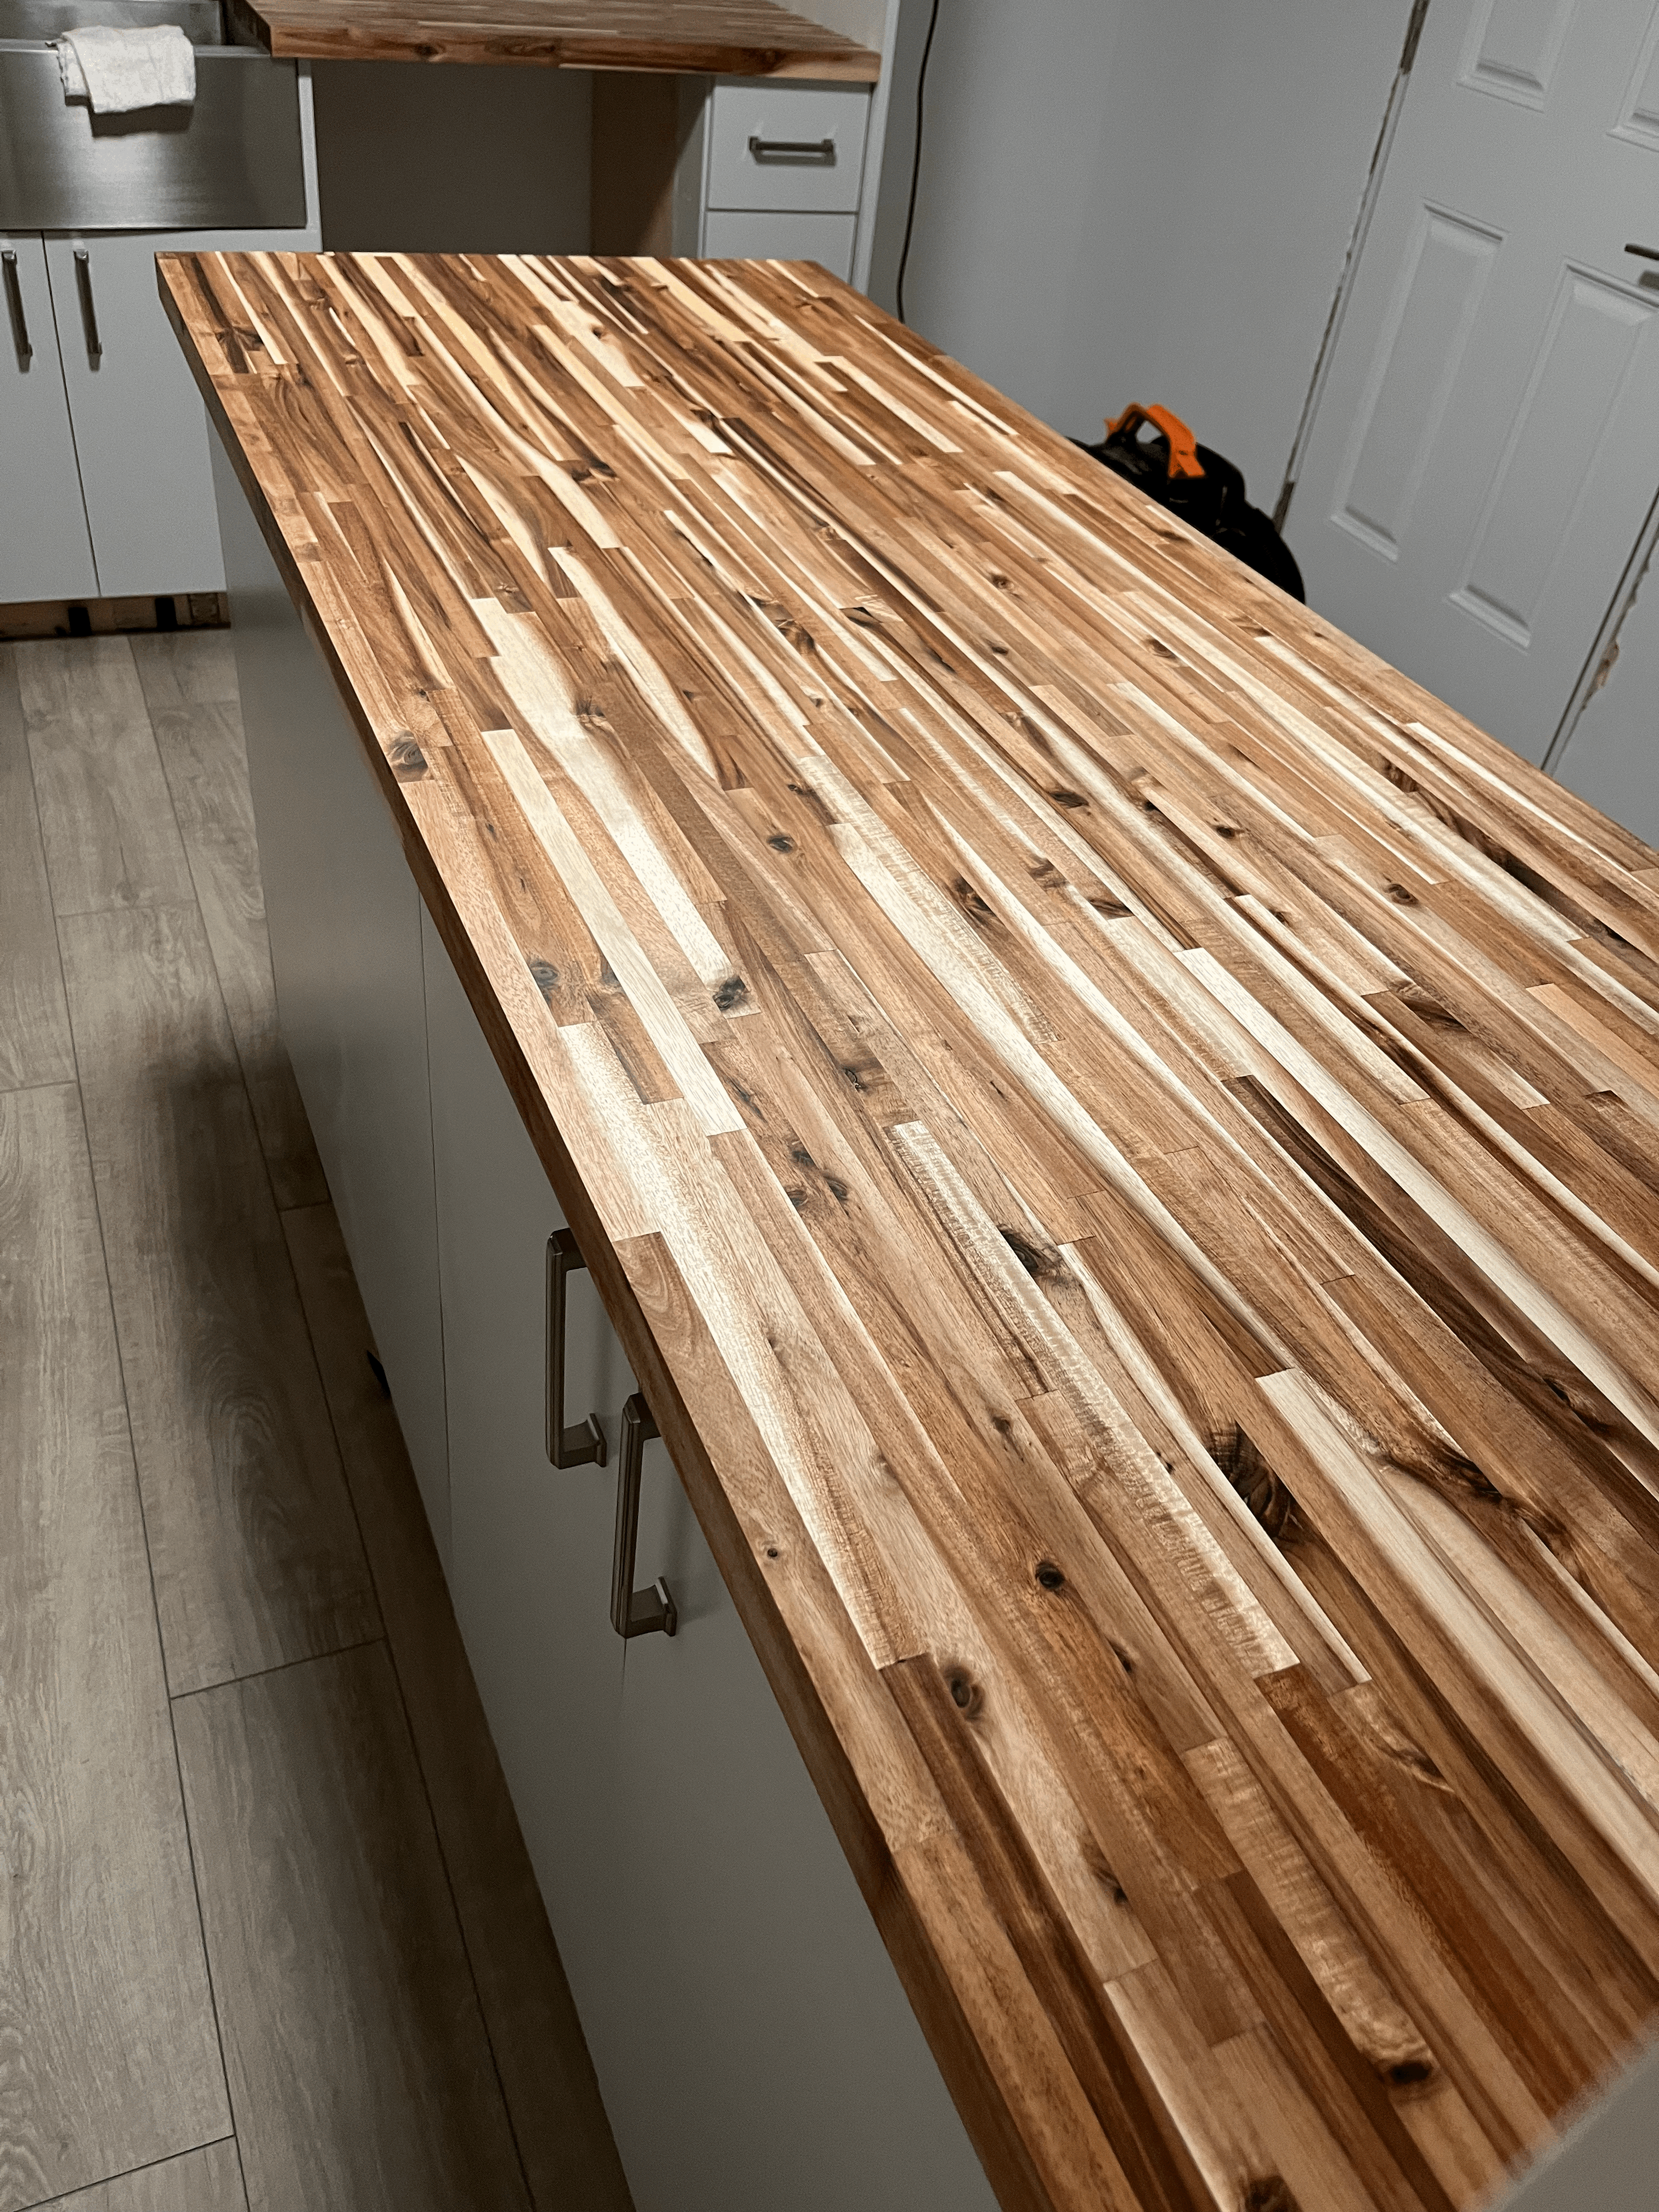
색감이 정말 아름답다.
사실 보통의 폴리우레탄 제품을 사용하지 않고 Odie's oil을 선택한 이유 중 하나는, 나무의 자연스러운 색감과 인위적이지 않은 표면을 갖고 싶었기 때문이다. 보통 겉만 코팅이 되는 폴리우레탄의 경우, 뭔가 인위적인 광이 생기는데 이거는 나무가 가진 그대로의 표면을 잘 살려주기 때문에 더욱 자연스럽다.
The color is really beautiful.
One of the reasons I chose Odie's oil over other polyurethane finish products was because I wanted to get the natural surface look of the butcher block. Compared to polyurethane products, which usually only seal just the top surface of the countertop, creating an artificial shine sheen, Odie's oil gives the butcher block it's own authentic natural look.
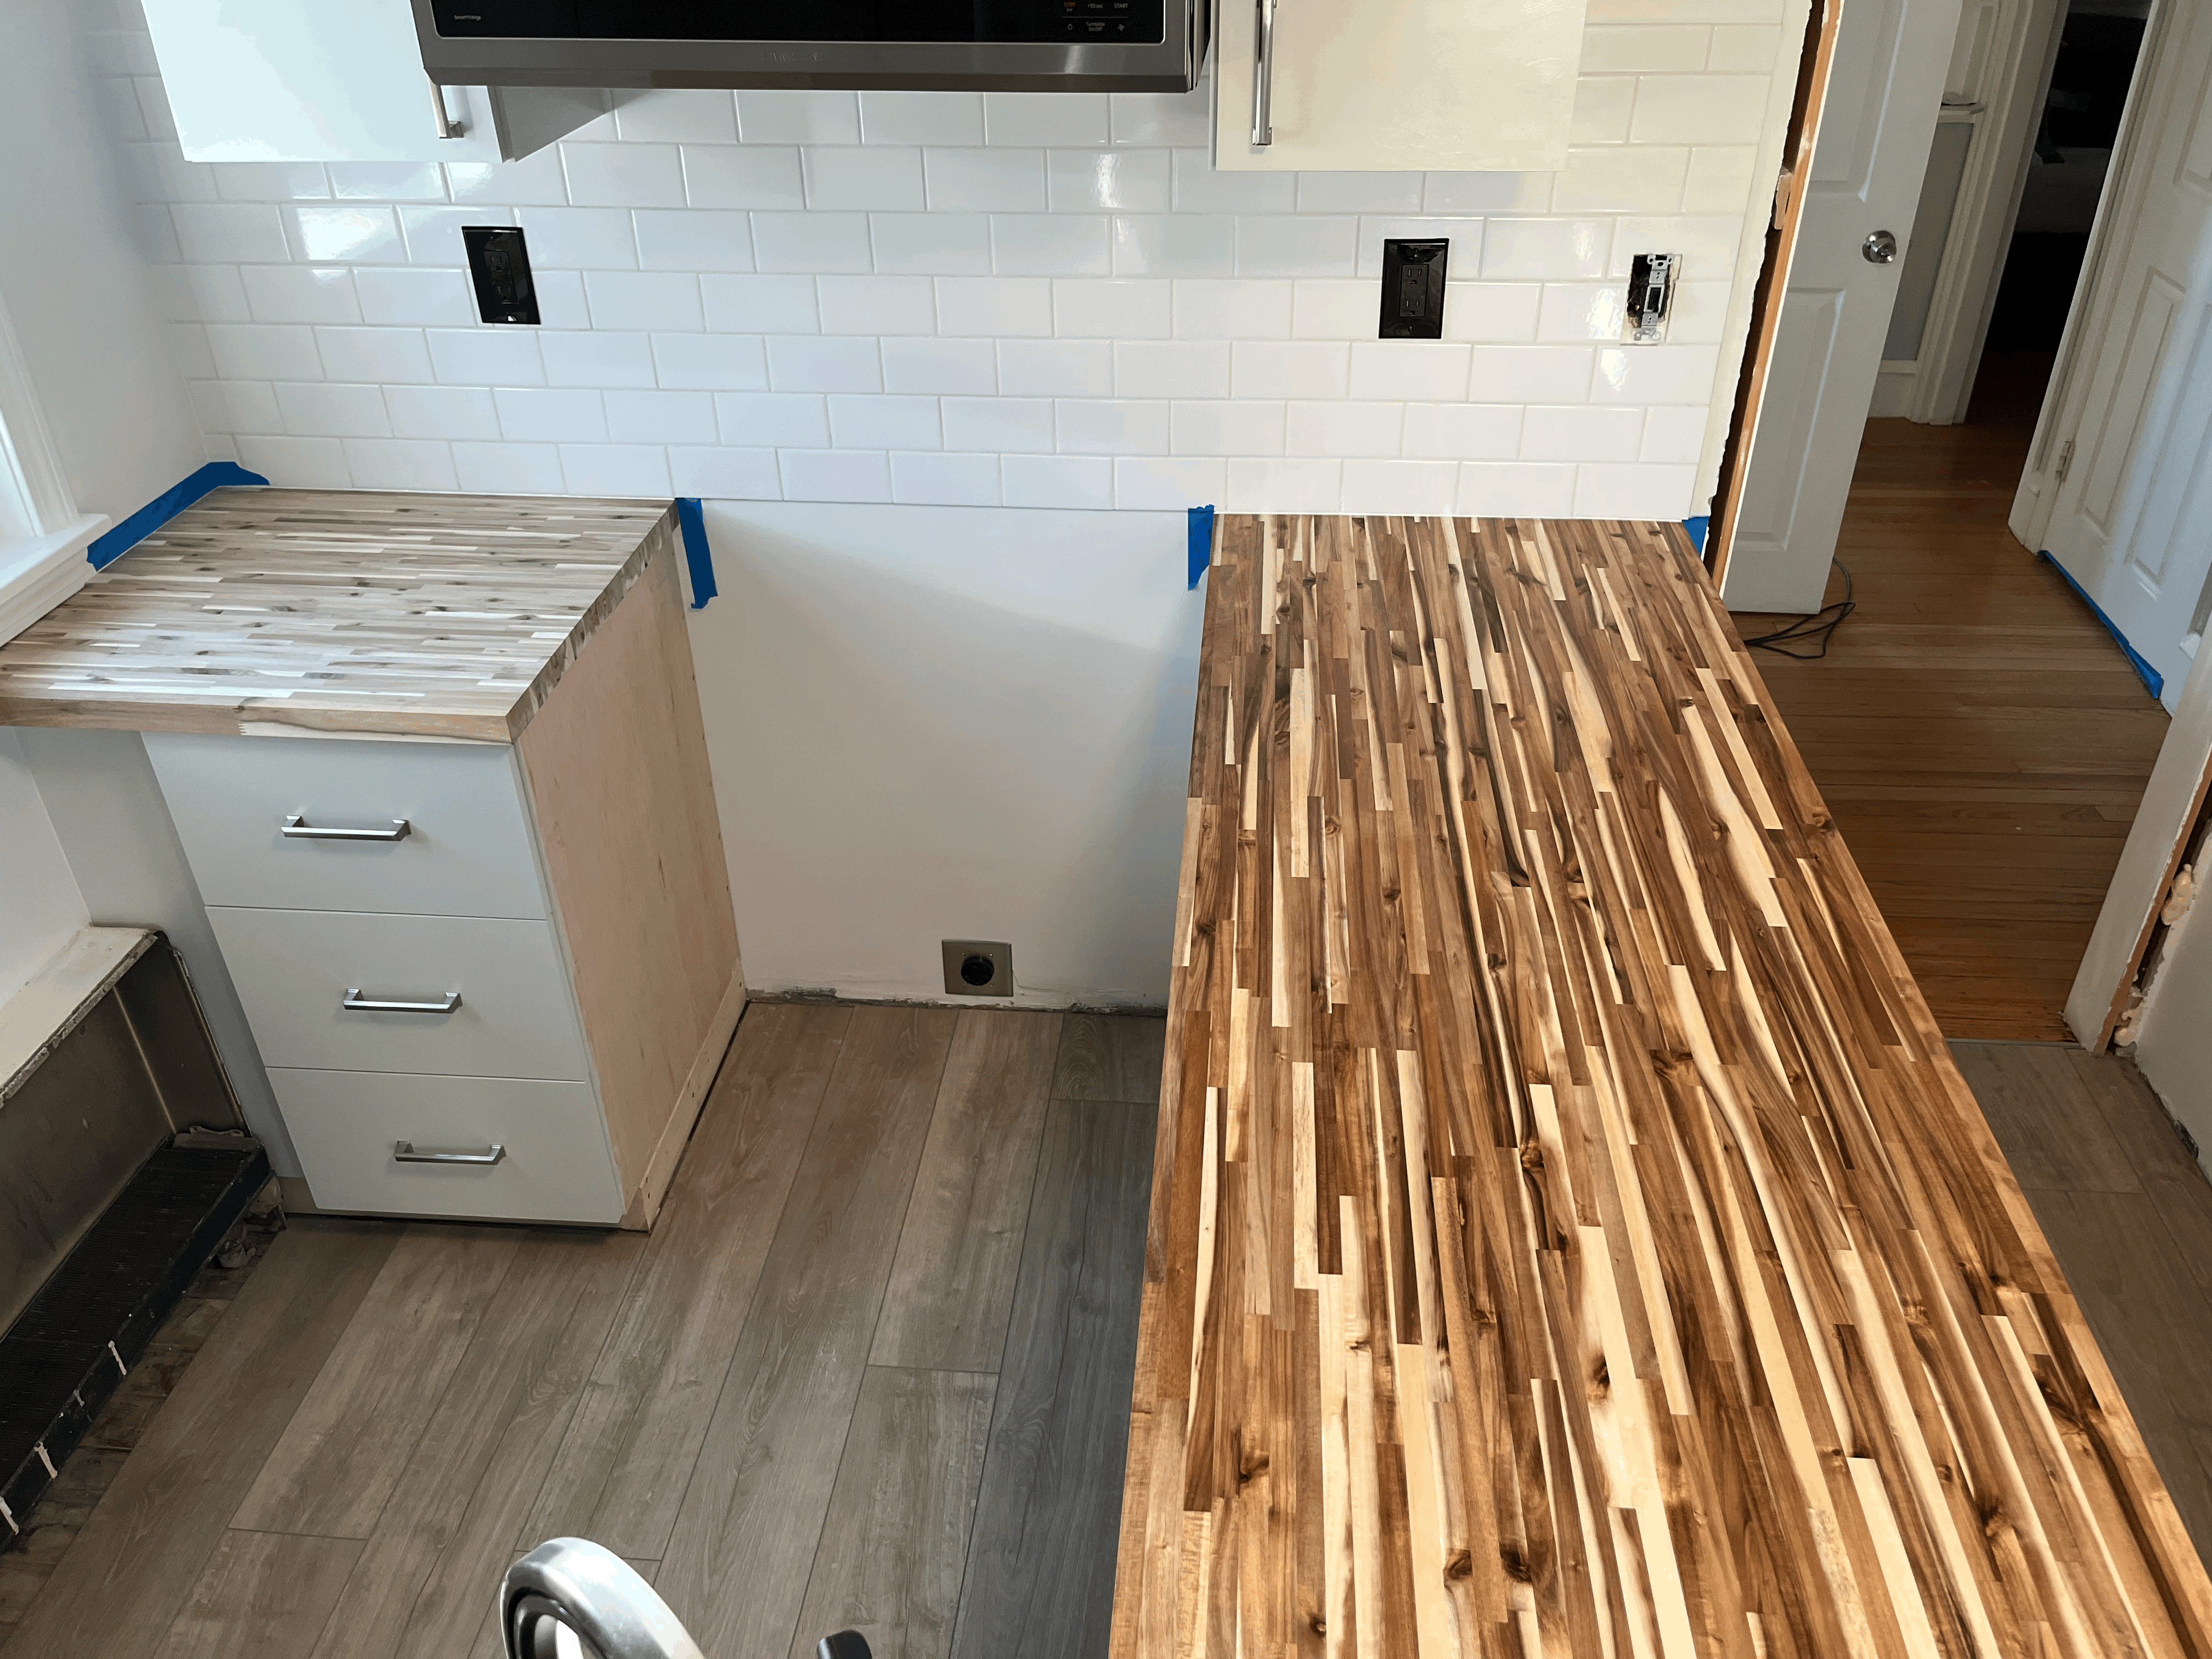
왼쪽의 상판이 오일을 바르기 전의 모습이고, 오른쪽 상판은 오일을 바르고 난 후의 모습이다.
처음에는 바르기 전의 색감도 꽤 마음에 들었었는데, 오일을 바르고 진해진 상판을 보니 제법 부엌 상판의 느낌이 나는 것 같다.
The countertop on the left is before I applied the oil, and the one on the right is after I applied it.
I honestly liked the color without oil at first, but I like it even more now as they seemed to have come to life.
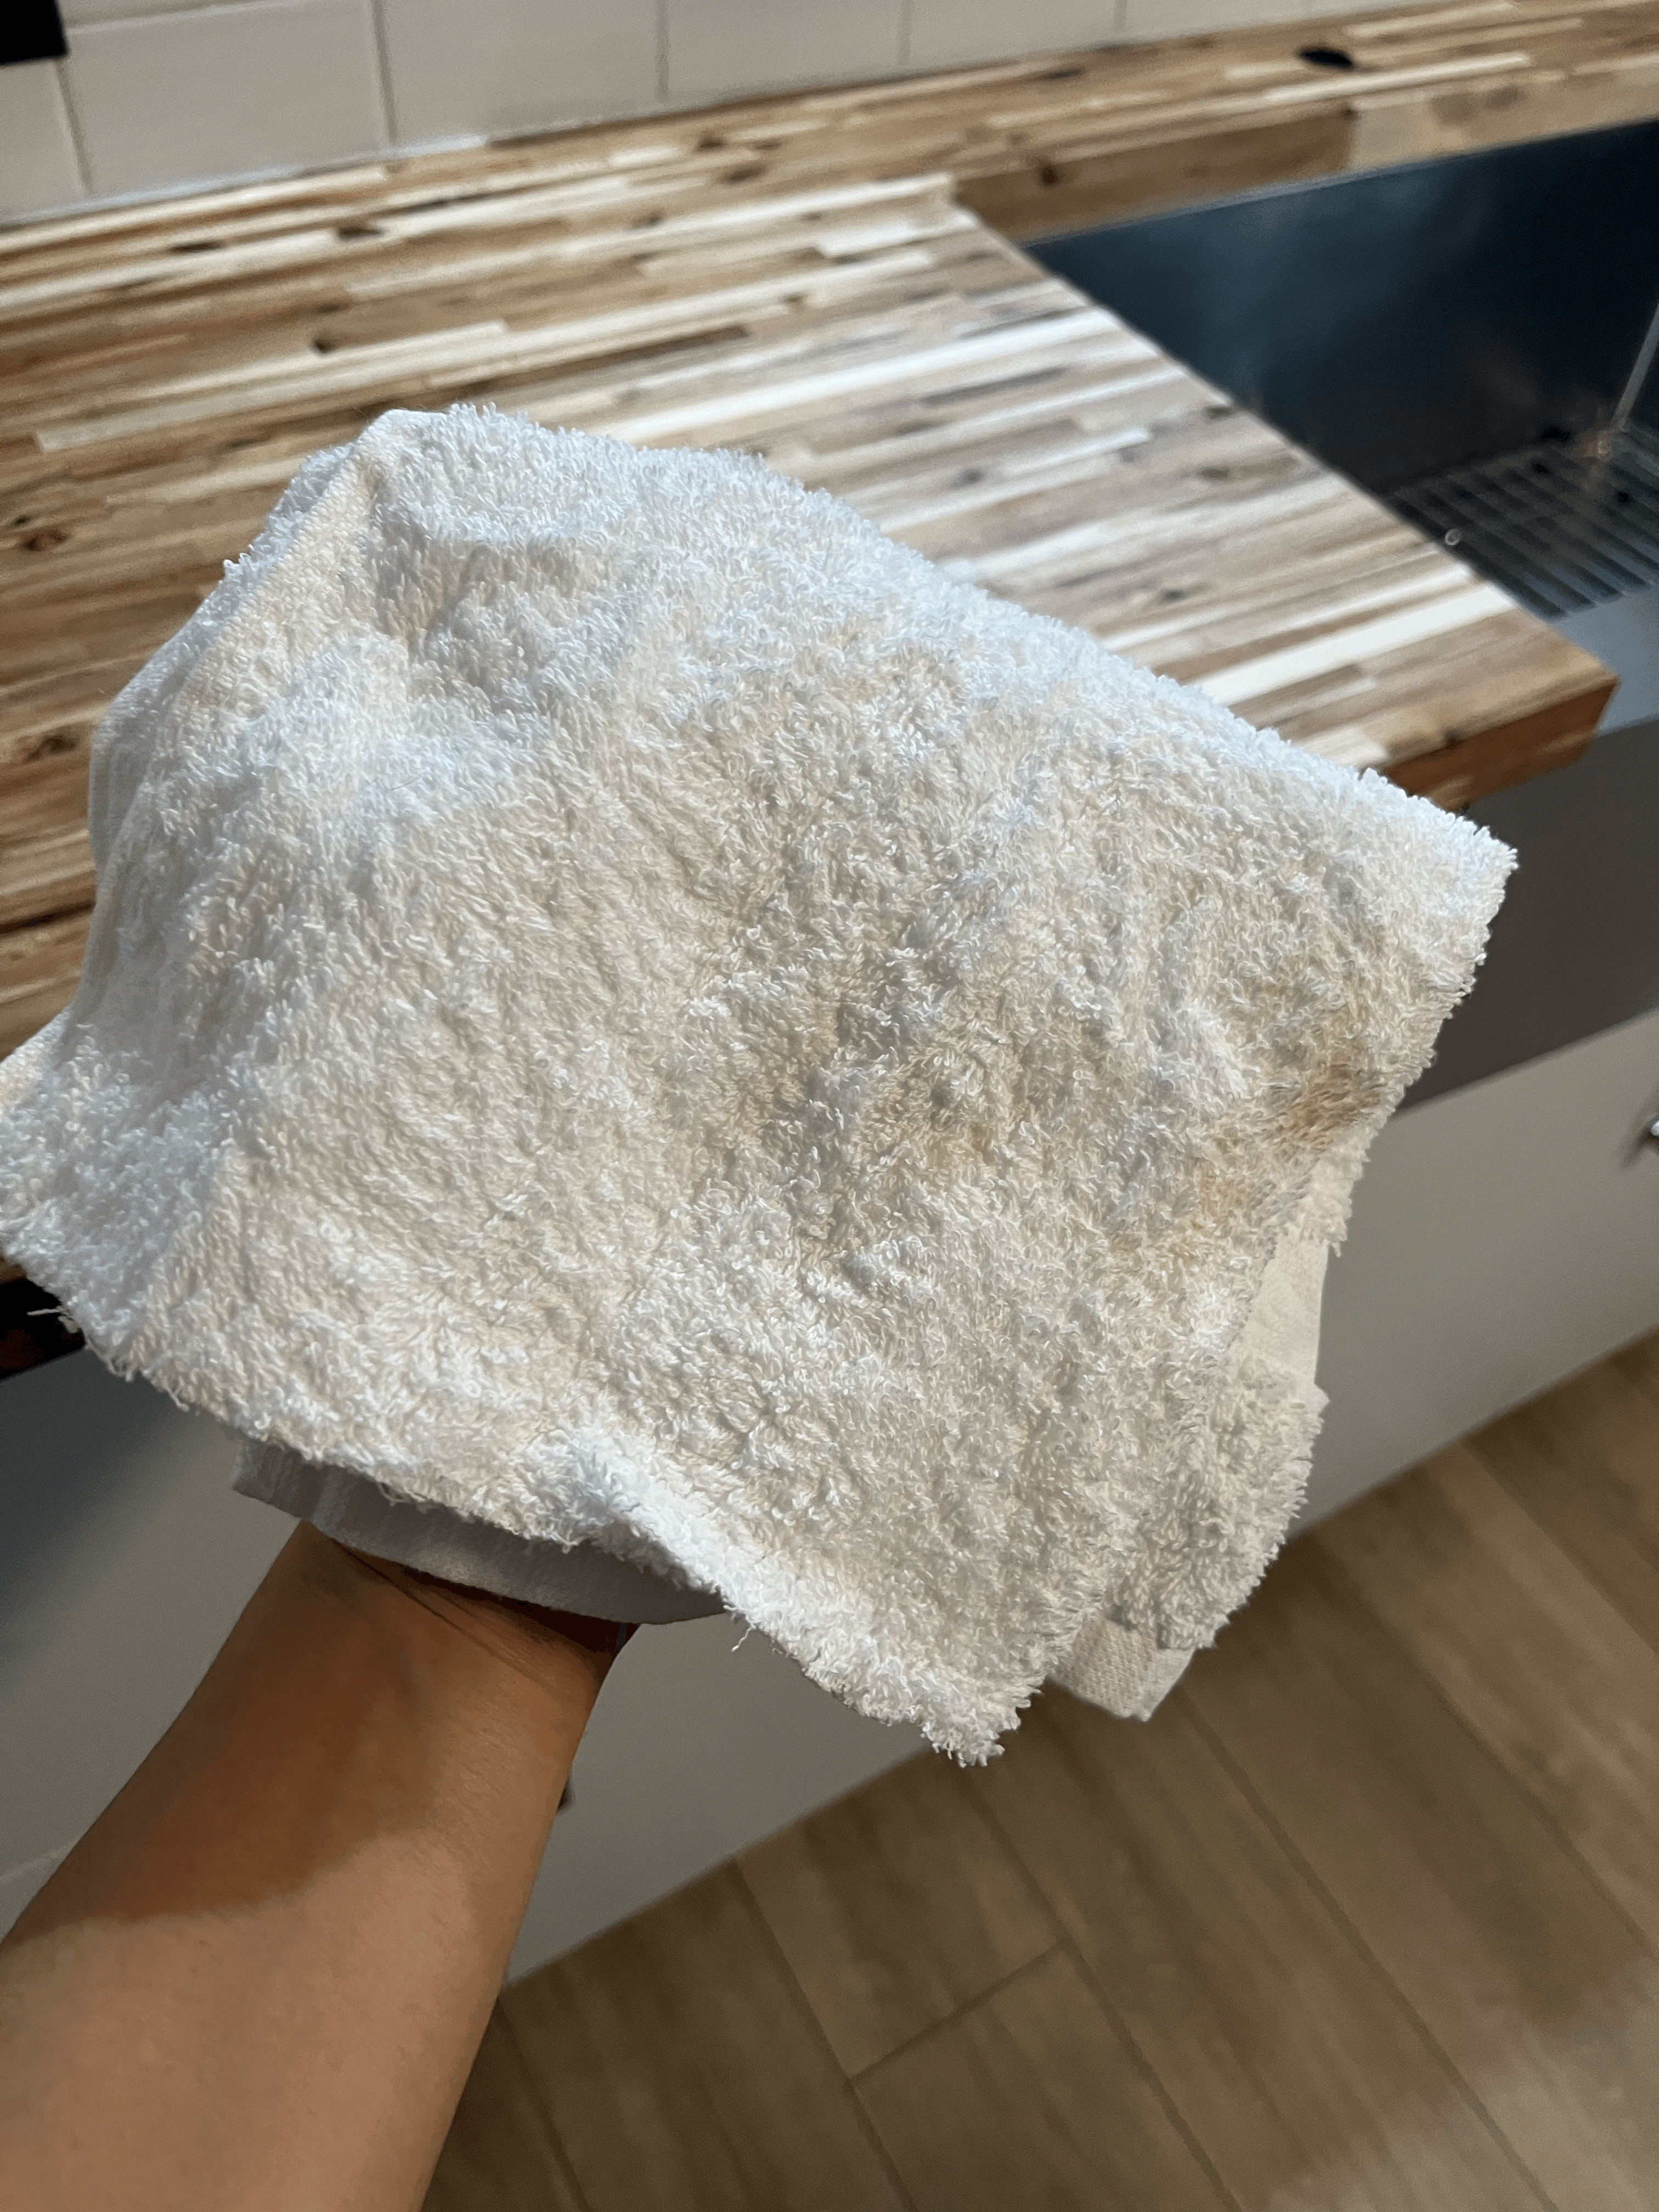
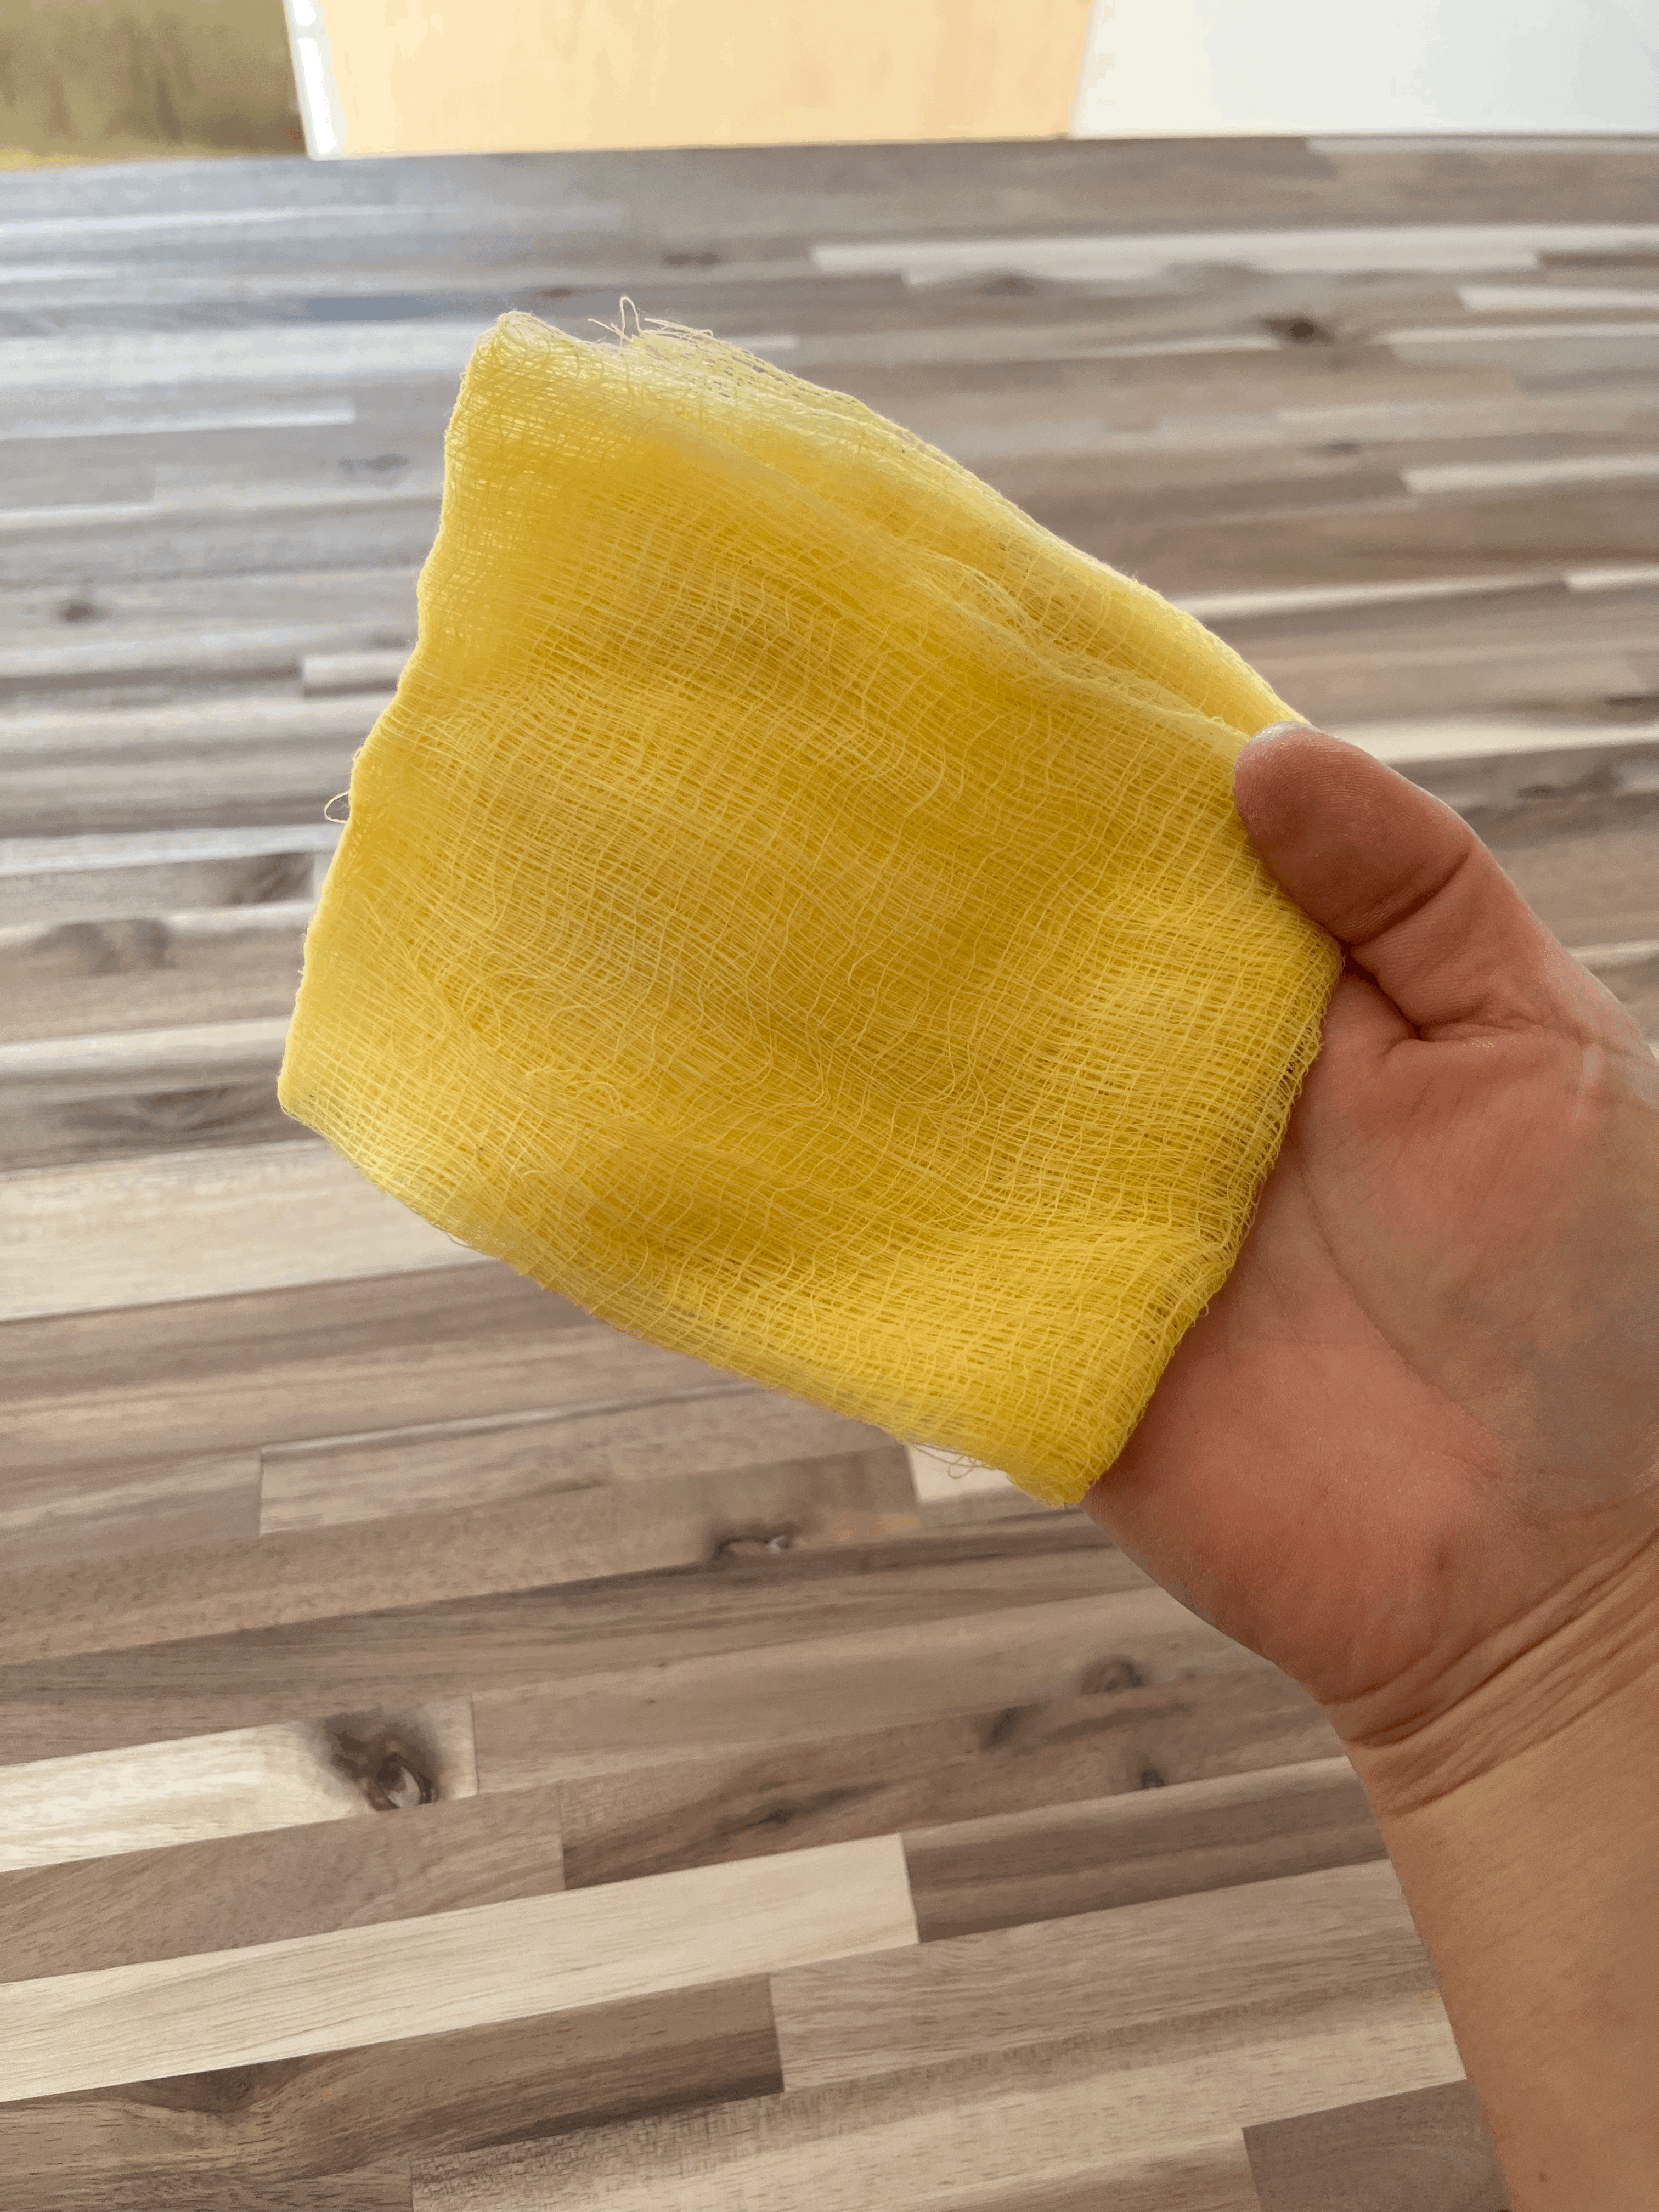
오일 작업을 마치고 나면, 1시간 정도 기다렸다가 나무 속에 다 스며들지 못한 오일은 닦아줘야한다.
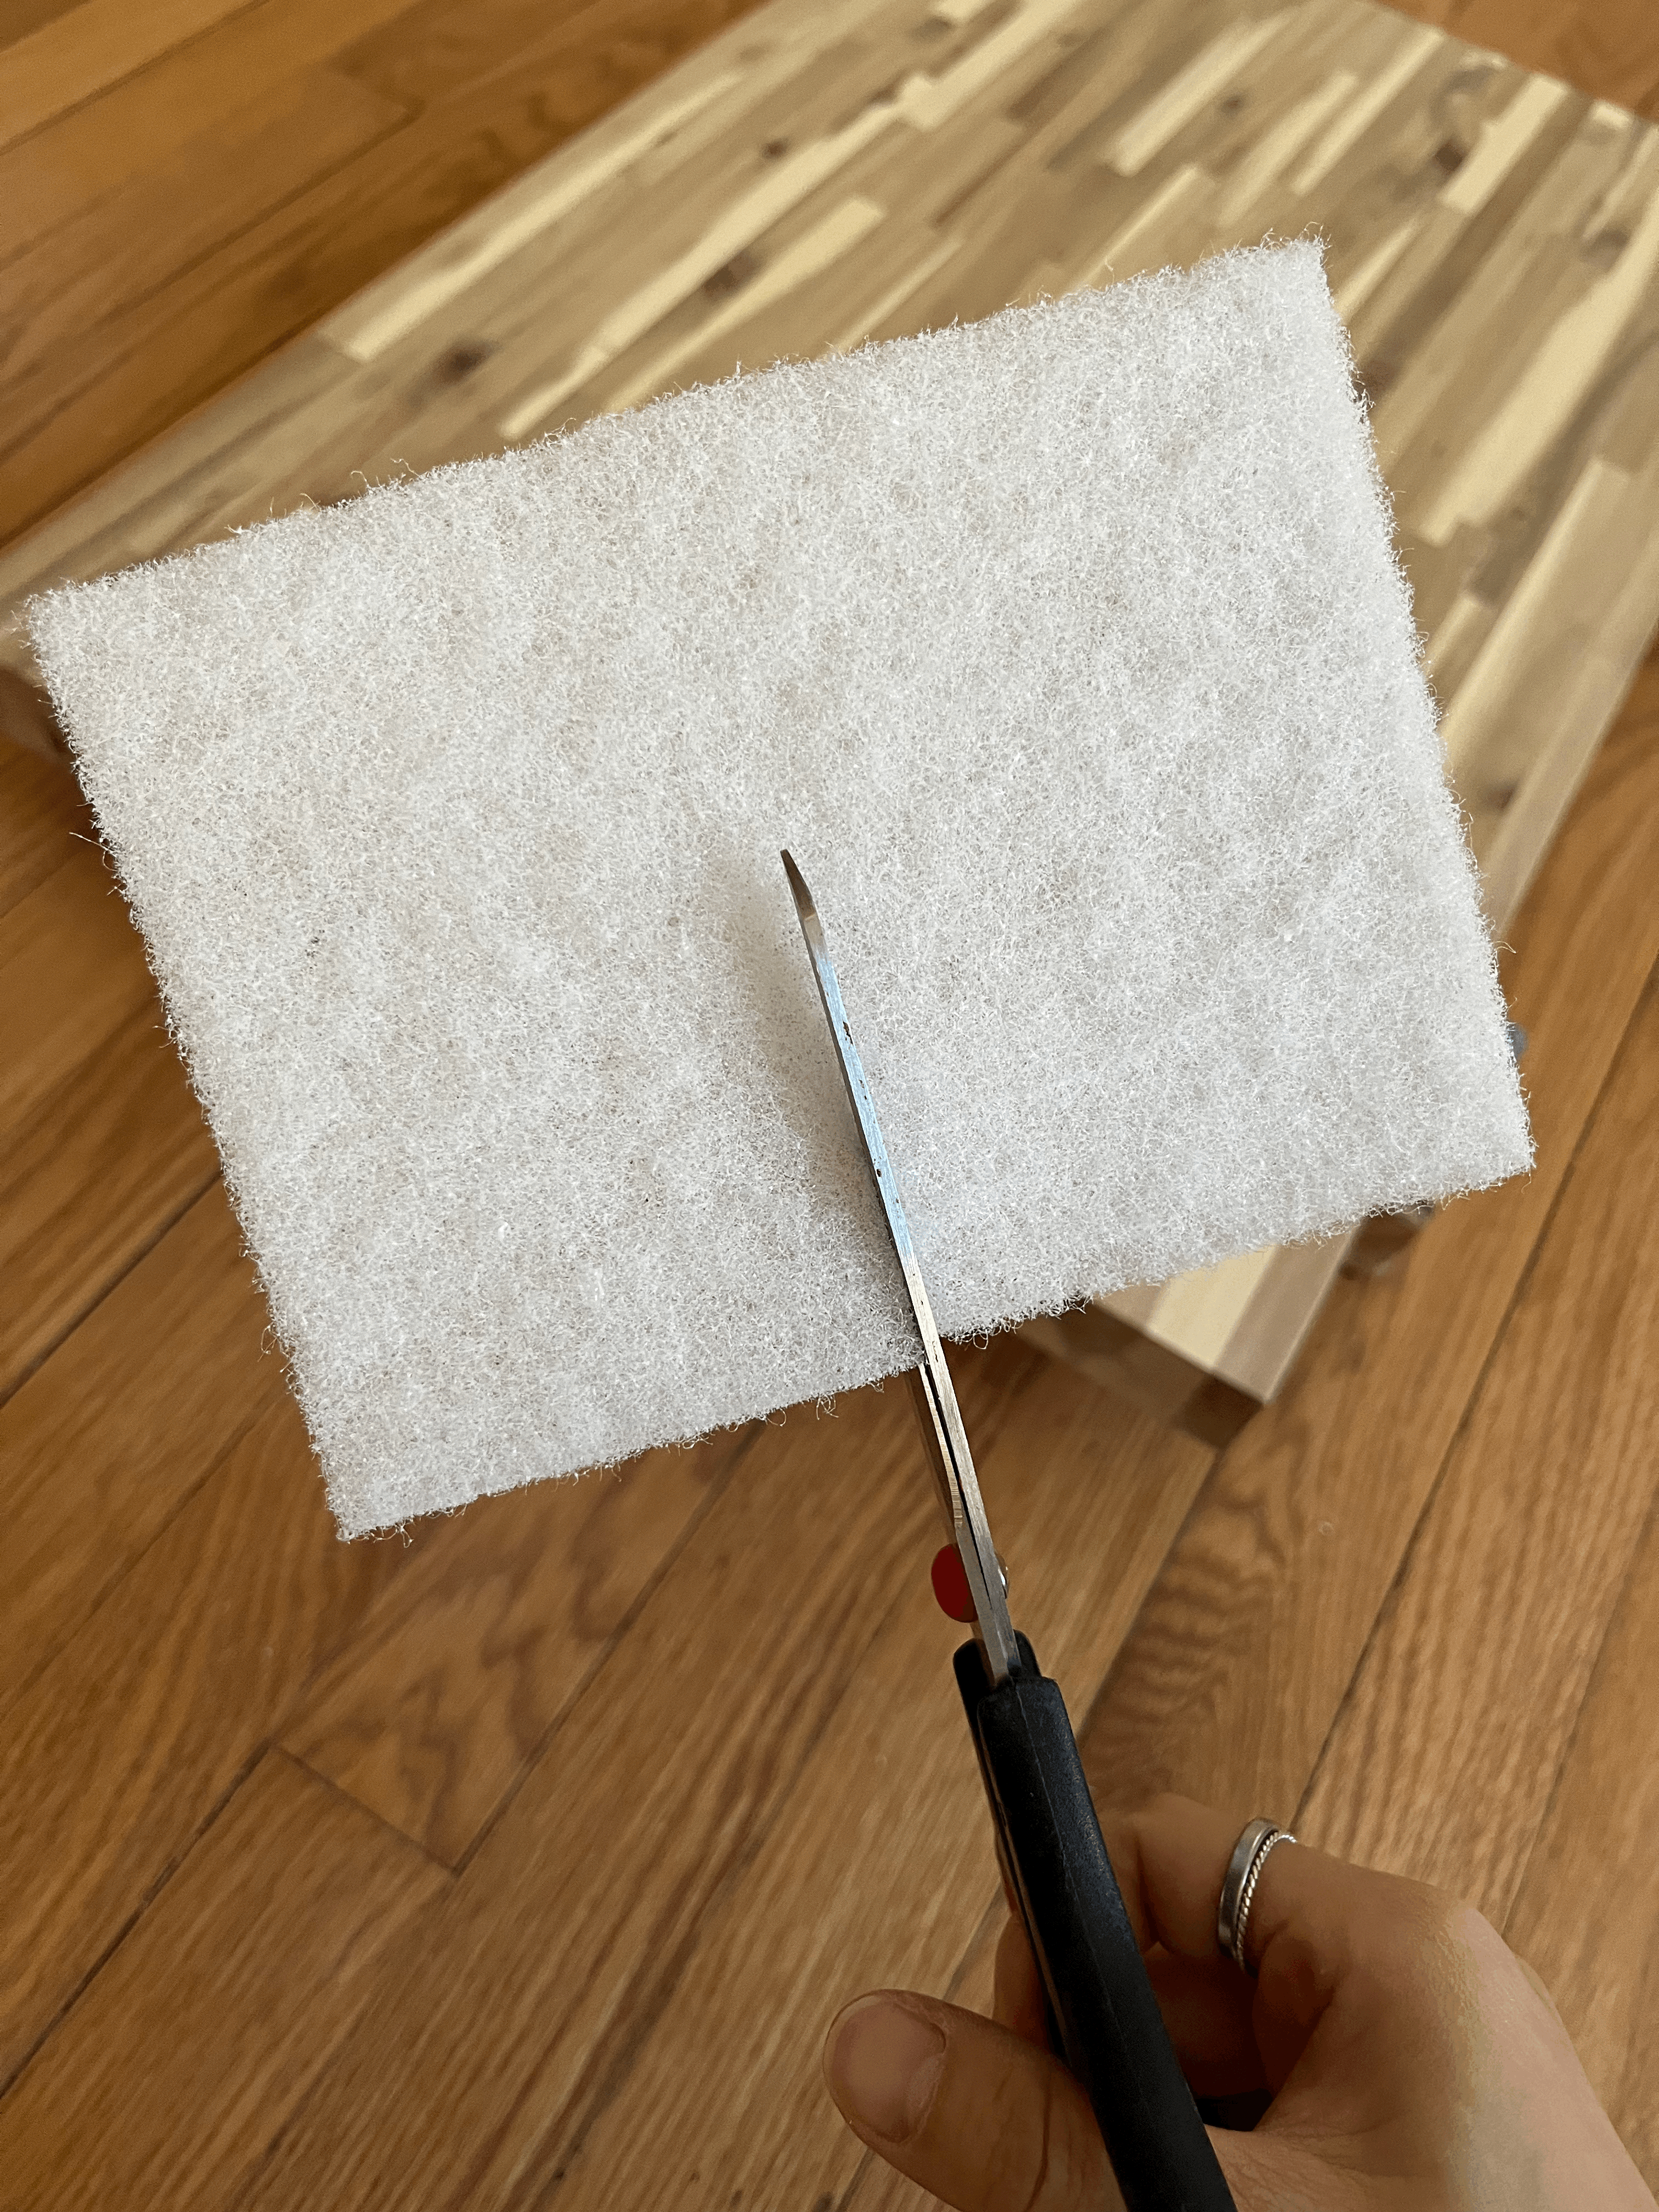
(위 타올도 아마존에서 구입한 Odie's oil starter kit에 함께 포함되어있었다.)
After applying the oil, you need to wait about an hour and then wipe off any excess oil that didn't soak into the wood. (the white towel from the picture above was also included in the Odie's oil starter kit from Amazon.)
Odie's oil에서는 이 작업을 굉장히 강조한다. 그래서 나도 남편이랑 힘을 가세해 엄청나게 열심히 닦아줬다.
Odie's oil stresses this part of the process a lot, so, my husband and I buffed it off very hard.


오일을 닦아내고 난 후의 타올은 다시 세탁해서 사용할 수가 없다고 하길래, 일단 버리지 않고 두어보았다.
혹시나 시간이 좀 지나고 나서 덜 닦인 오일이 표면으로 올라올 경우를 대비하고 싶었다. 실제로 나름 오일을 잘 닦았다고 생각했는데 손으로 쓰윽 만져보면 약간 덜 부드럽게 느껴지는 부분이 있어서 자기 전에 한번 더 닦아줬다.
Because you can't wash the used towels in the washing machine and reuse them after buffering, I was supposed to throw them away. However, just in case more excess oil came to the surface after a few hours, I kept them. Actually I thought I buffed pretty well, but there were some areas less dry than others. So, I ended up having to buff one more time before bed.
그러고 다음날 확인해보니 다행히도 아주 뽀송뽀송했다.
이제 이틀 정도 기다렸다가 Universal oil을 같은 방법으로 바를 계획이다. super penetrating oil은 말그대로 나무 속으로 잘 스며들 수 있도록 만든 제품이라 점도가 묽은 편이었는데, Universal oil은 그보다 되지 않을까 싶다.
The next day, I checked the countertops and they were really soft and dry.
Now, I'm going to wait 2 more days and then apply the universal oil the same way. The super penetrating oil is pretty watery because it's designed to penetrate into the wood. So, I think the universal oil might be thicker than the super penetrating oil.
Odie's oil을 바른 후의 원목 상판에 반한 우리 남편은 부엌을 수시로 들락날락거리며 바라보곤 한다. ^^
My husband must love the look of the countertops because he's constantly going into the kitchen to see them. :)