2023. 4. 6. 10:28ㆍDIY projects
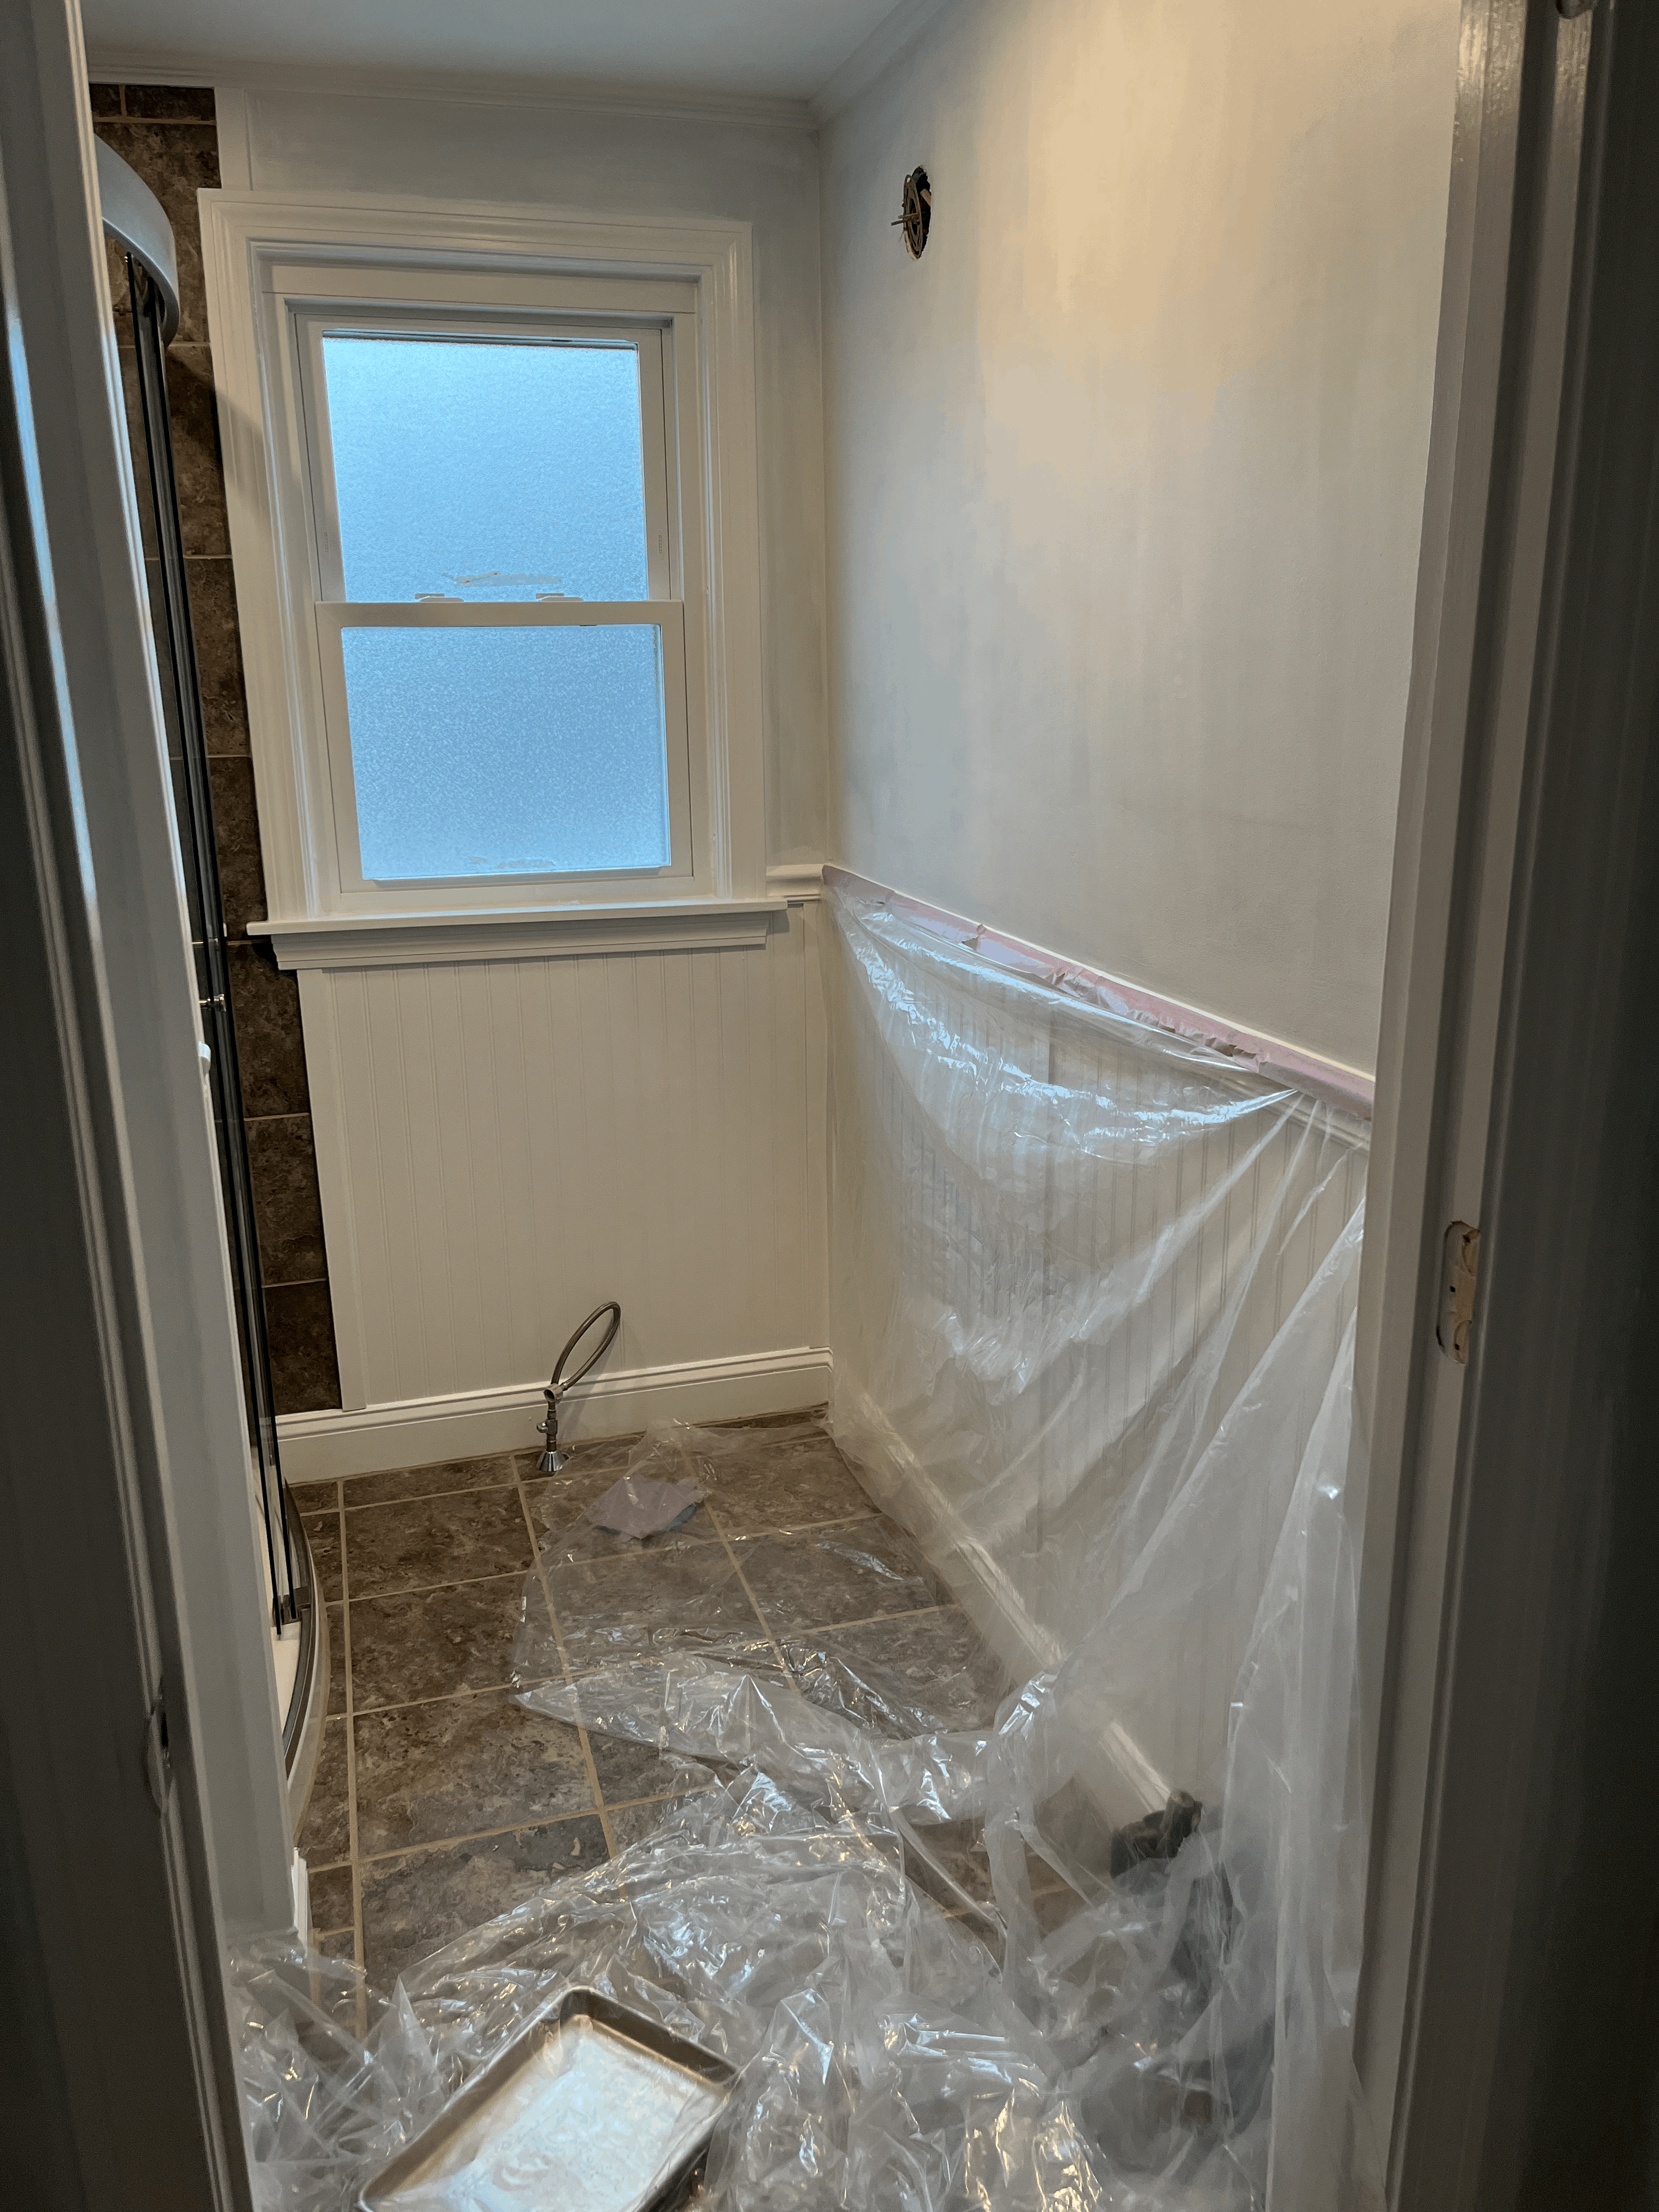
화장실 벽에 프라임을 끝내고, 페인트 작업과 백스플래시 타일 작업을 같이 했다.
(프라임 작업에 대한 포스팅은 글 가장 하단에 링크를 걸어두었으니 참고하길...)
After I finished priming the bathroom wall, I started to work on painting and backsplash tiling.
(There is a link about how I primed the wall at the end of this post...)

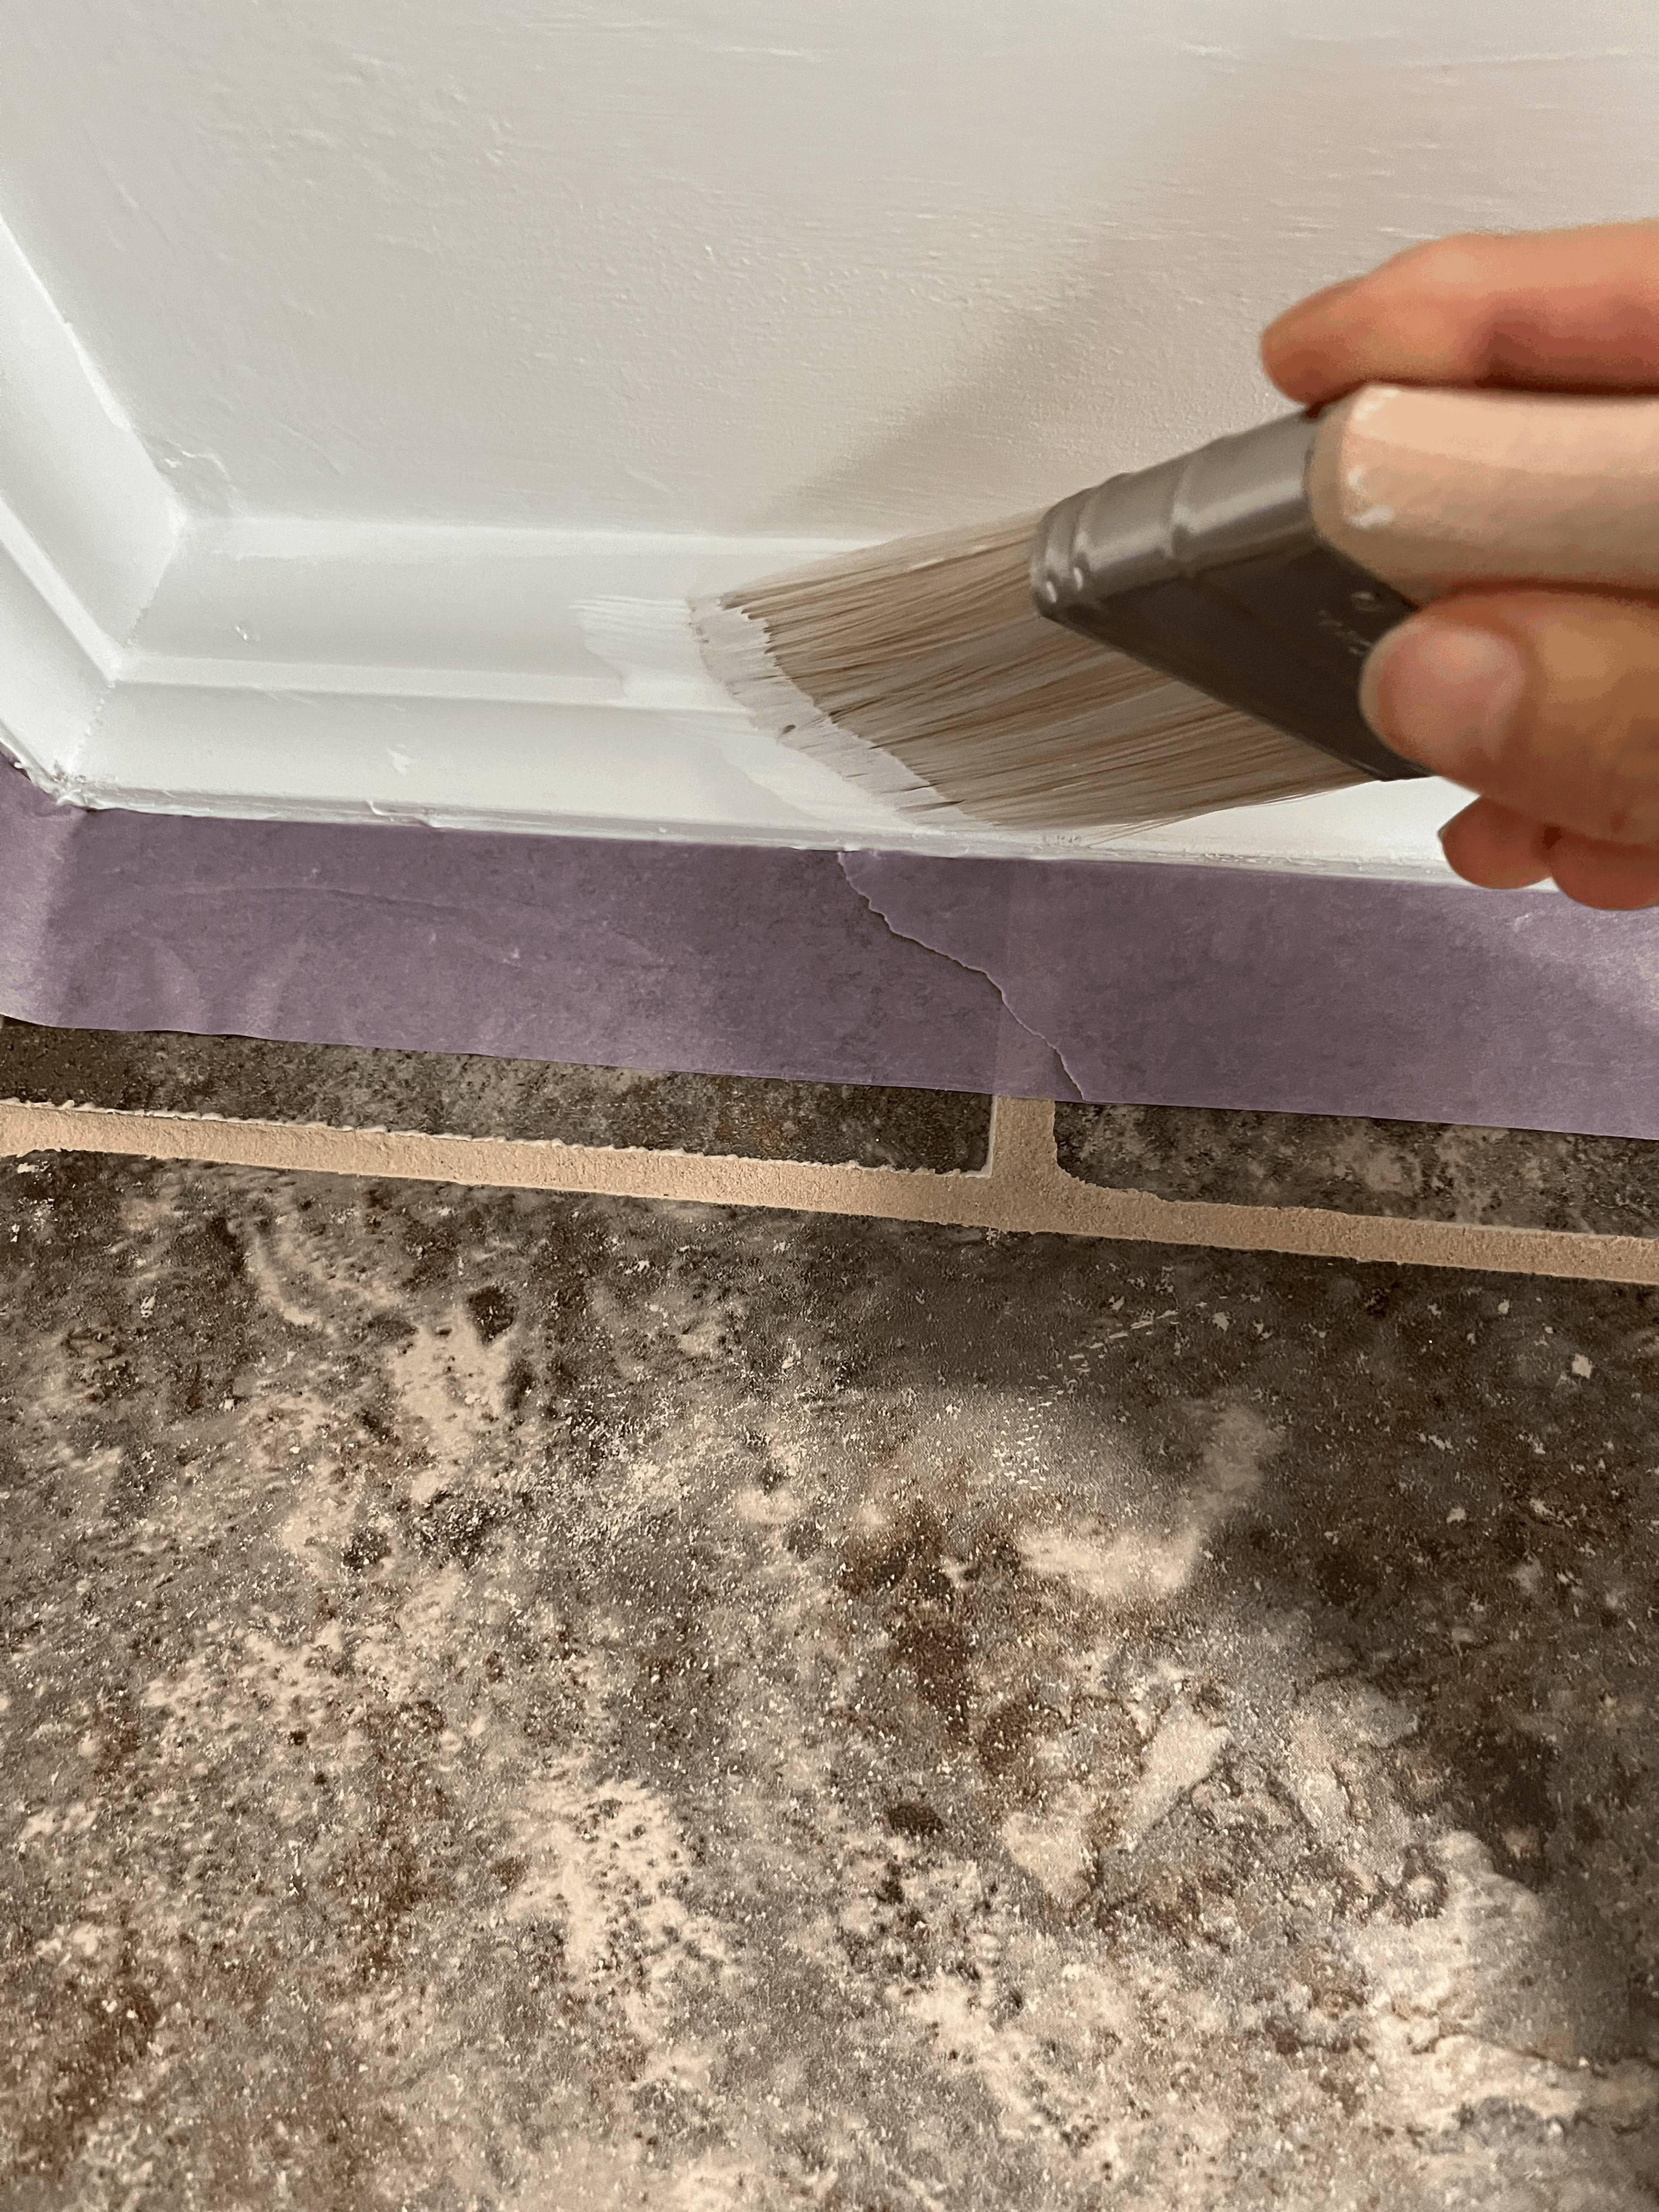
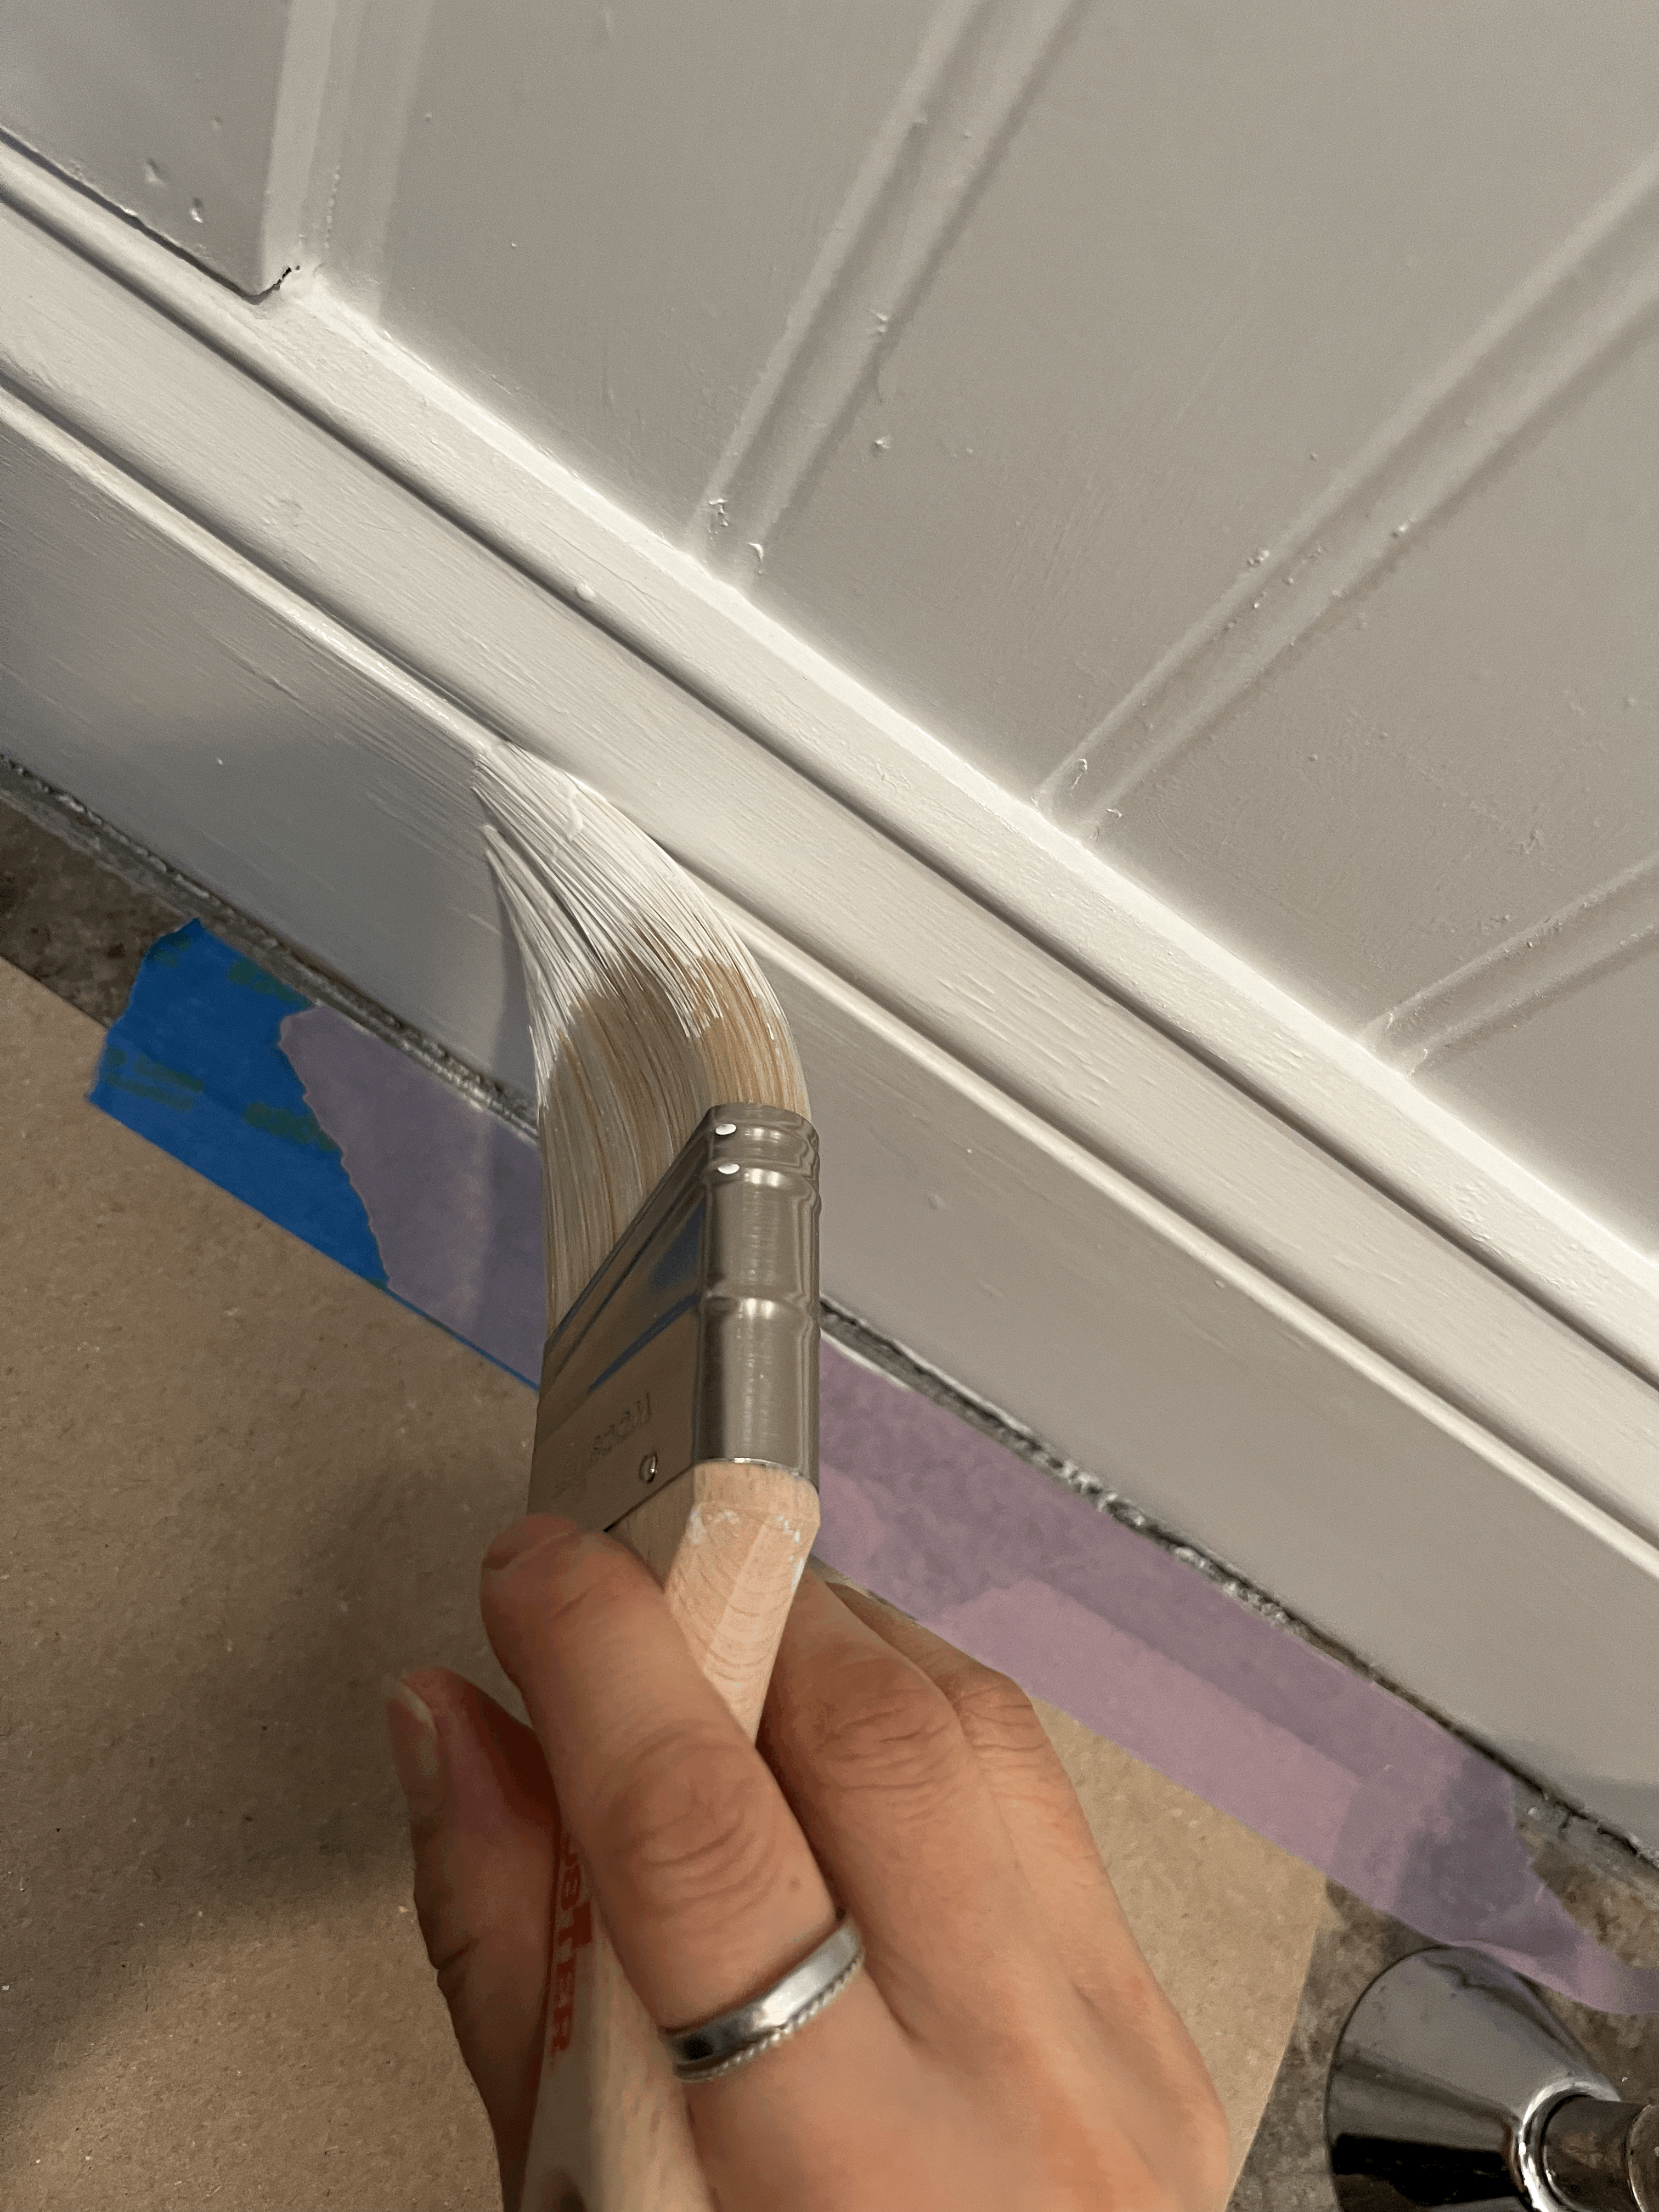
본격적으로 페인트를 칠하기 전에, caulking을 해야할 곳이 있다면 미리 해두는 것이 좋다. 페인트를 하고 나서 하면 꽤 표시가 난다.
I suggest you caulk first if there are any gaps before painting. It is pretty visible if you caulk after painting even though the paint is white.
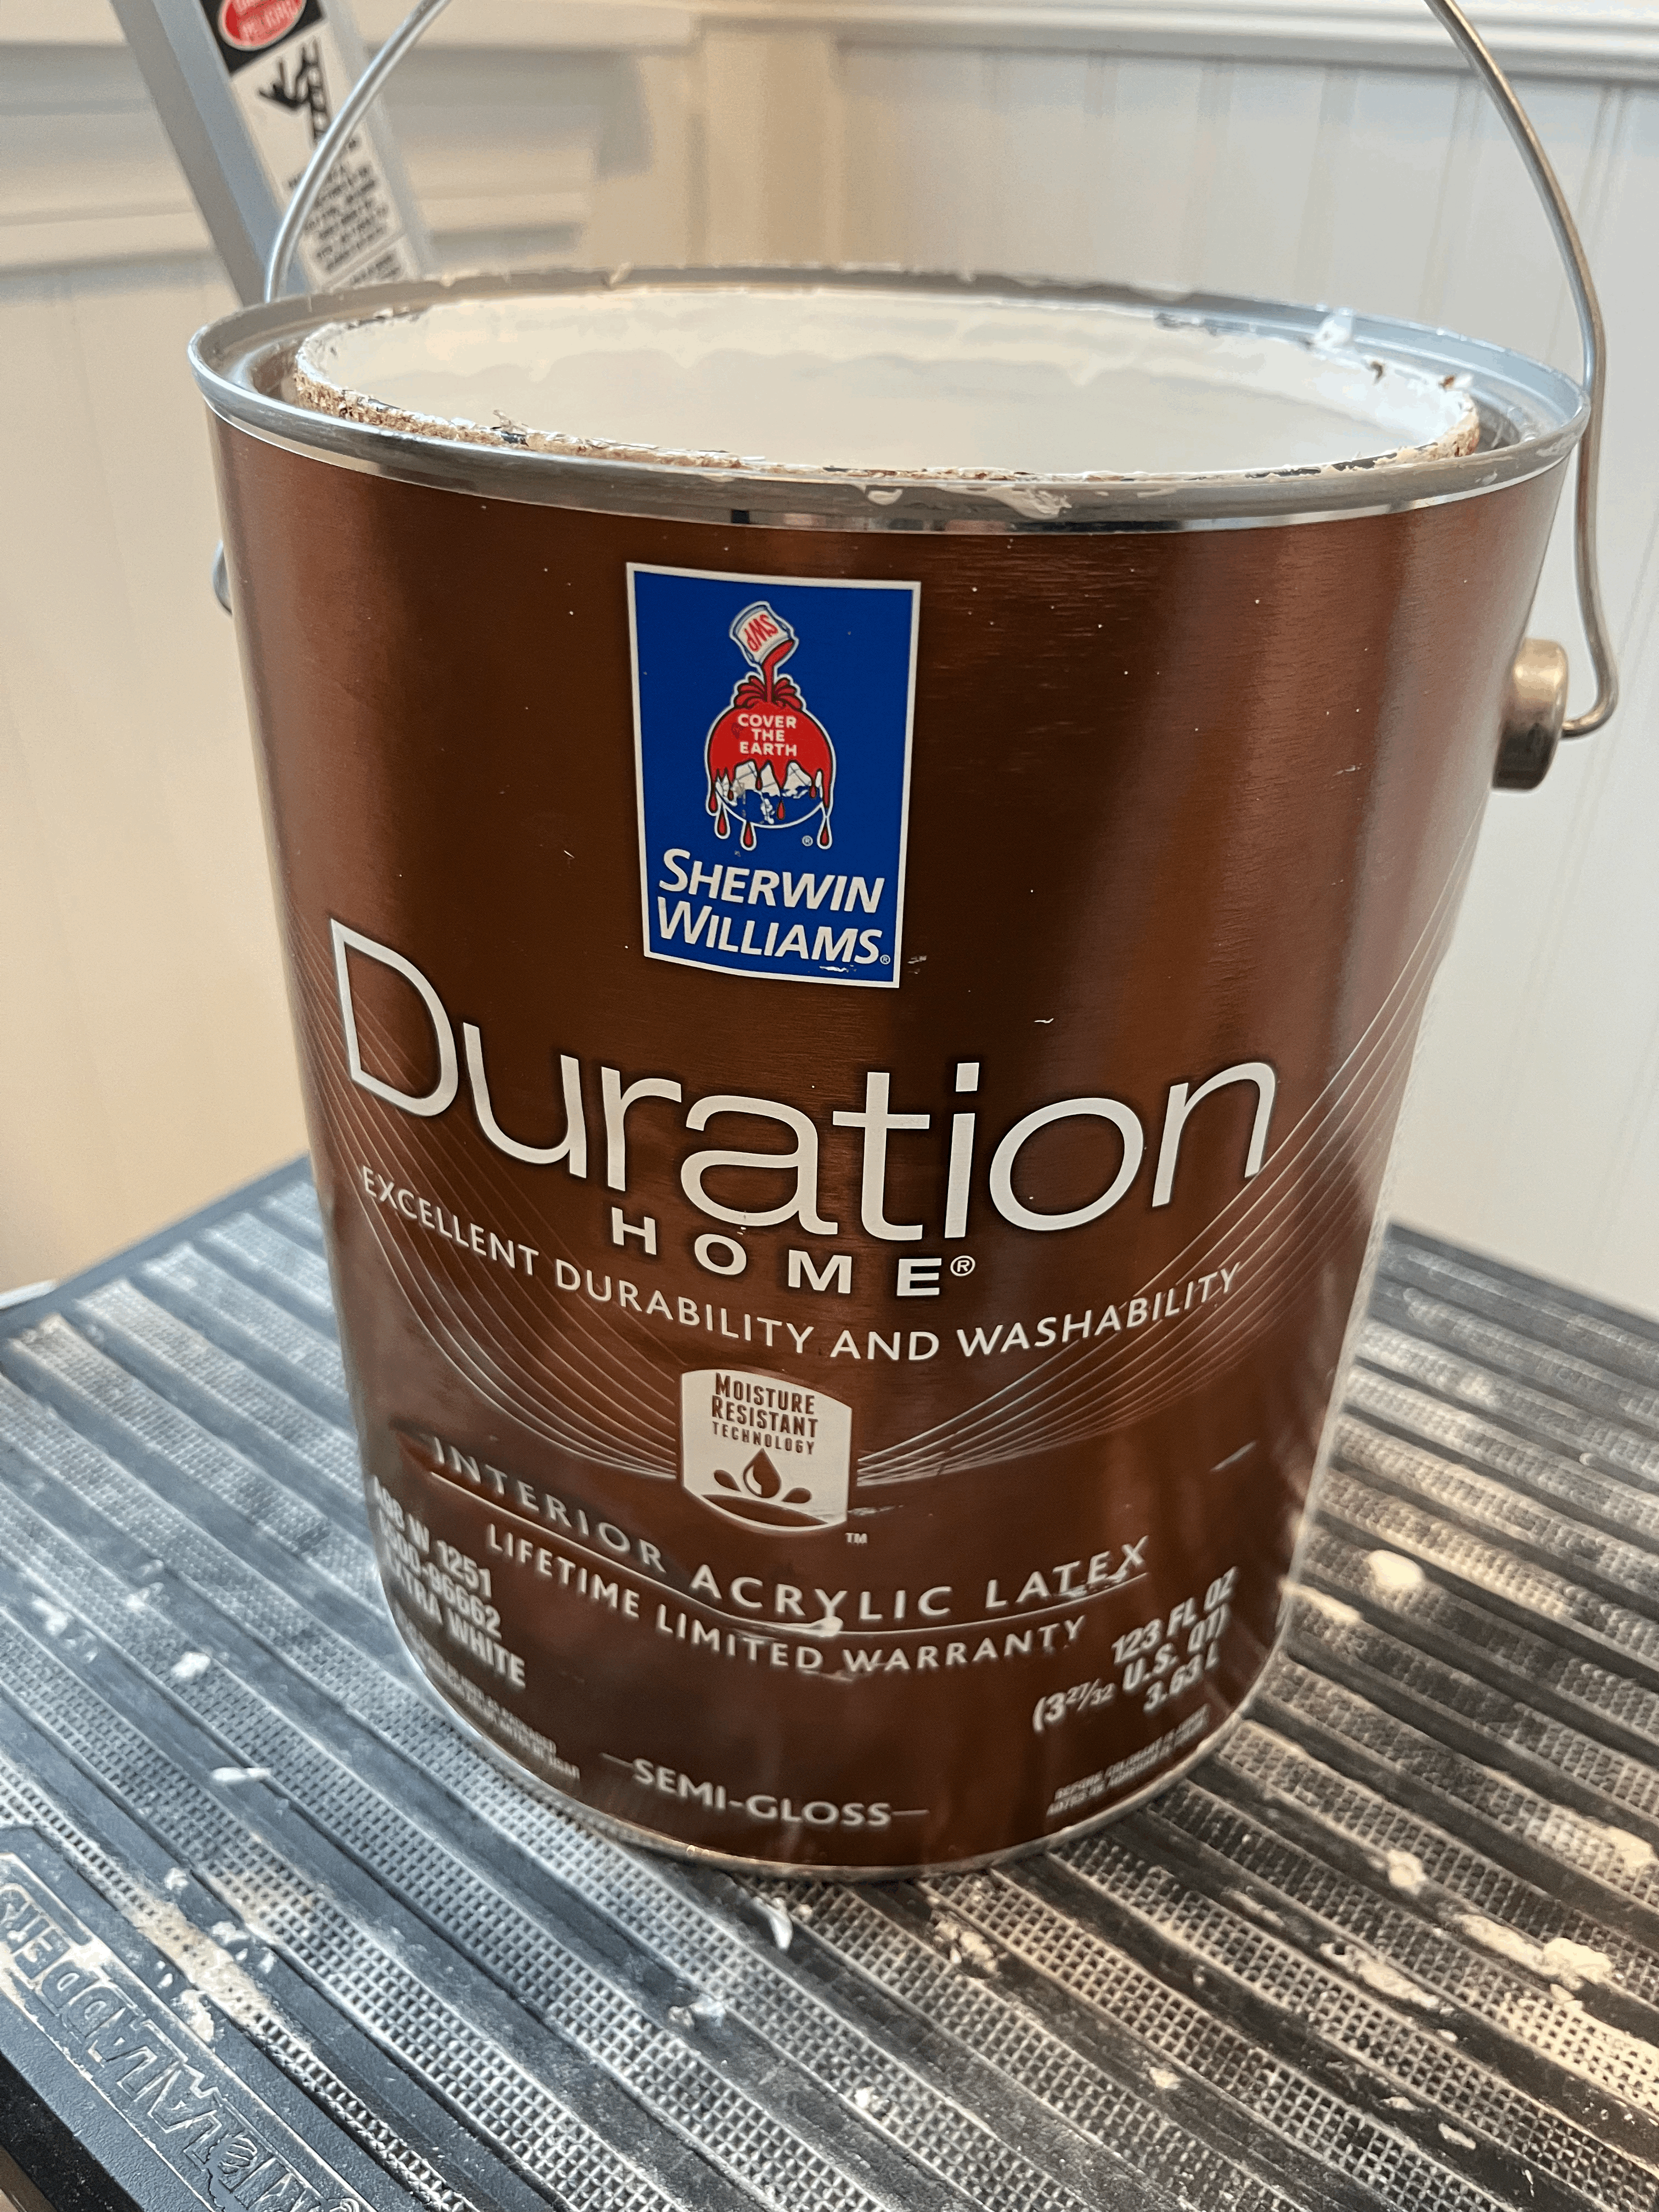
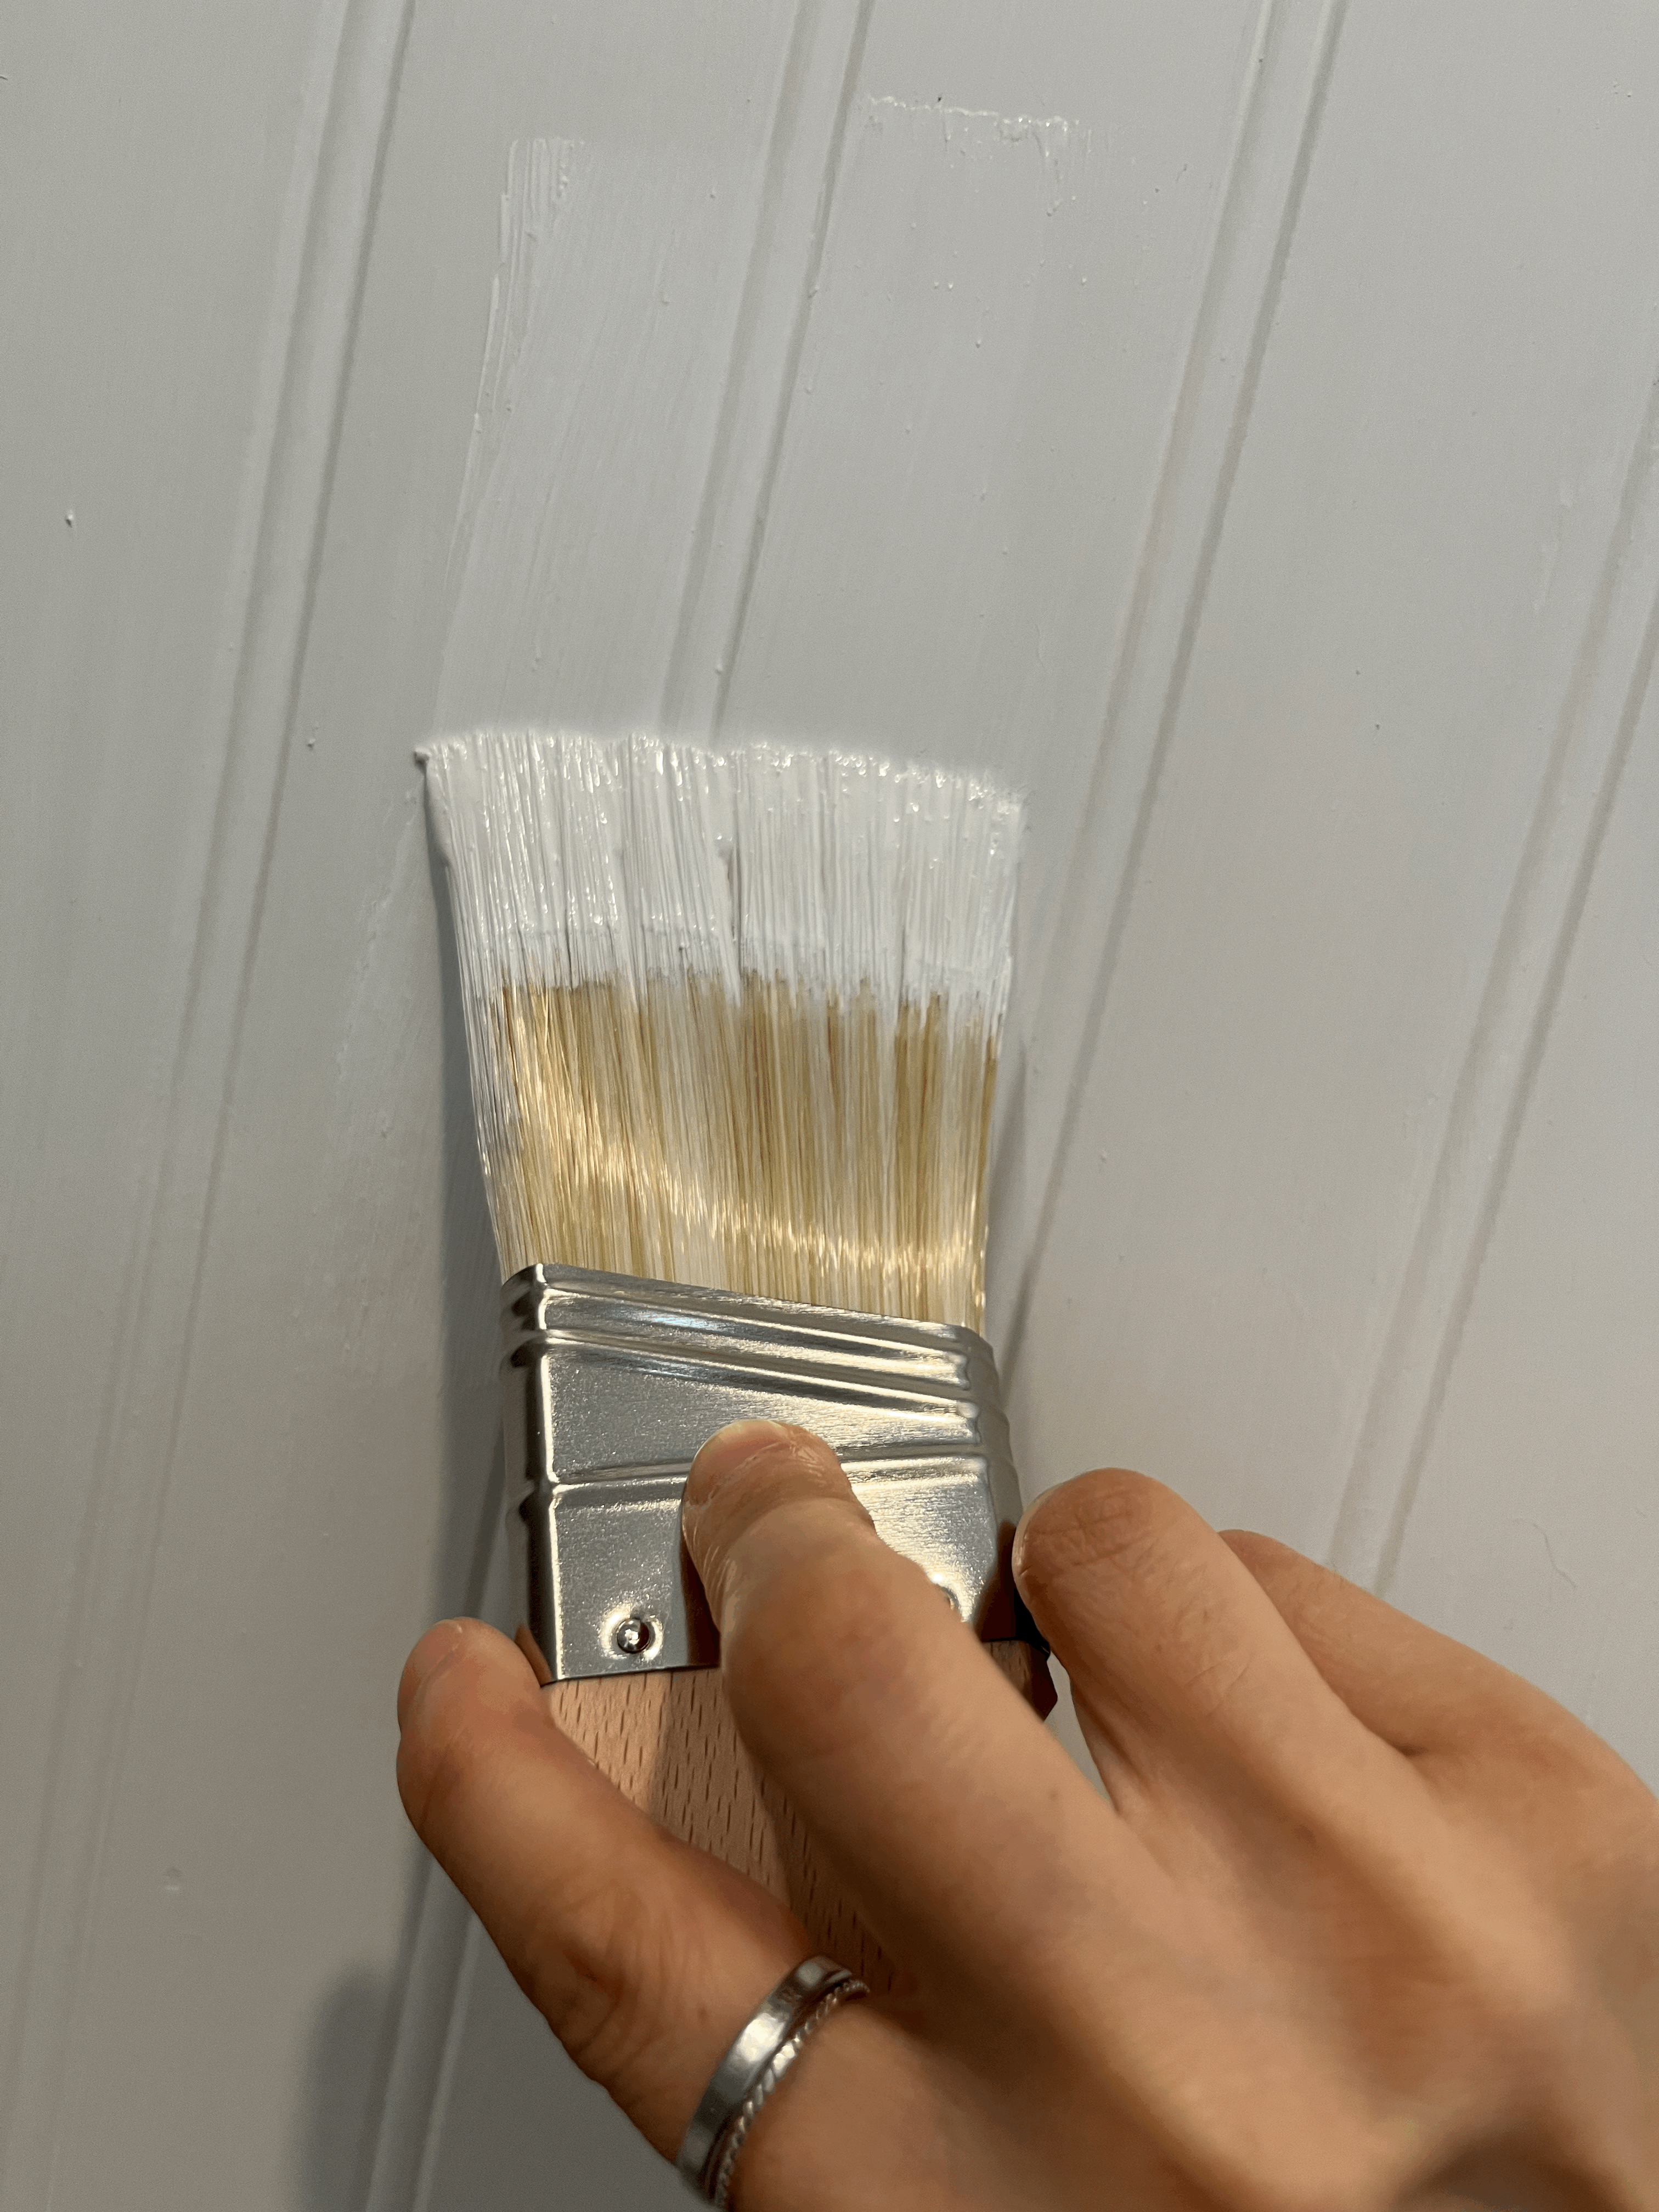
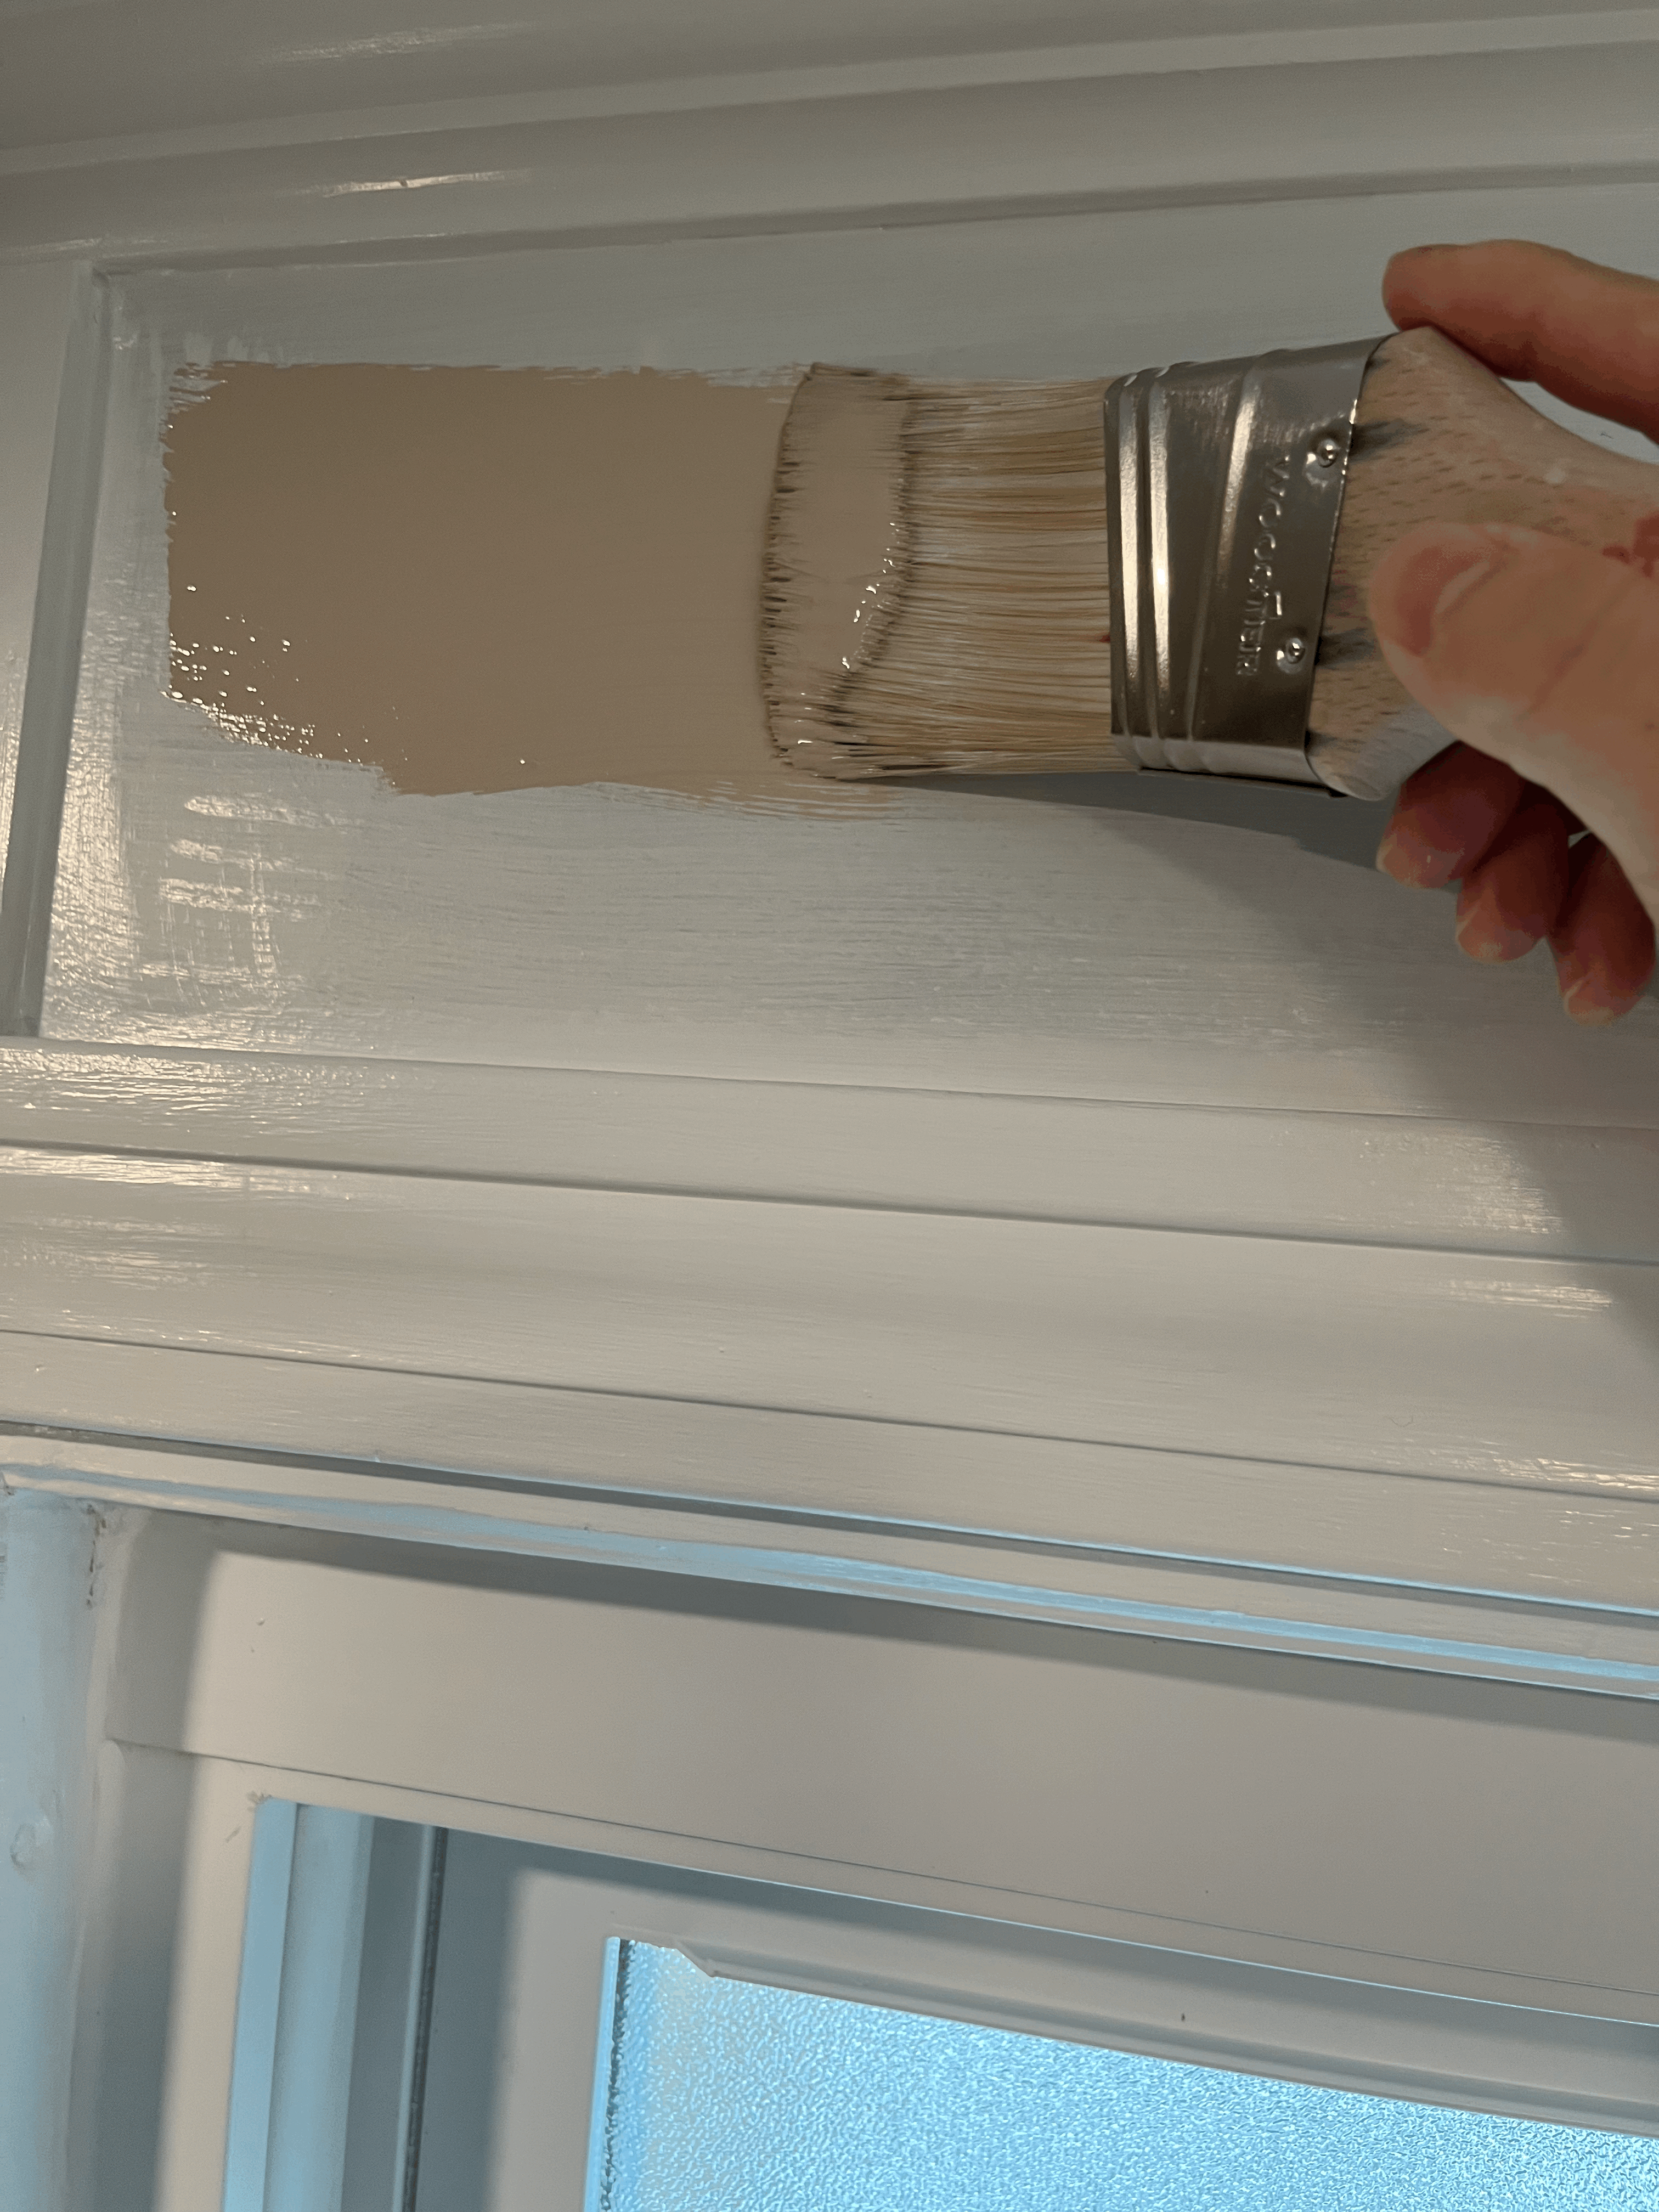
우선 크라운 몰딩과 비드 보드, 윈도우 프레임, 도어 프레임, 베이스 보드에는 원래대로 하얀색 페인트를 칠하기로 했다. 그래서 부엌에서 사용했던 셜윈 윌리엄즈 듀레이션 페인트를 사용했다.
I decided to keep the white color for the crown molding, beadboard, window frame, door frame and baseboard. So I used the Sherwin Williams Duration white paint which I used for the baseboard, window and door frame in the kitchen.
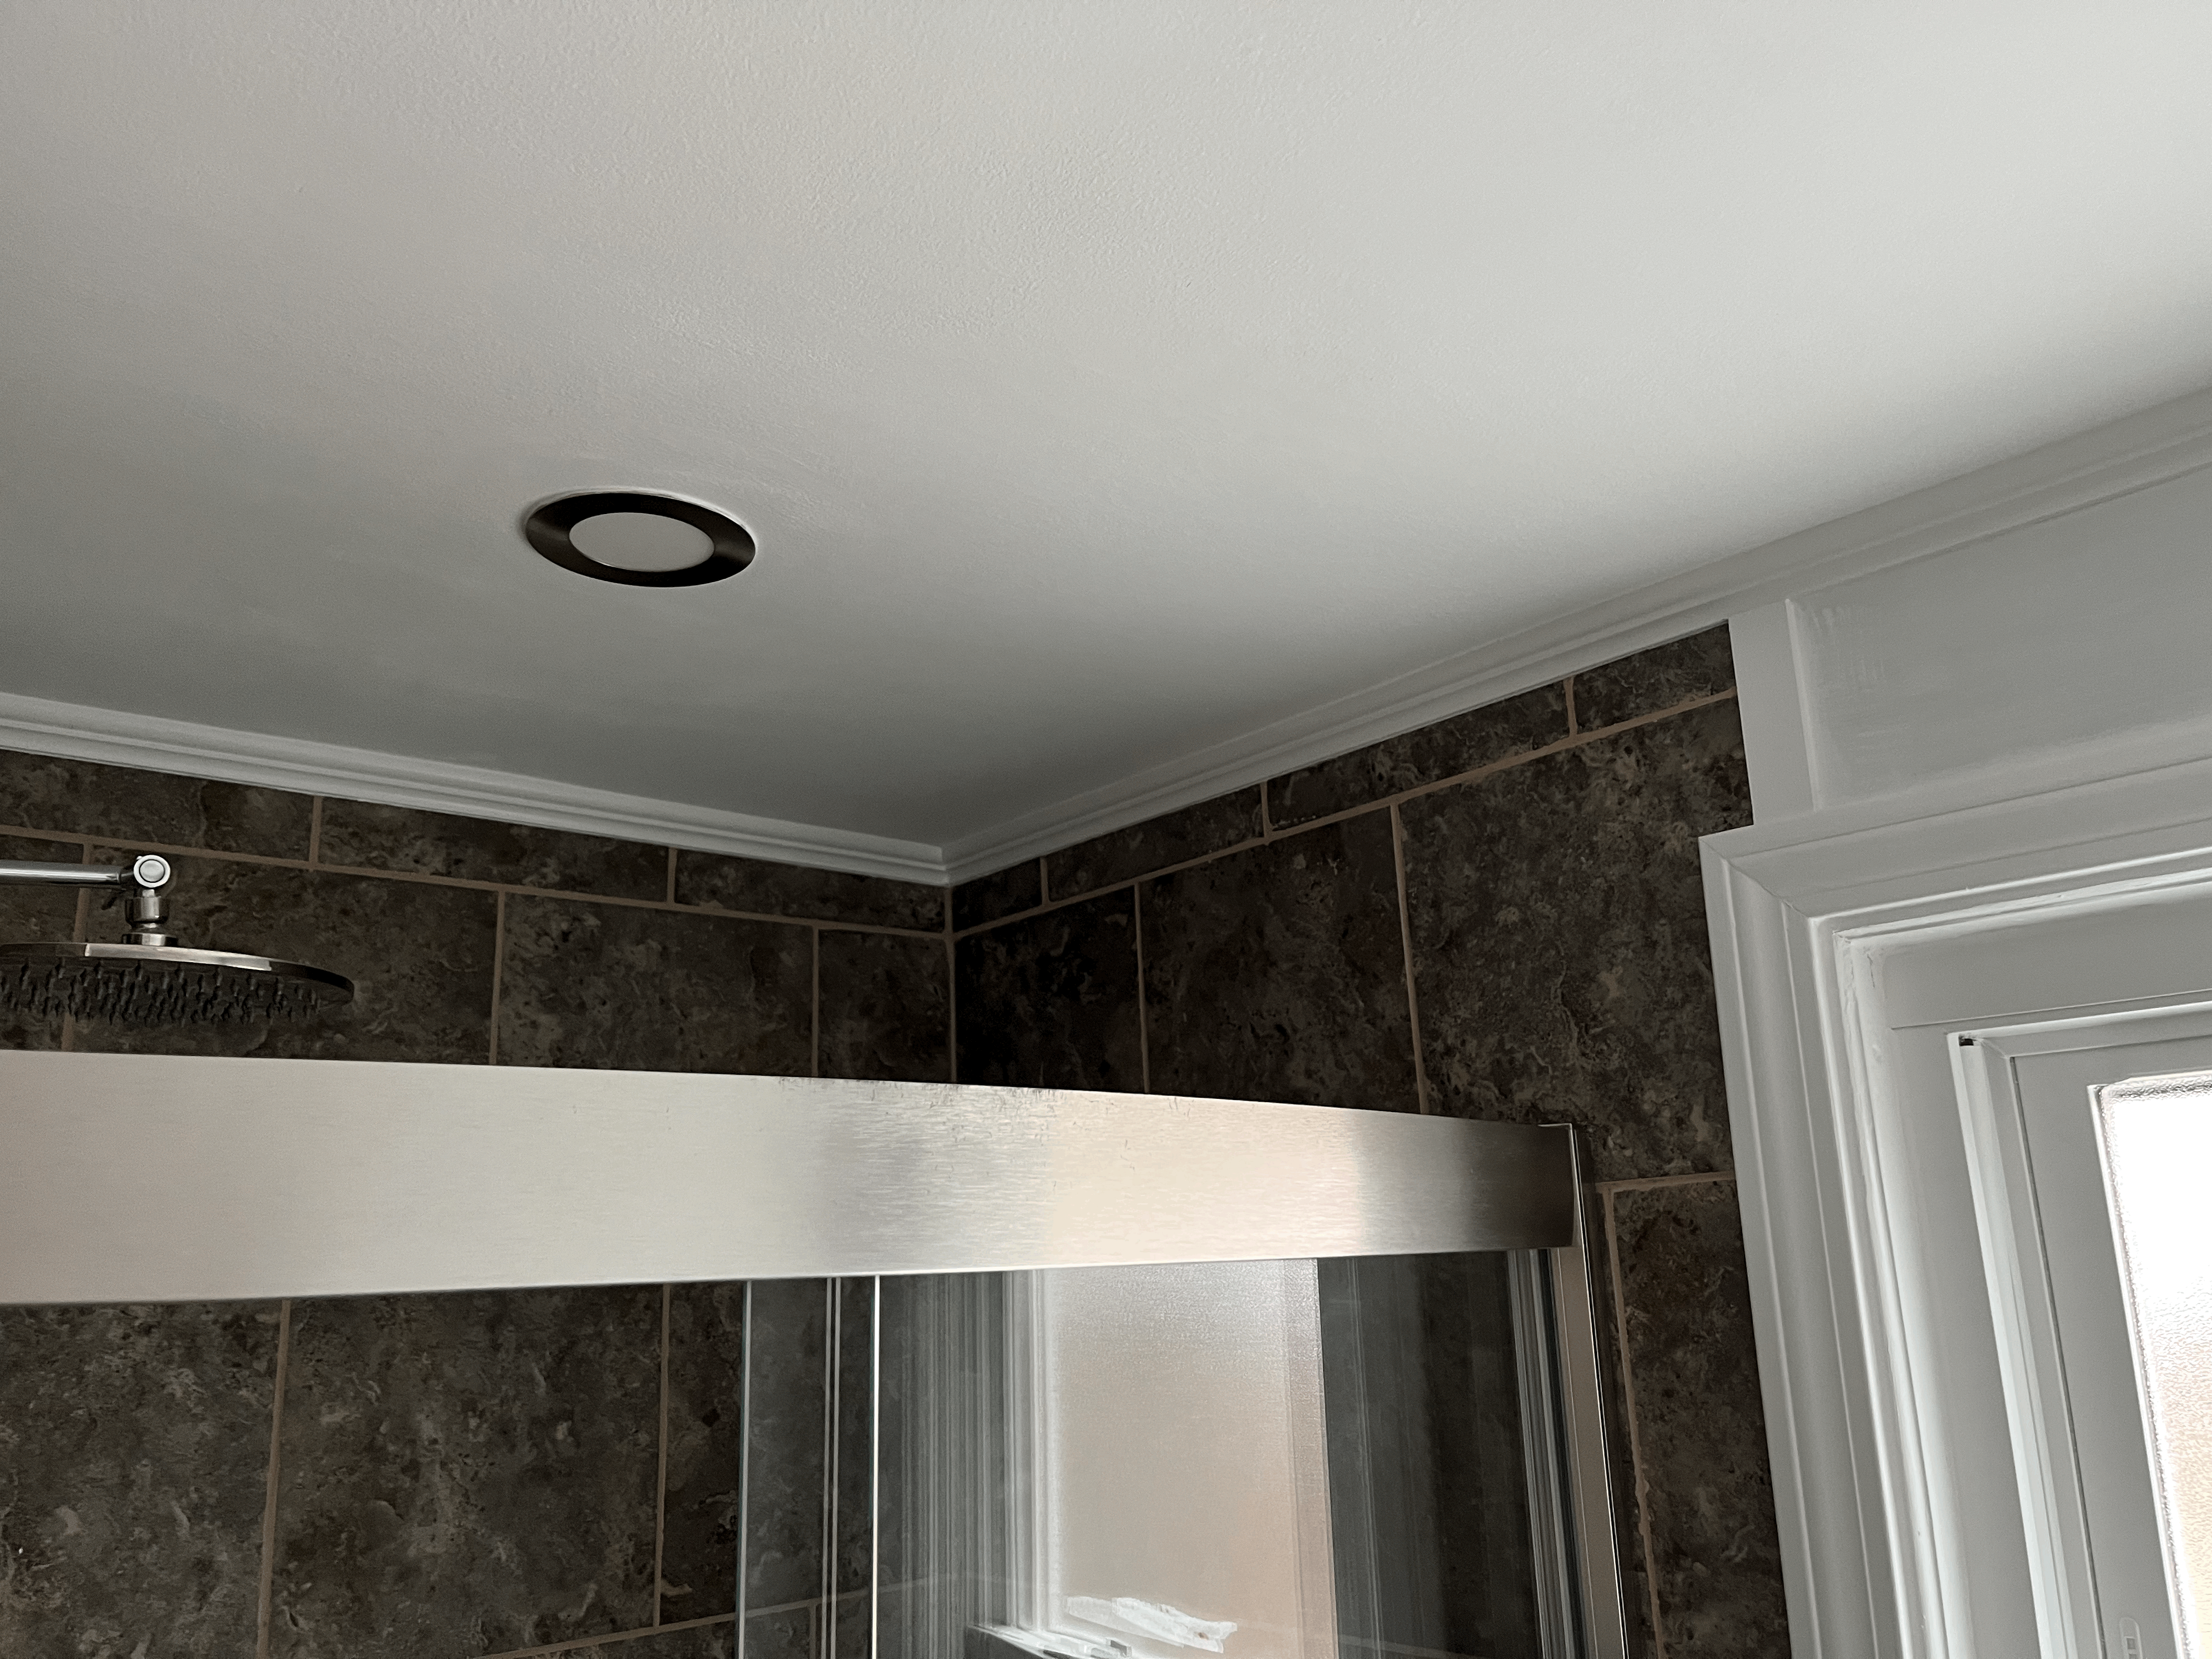
크라운 몰딩.
Crown molding.
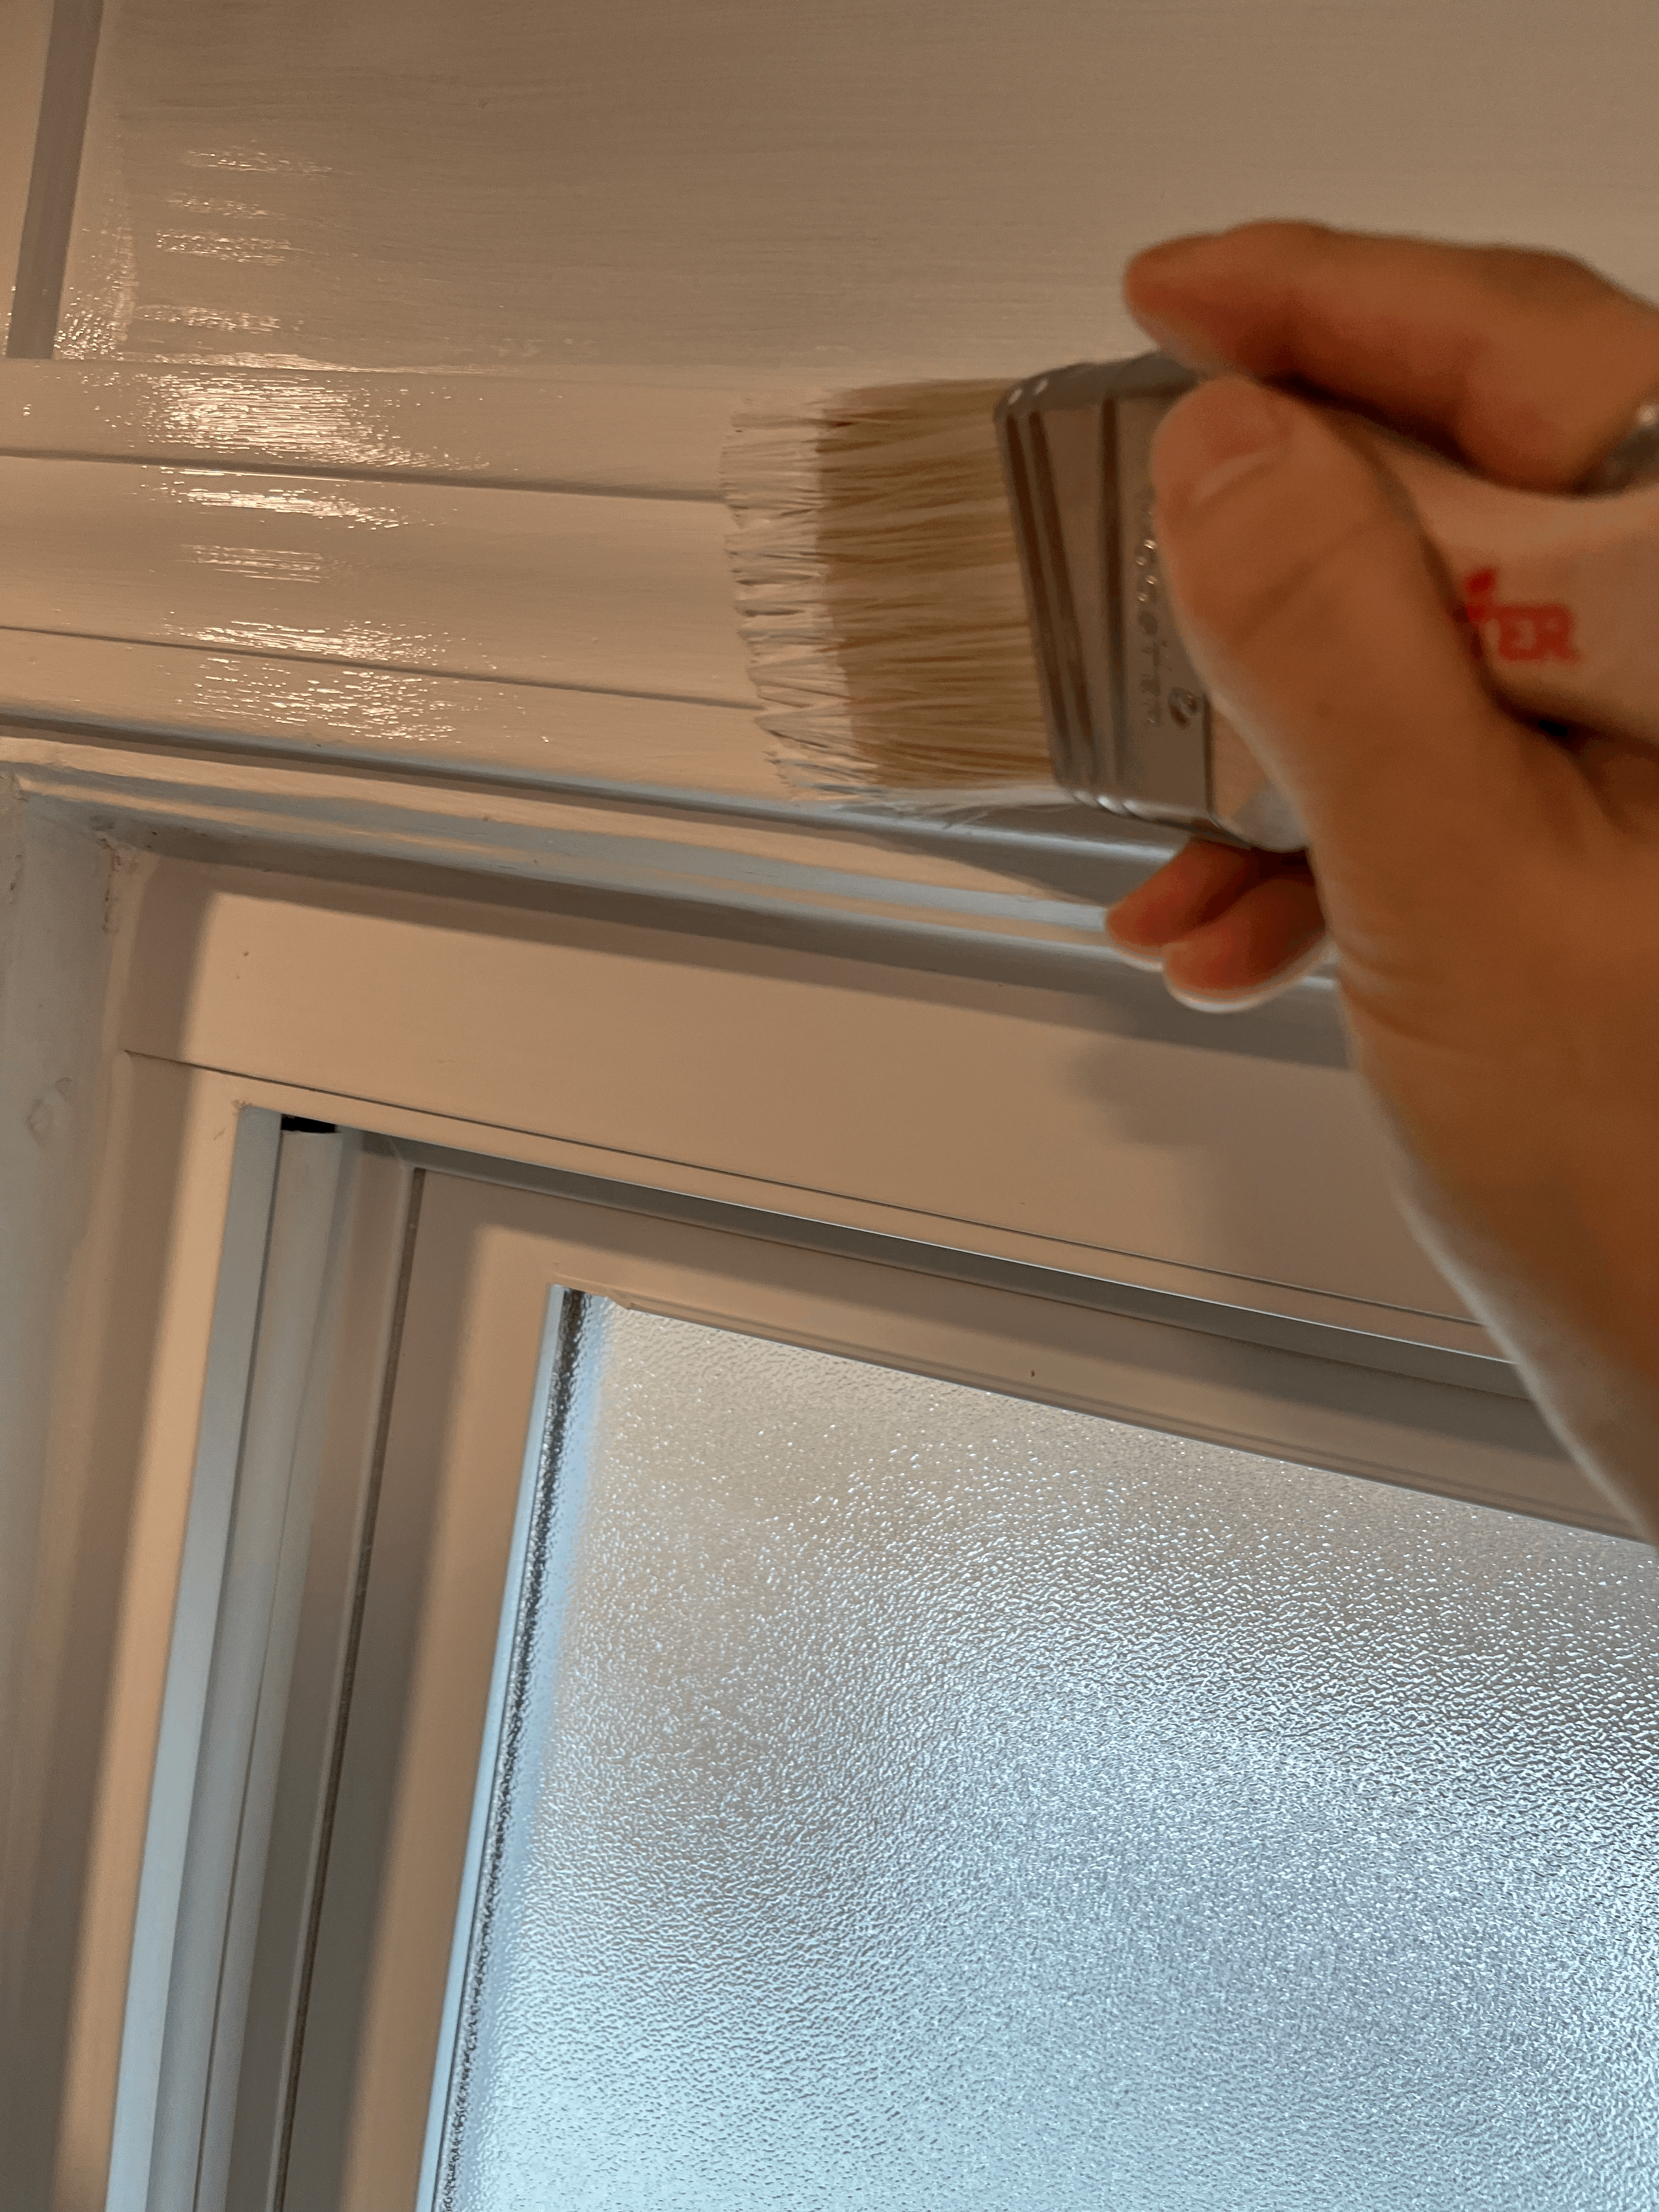
윈도우 프레임.
Window frame.
비드 보드.
Beadboard.
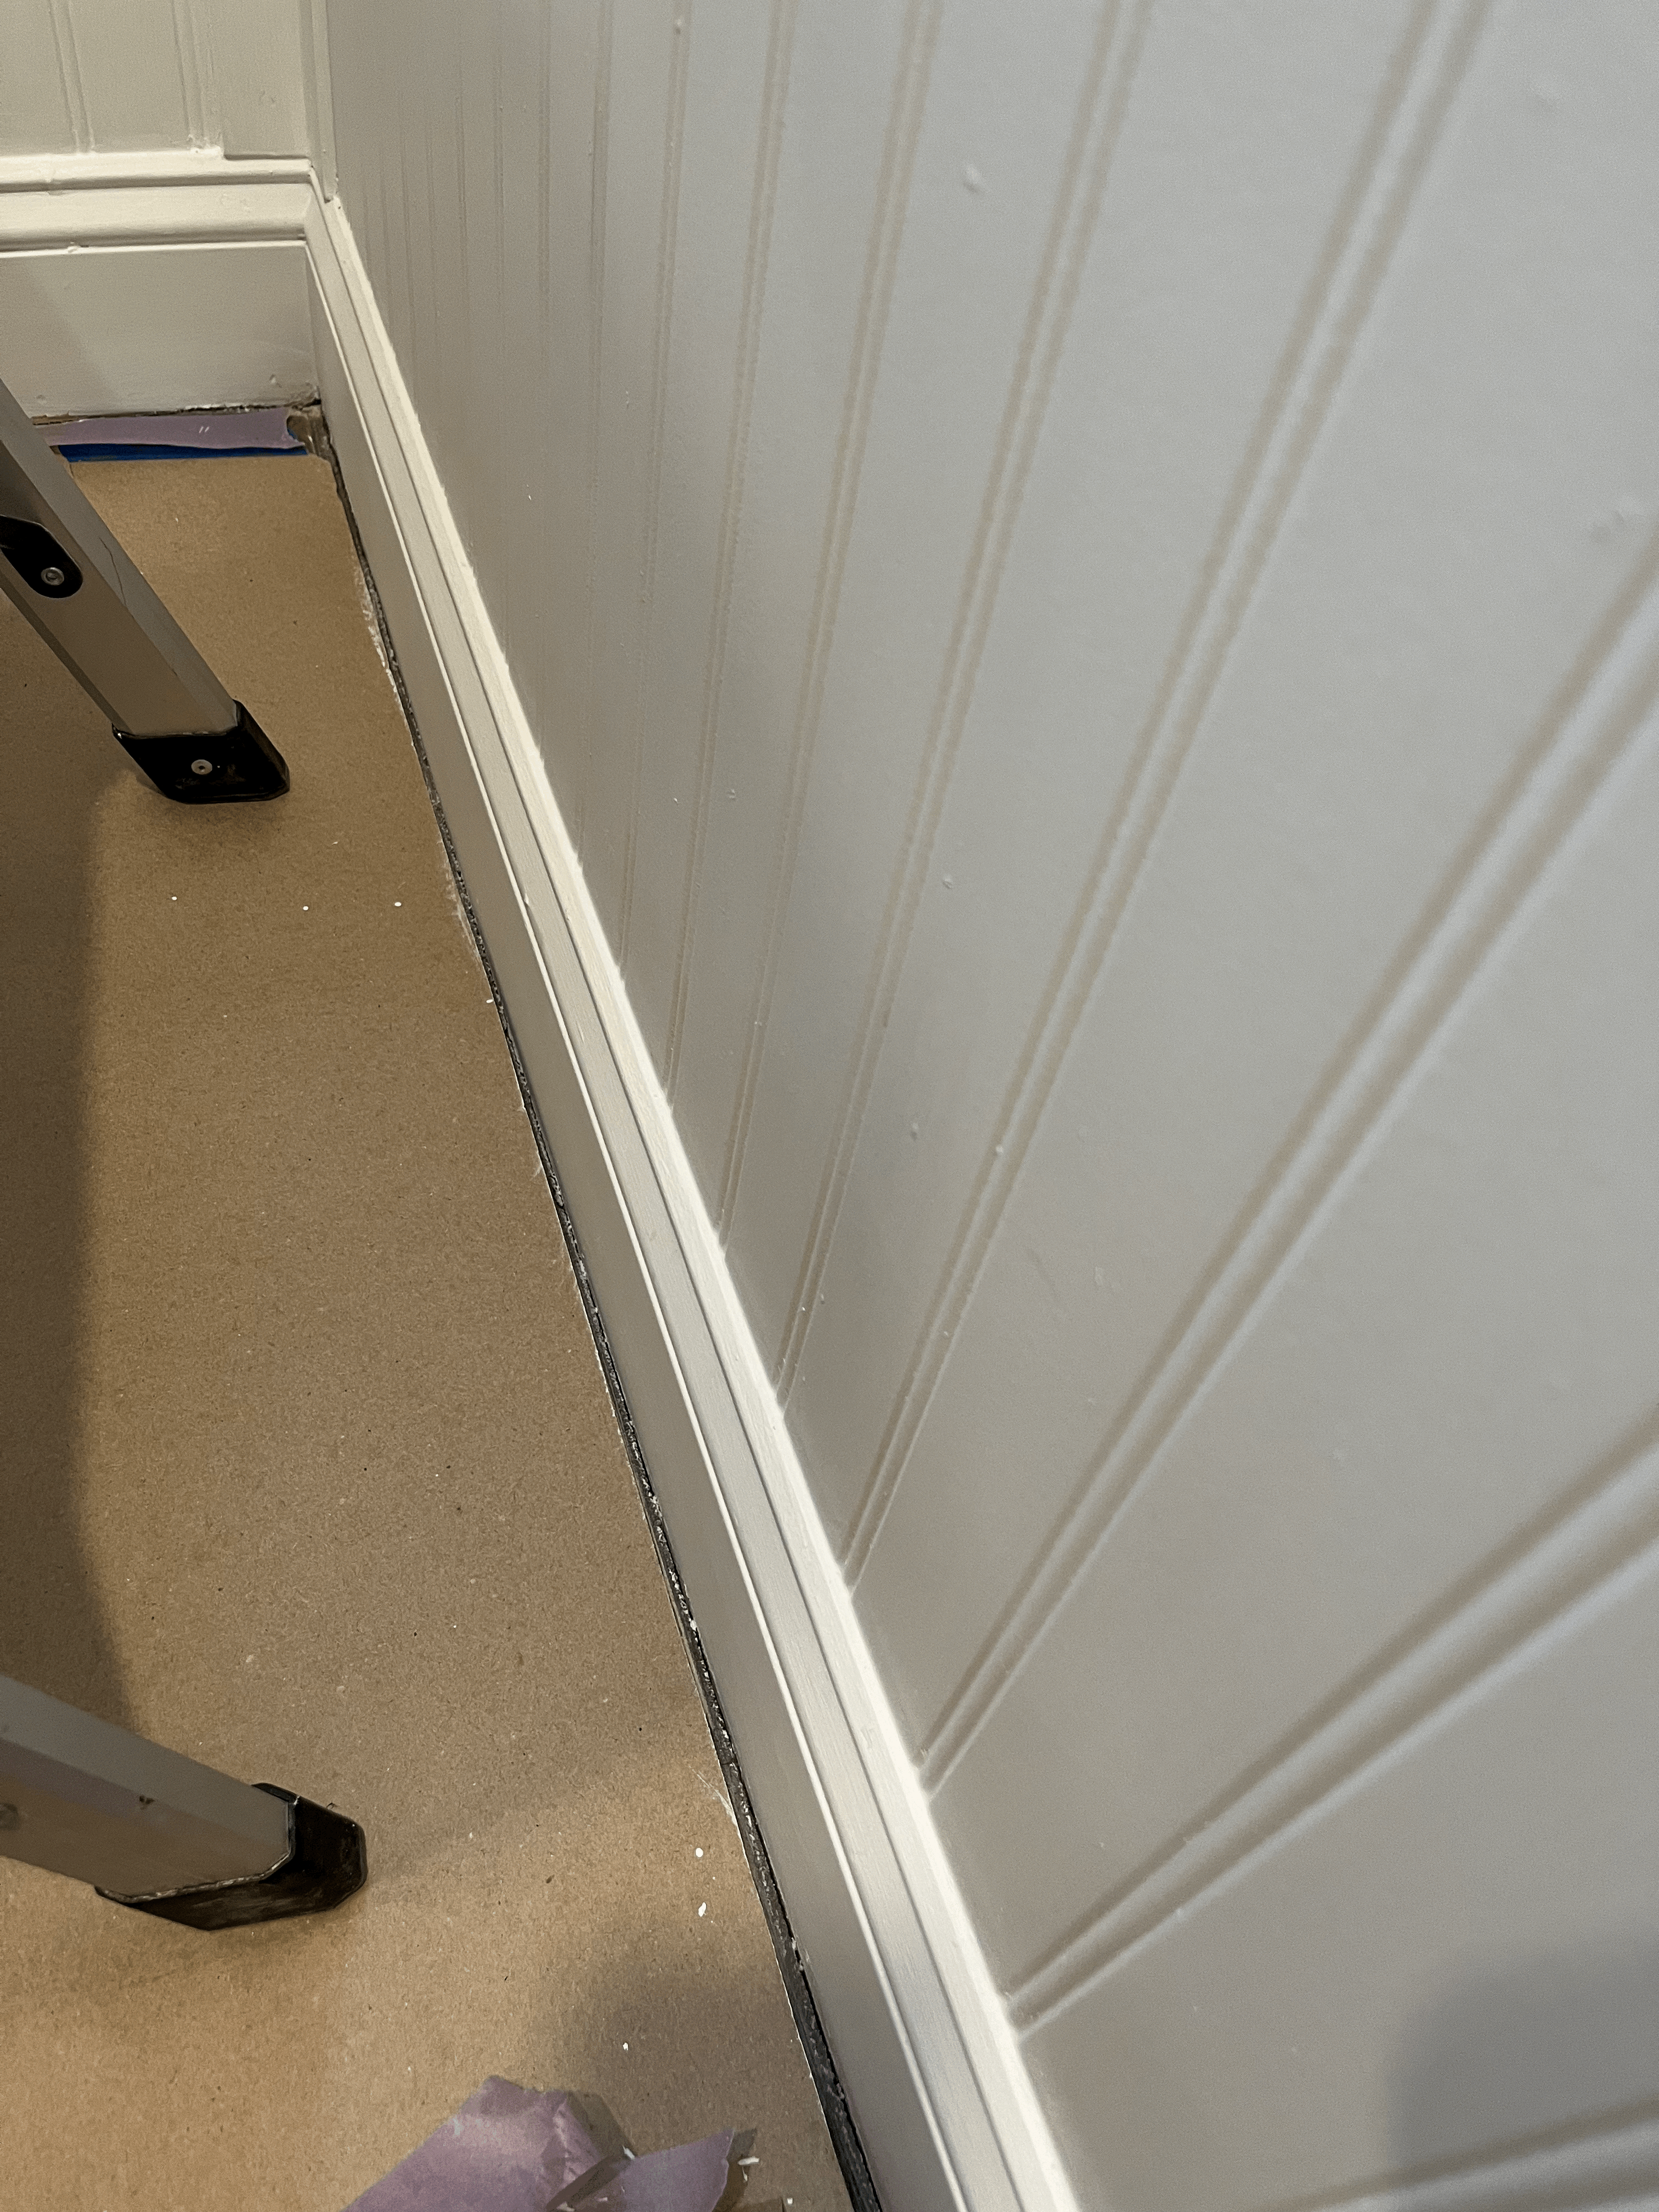
베이스 보드.
Baseboard.
도어 프레임.
Door frame.
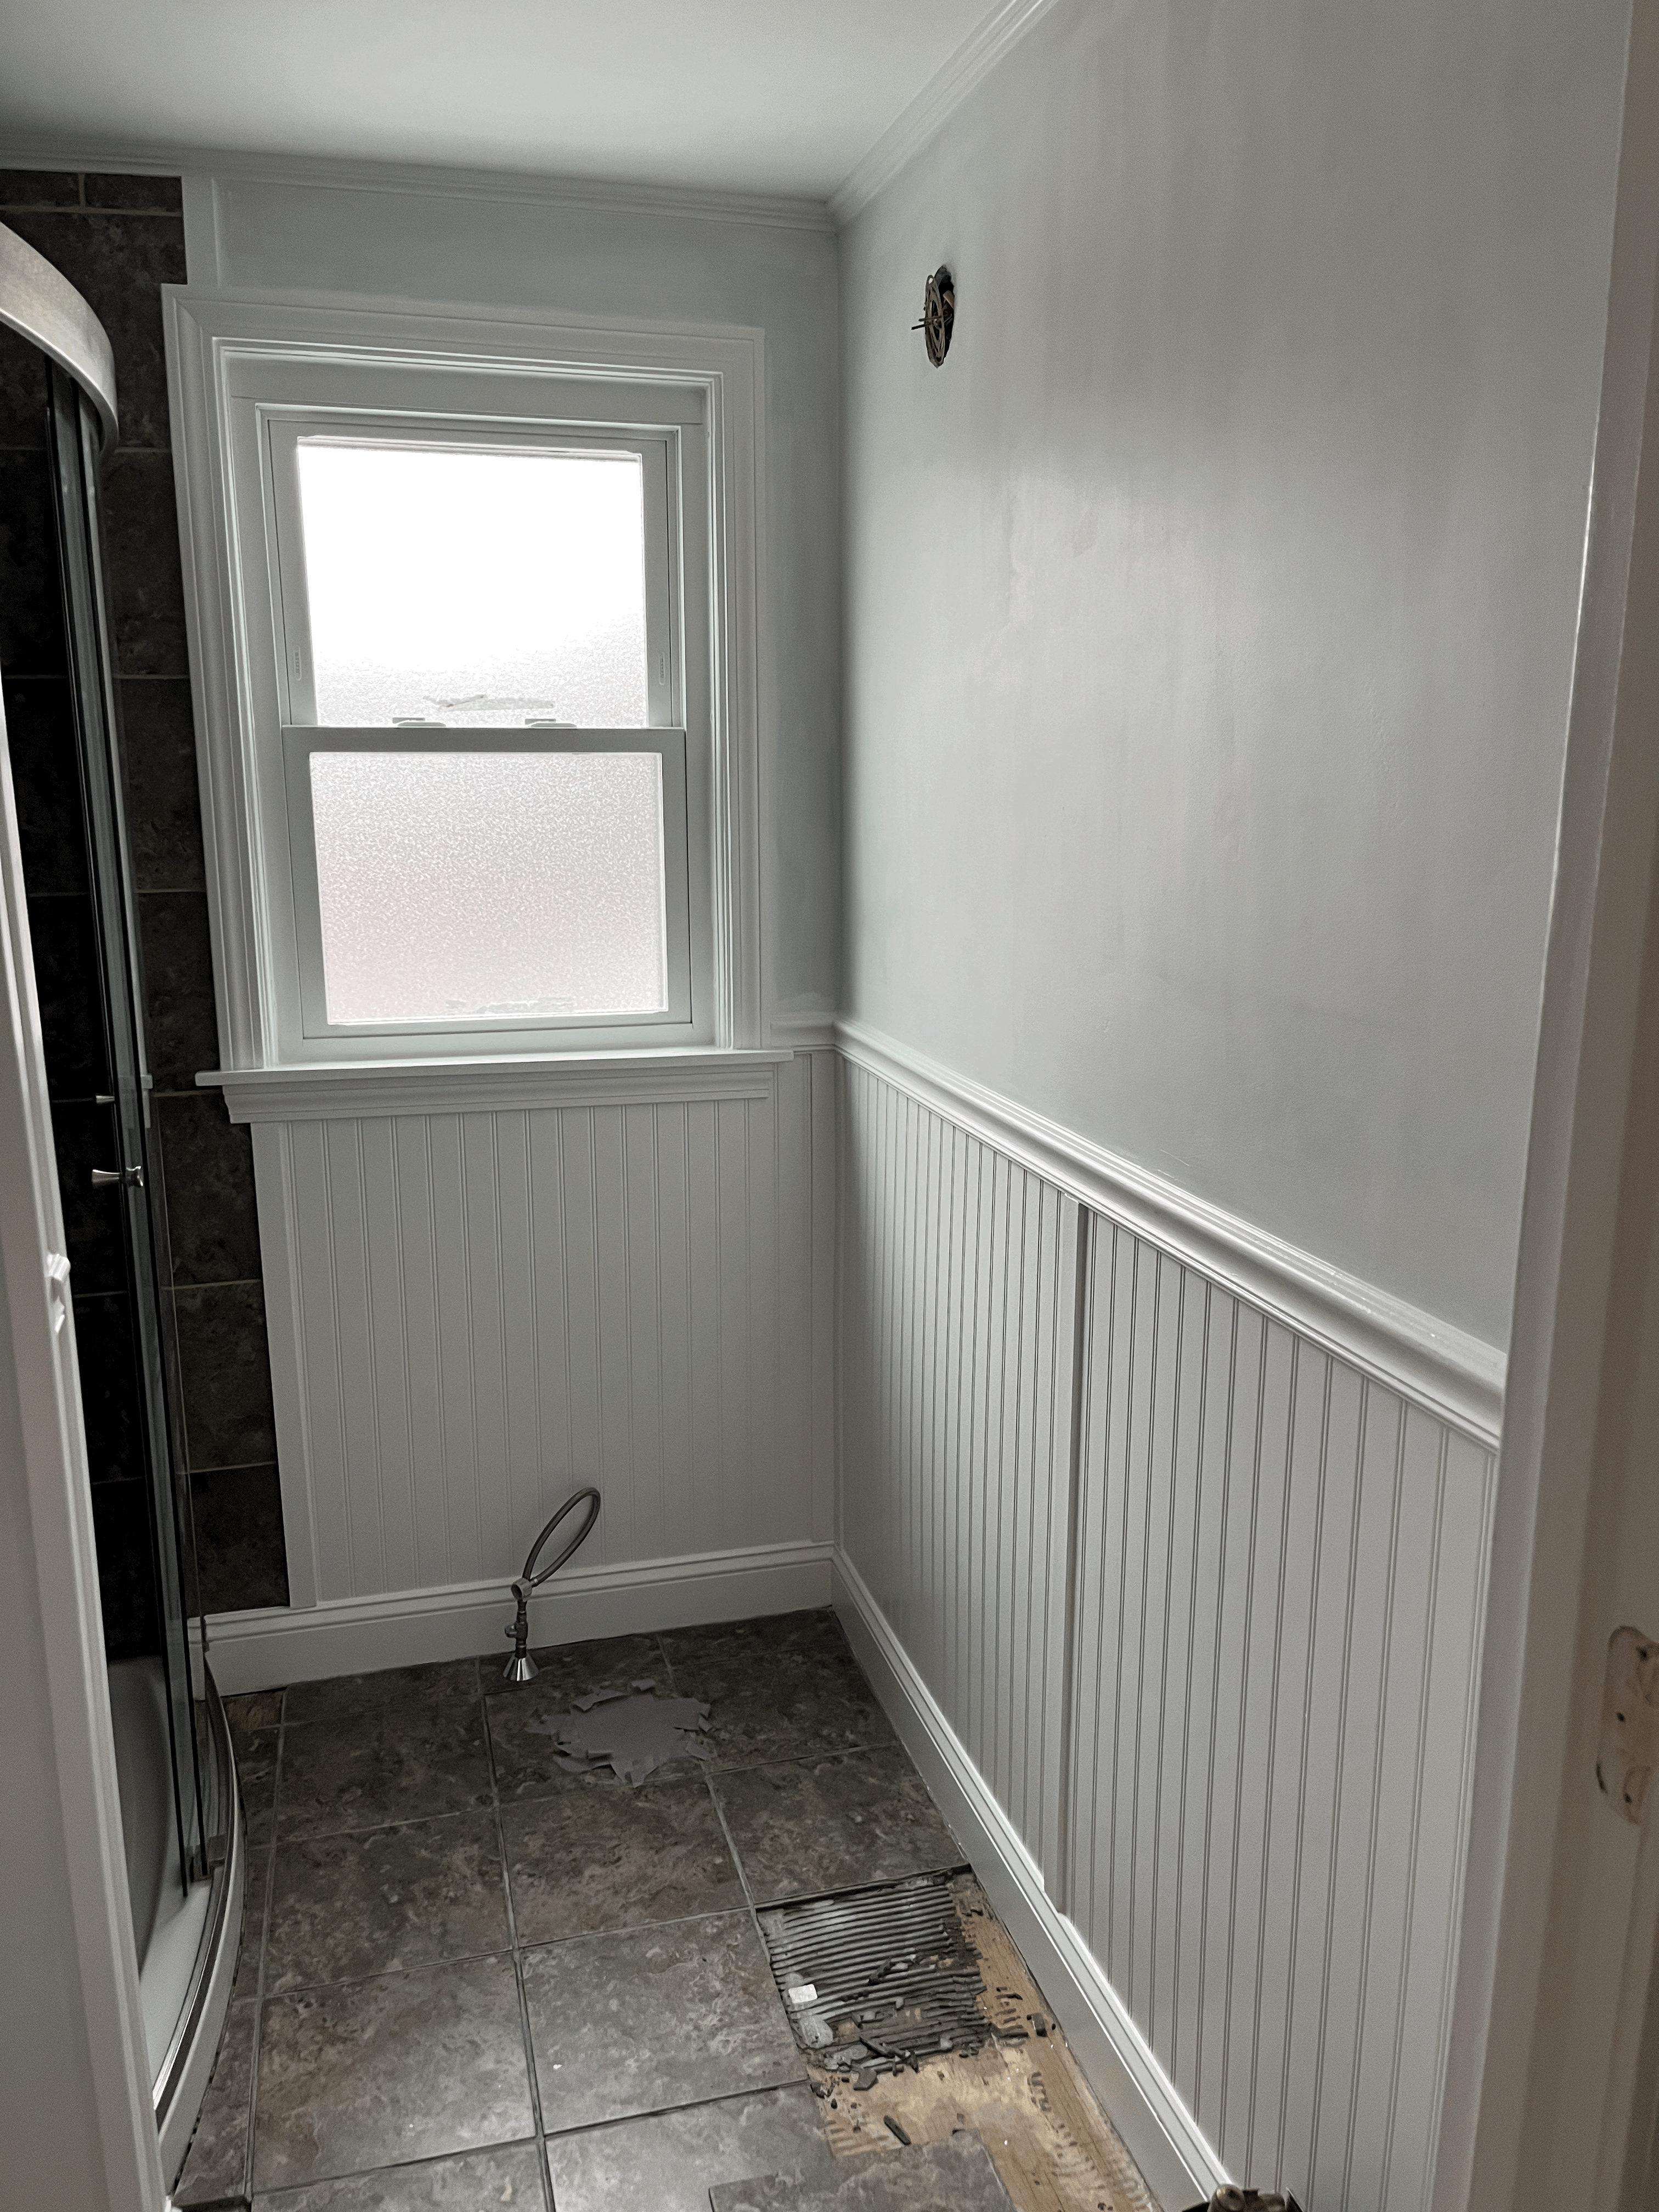
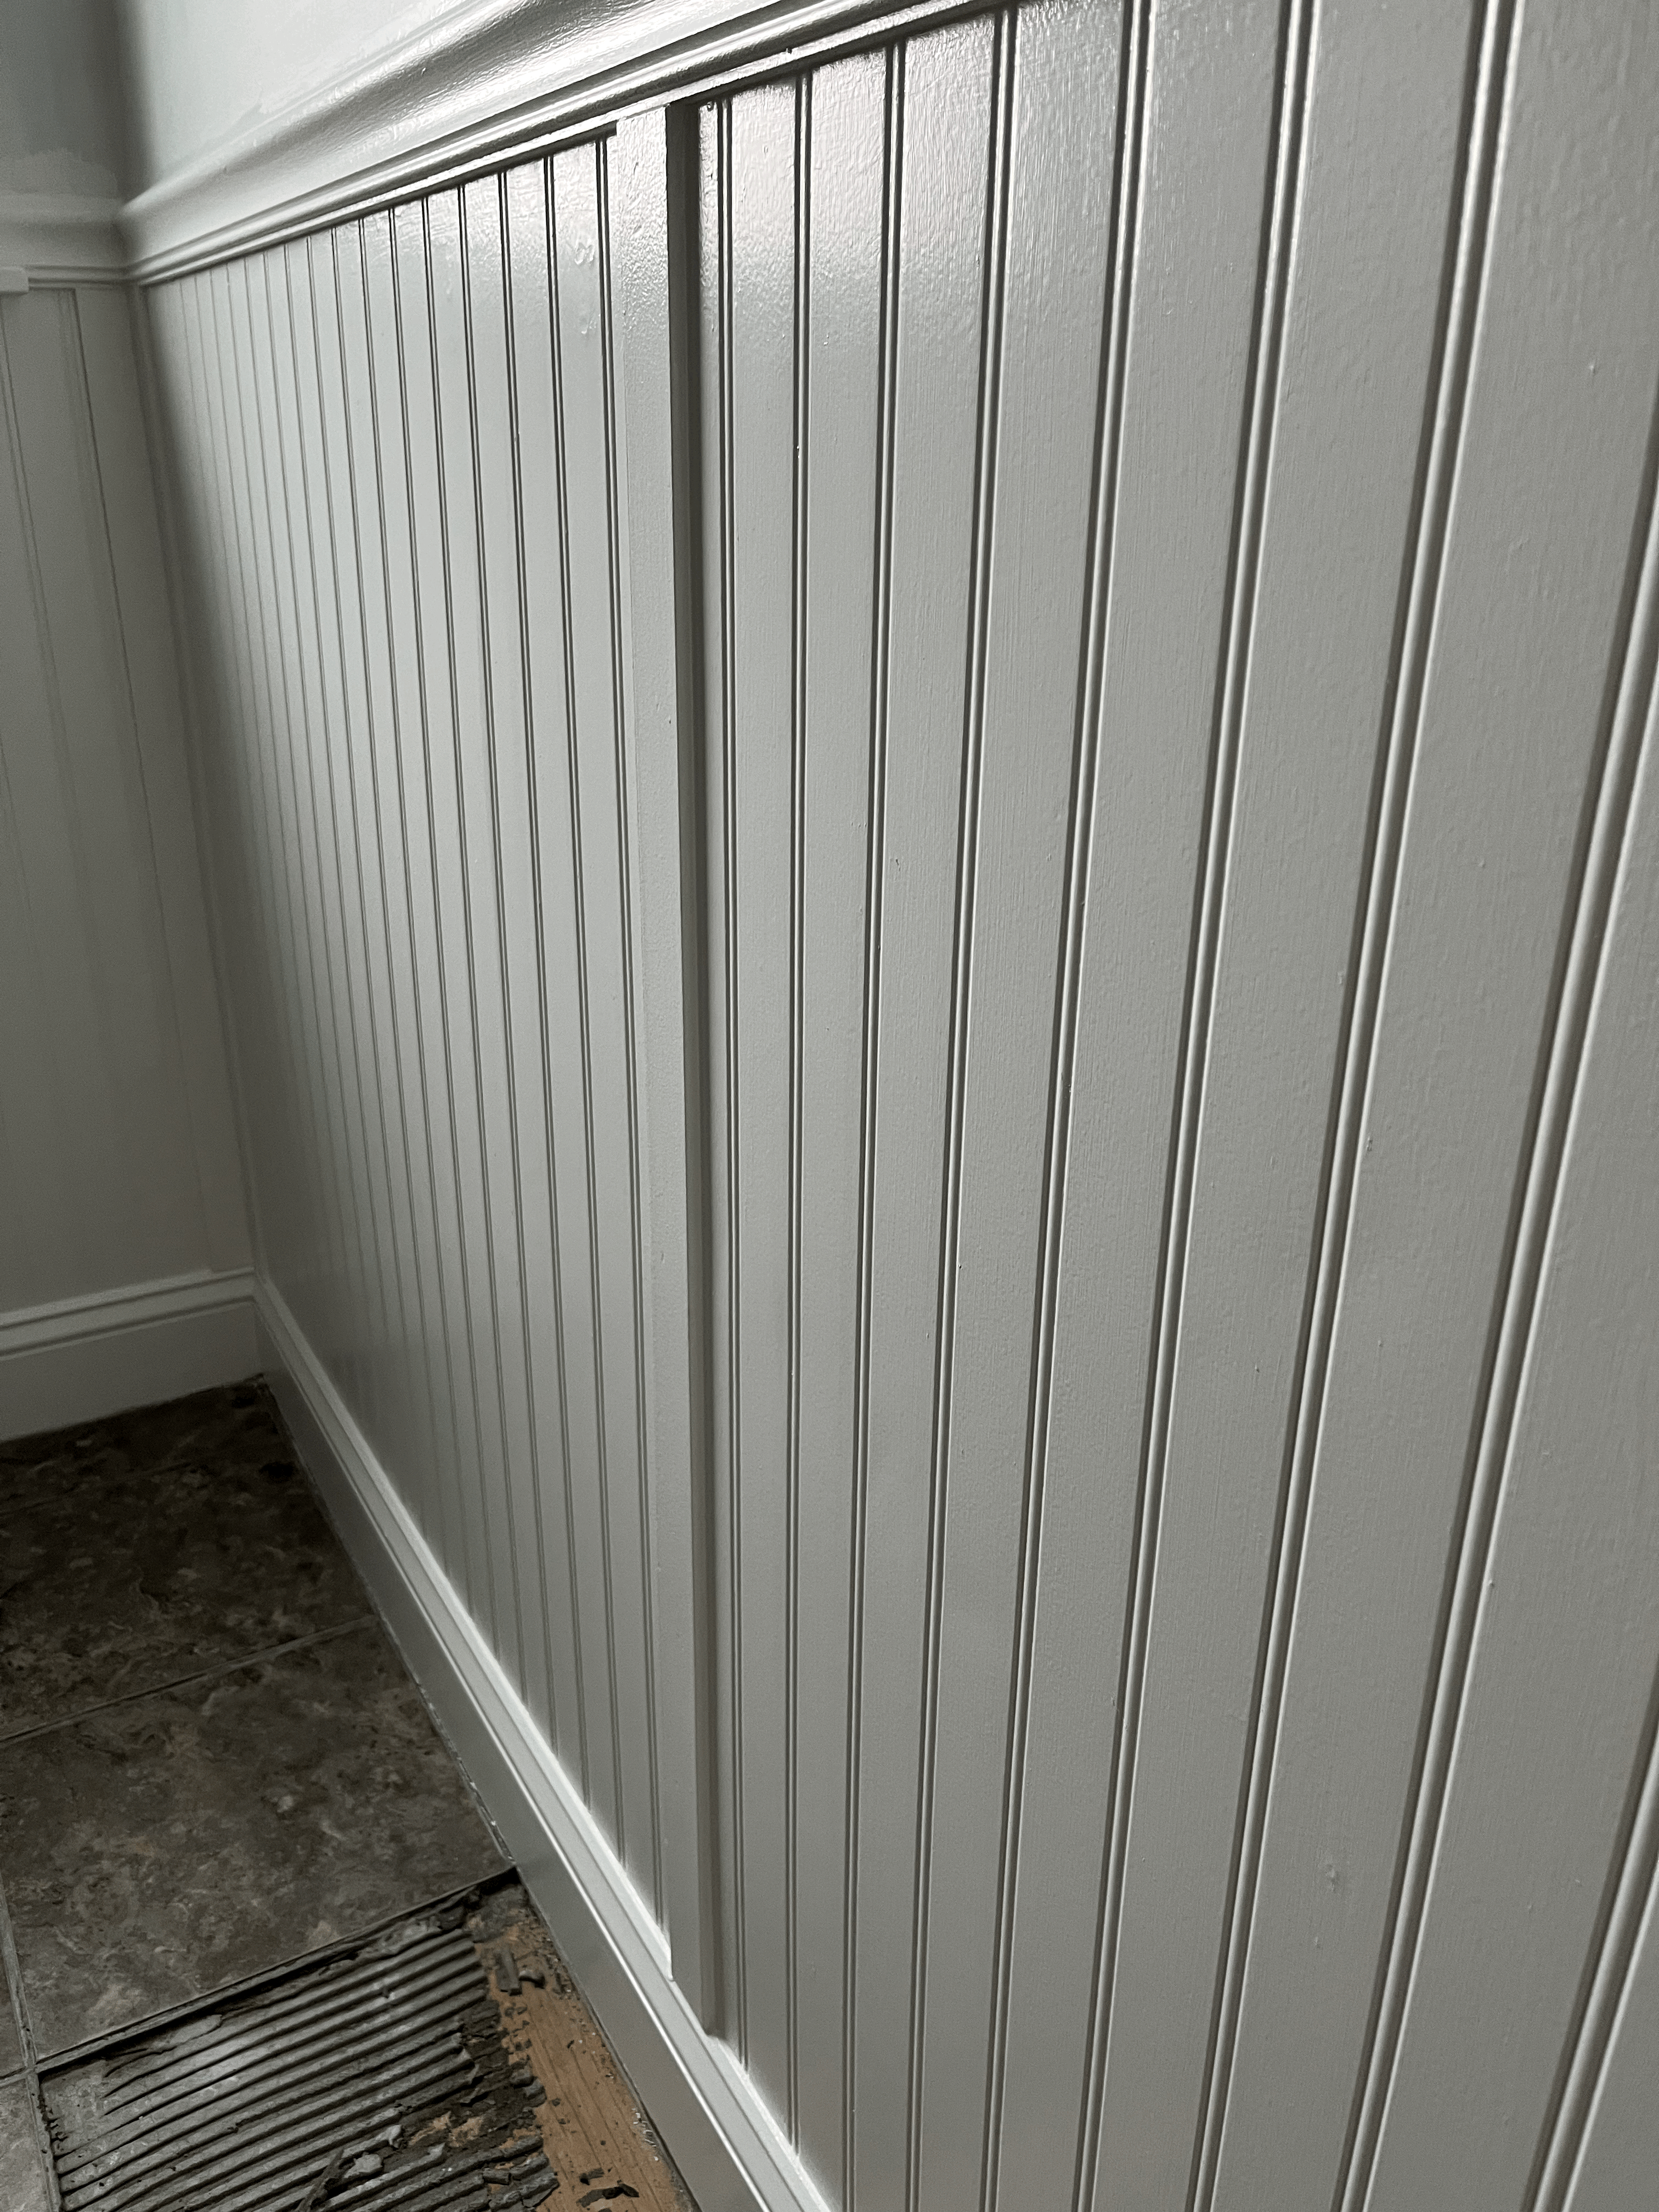
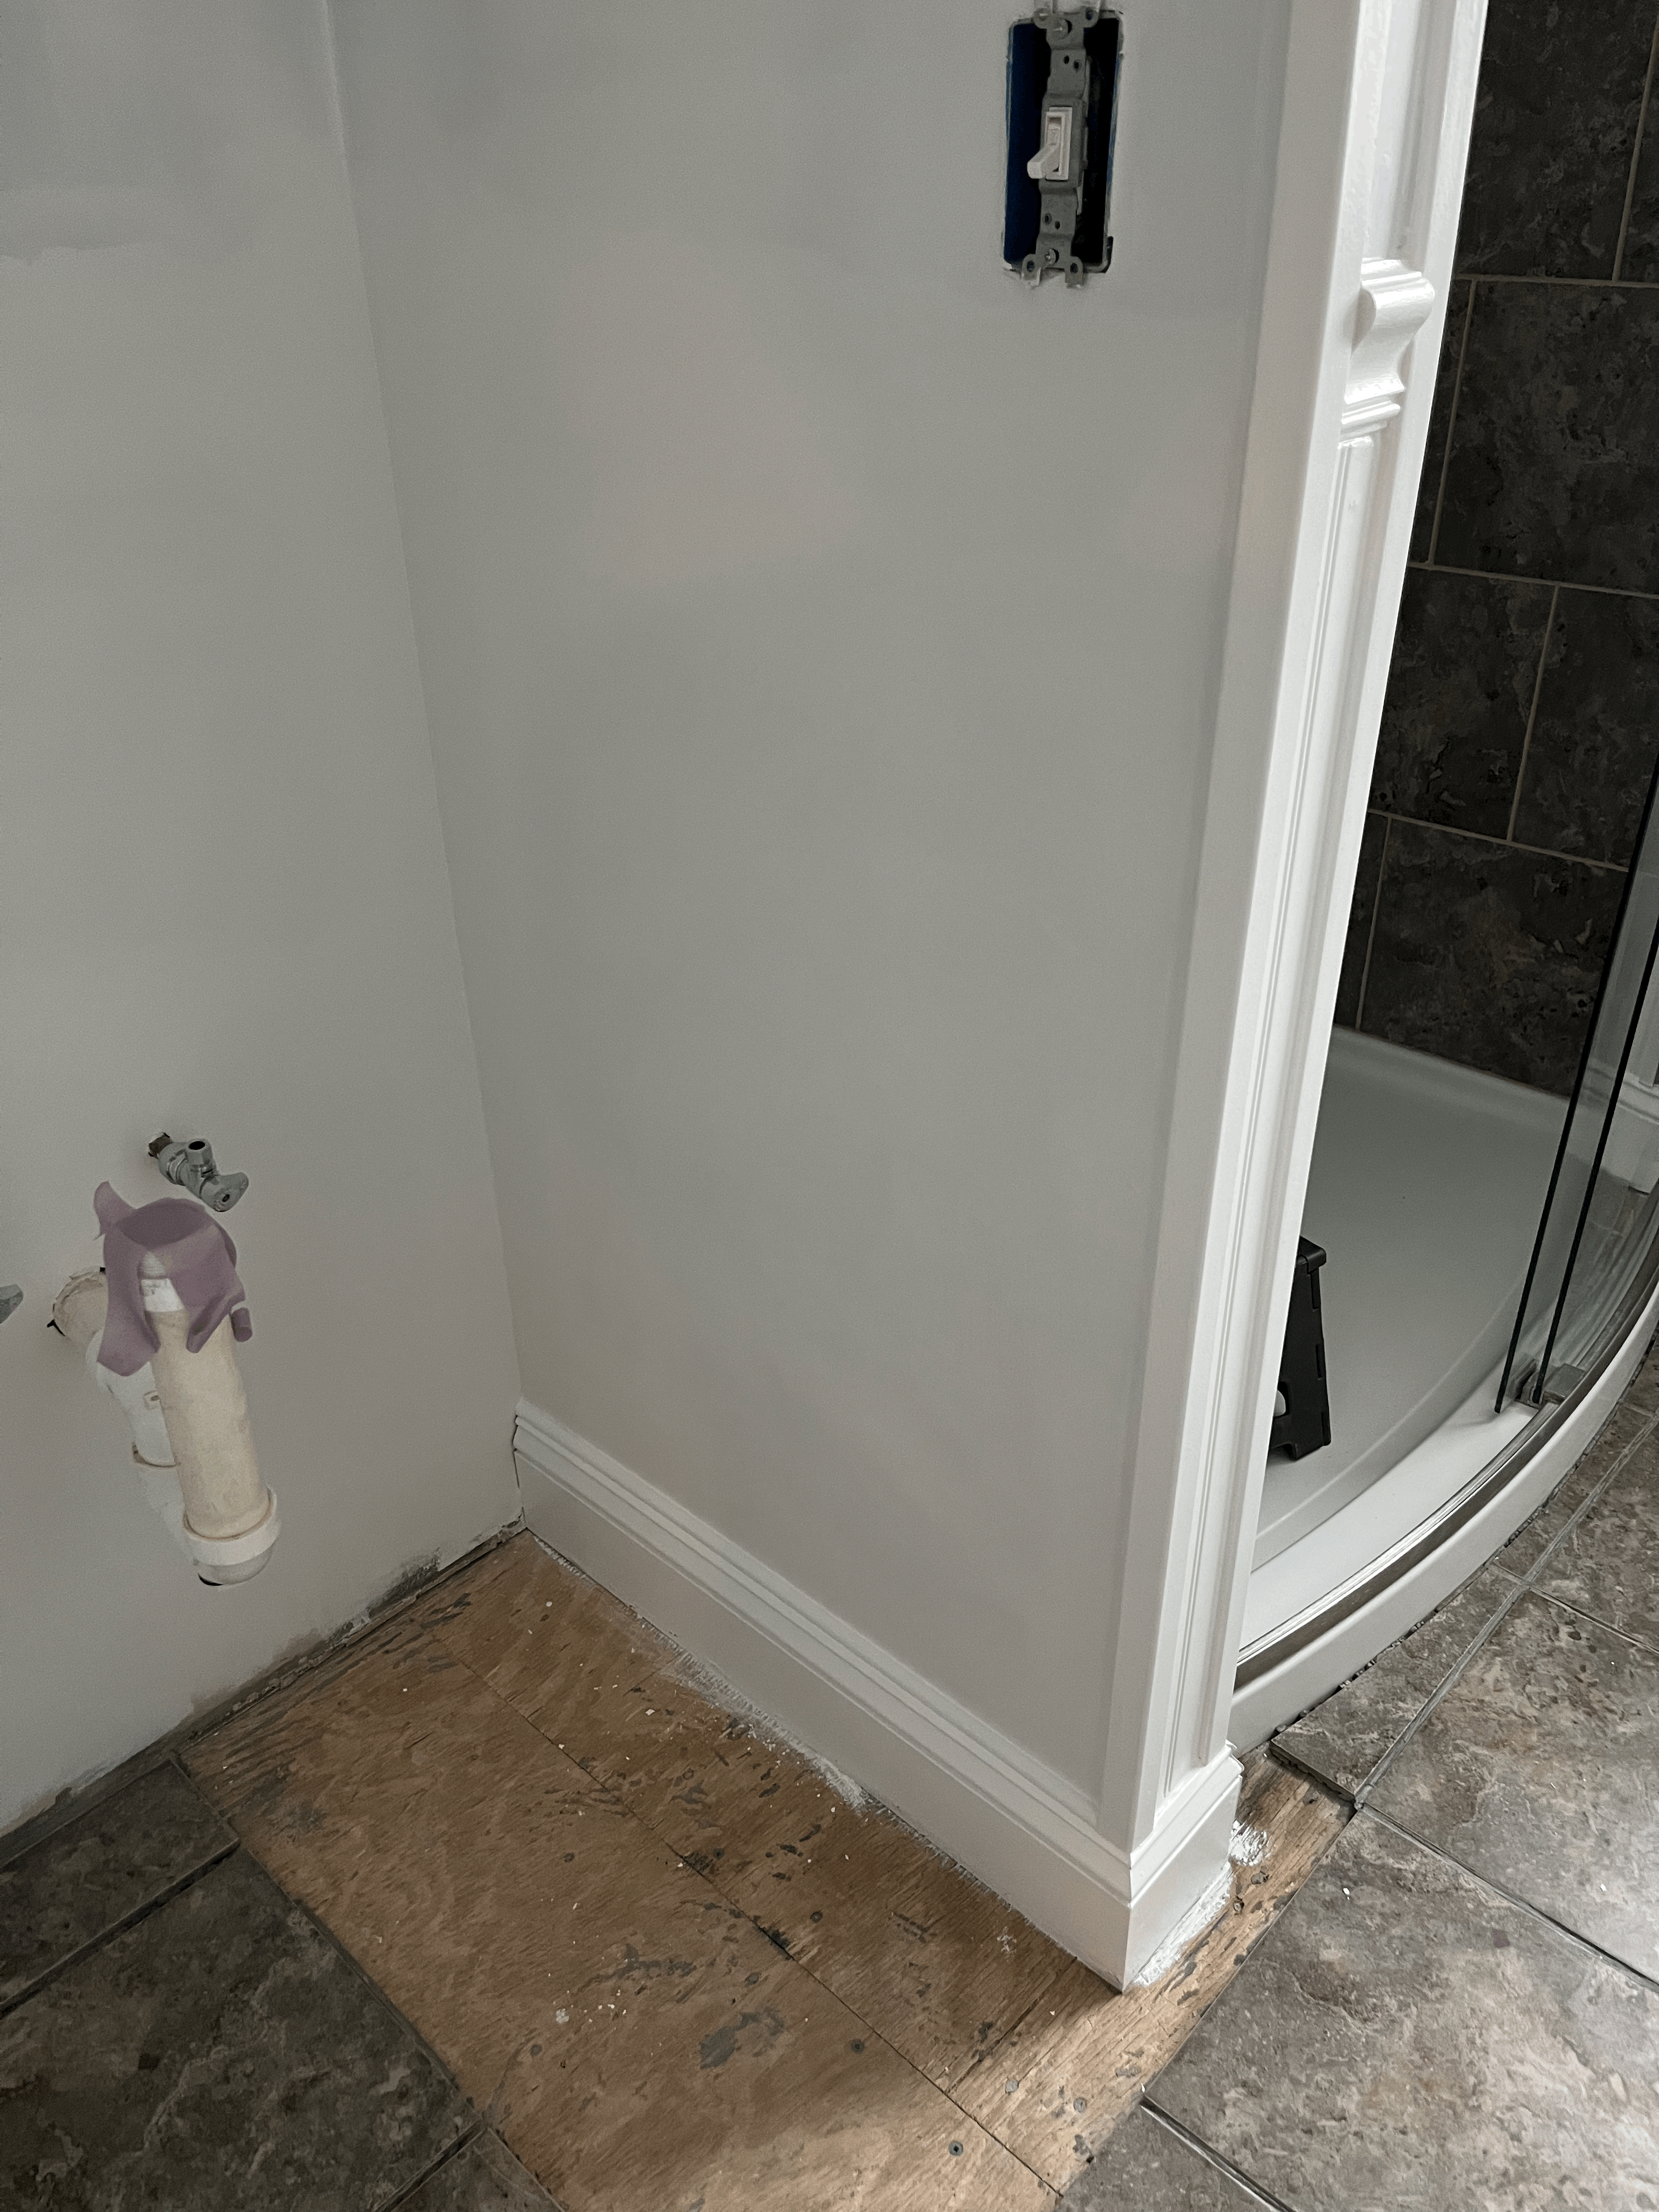
총 두번의 코팅으로 마무리했다.
이렇게 하얀색 페인트 부분들을 끝내고, 나머지 벽을 칠하기 전에 백스플래쉬 타일을 먼저 설치하기로 했다.
I finished a second coat of paint.
After, I decided to install the backsplash tile before painting the other walls.
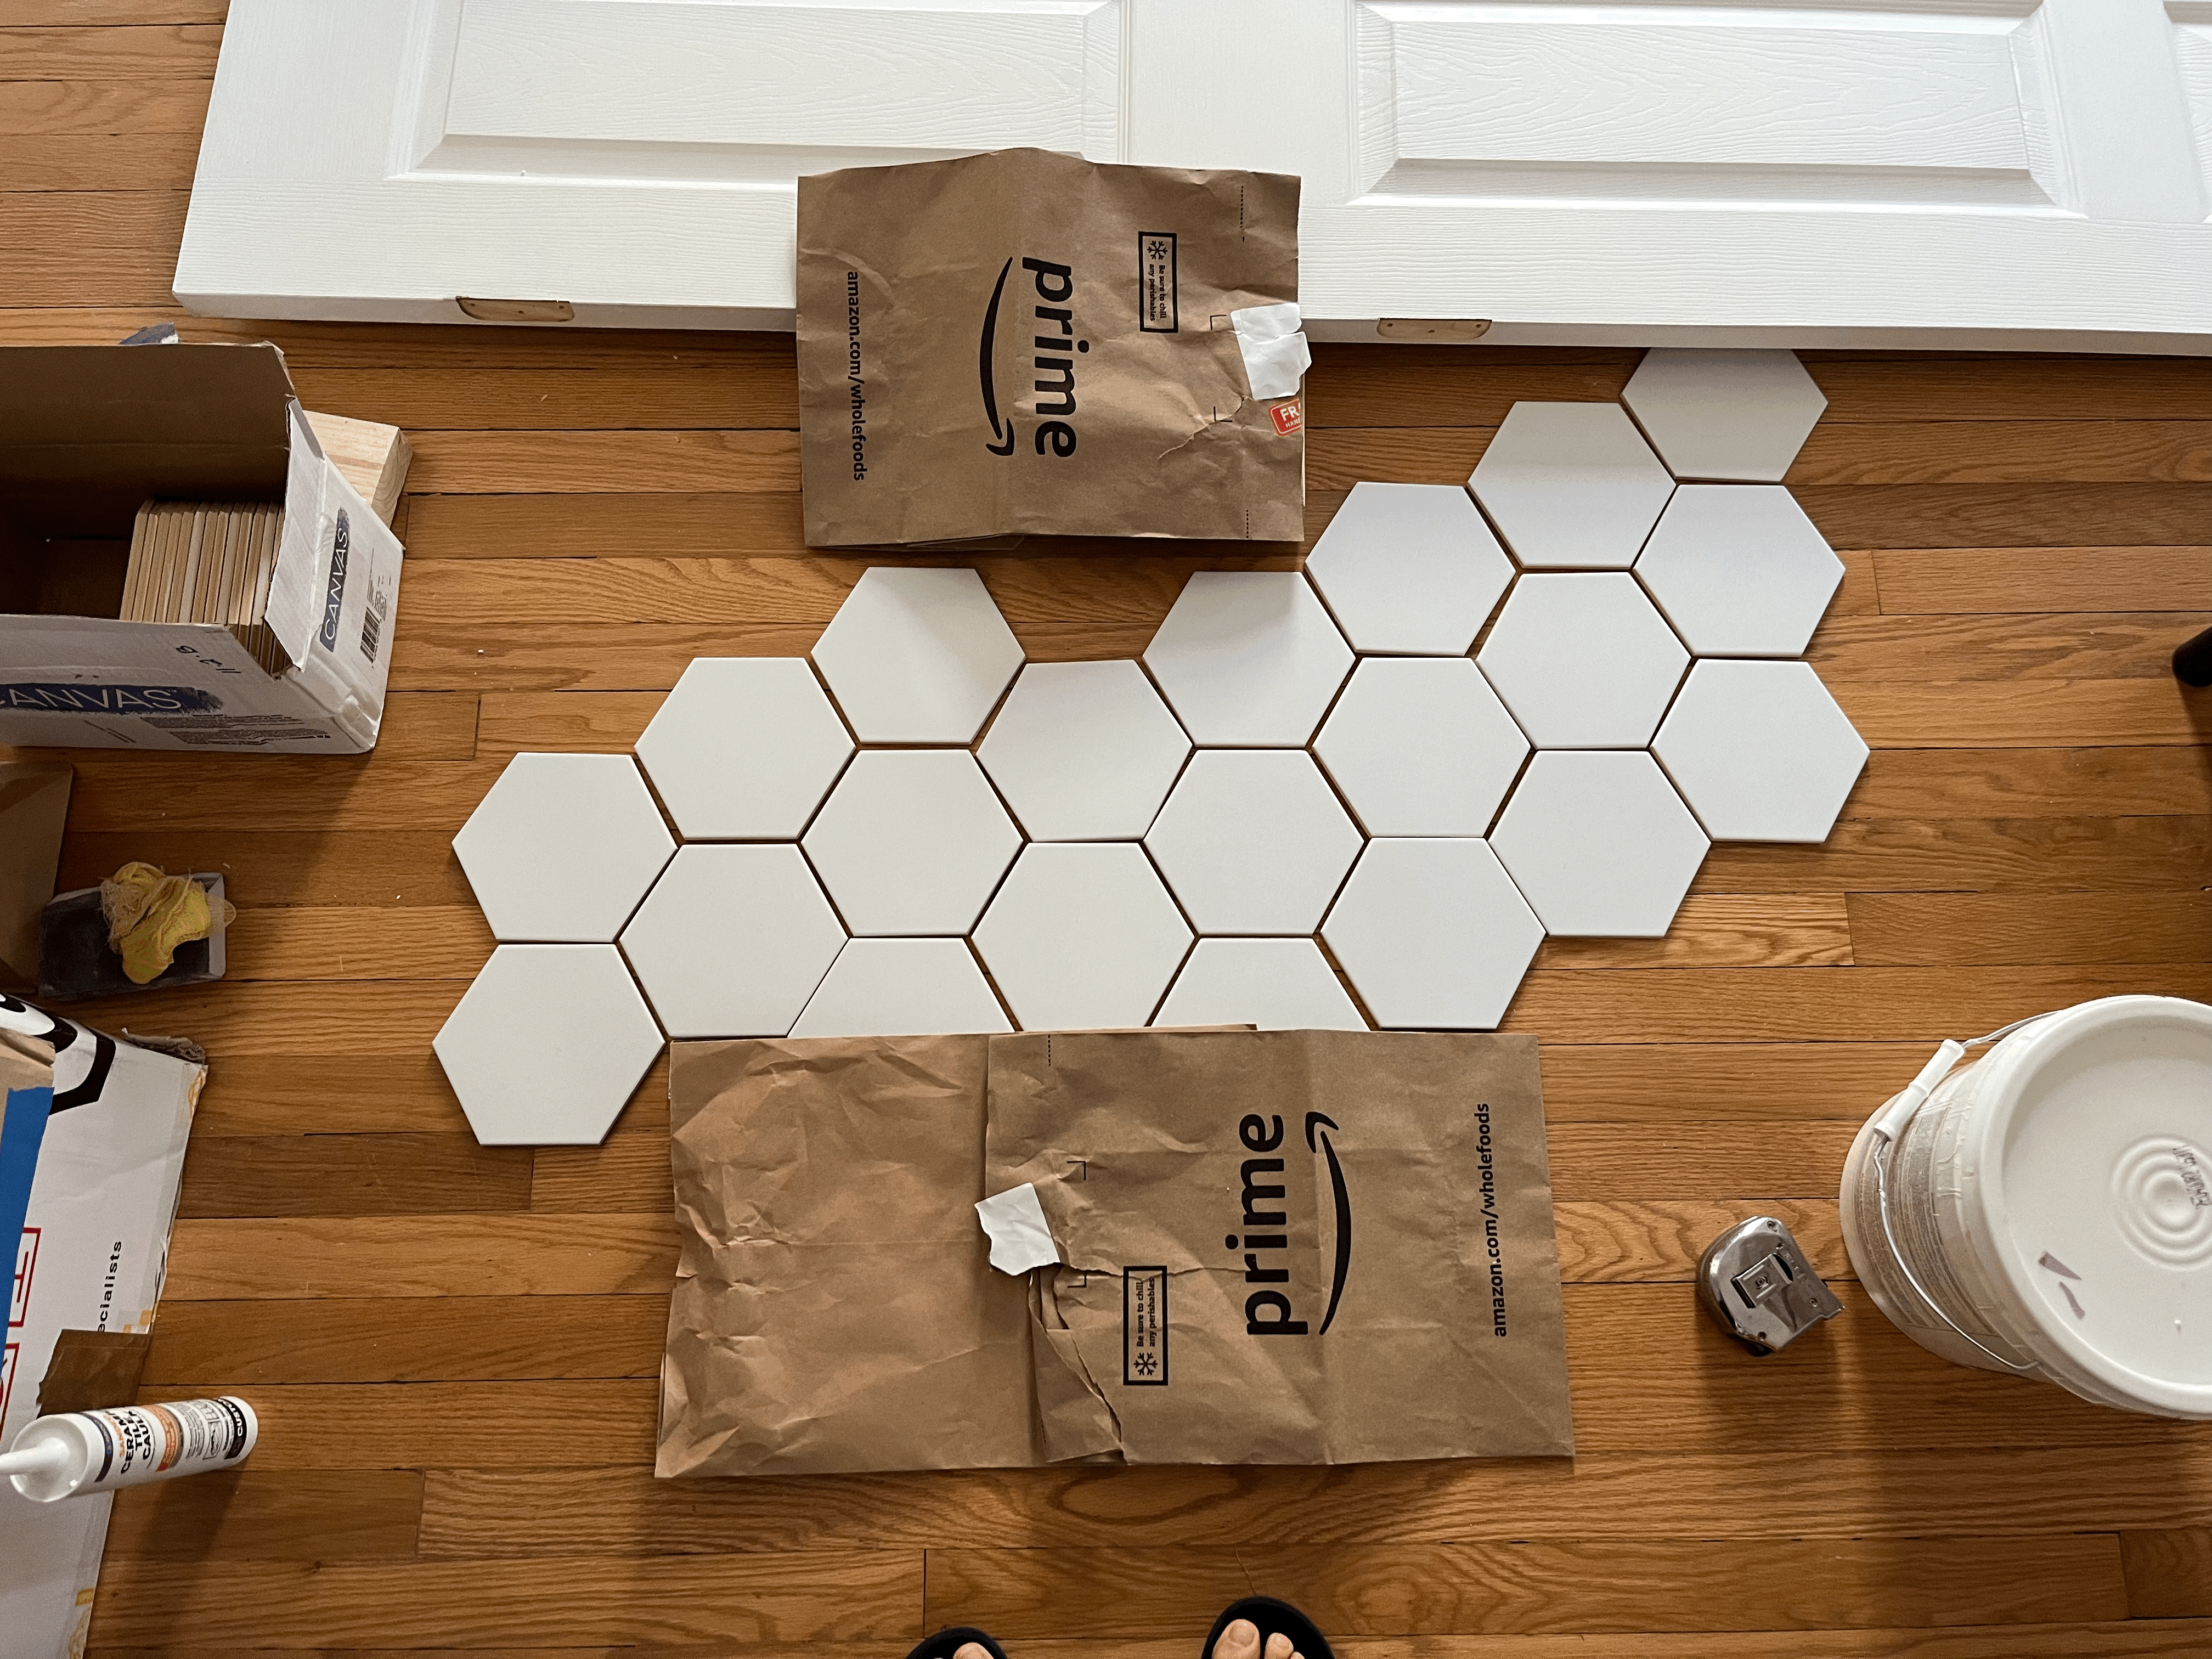
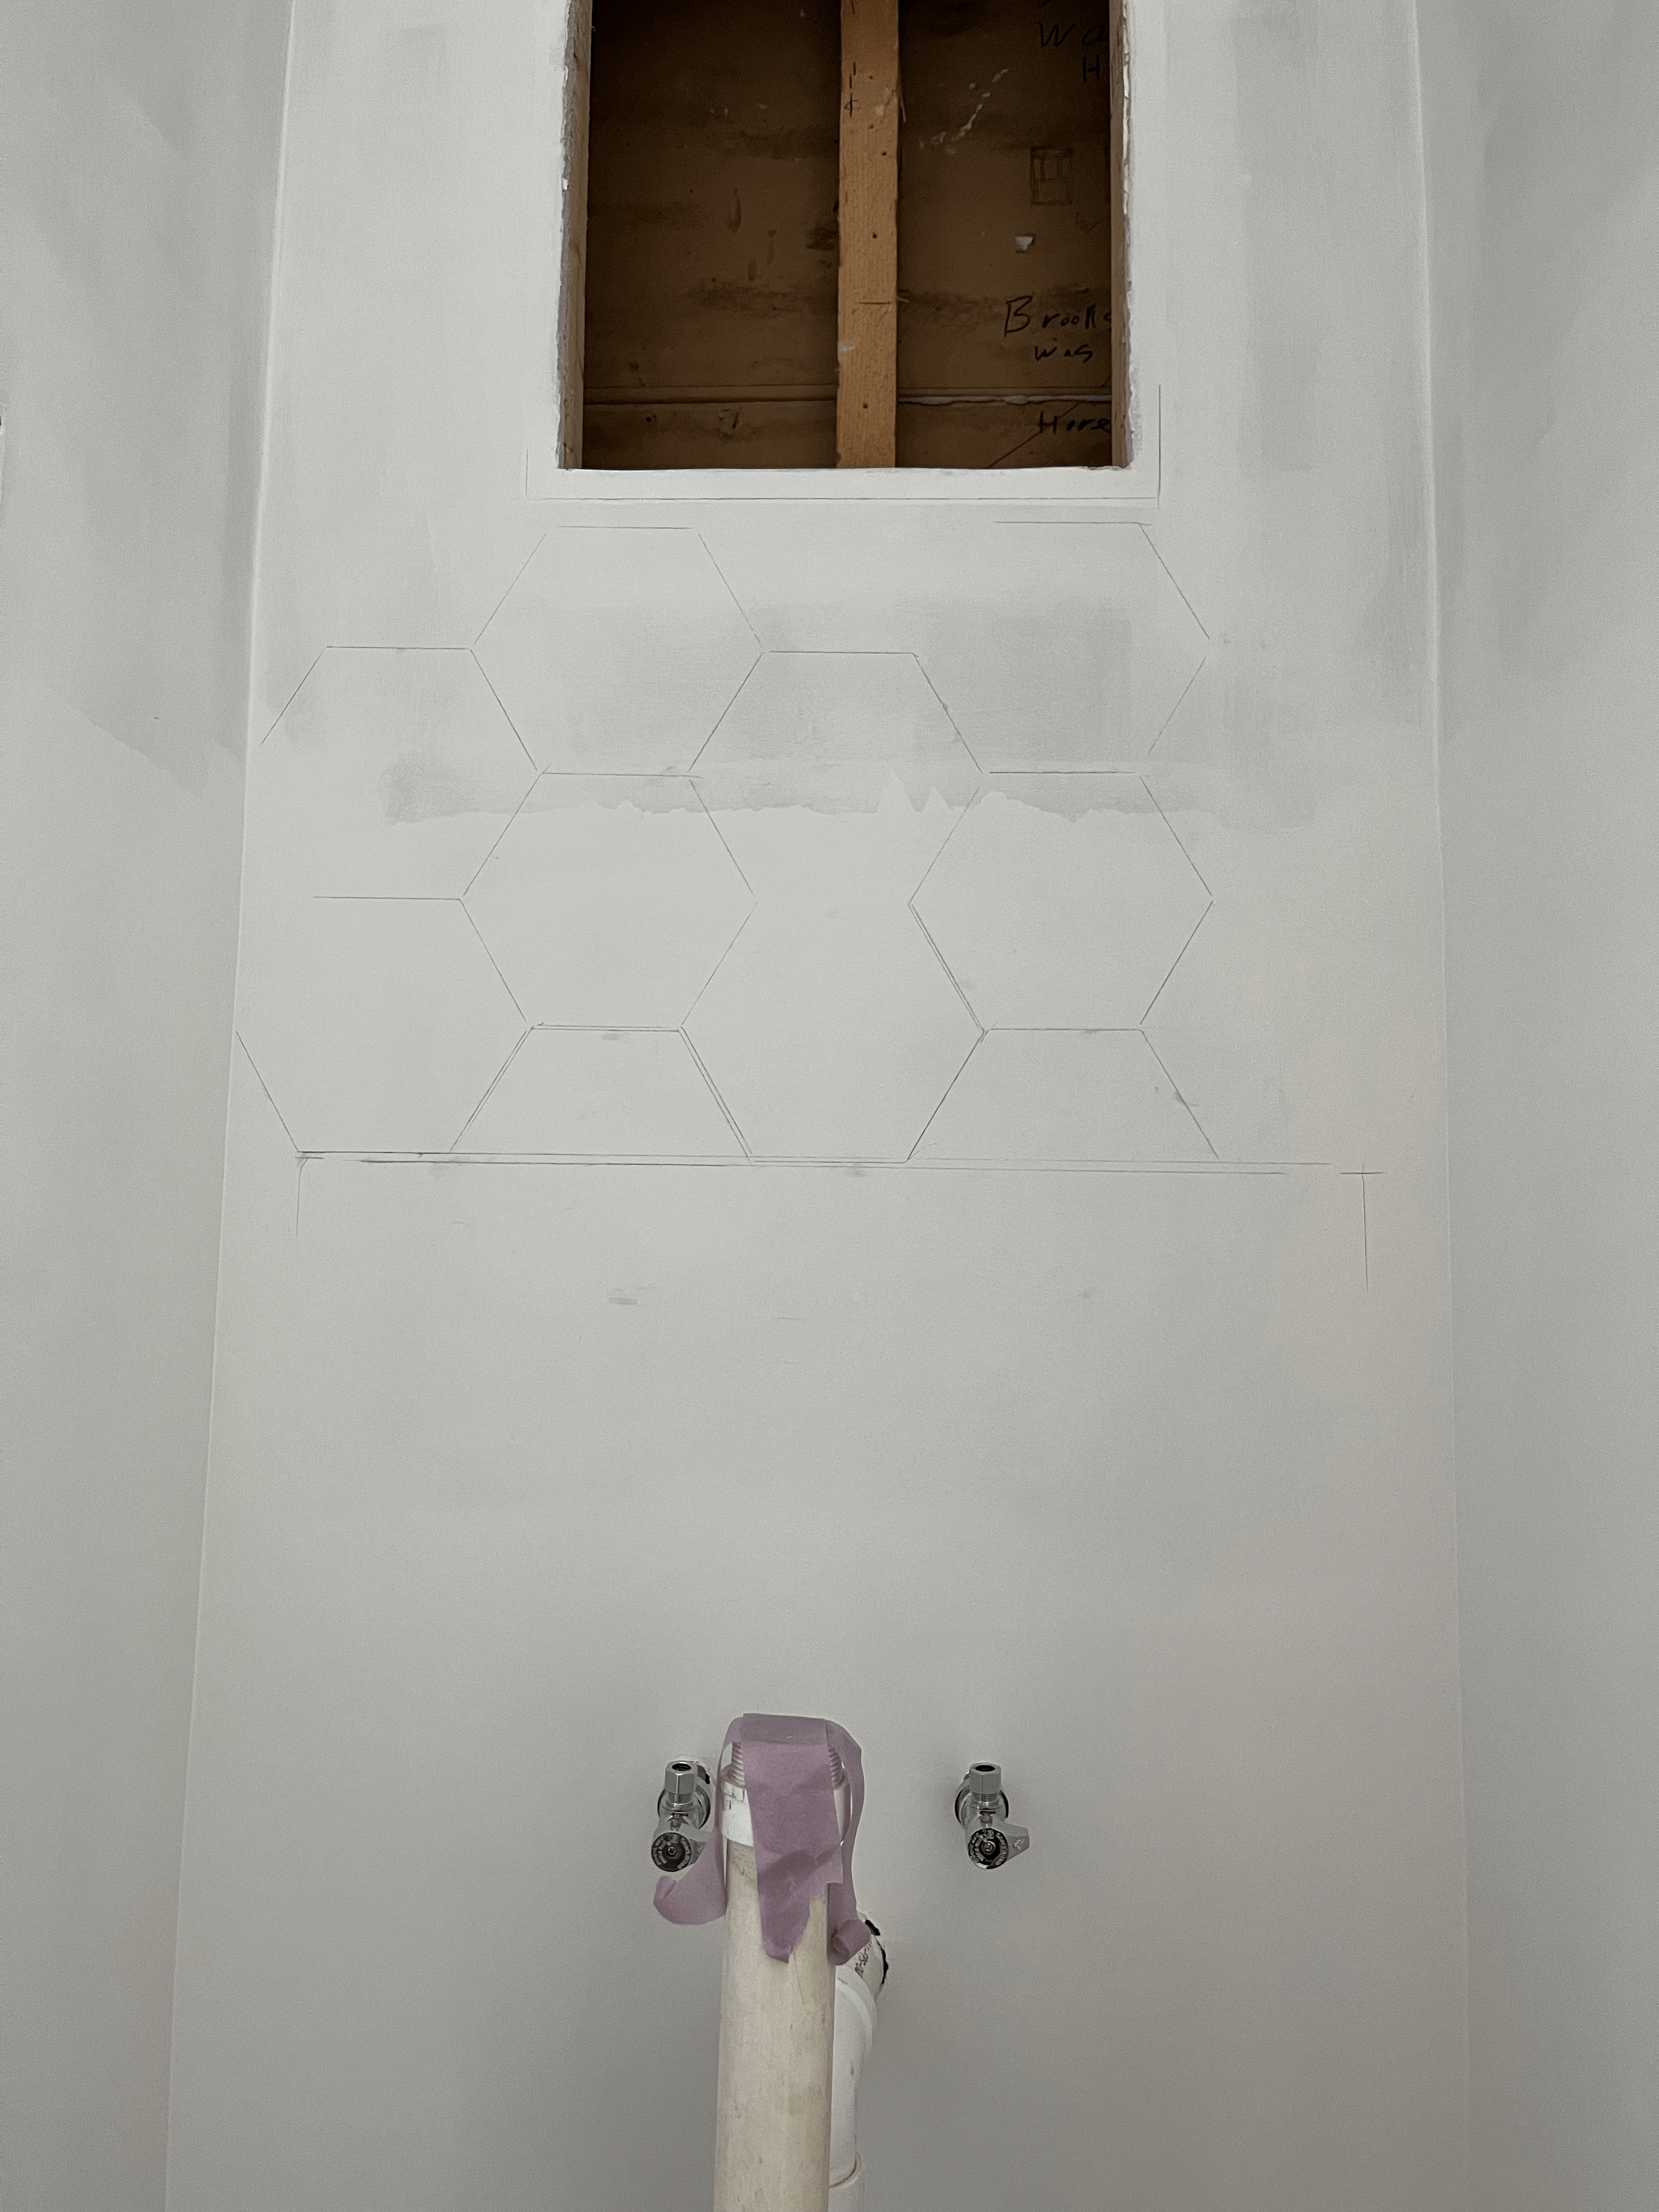
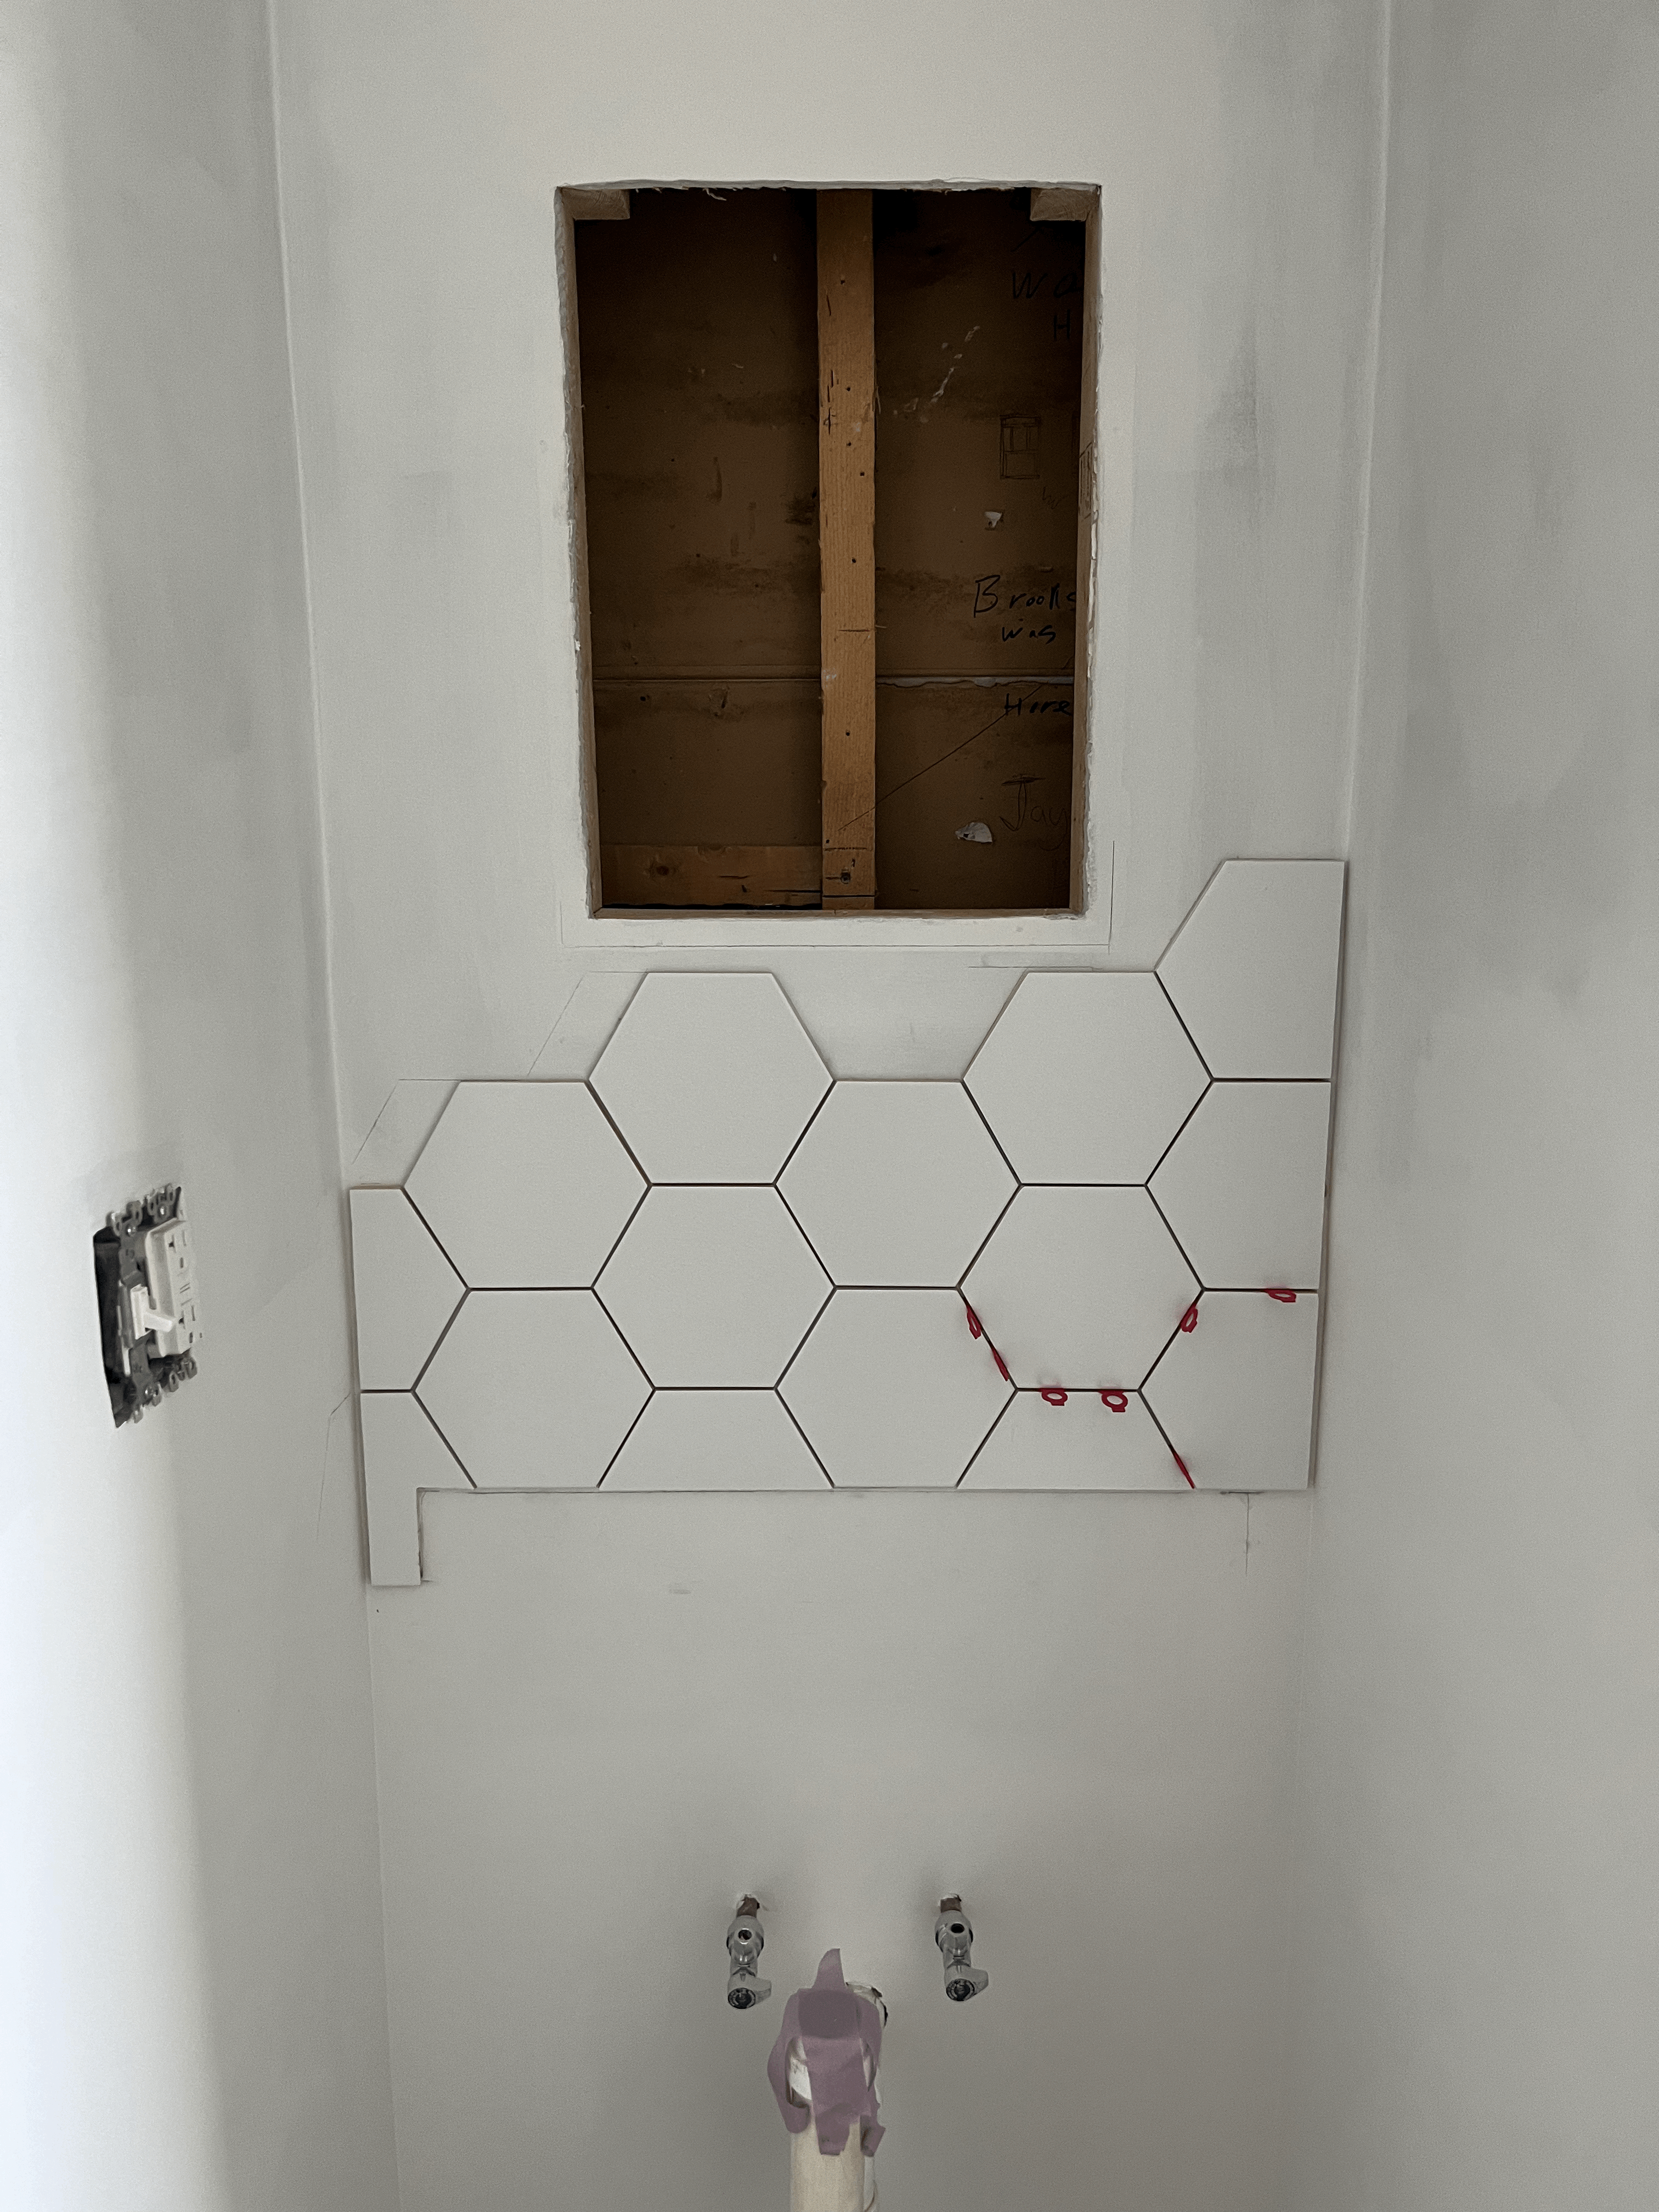
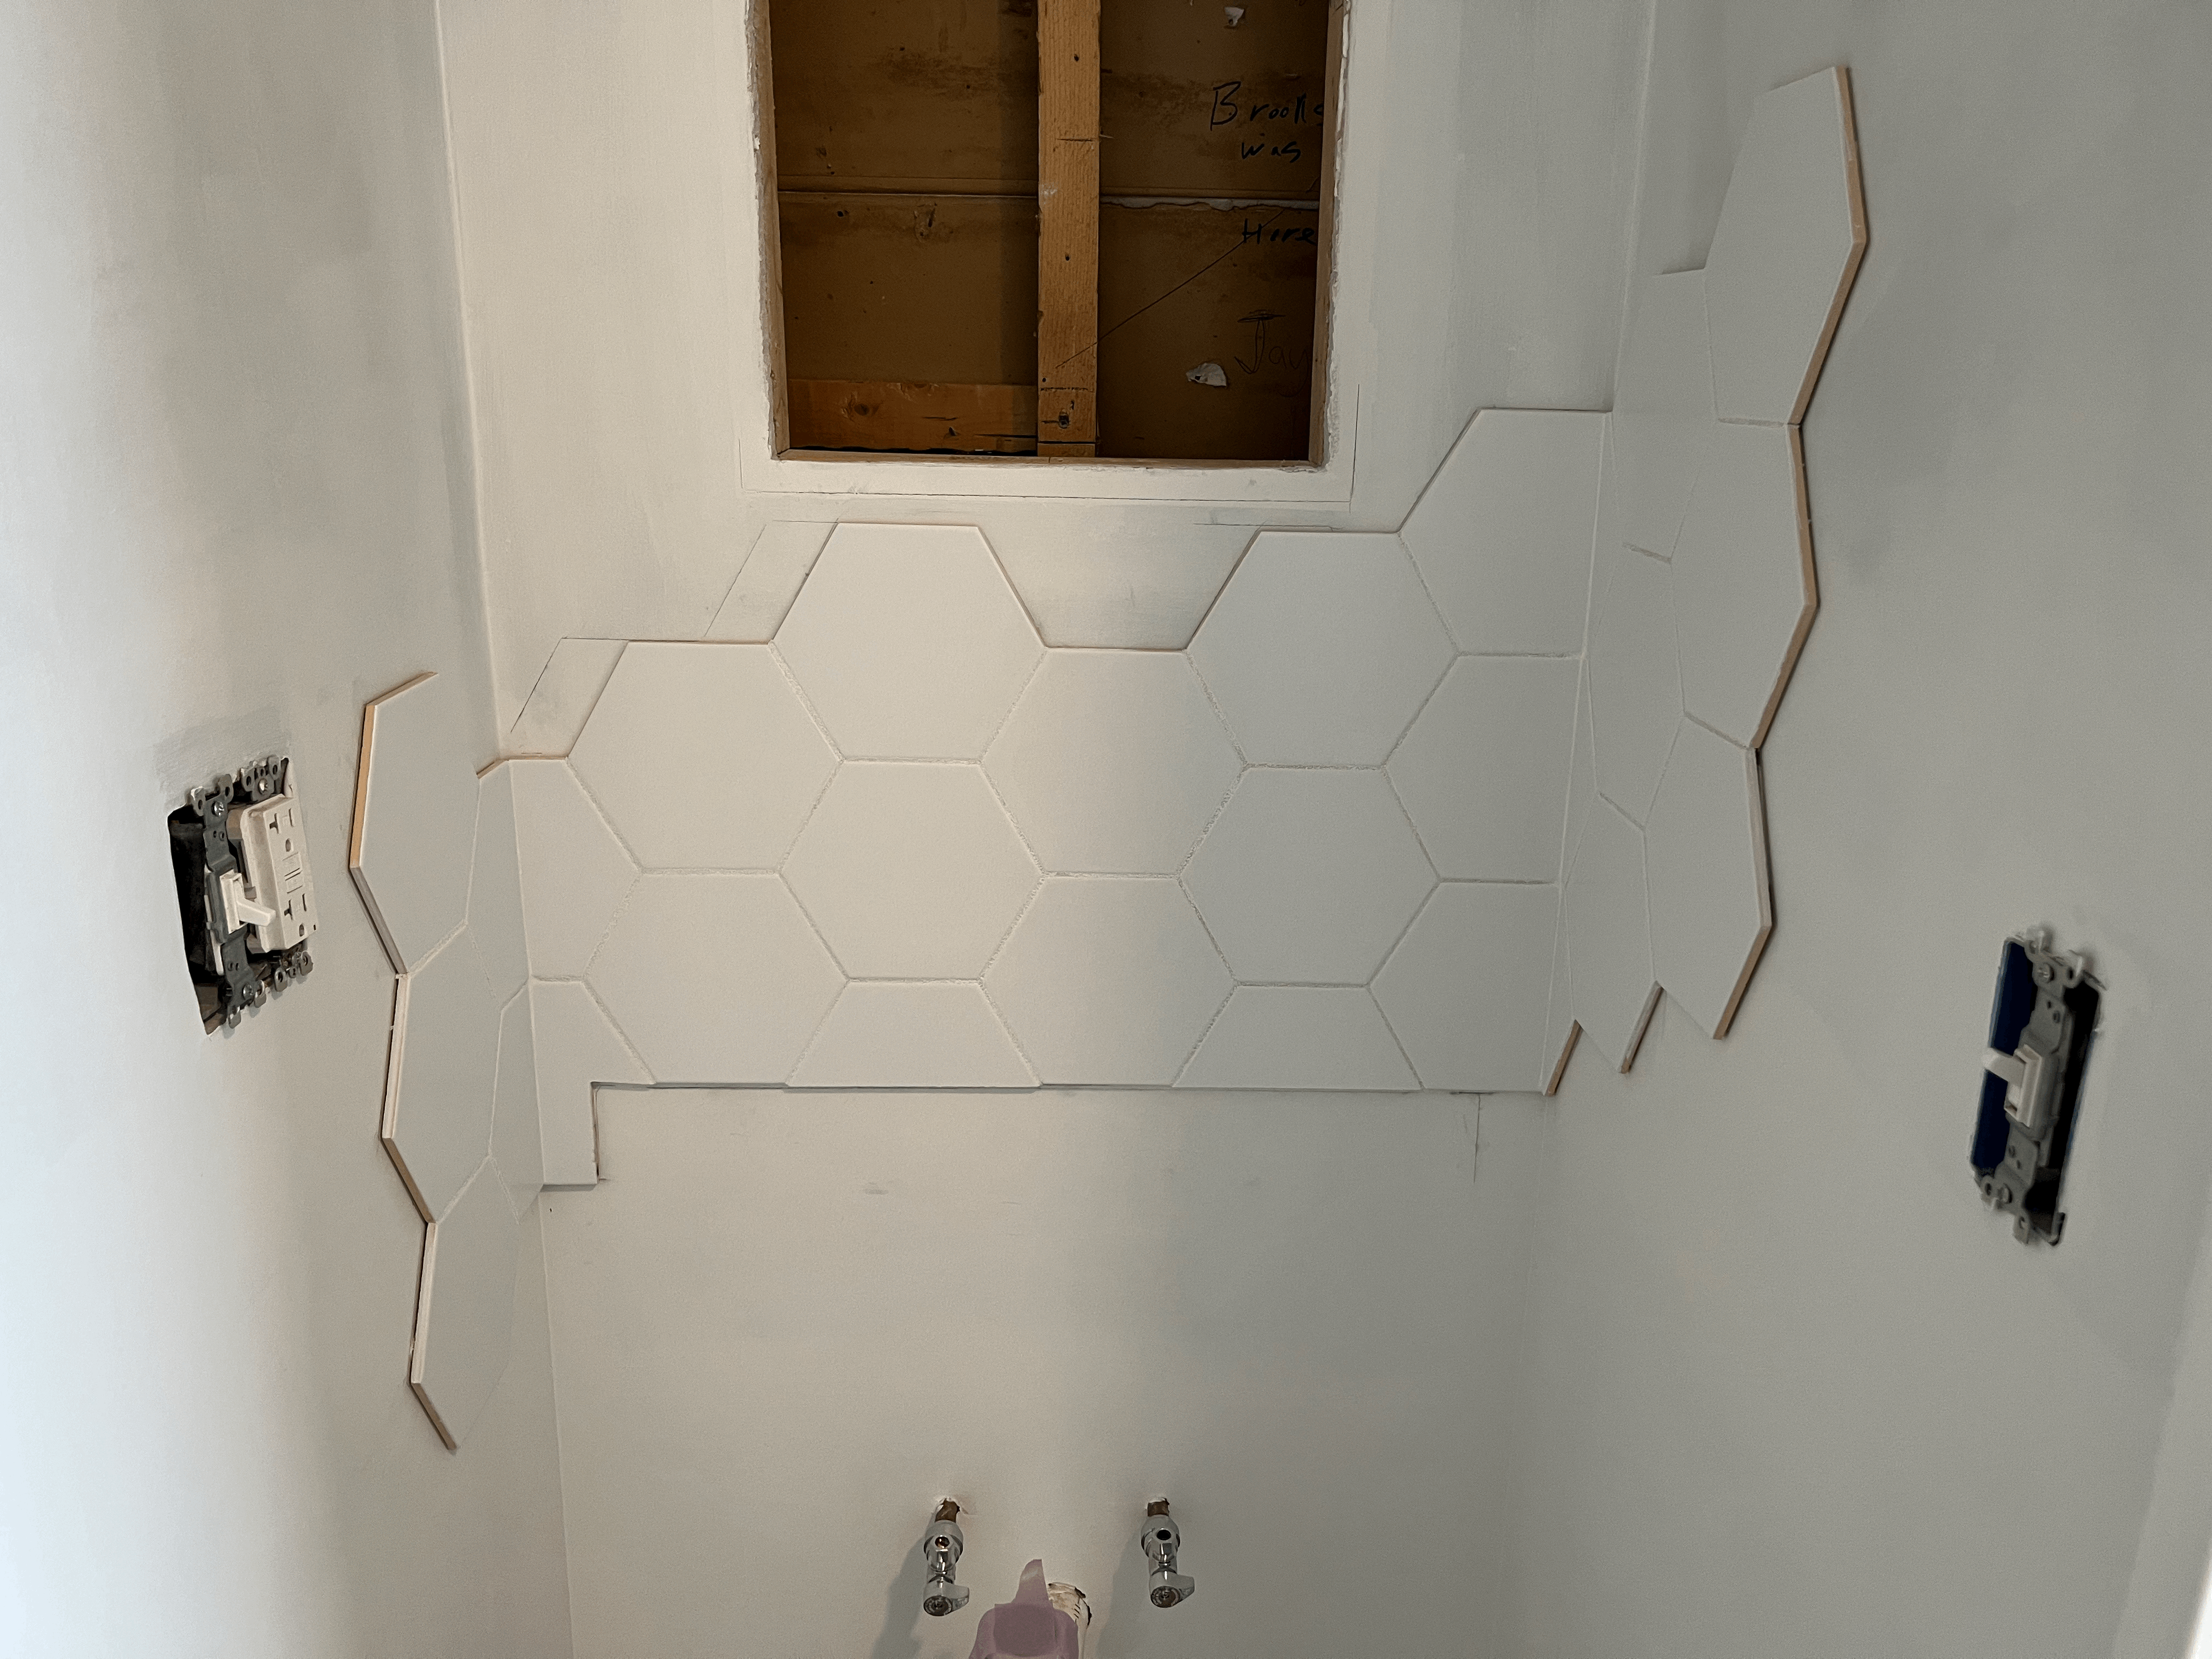
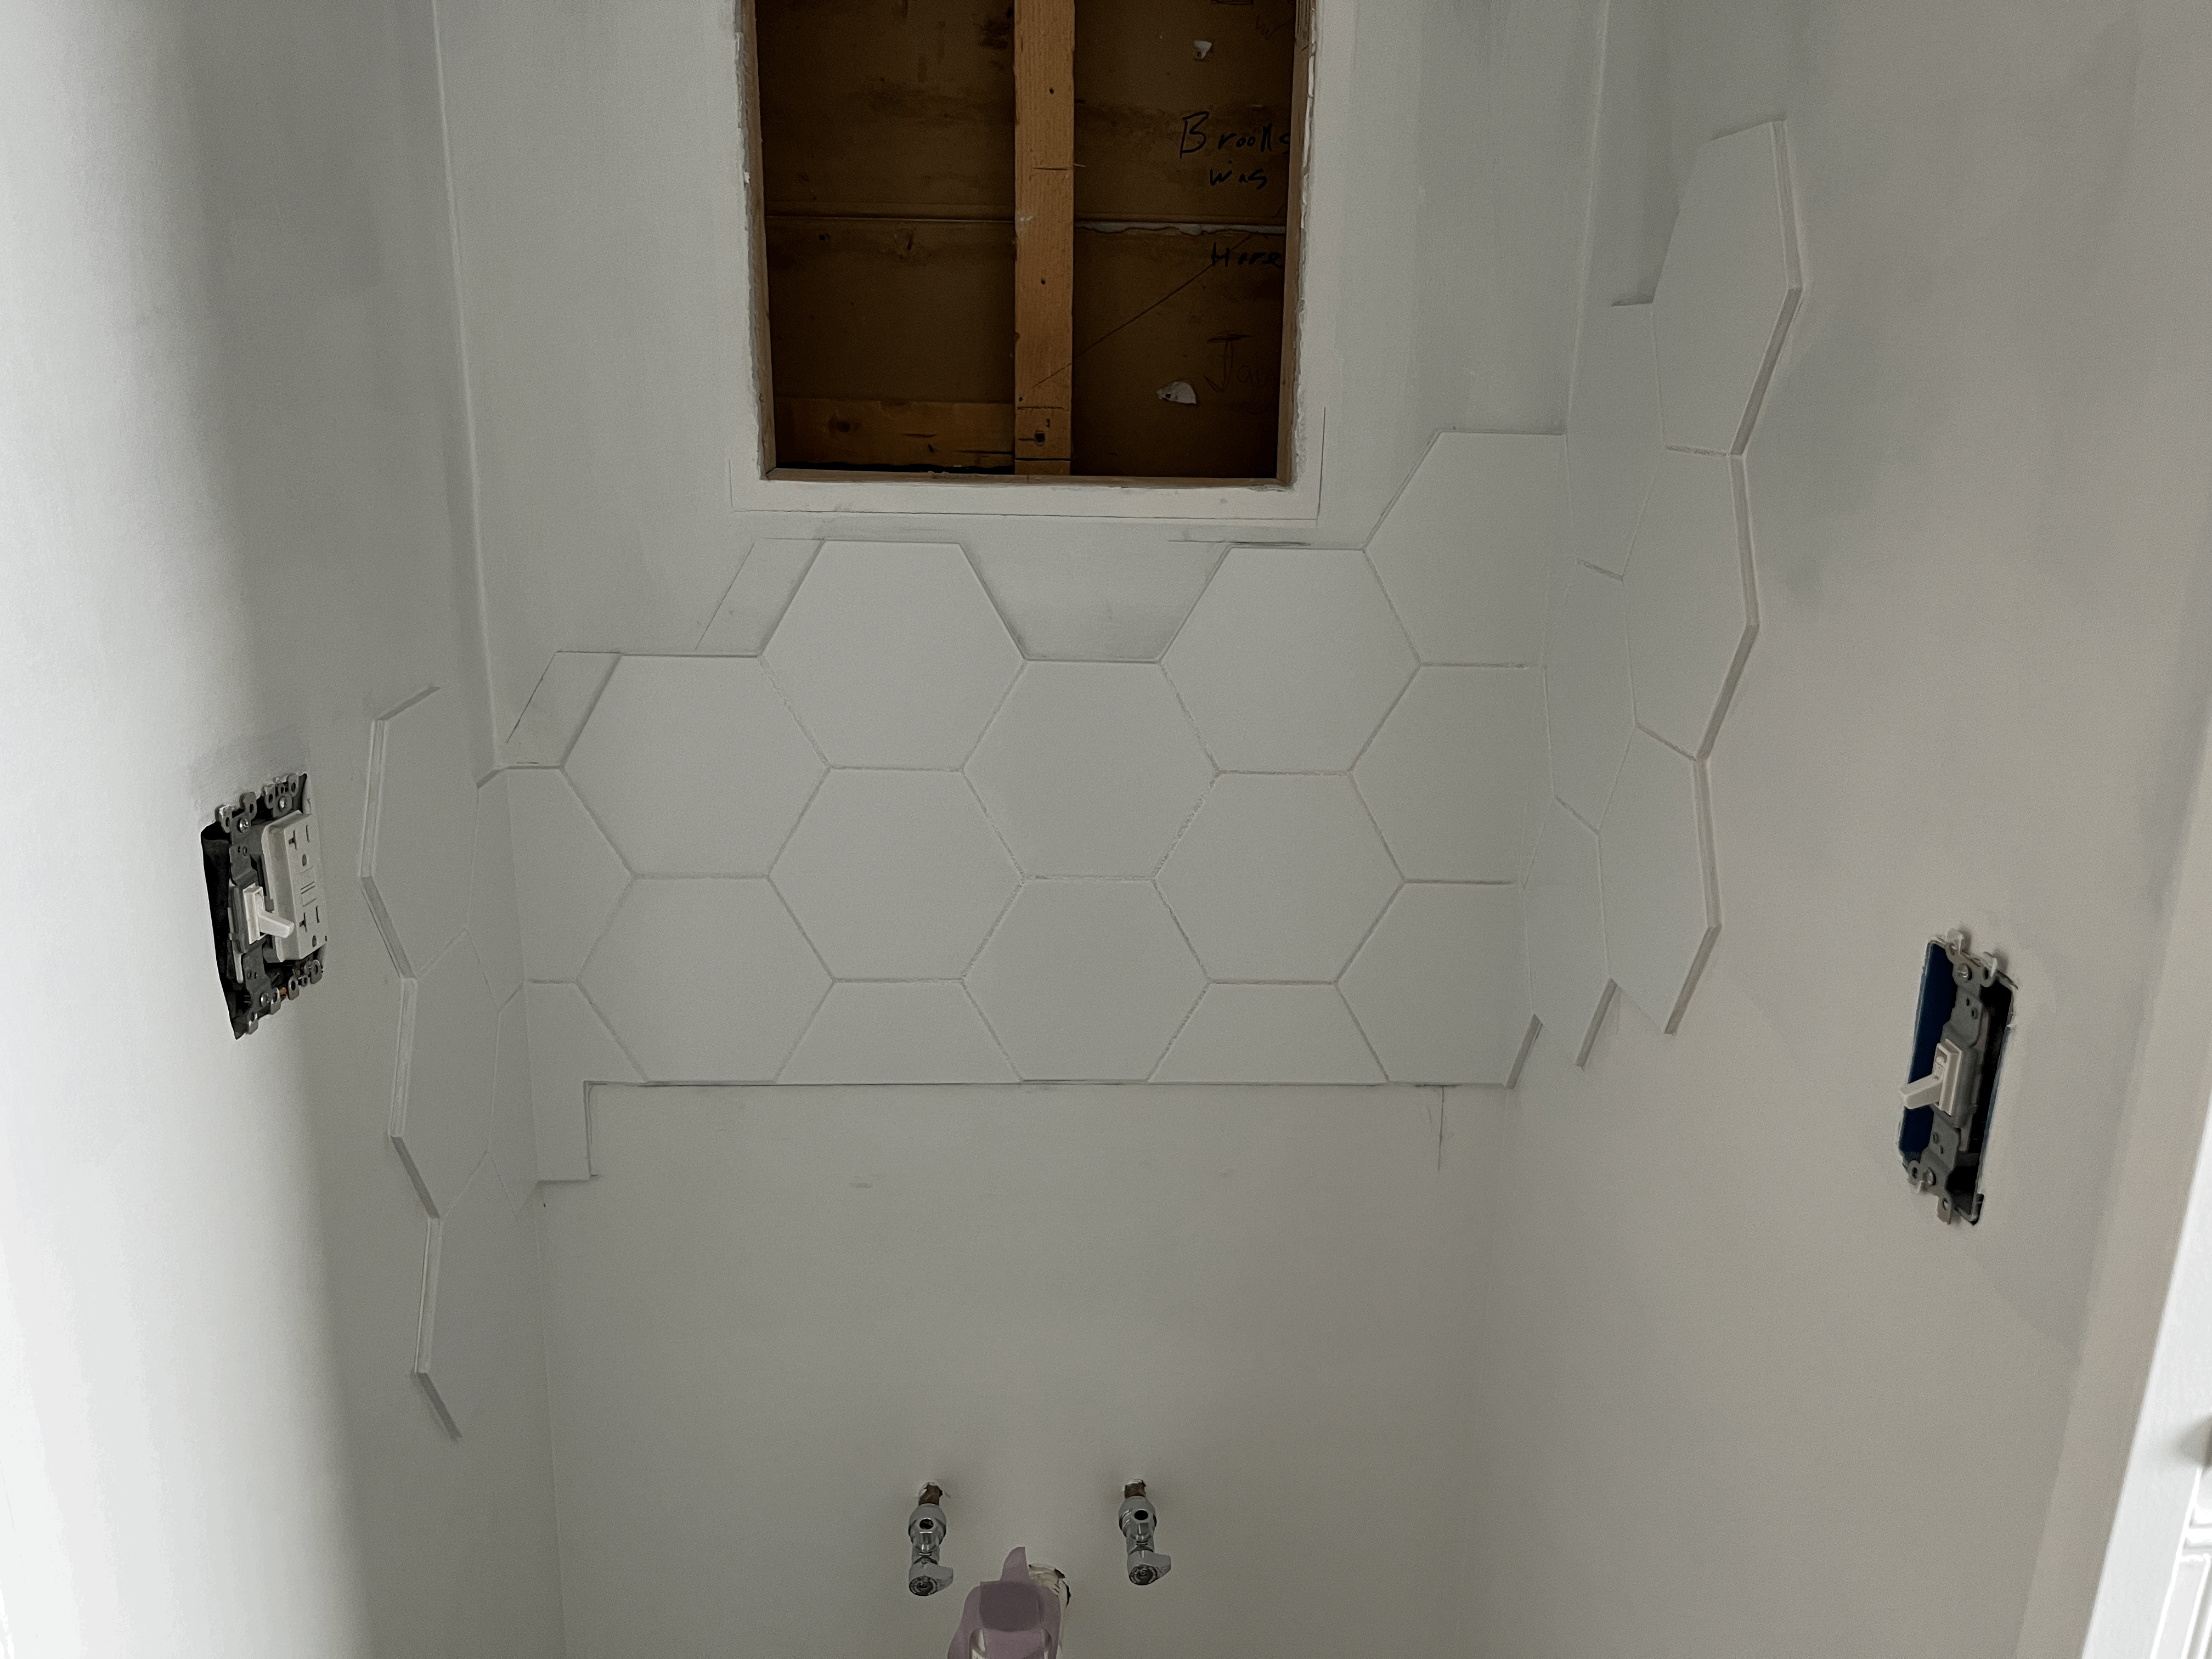
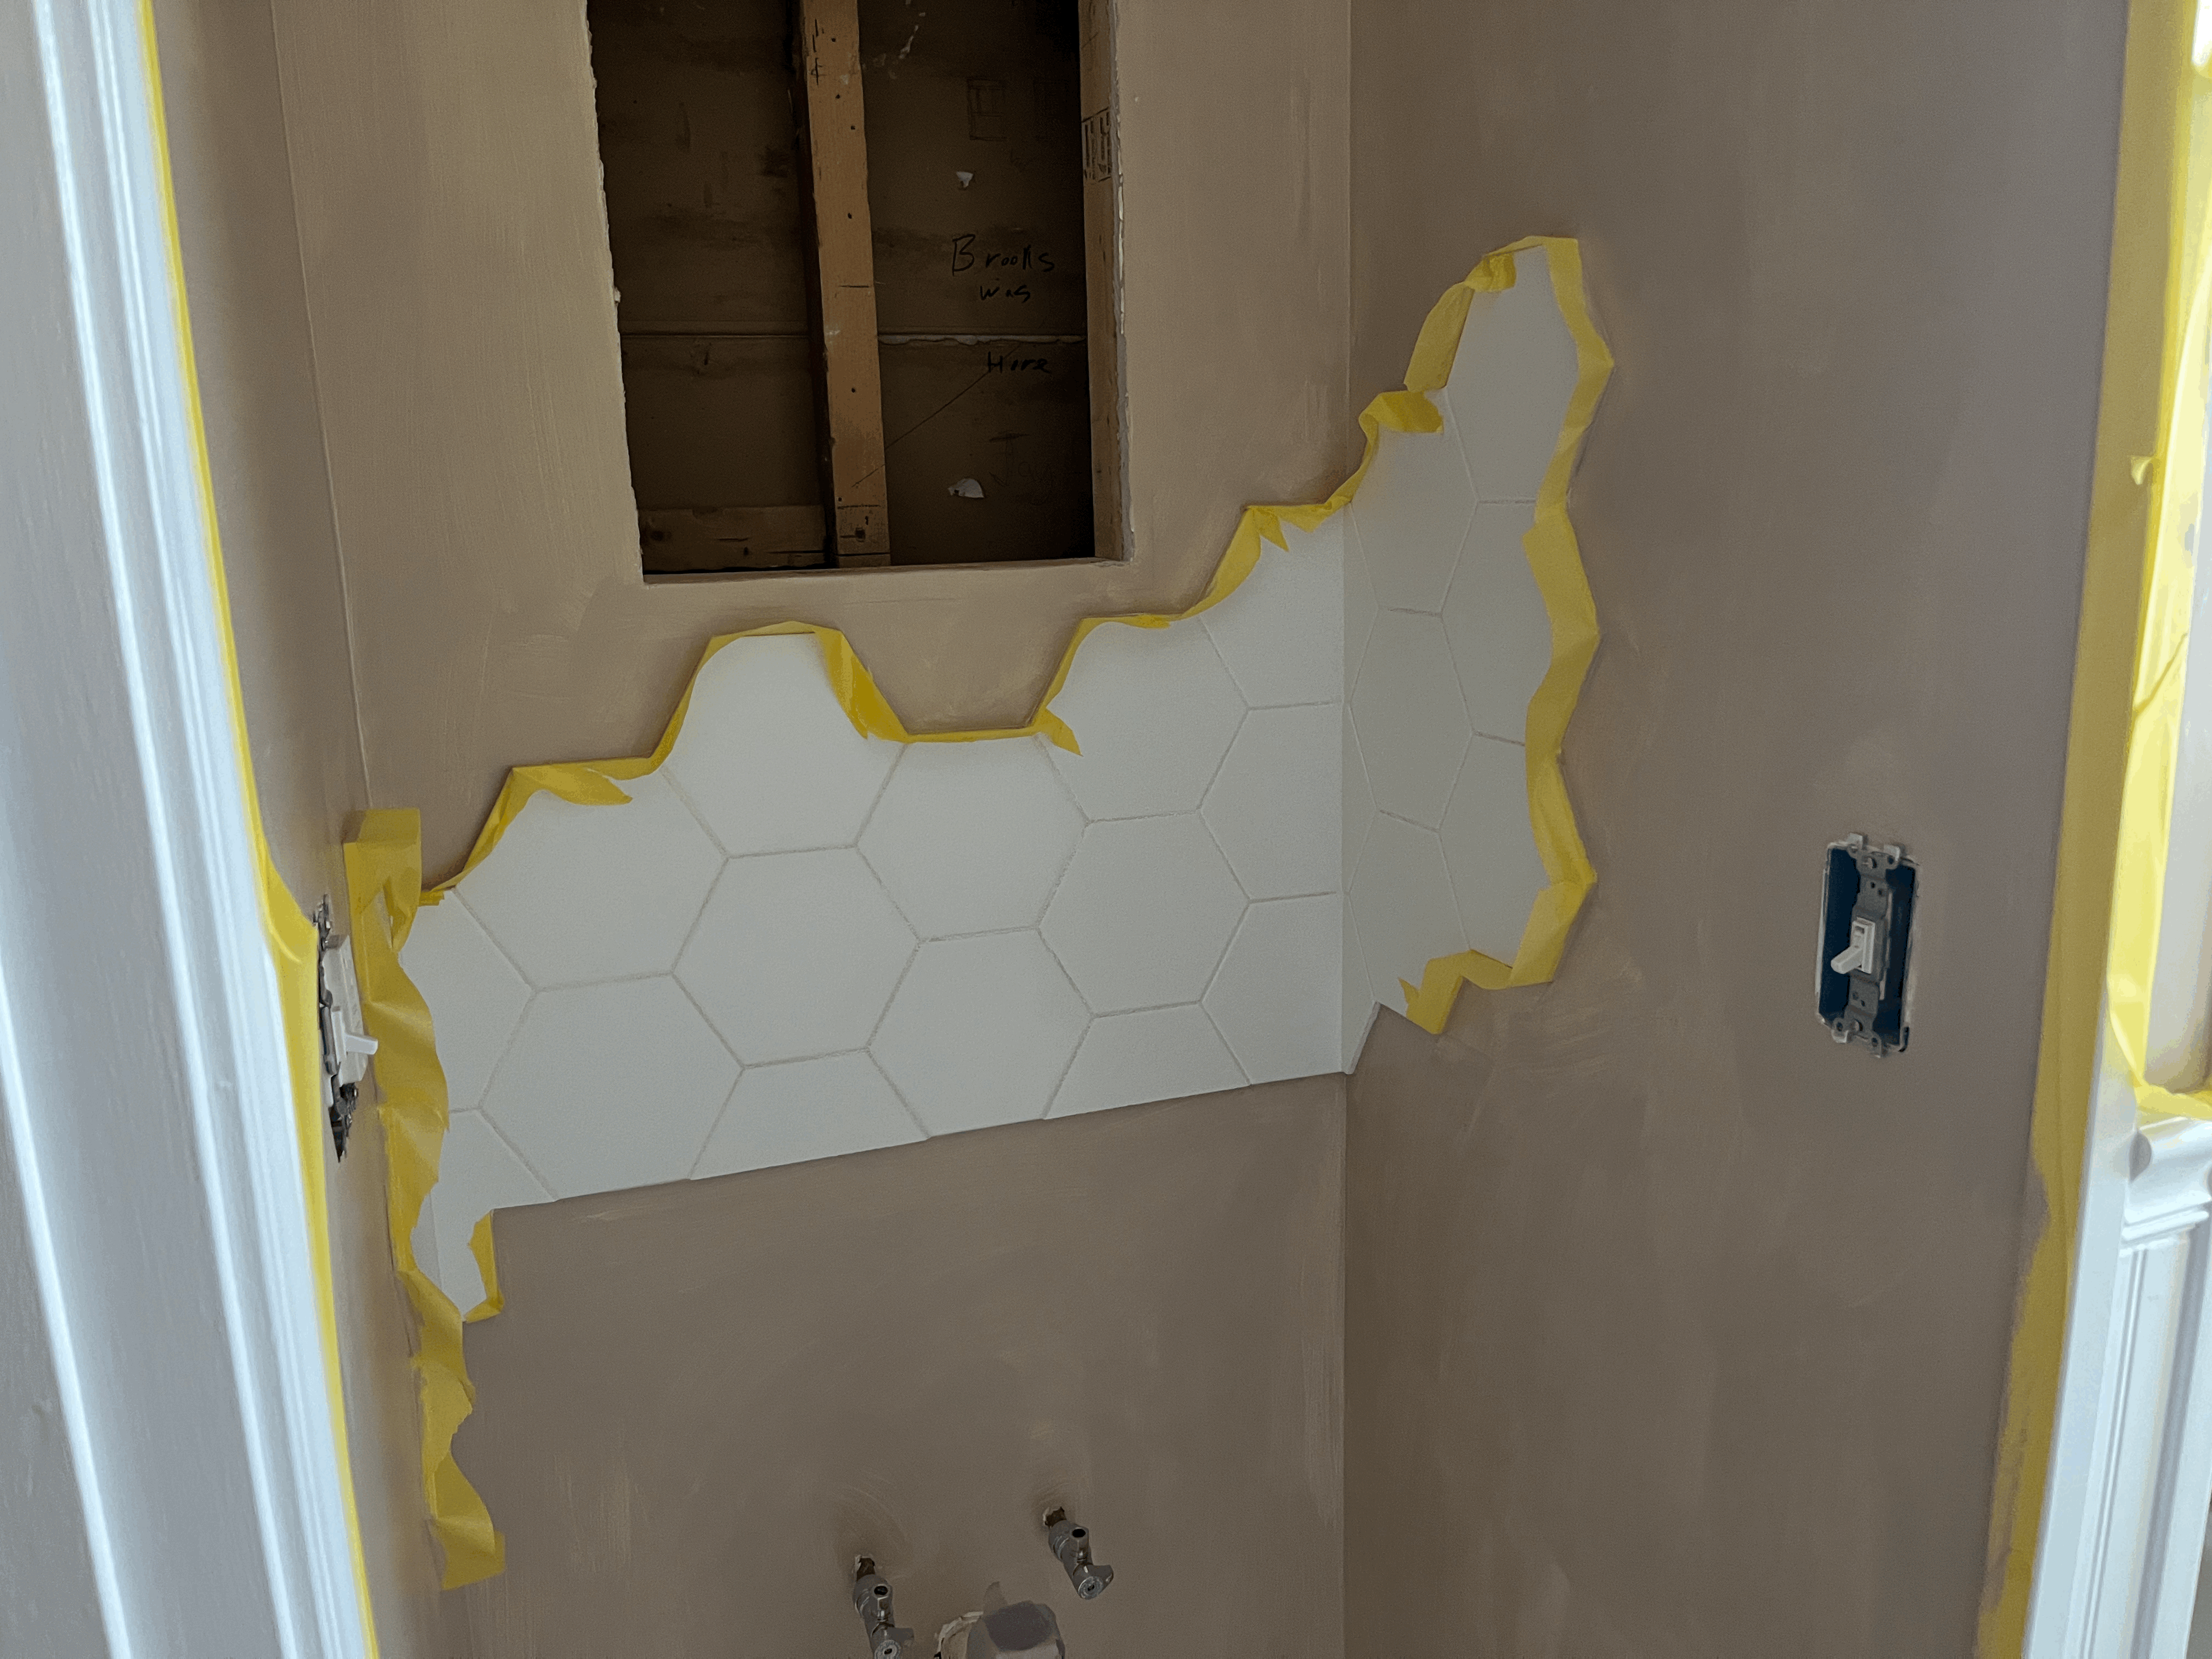
예전부터 헥사곤 모양의 타일을 사용해보고 싶었는데, 생각이 단순한 남편은 무조건 사각형 타일만 괜찮다고 했었다.
그래서 부엌에도 그냥 서브웨이 타일로 했는데, 화장실만큼은 헥사곤으로 하리라 다짐했었다.
그리하여 헥사곤 타일을 이번에 구입했다.
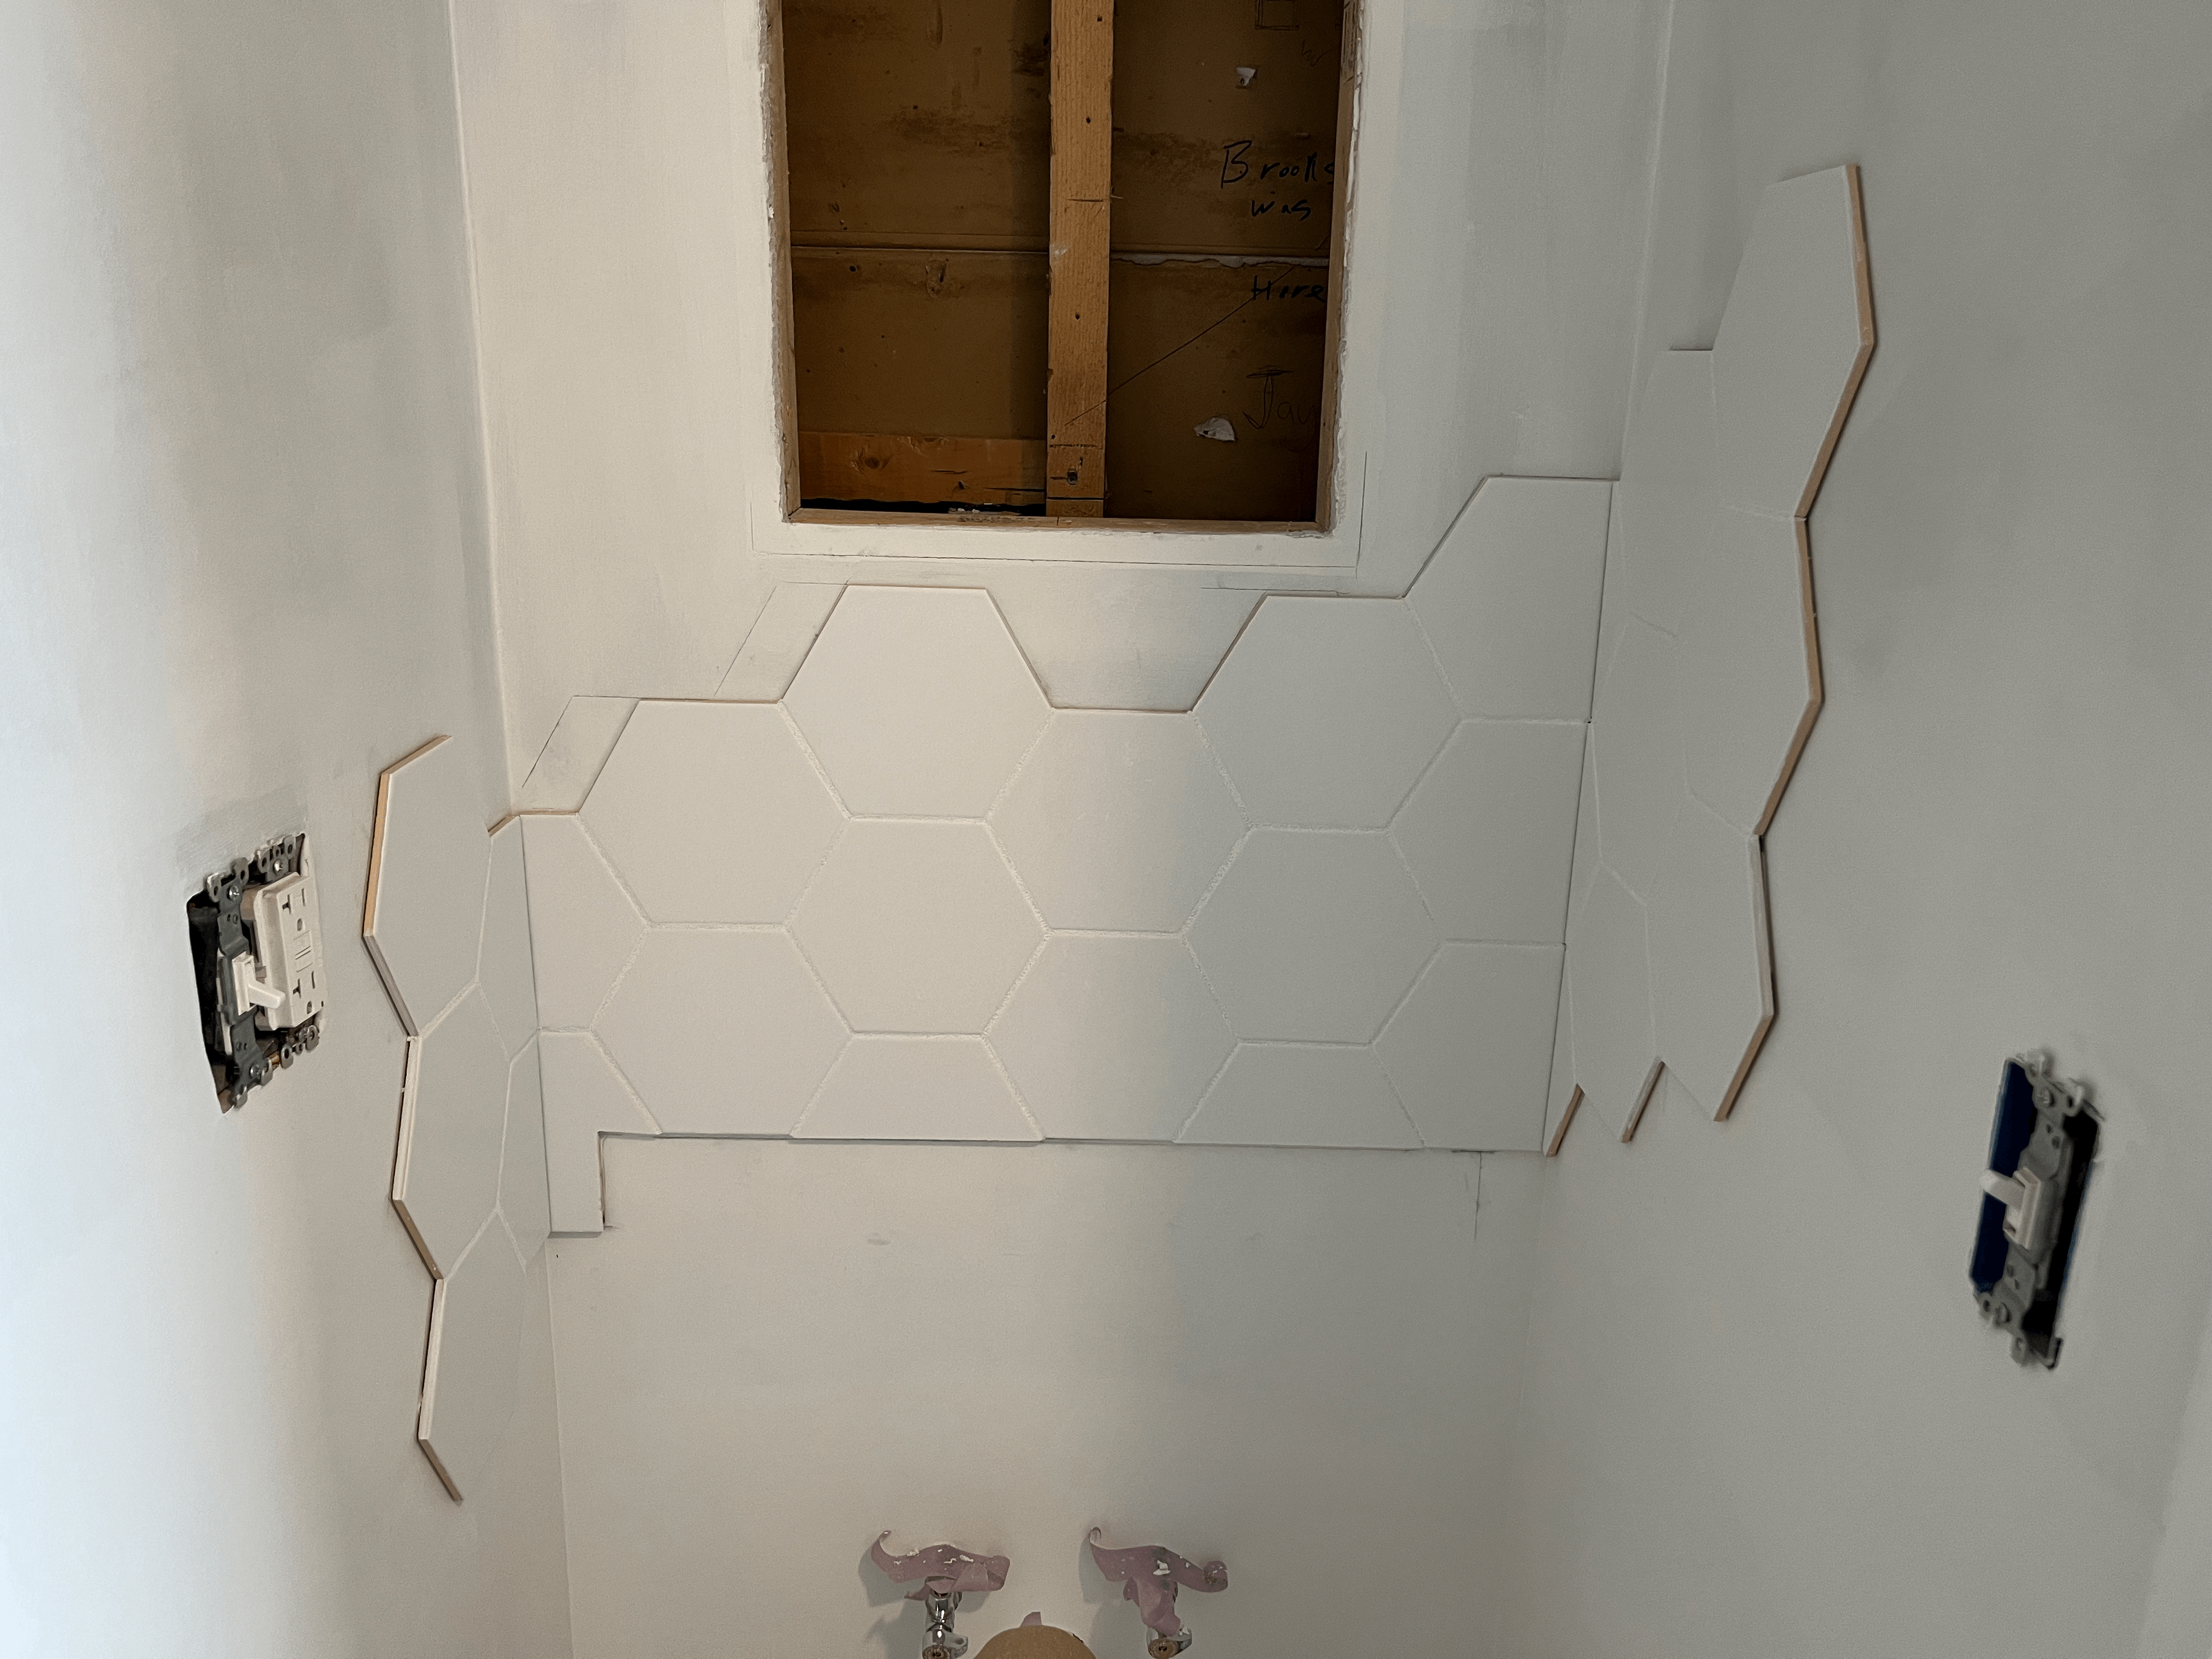
뭔가 정해진 모양없이 나열되는 헥사곤 모양이 너무 매력적이라 나도 그렇게 해보고 싶었다.
그렇게 고안해낸 최종 도안이 바로 위 사진의 모양이다.
I've always wanted to have hexagon tile, but my husband only likes square tile.
That's why we had subway tile installed in the kitchen. However, I definitely wanted hexagon tile for the bathroom and I ended up getting them this time.
I love the abstract shape I can make with hexagon tiles.
So I played with them until I found the design I liked. The picture above is the final one I decided to go for.
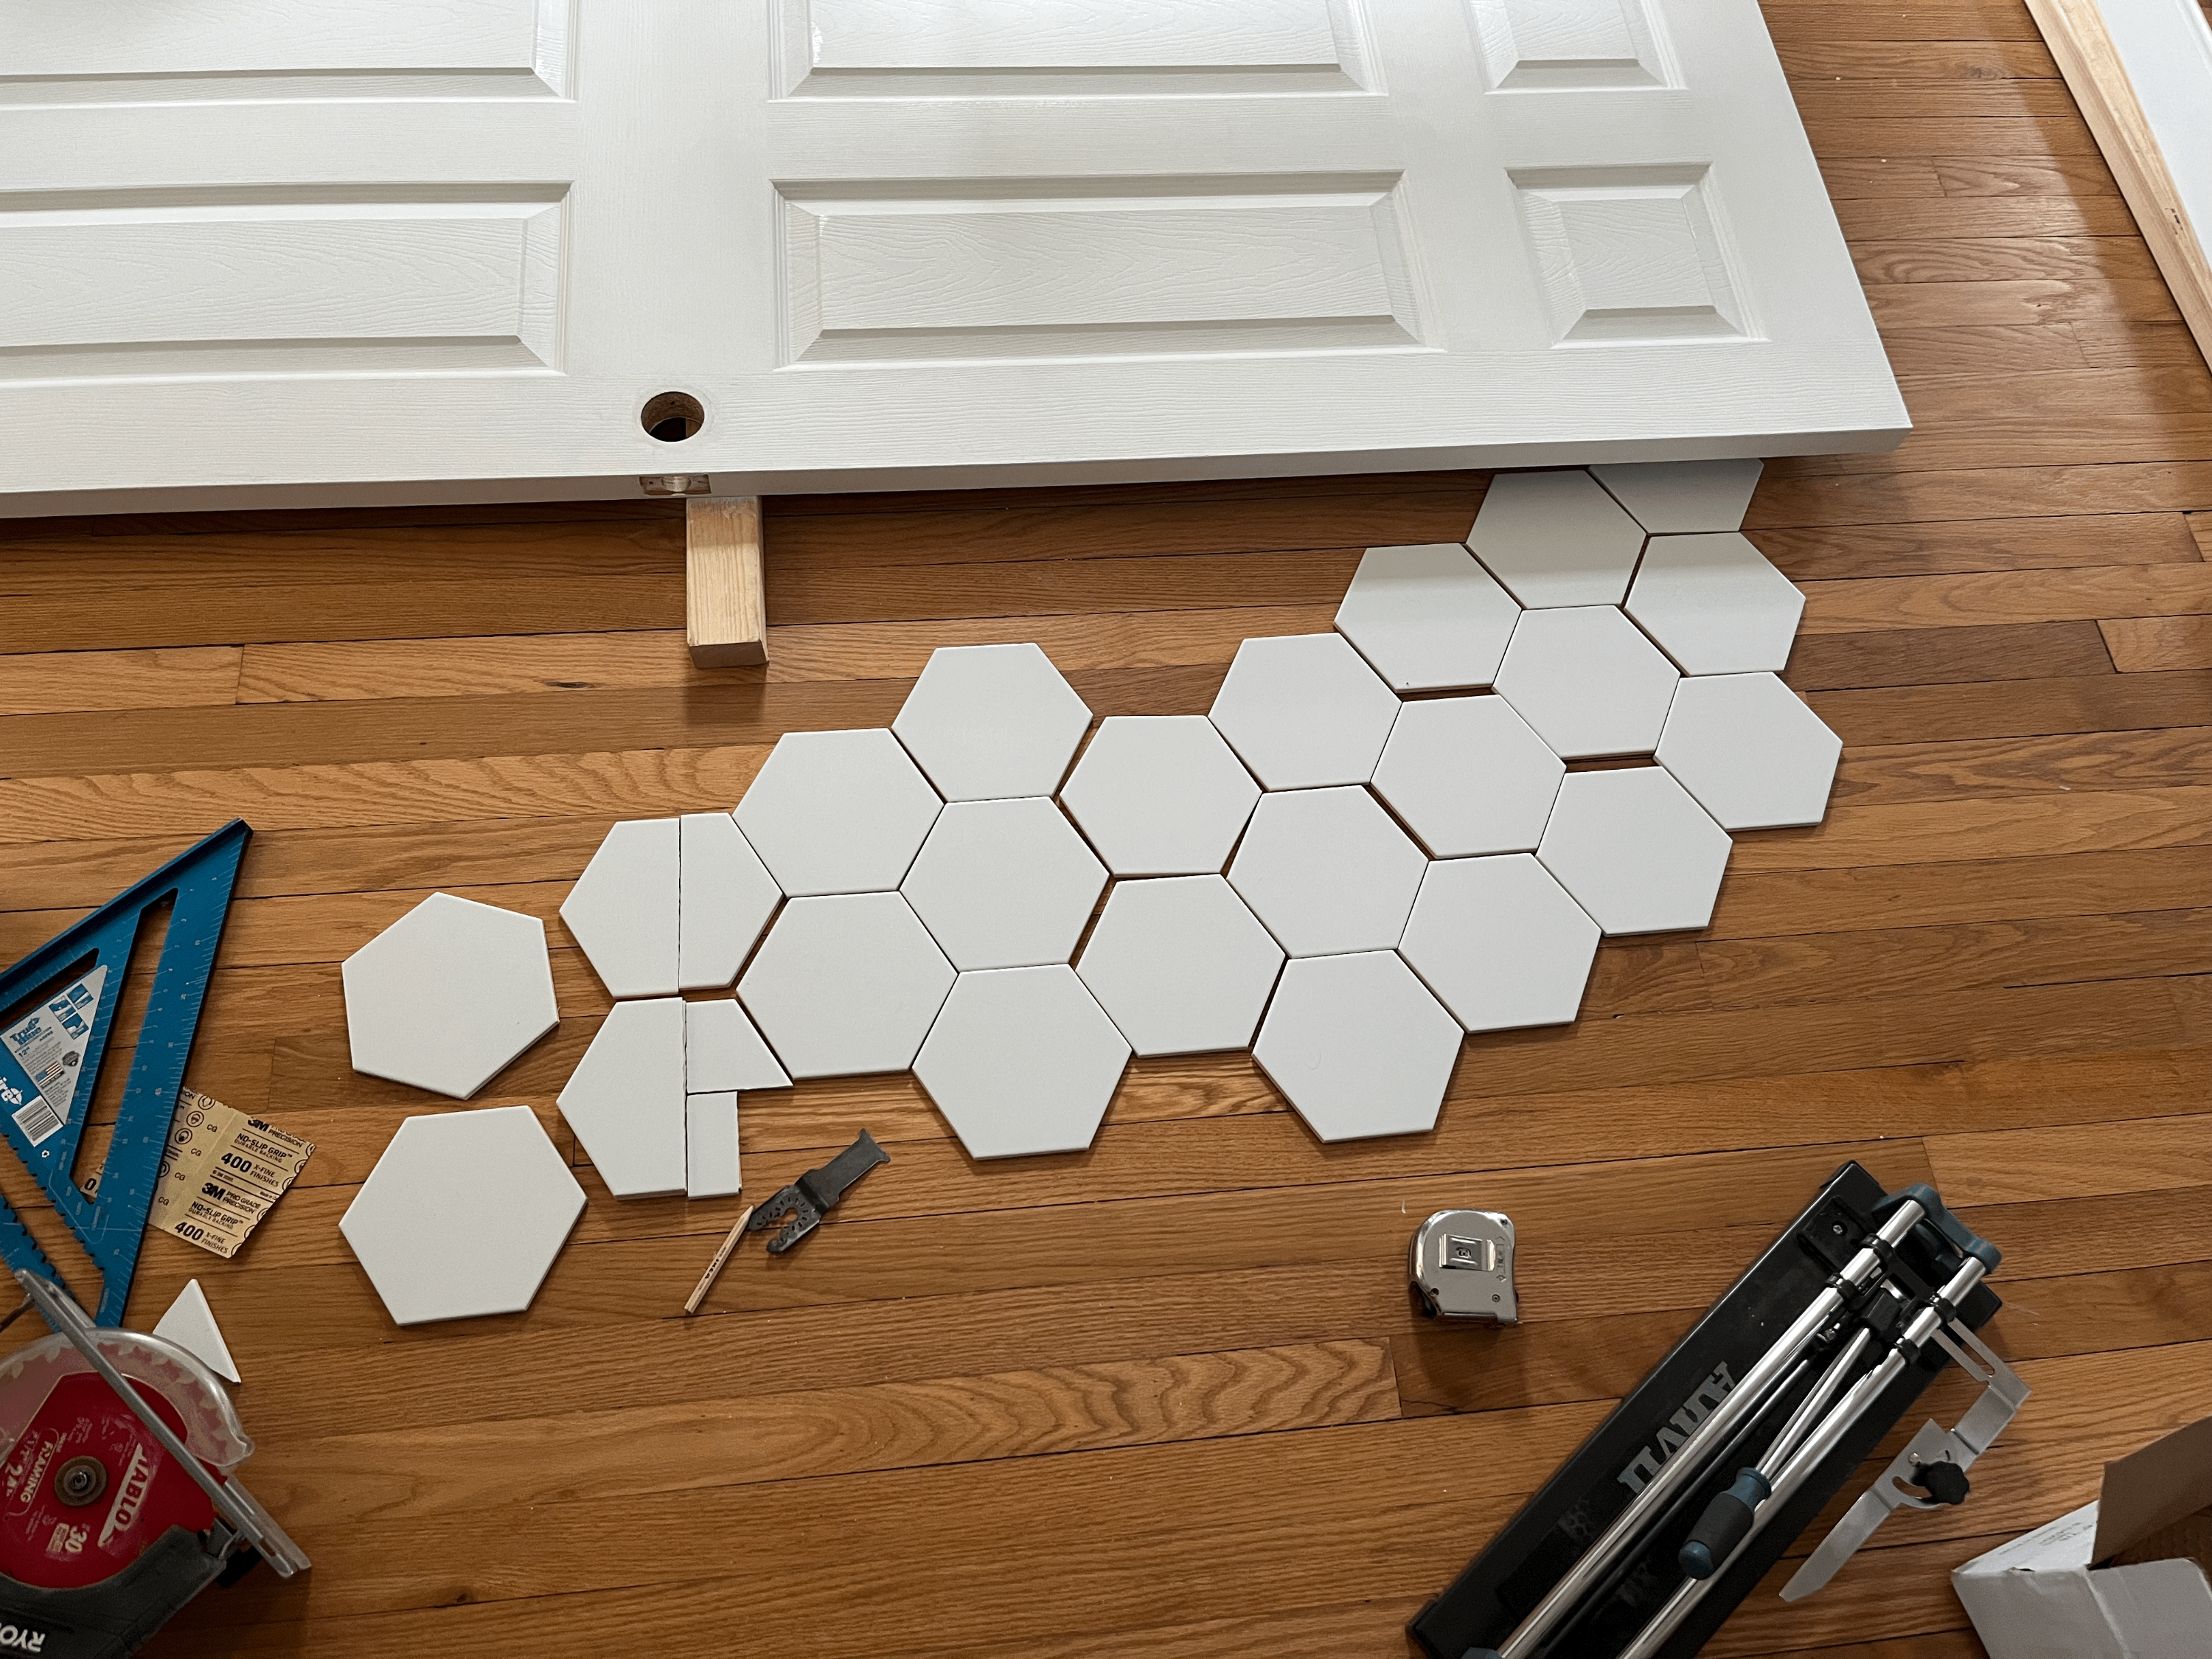
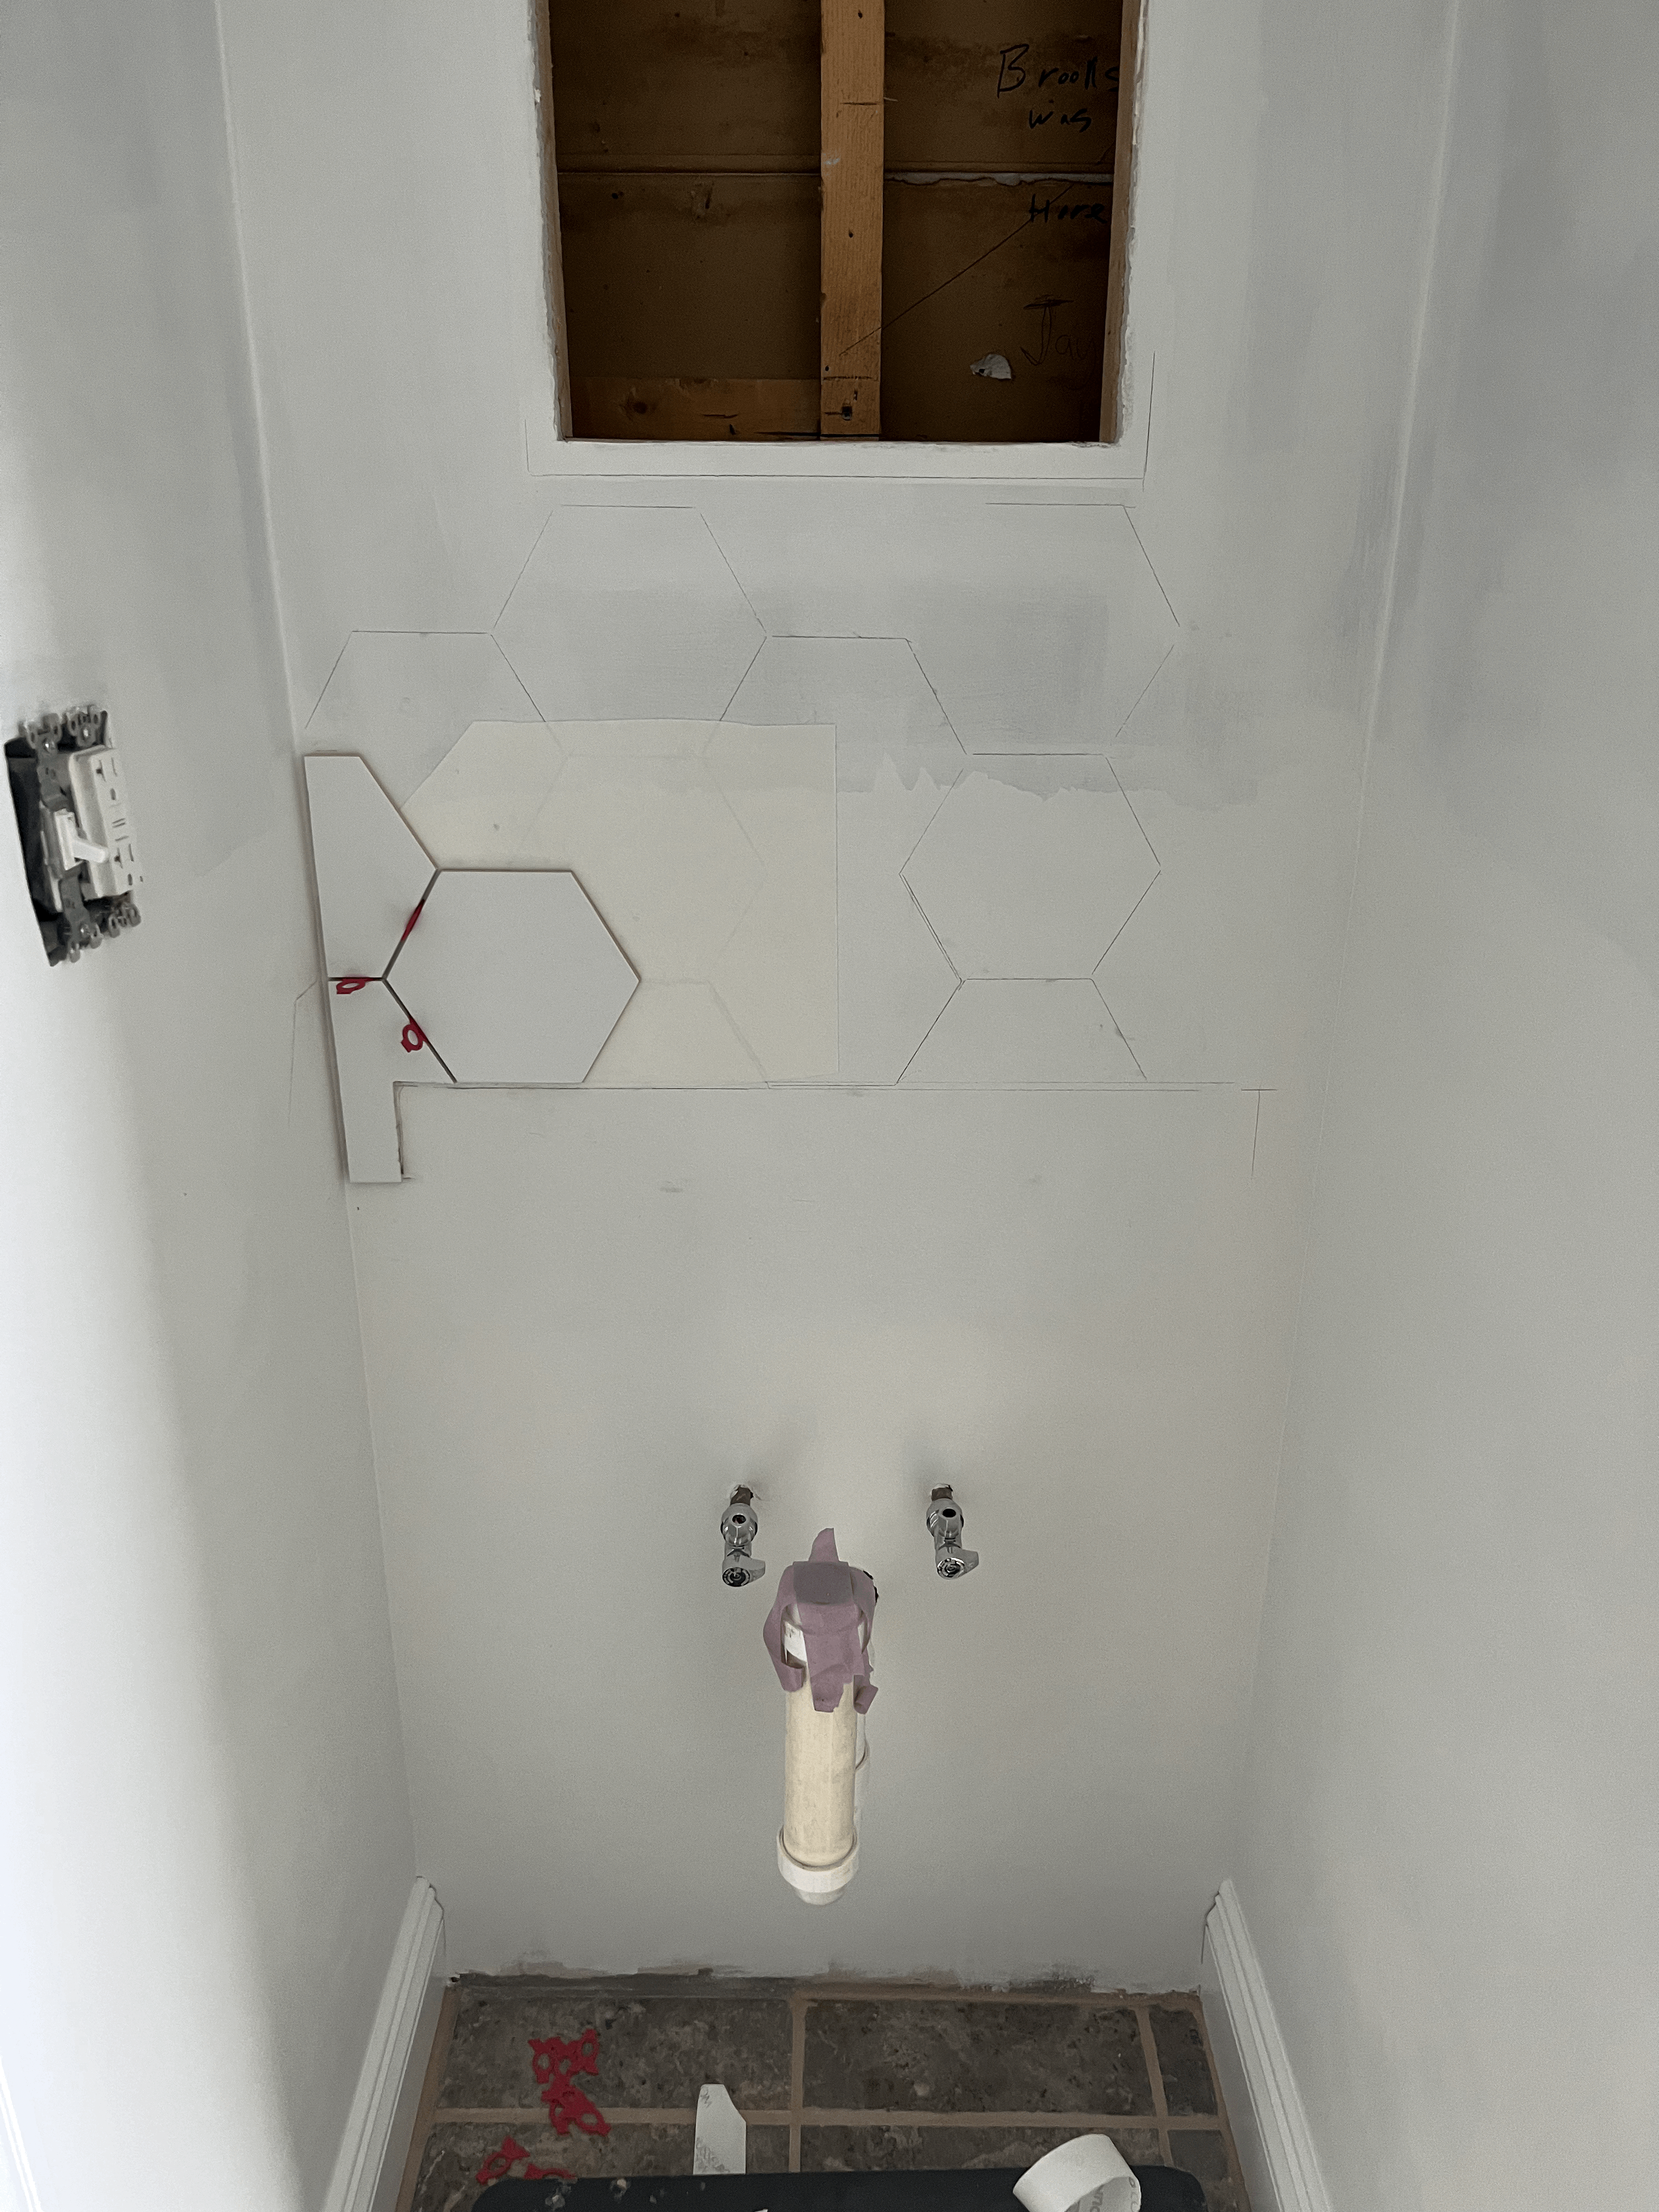
L모양으로 잘라야하는 놈이 딱 하나 있었는데 멀티툴로 해결하고, 그것 외에는 홈디포에서 산 타일 커터로 모두 쉽게 자를 수 있었다.
There was one tile that I had to cut into an L shape, which was not easy without a wet saw. Since I don't have a wet saw, I figured out how to cut it with my multi tool. Other than that one tile, I could cut everything with a tile cutter I bought from Home Depot.
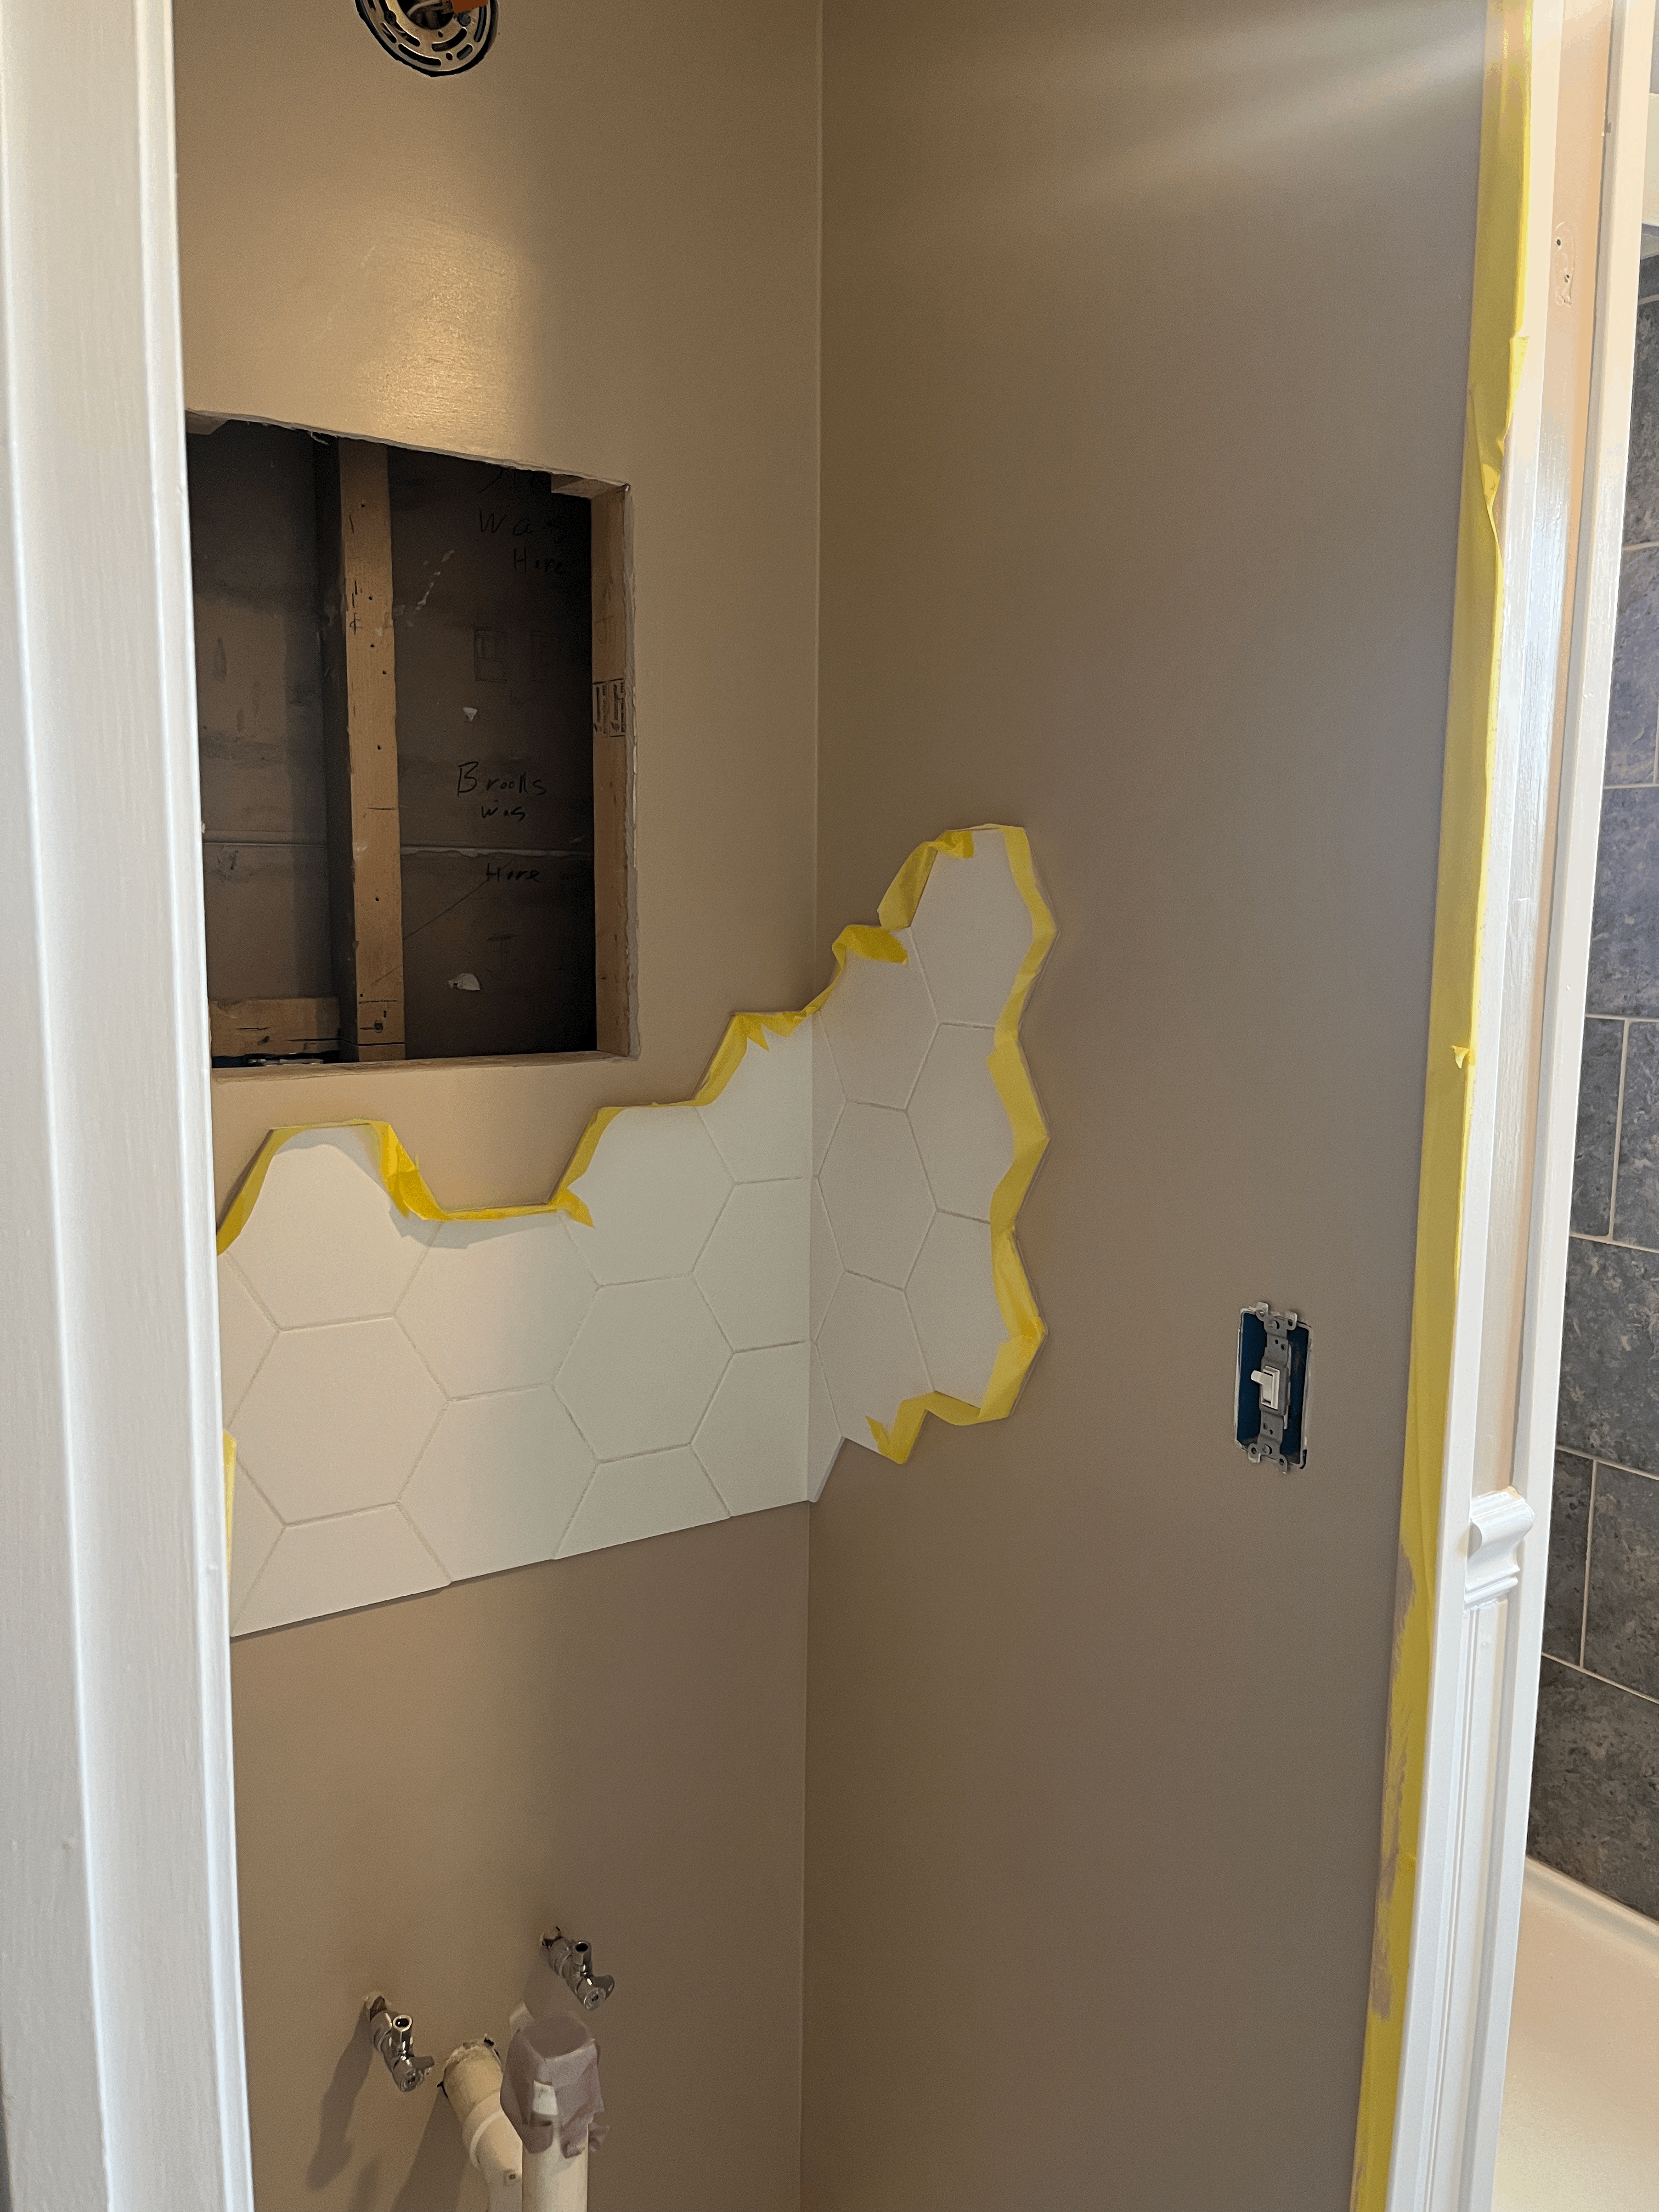
이때가 캐비넷을 설치하기전이었는데, 타일을 붙일 위치를 선정하기 위해 캐비넷을 잠깐 세팅해서 선을 그렸다.
싱크대가 놓이는 높이보다 살짝 아래에 타일이 있어야했기 때문에 캐비넷 높이와 딱 맞게 맞췄다.
This was before I installed the cabinet and I just had to place it temporarily so that I could mark where the tiles ended.
I drew the line right on the top of the cabinet because the tiles were supposed to be a little under the sink.
그리고 메디슨 캐비넷도 임시로 붙여서 선을 그린 다음, 타일이 붙여질 공간을 확인했다.
I also drew a line where the medicine cabinet ends so the tiles would not be in the way when I installed it.
실패없이 하기 위해 벽에 직접 도안을 그려보기까지 했다^^;;
After that, I tried drawing the tile design I wanted to have on the wall.
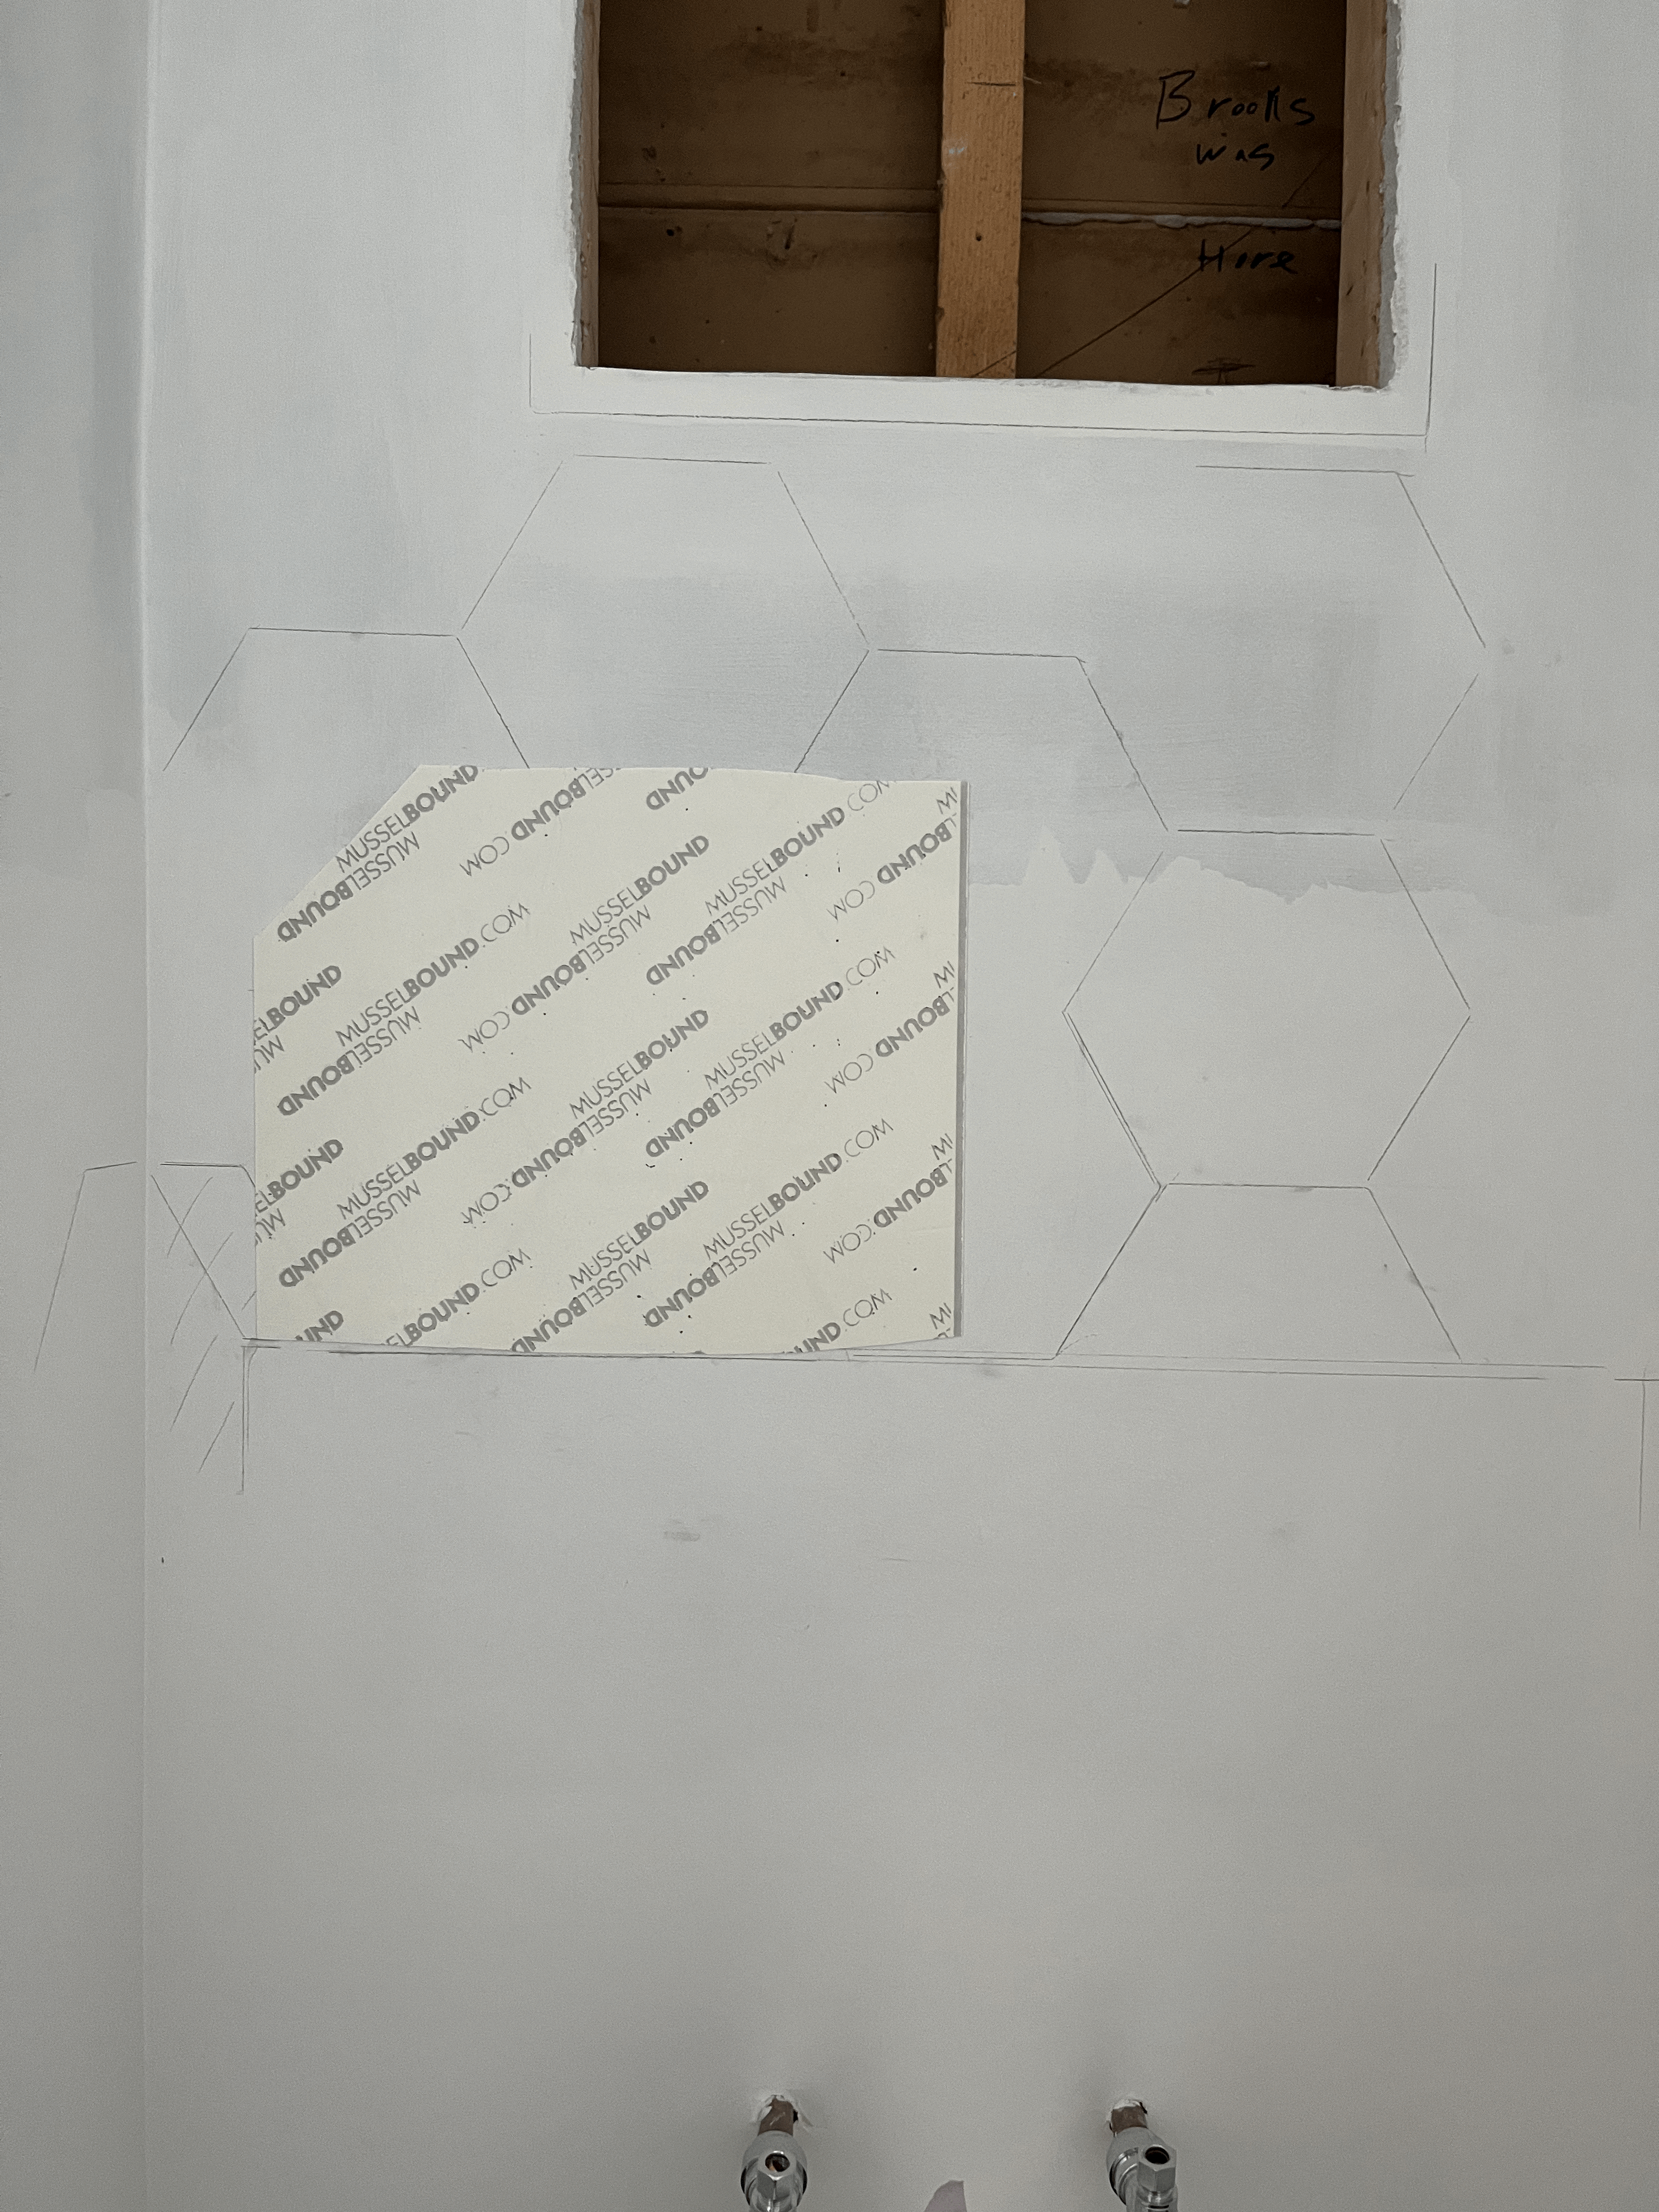
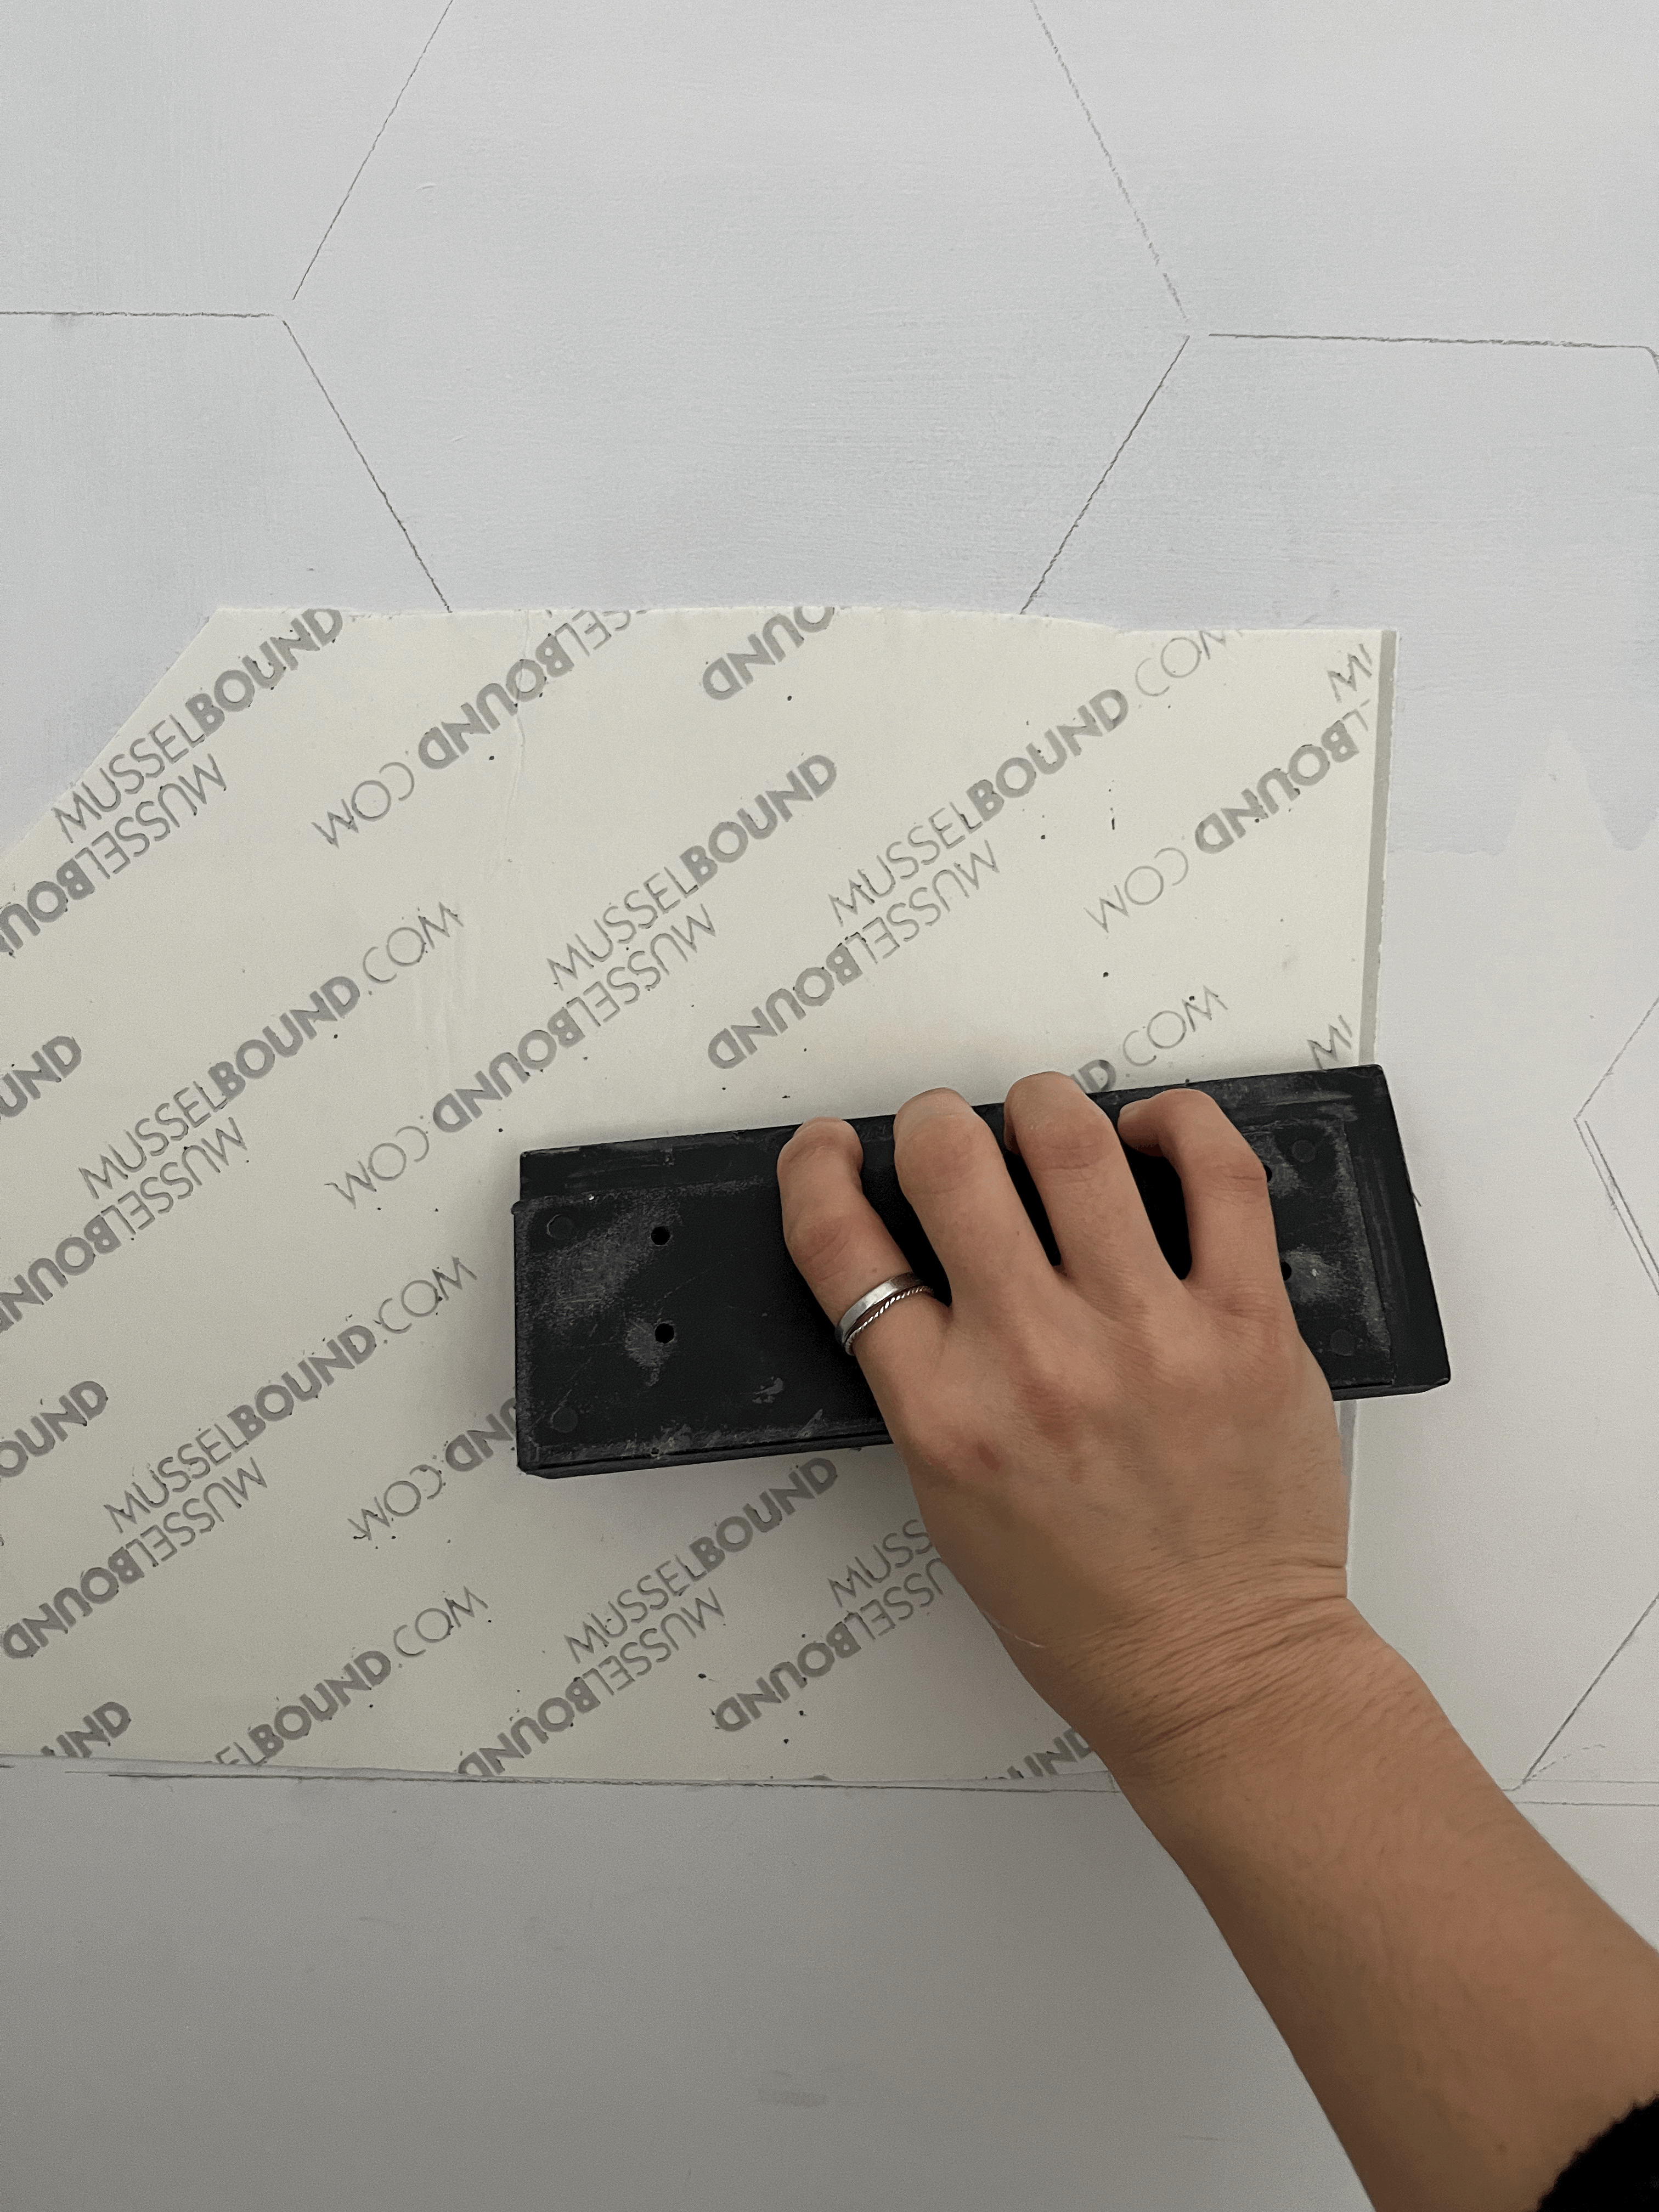
나는 mortar이 아닌, 머셀 바운드의 매트 제품을 사용했다.
부엌 타일도 모두 머셀 바운드 타일 매트를 사용했는데, 아래 유투브 영상에서 그 과정을 확인할 수 있다.
I used the Musselbound tile mat to attach the tiles on the wall instead of a mortar.
I did the same thing for the kitchen, so you can check out that video below if you want to watch the process.
타일을 단면에 붙이는 건 뭐.. 식은 죽 먹기였다.
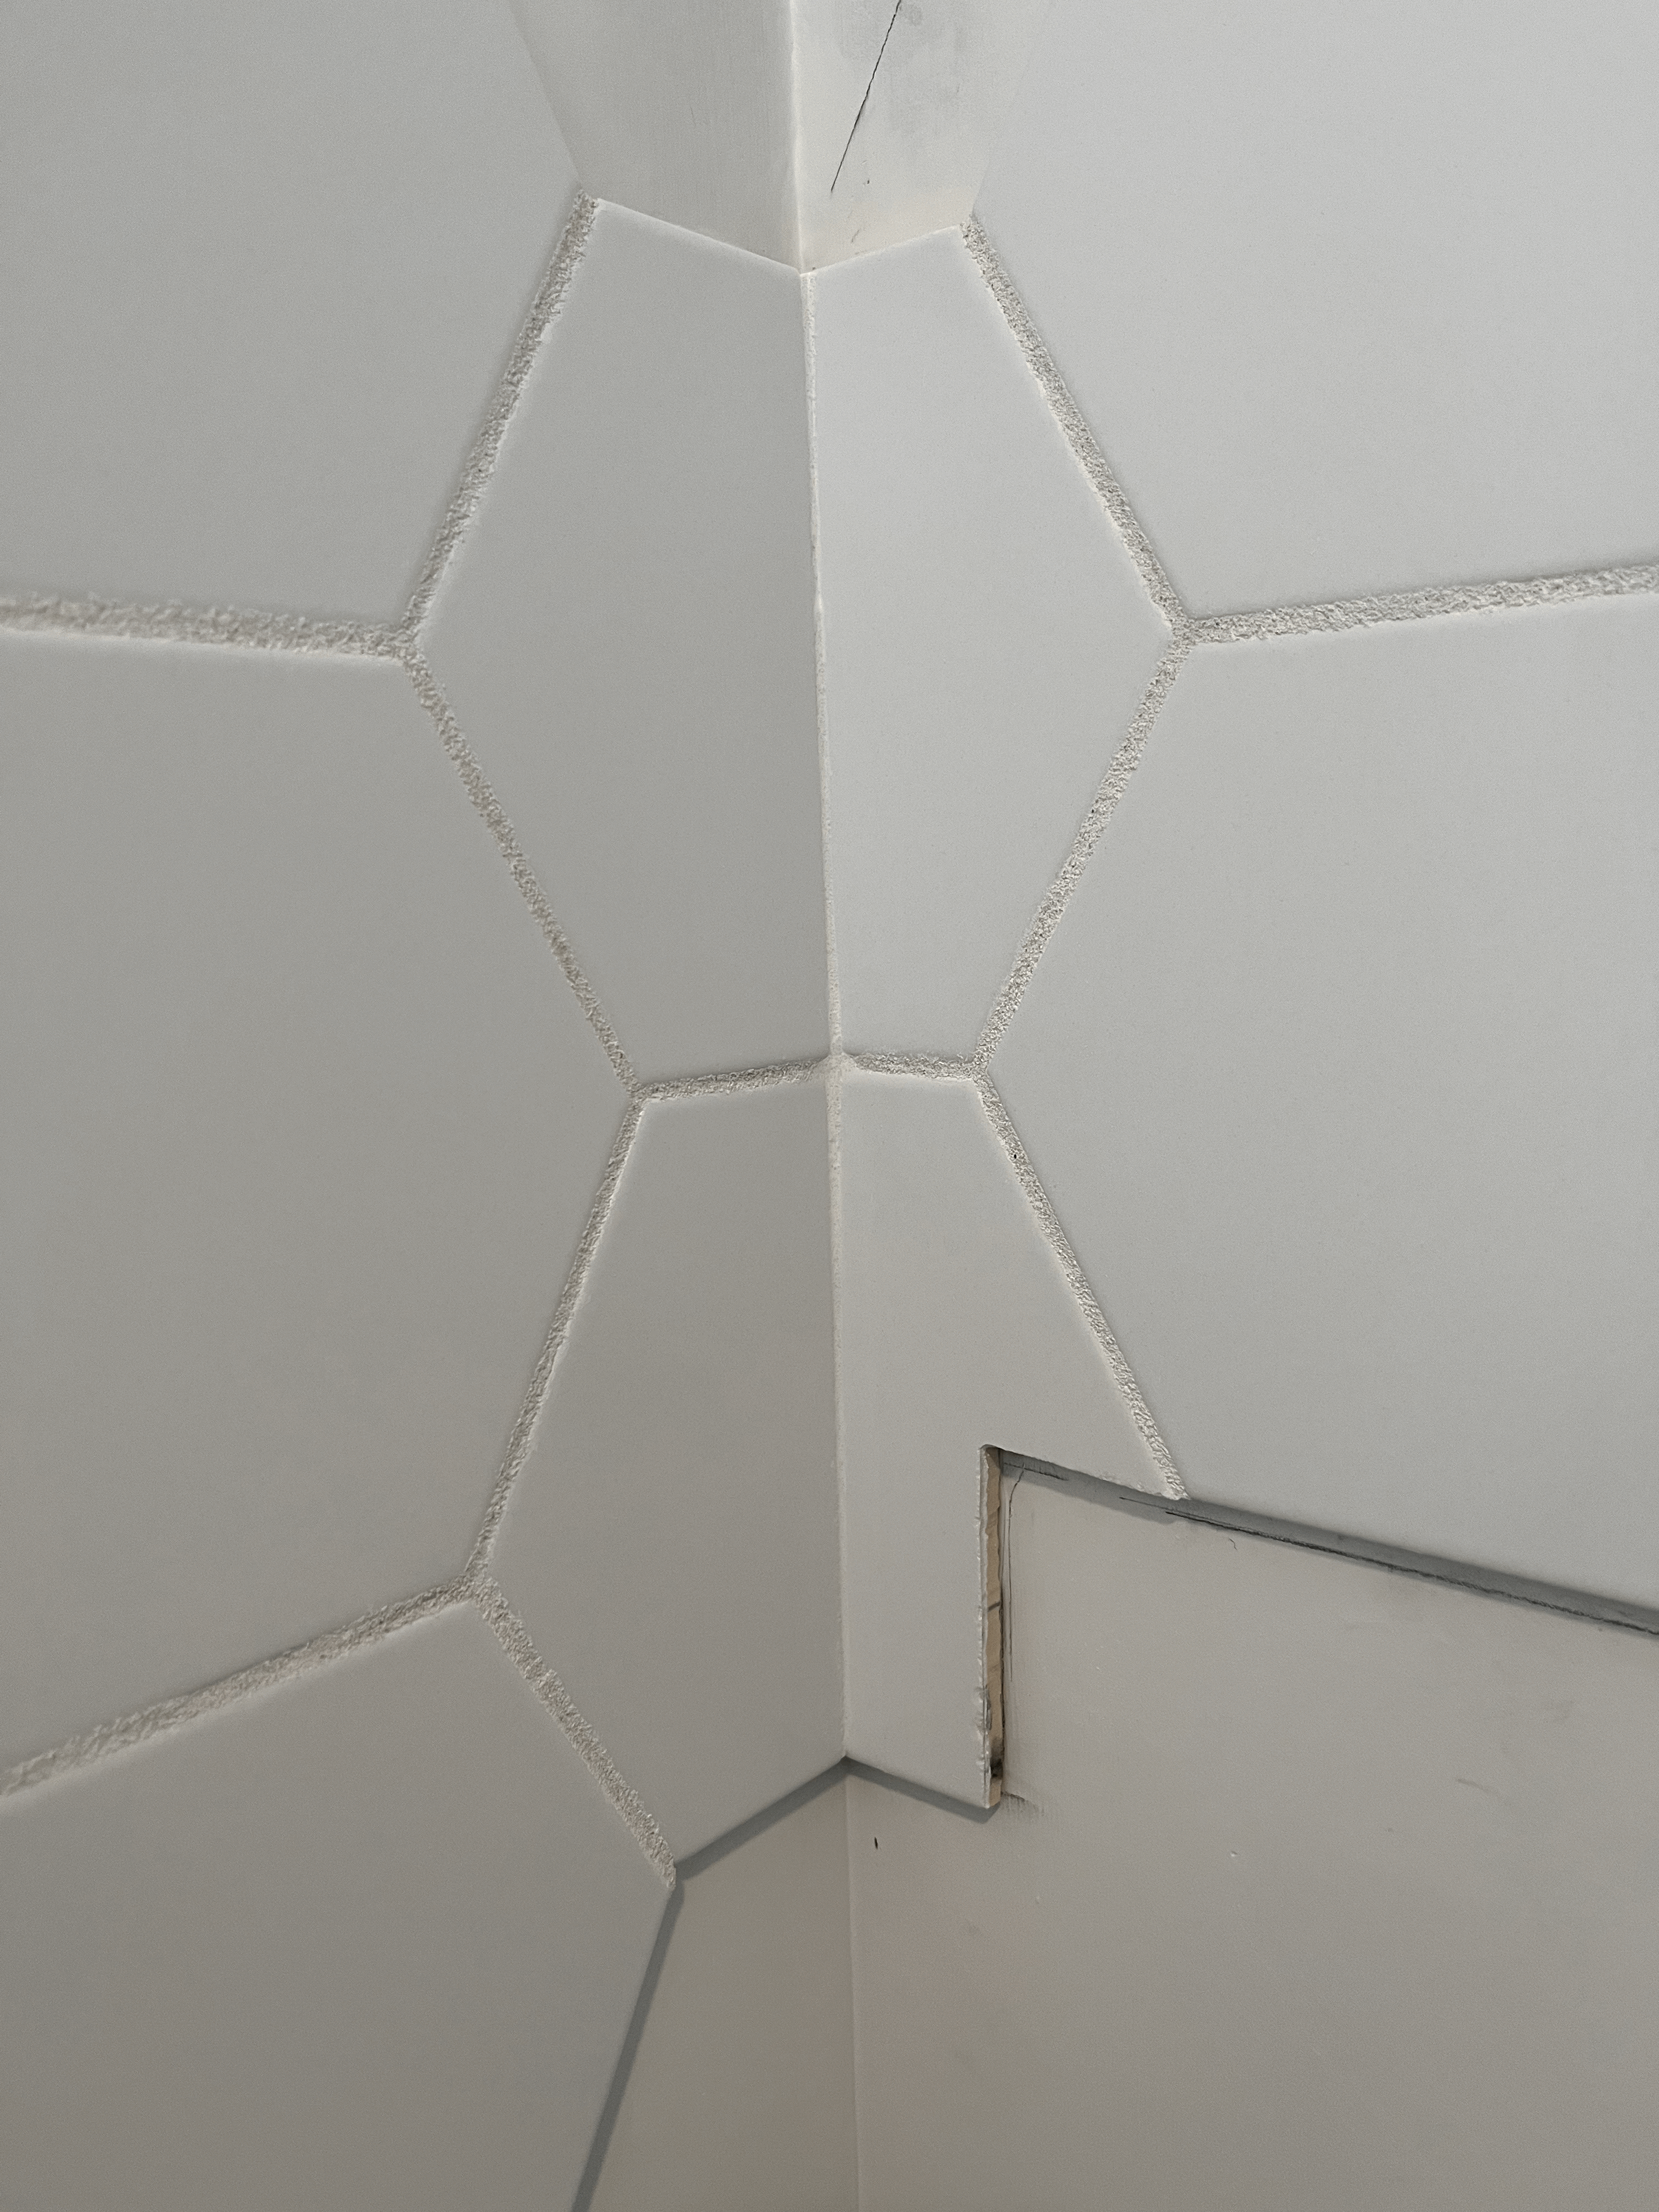
근데 문제는 코너였다.
부엌에서도 타일을 단면으로만 붙였지, 코너까지 연결한 곳은 없었다.
It was a piece of cake to tile on the straight surface with the Musselbound tile mat, but the tricky part was the corner.
I didn't have any experience tiling corners.
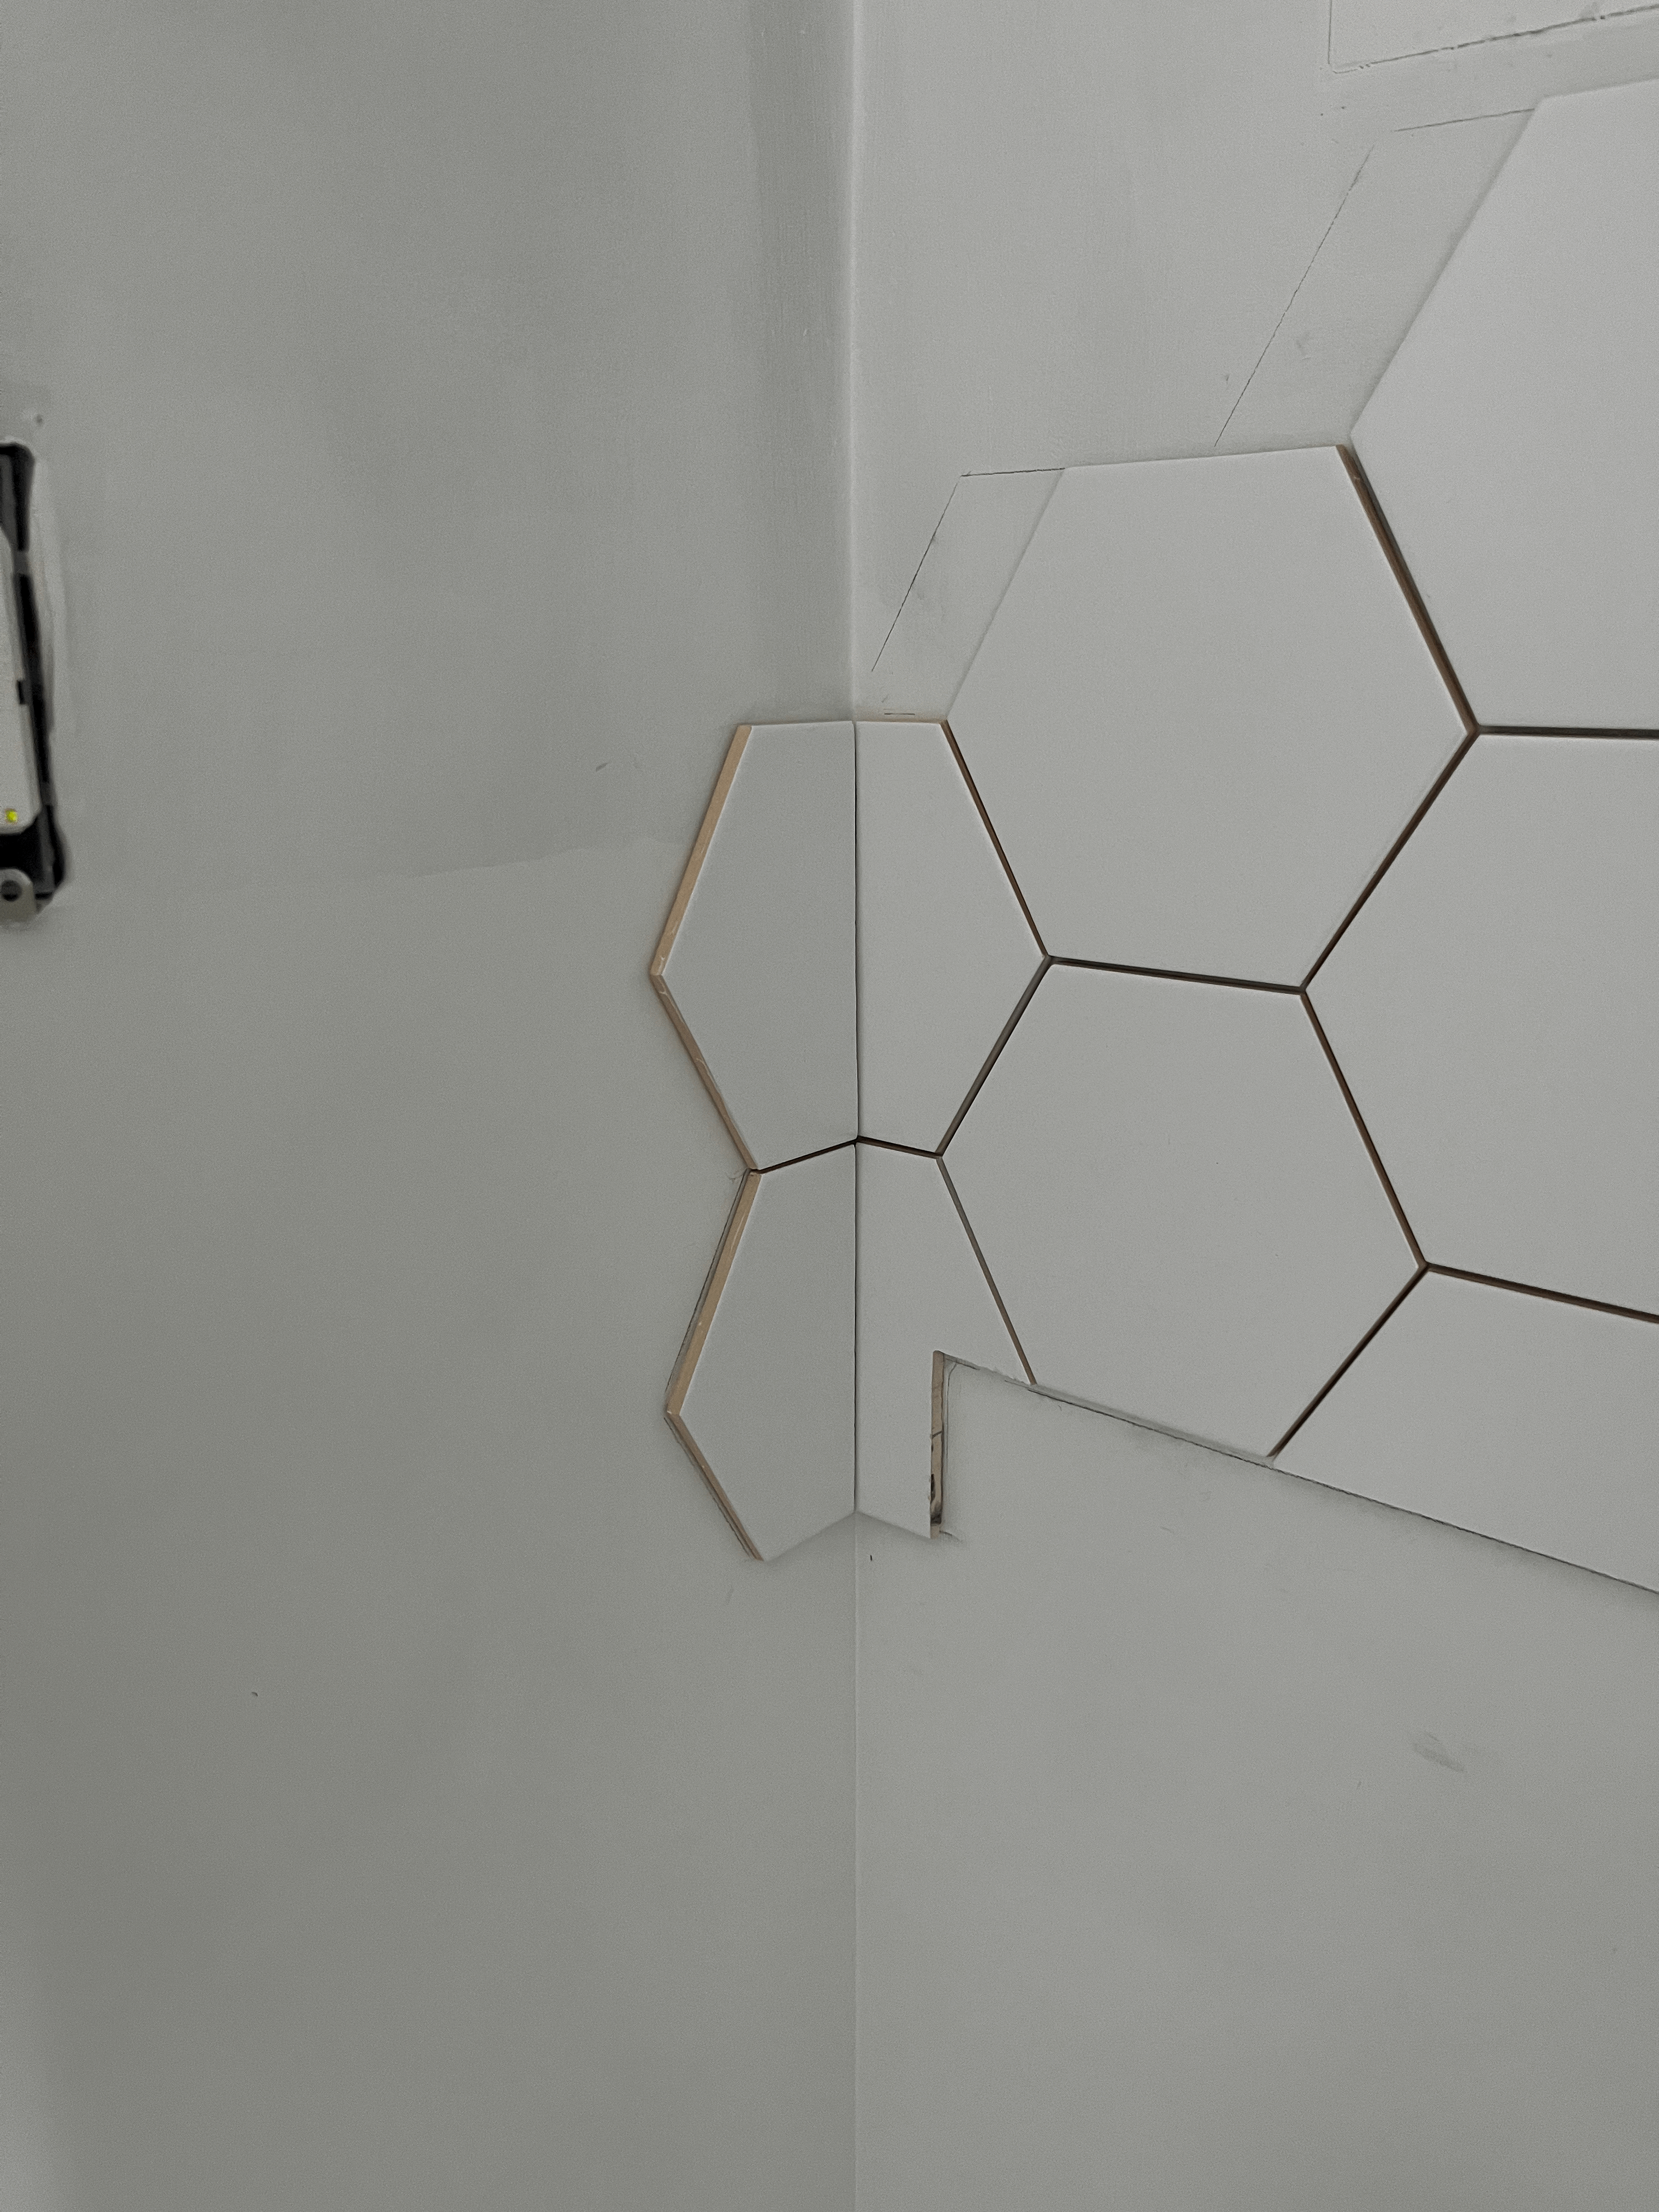
한쪽 타일을 코너에 바짝 붙여서 붙이면 타일과 타일이 만나는 지점이 코너 선과 자연스럽게 연결되지 않아 좀 이상했다.
그래서 최대한 타일과 타일이 만나는 지점이 코너의 선과 일치하도록 붙였다.
그렇게 했더니 연결선도 자연스럽고 괜찮았다.
근데 위에서 보면 코너의 타일과 타일이 만나는 부분의 위쪽에 공간이 보였다.
부엌의 경우, 저런게 보통 캐비넷 바로 아래에서 끝나면 상관이 없는데 나는 위에 아무것도 없기 때문에 그 gap이 너무 잘 보였다.
나중에 얘기하겠지만, 어쩔 수 없이 caulking으로 채워넣어야했다.
When I tried to attach the tile on one side all the way to the corner, the line where the tiles meet didn't match with the corner line.
So I tried to move the line where the tiles meet in the center of the corner line.
Then it looked much better.
However, I could see the gap between the tiles in the corner. I guess, if it was in the kitchen, It wouldn't matter because tiles usually end at the bottom of the upper cabinet and it's covered.
But in this case, there was not gonna be anything above the corner tile, so I had to cover that gap.
I will mention this part later, but I had to fill the gap with caulk.

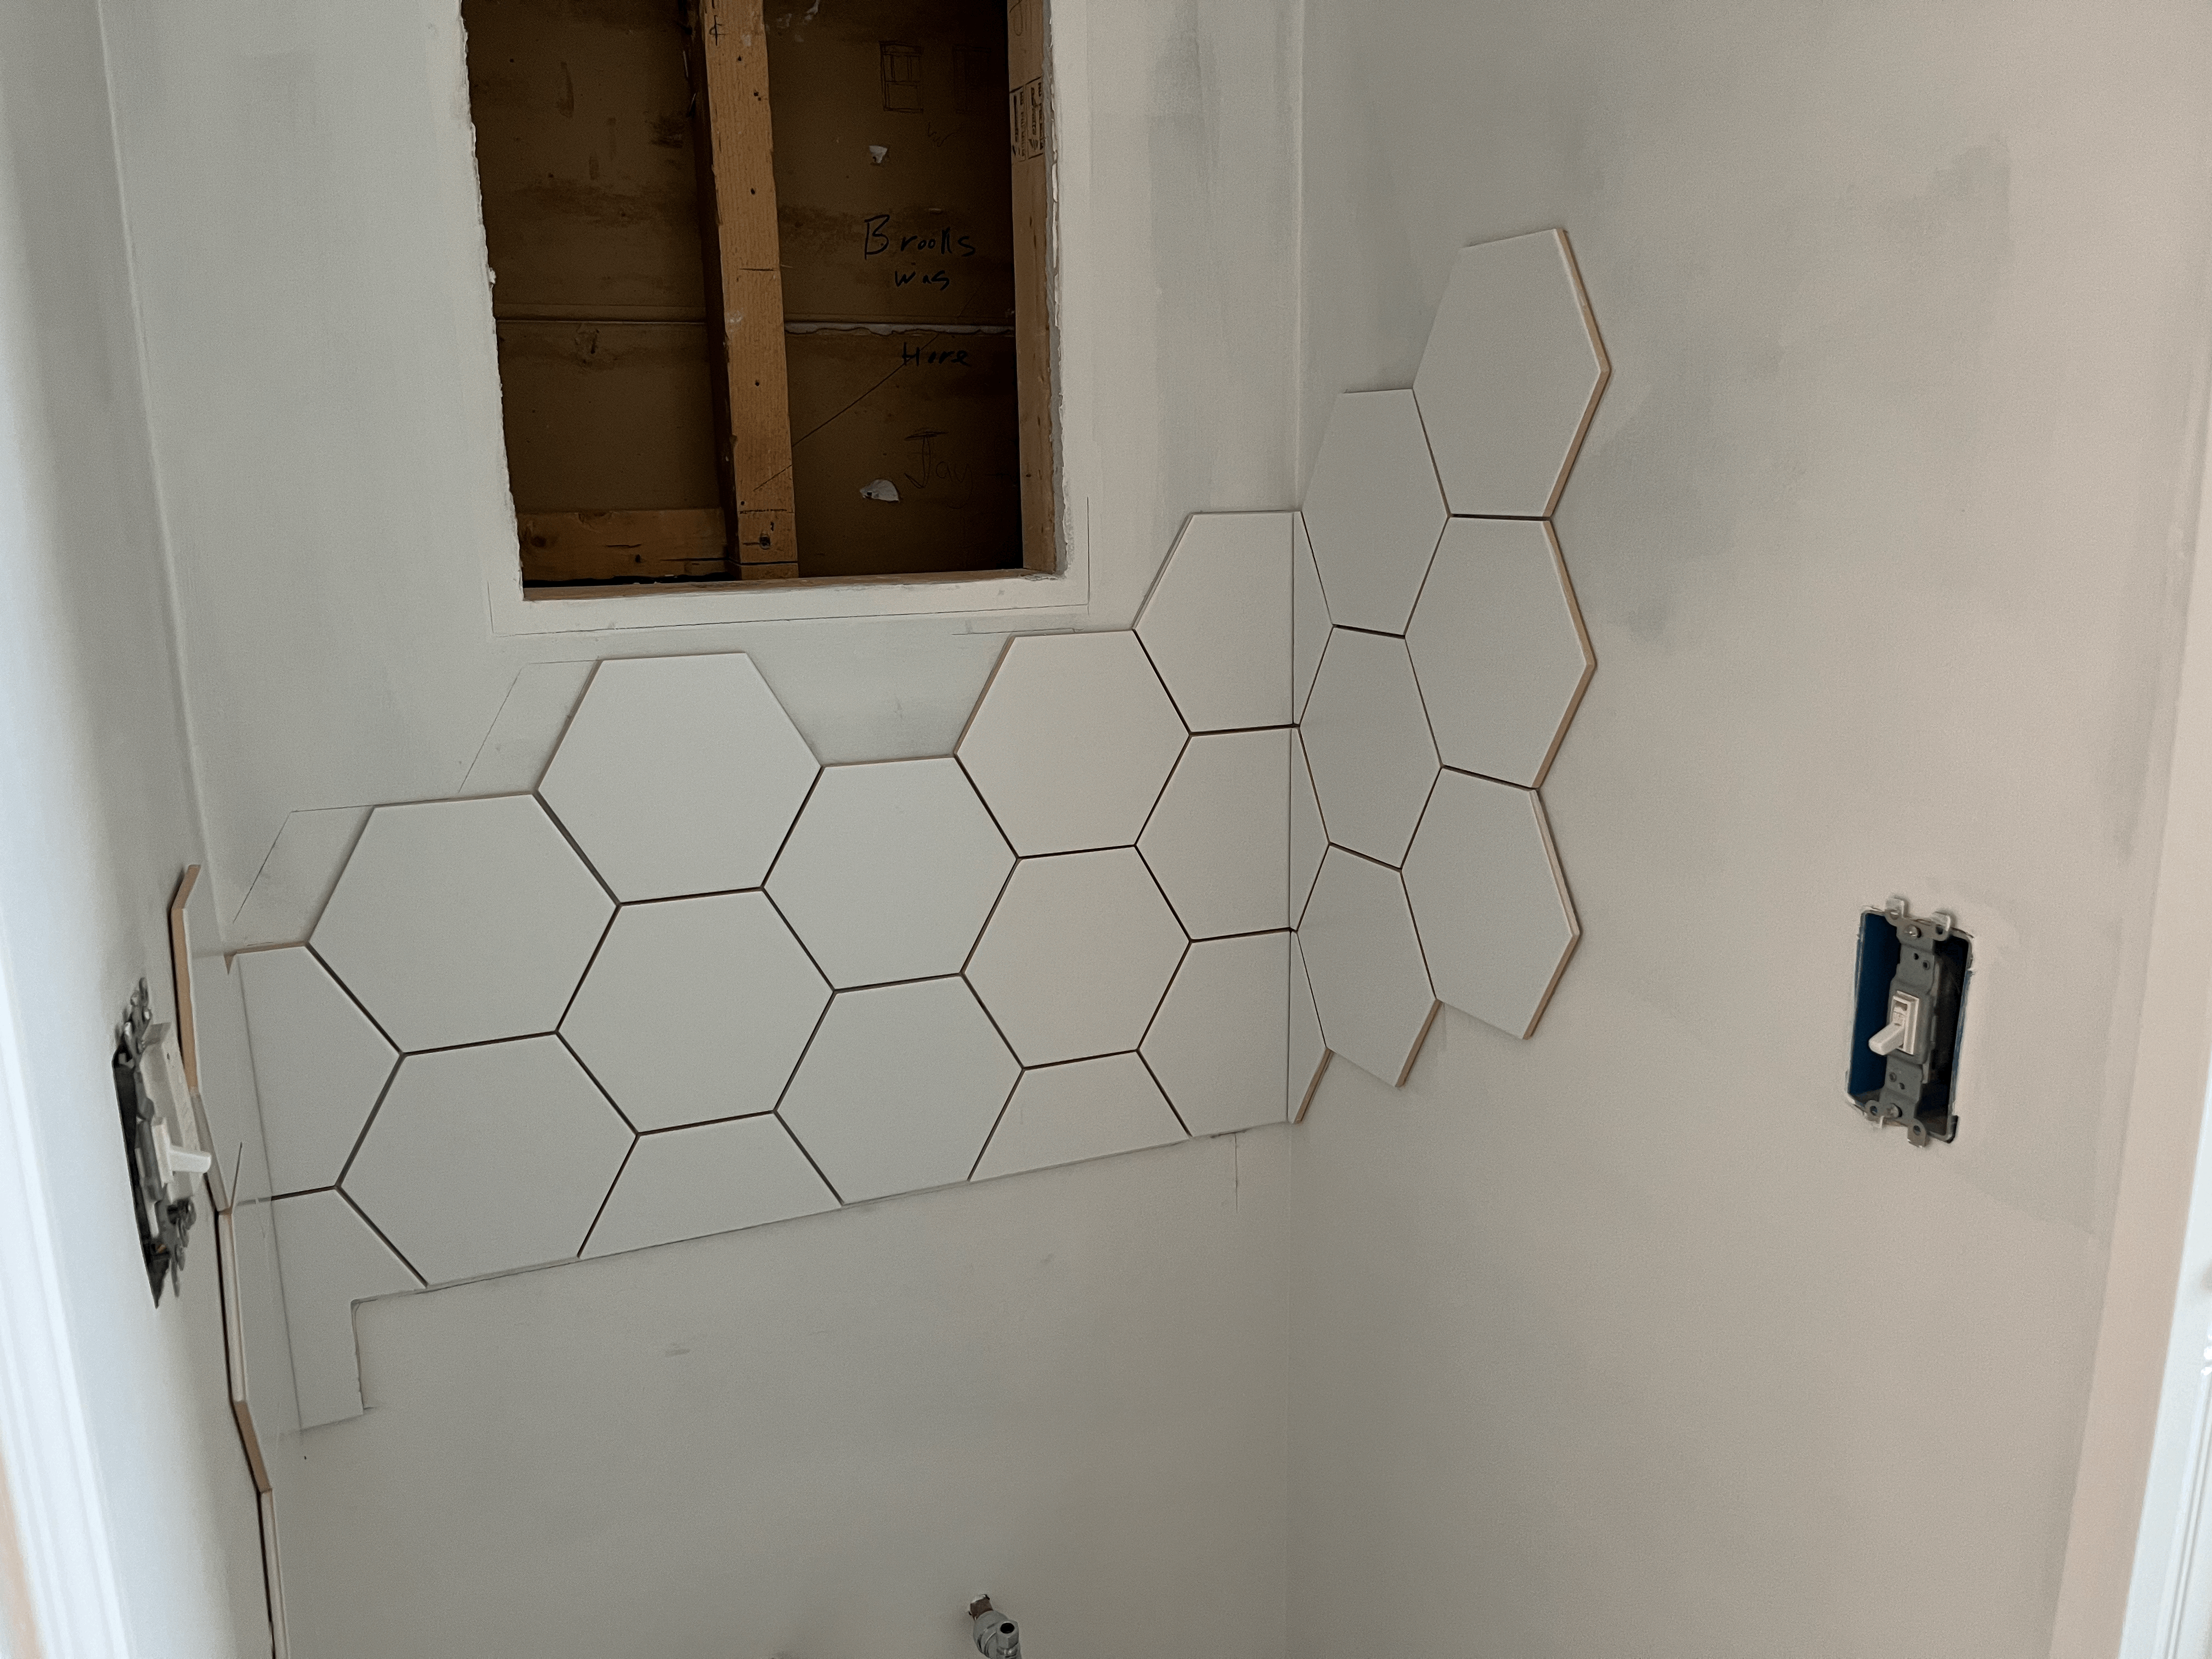
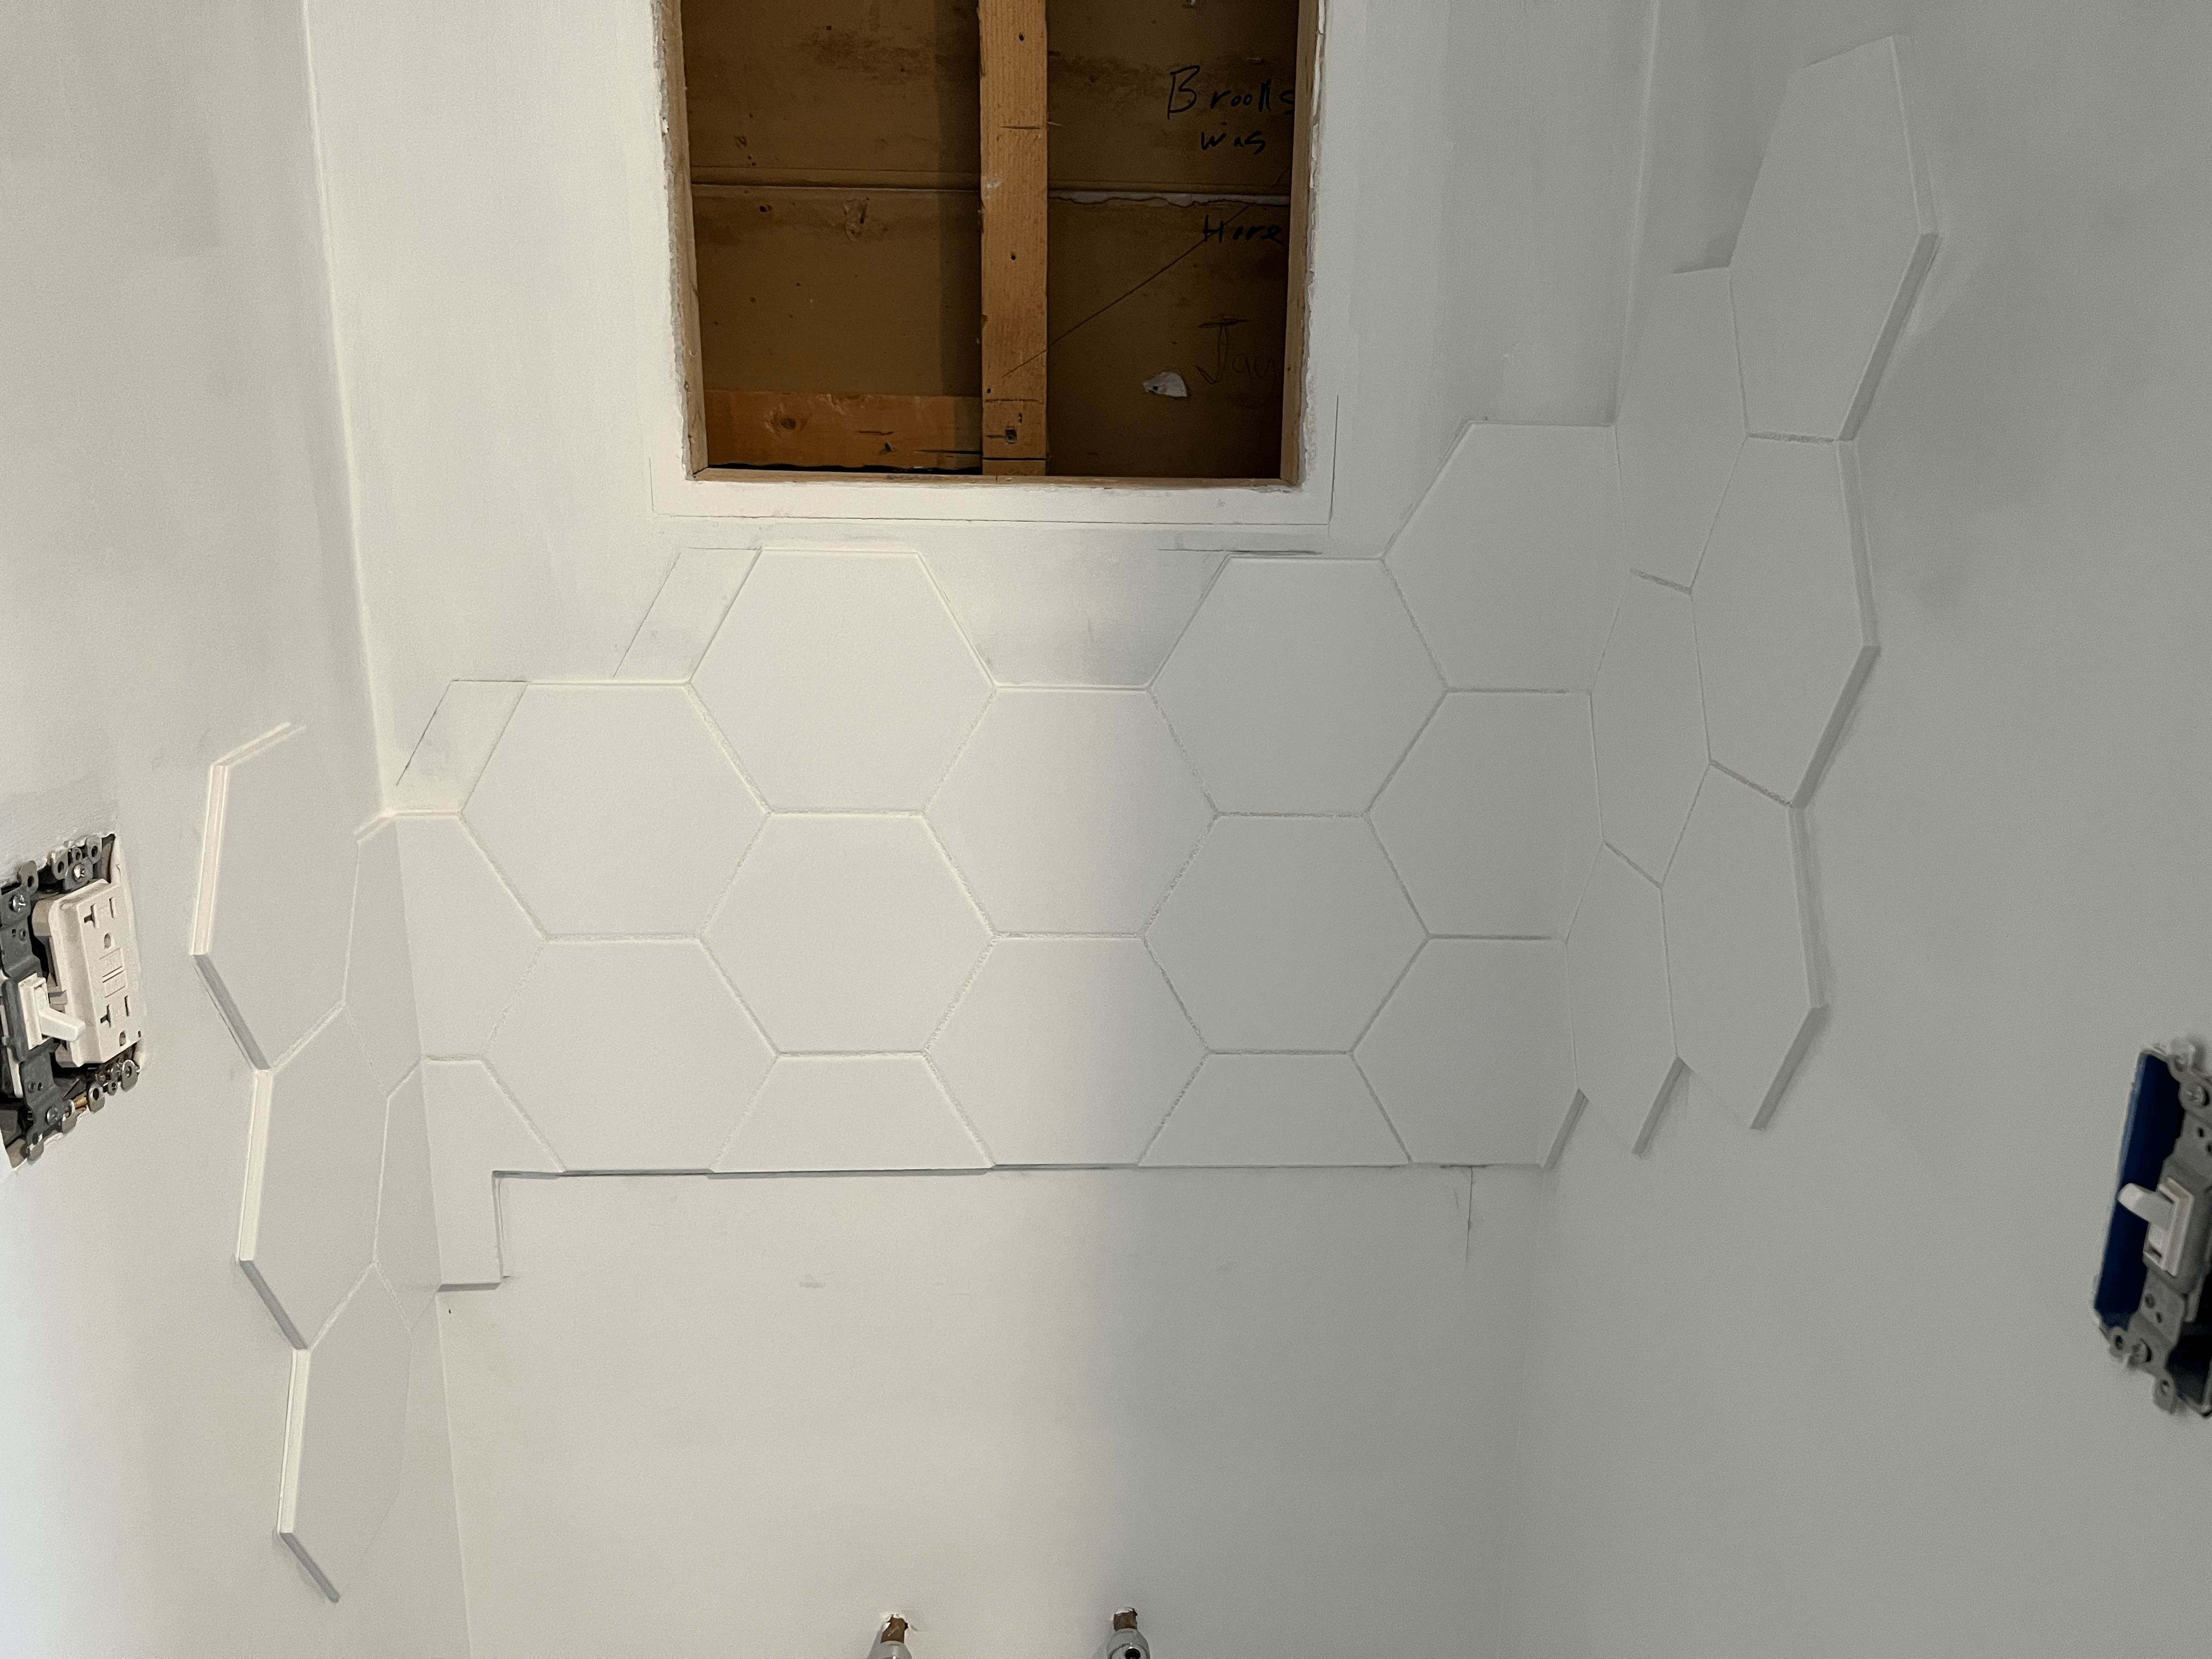
어쨌든 이것이 완성본이다. 줄눈은 하얀색으로 결정했지만, 이렇게 보니 검은색과 같은 어두운 색도 괜찮지 않았을까 싶다.
Anyway this is the final tile design. I chose a white grout, but now that I see the picture, it wouldn't have been bad with a black or dark color grout either.
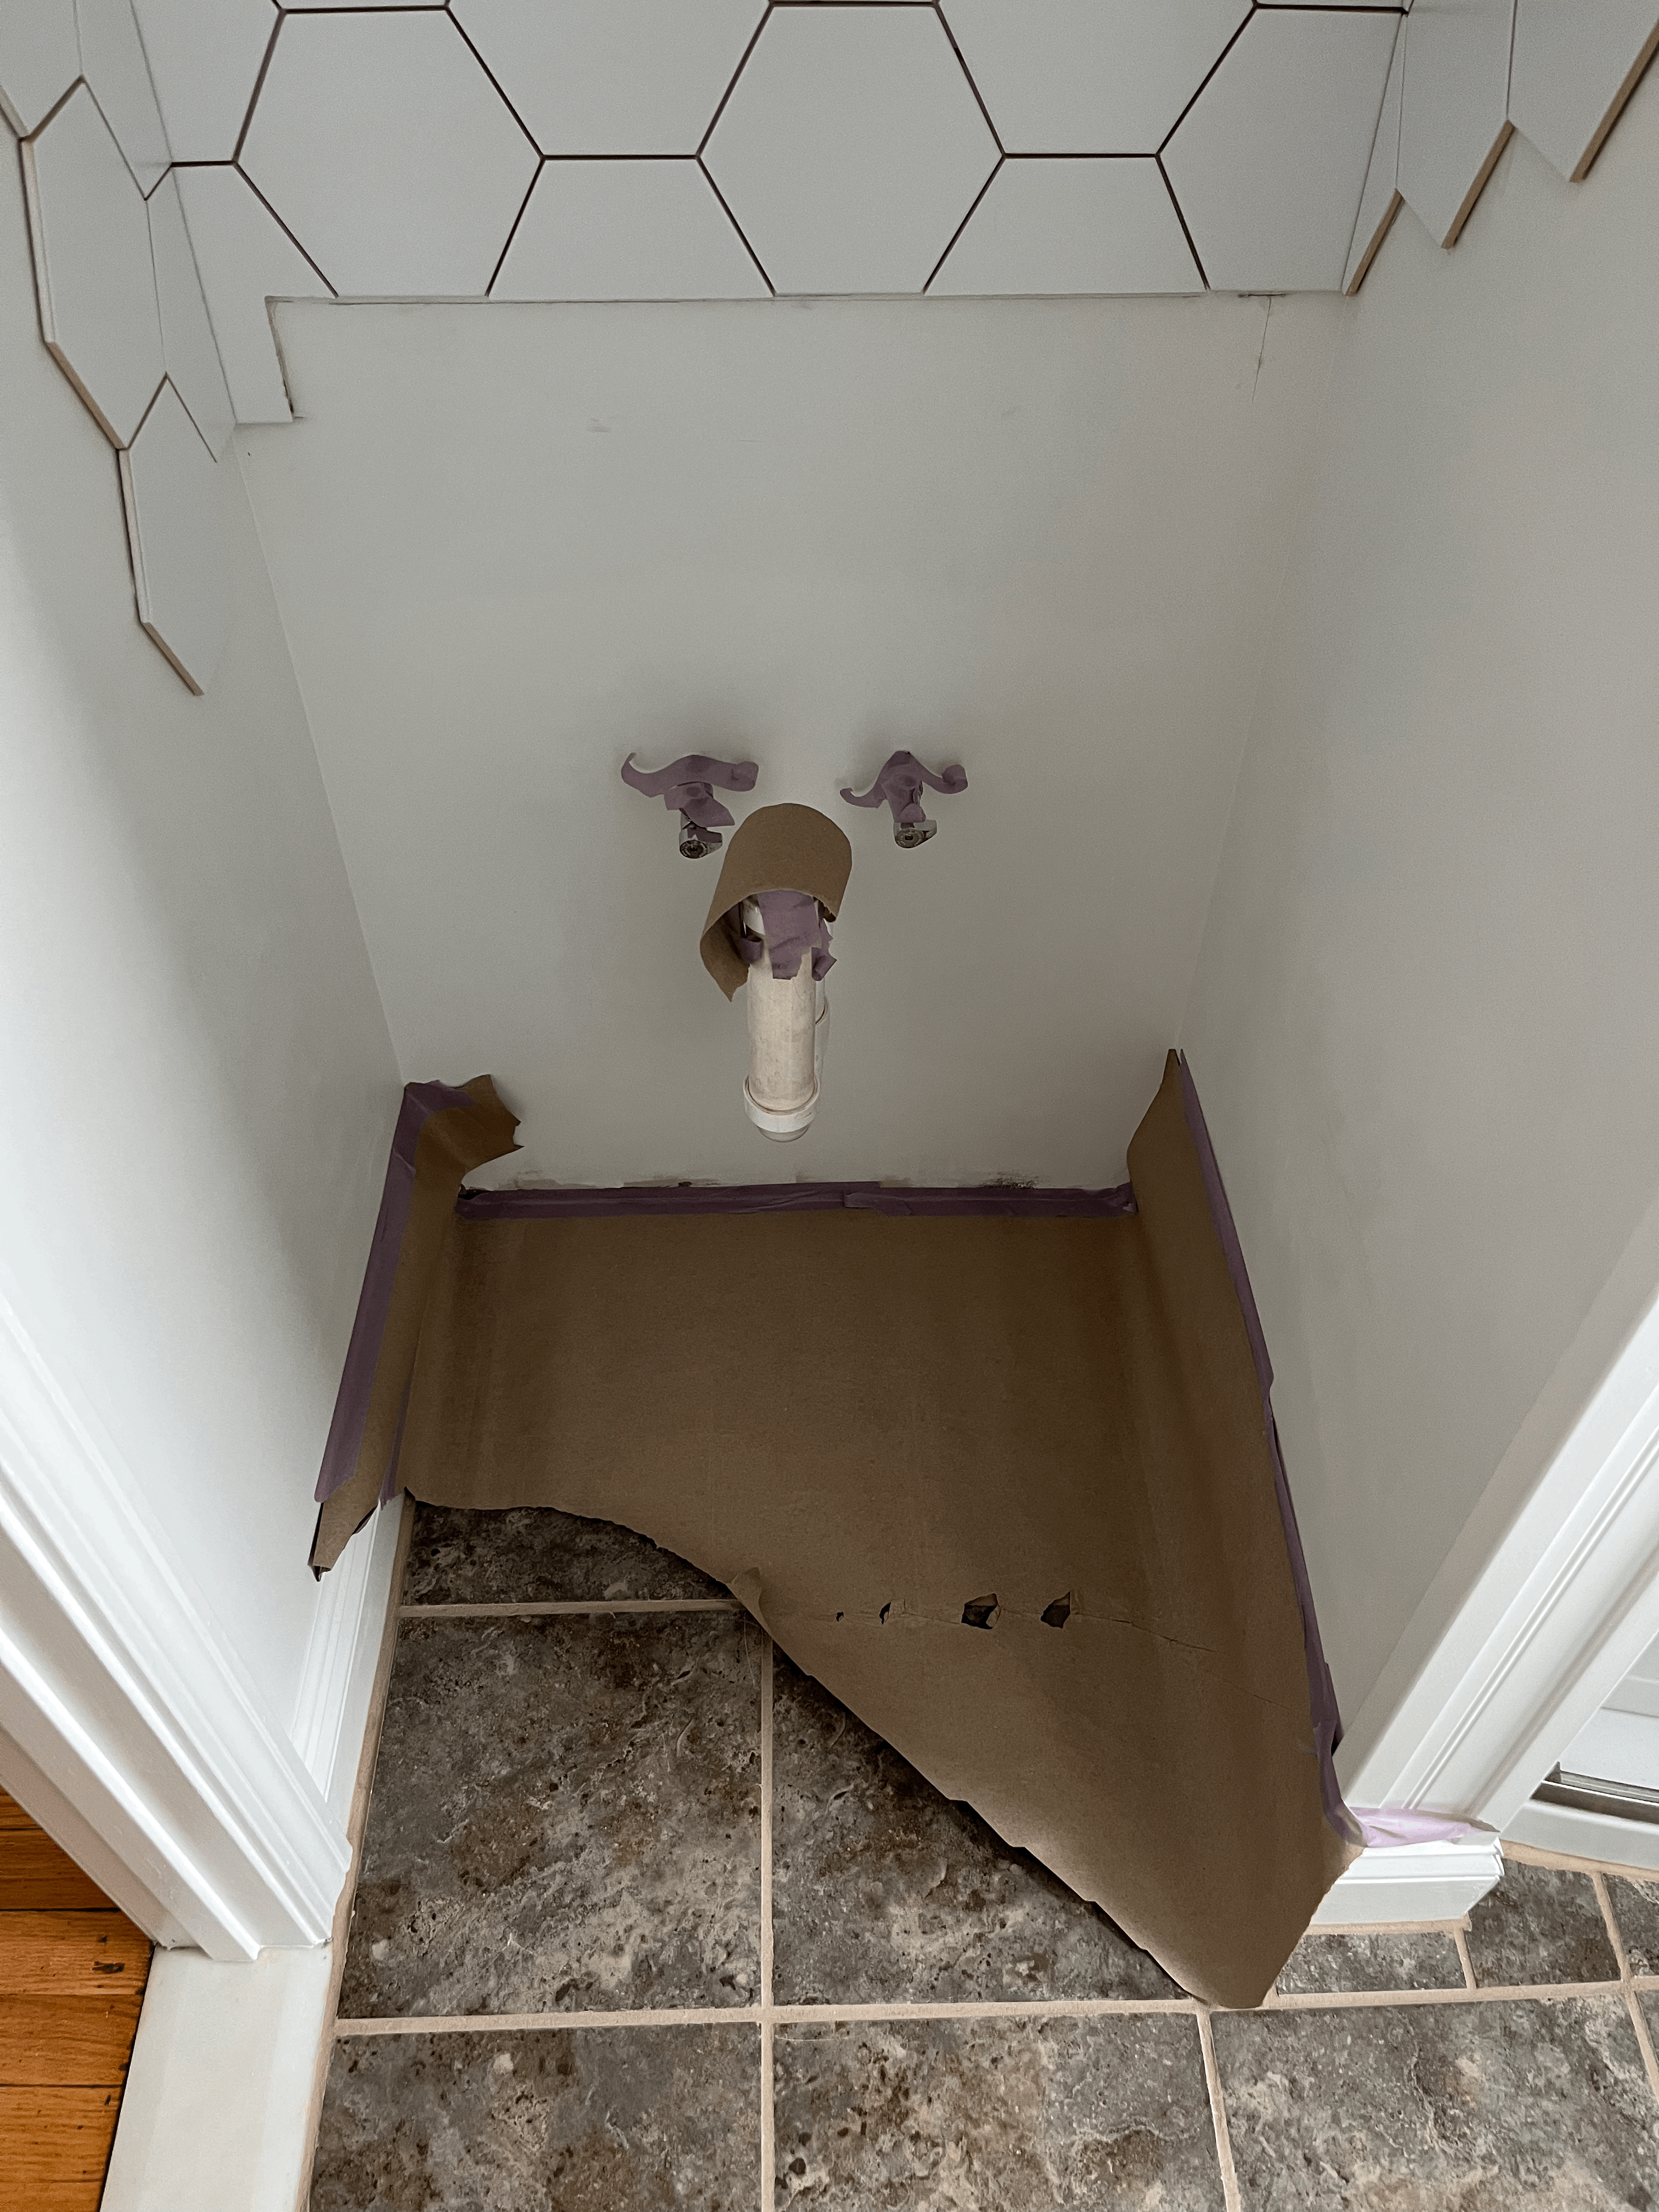
줄눈 작업을 하기 전에 바닥에 브라운 페이퍼도 깔아주고, 수도관과 배수관의 구멍을 막아 줄눈 덩어리가 떨어지는 것을 방지했다.
I placed brown paper on the floor, and taped the shut-off valve and drain pipe hole before grouting.
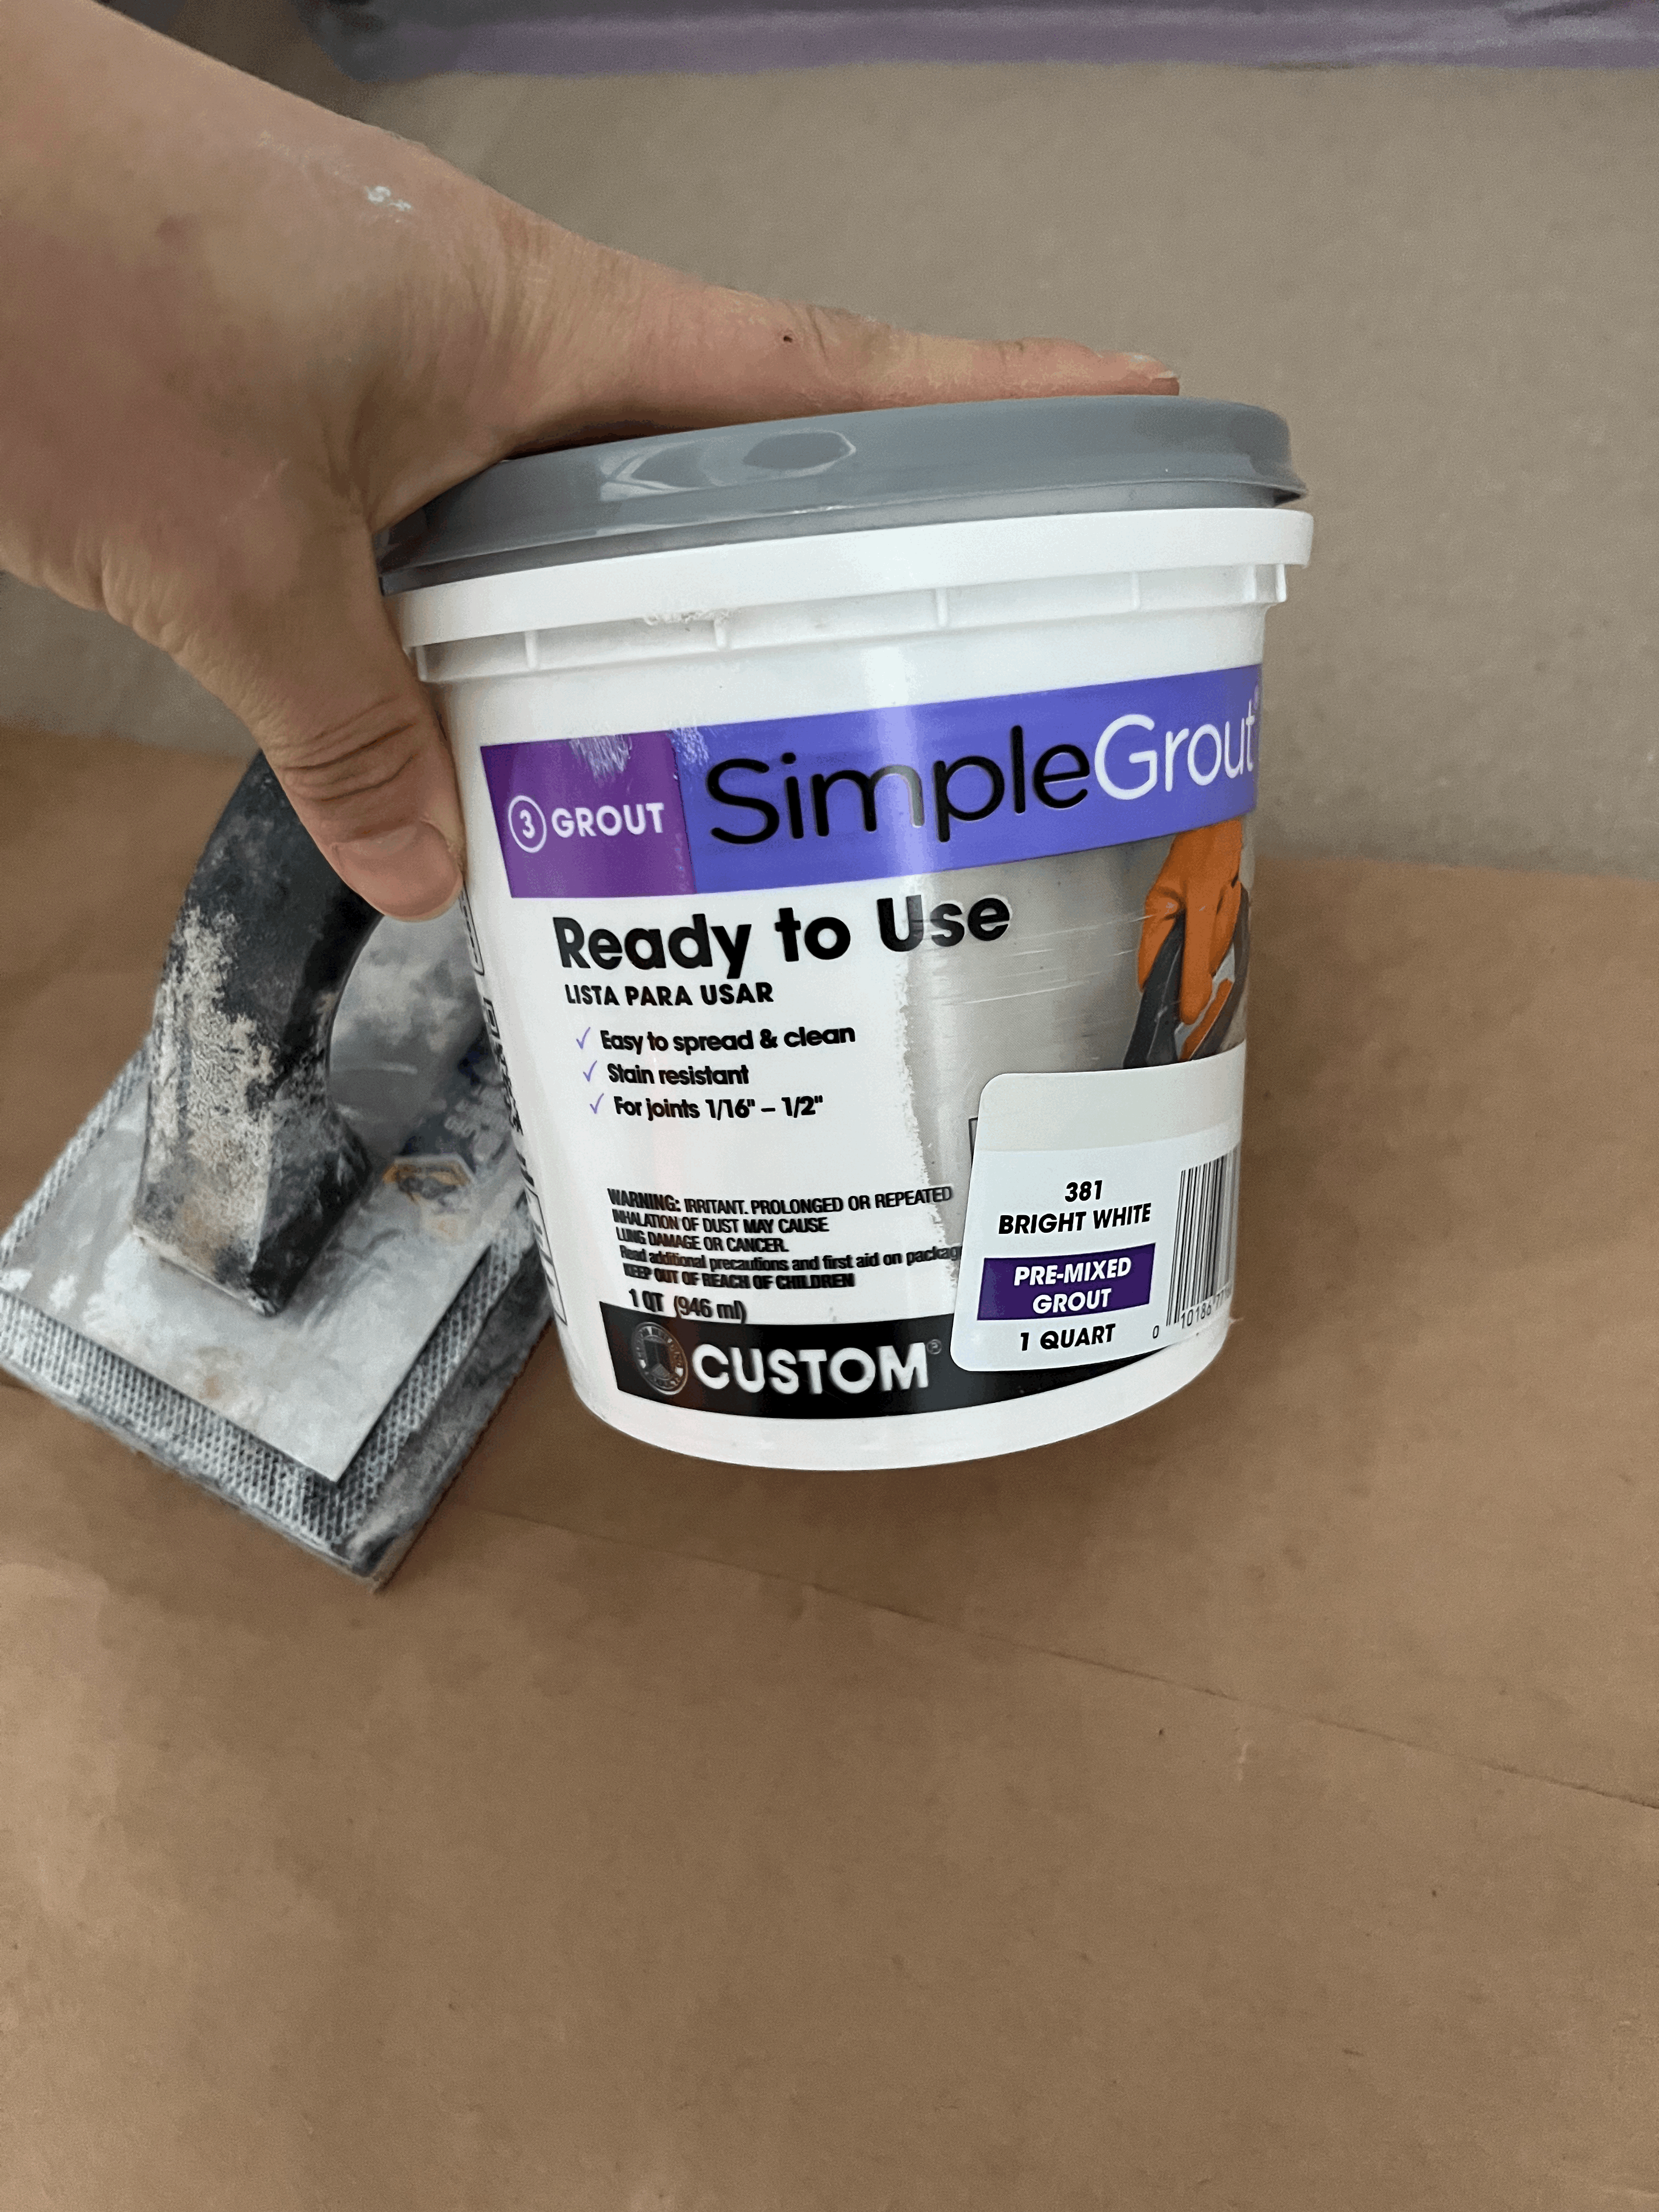

줄눈은 부엌에서 사용하고 남은 제품을 사용했다. 돈도 아낄겸...^^
I used the leftover grout from the kitchen backsplash so I could save some money. :)
코너를 제외한 단면에 grout을 채운 사진이다.
워낙 작은 범위라 작업이 수월하기도 했고 엄청 빨랐다.
I grouted the whole surface except the corner.

인터넷에 찾아보니, 코너를 grout으로 채우면 나중에 갈라진다고 한다. 그래서 코너는 grout 작업을 하면서 일단 남겨뒀다.
From searching online, I firgured out that it might crack if you grout the corner. That's why I left the corner while grouting.
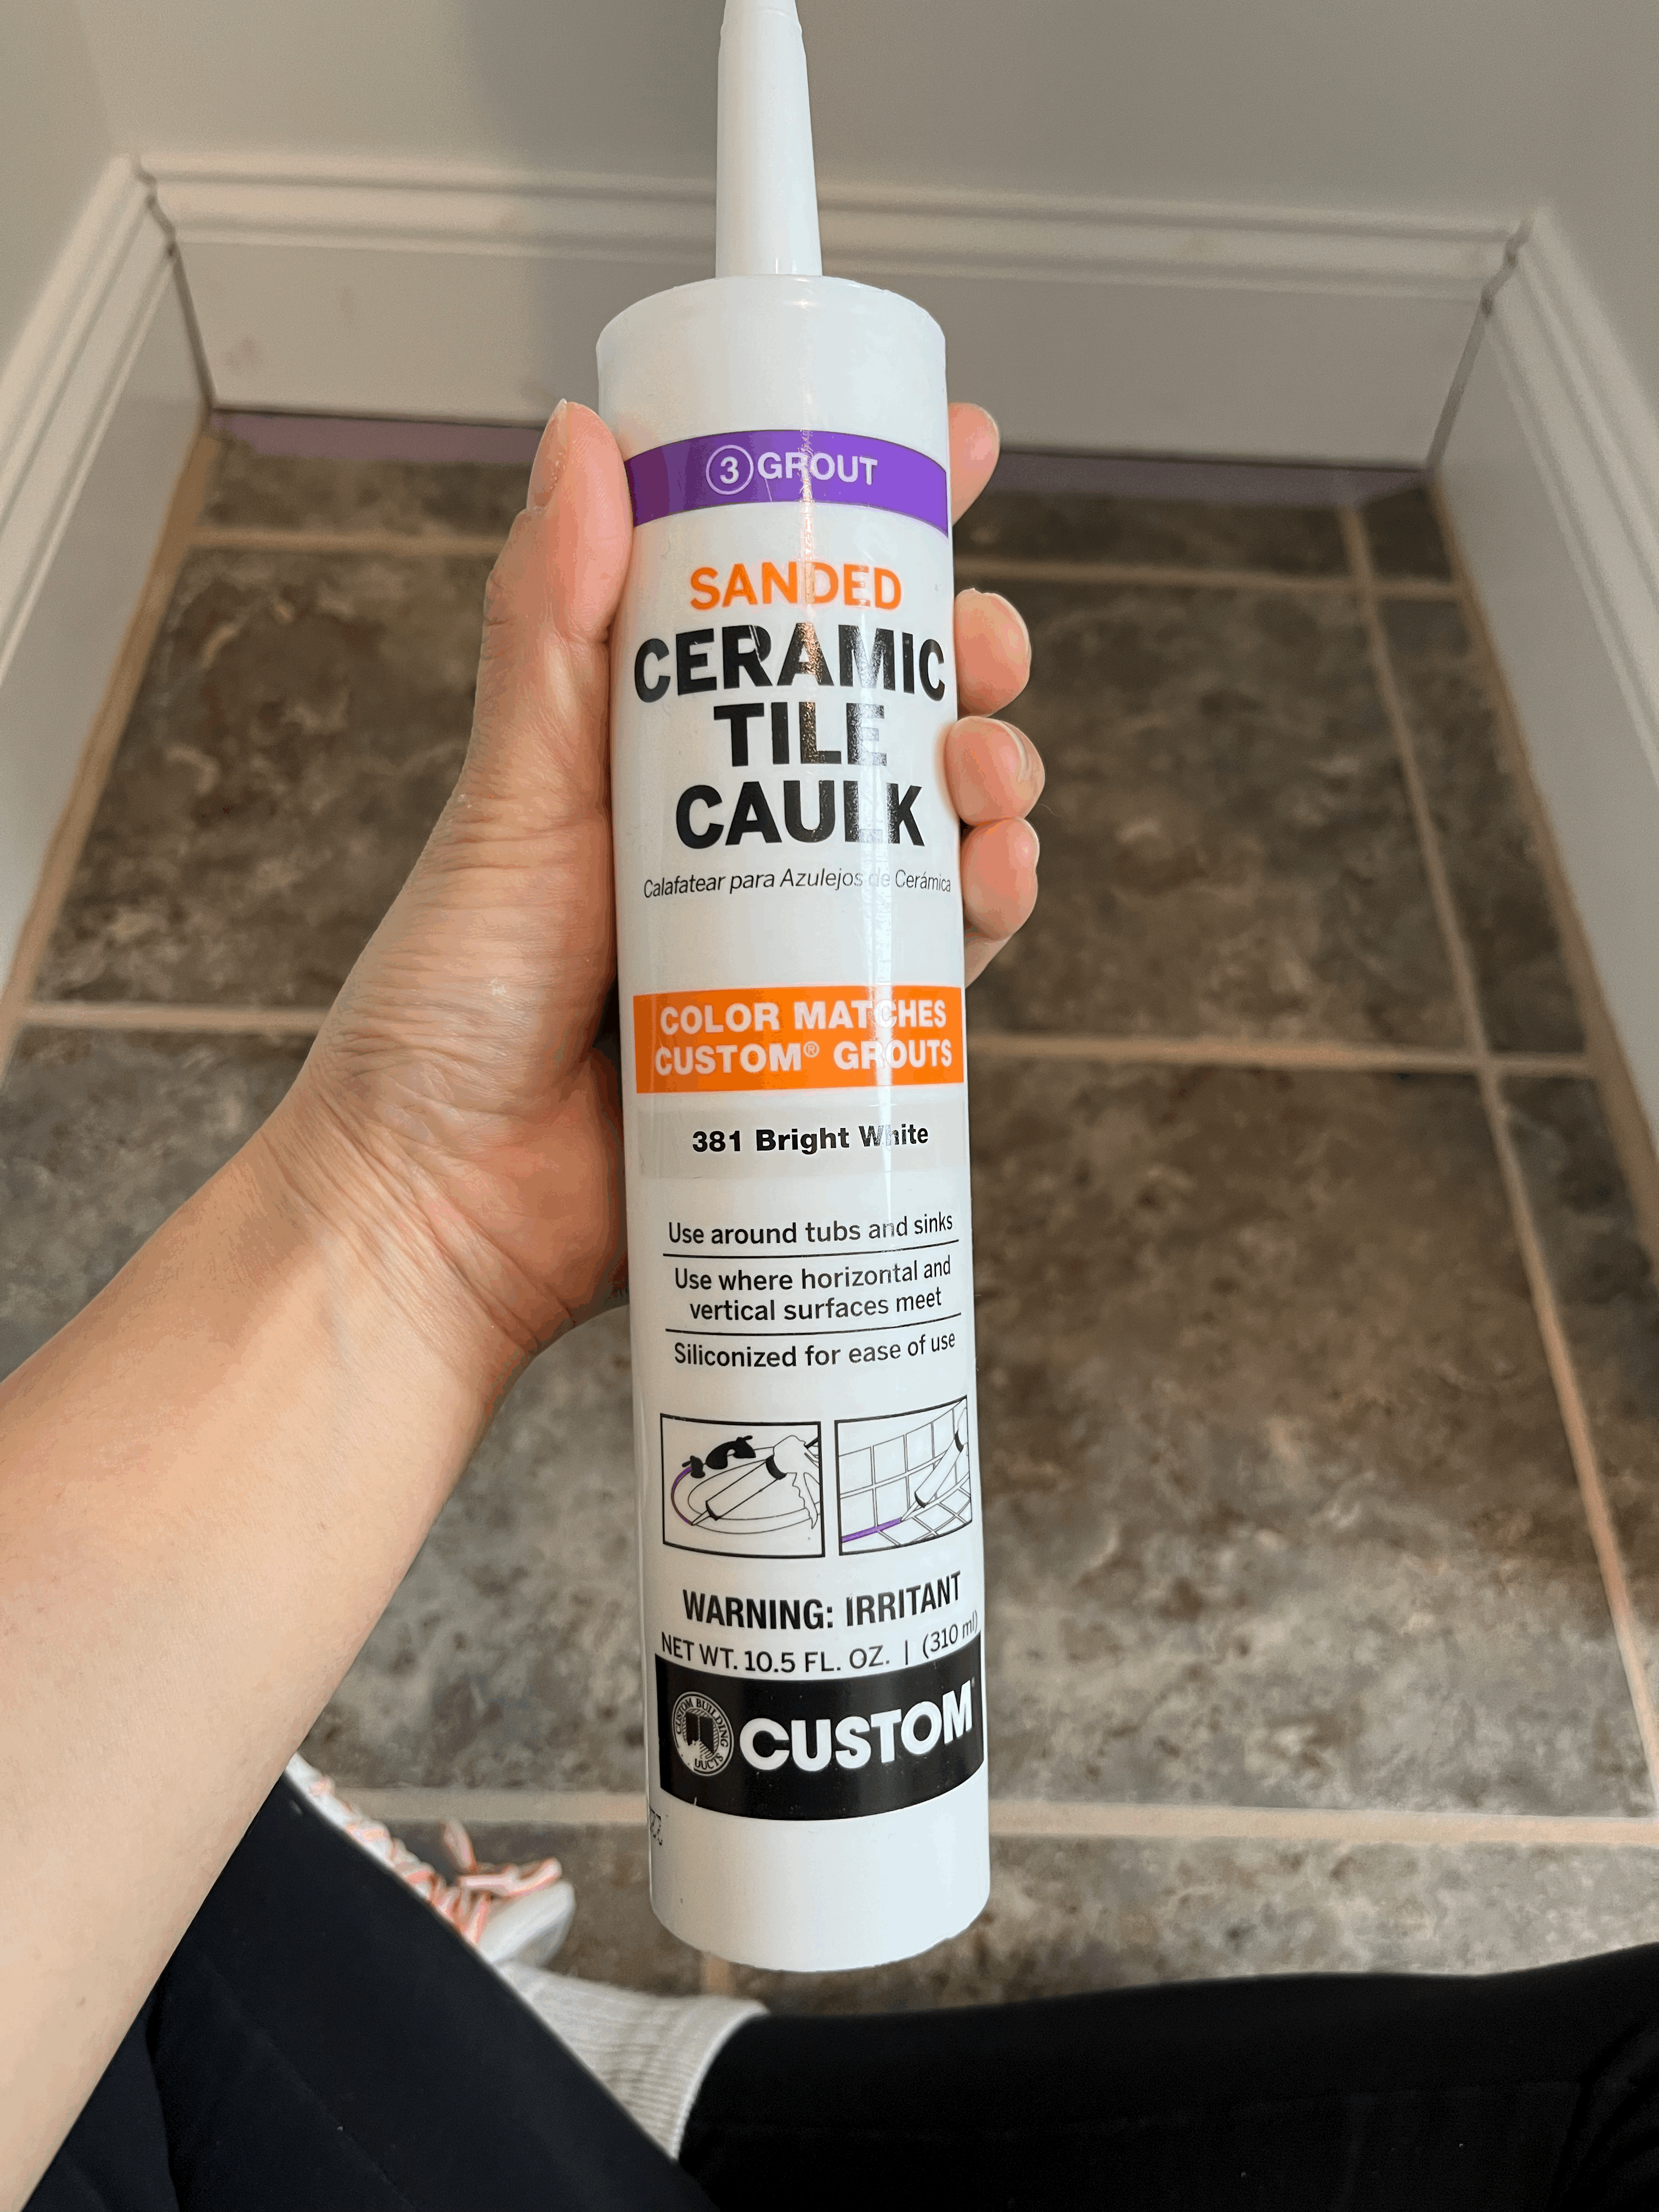
그리고 내가 사용한 grout과 텍스처가 비슷한 caulking 제품이 있어서 그걸로 사용했다. 비눗물을 사용하니 발림성도 좋았다.
So, for the corner, I used a sanded ceramic tile caulk which the texture is similar with the grout I used. It was easy to smooth out with soapy water.

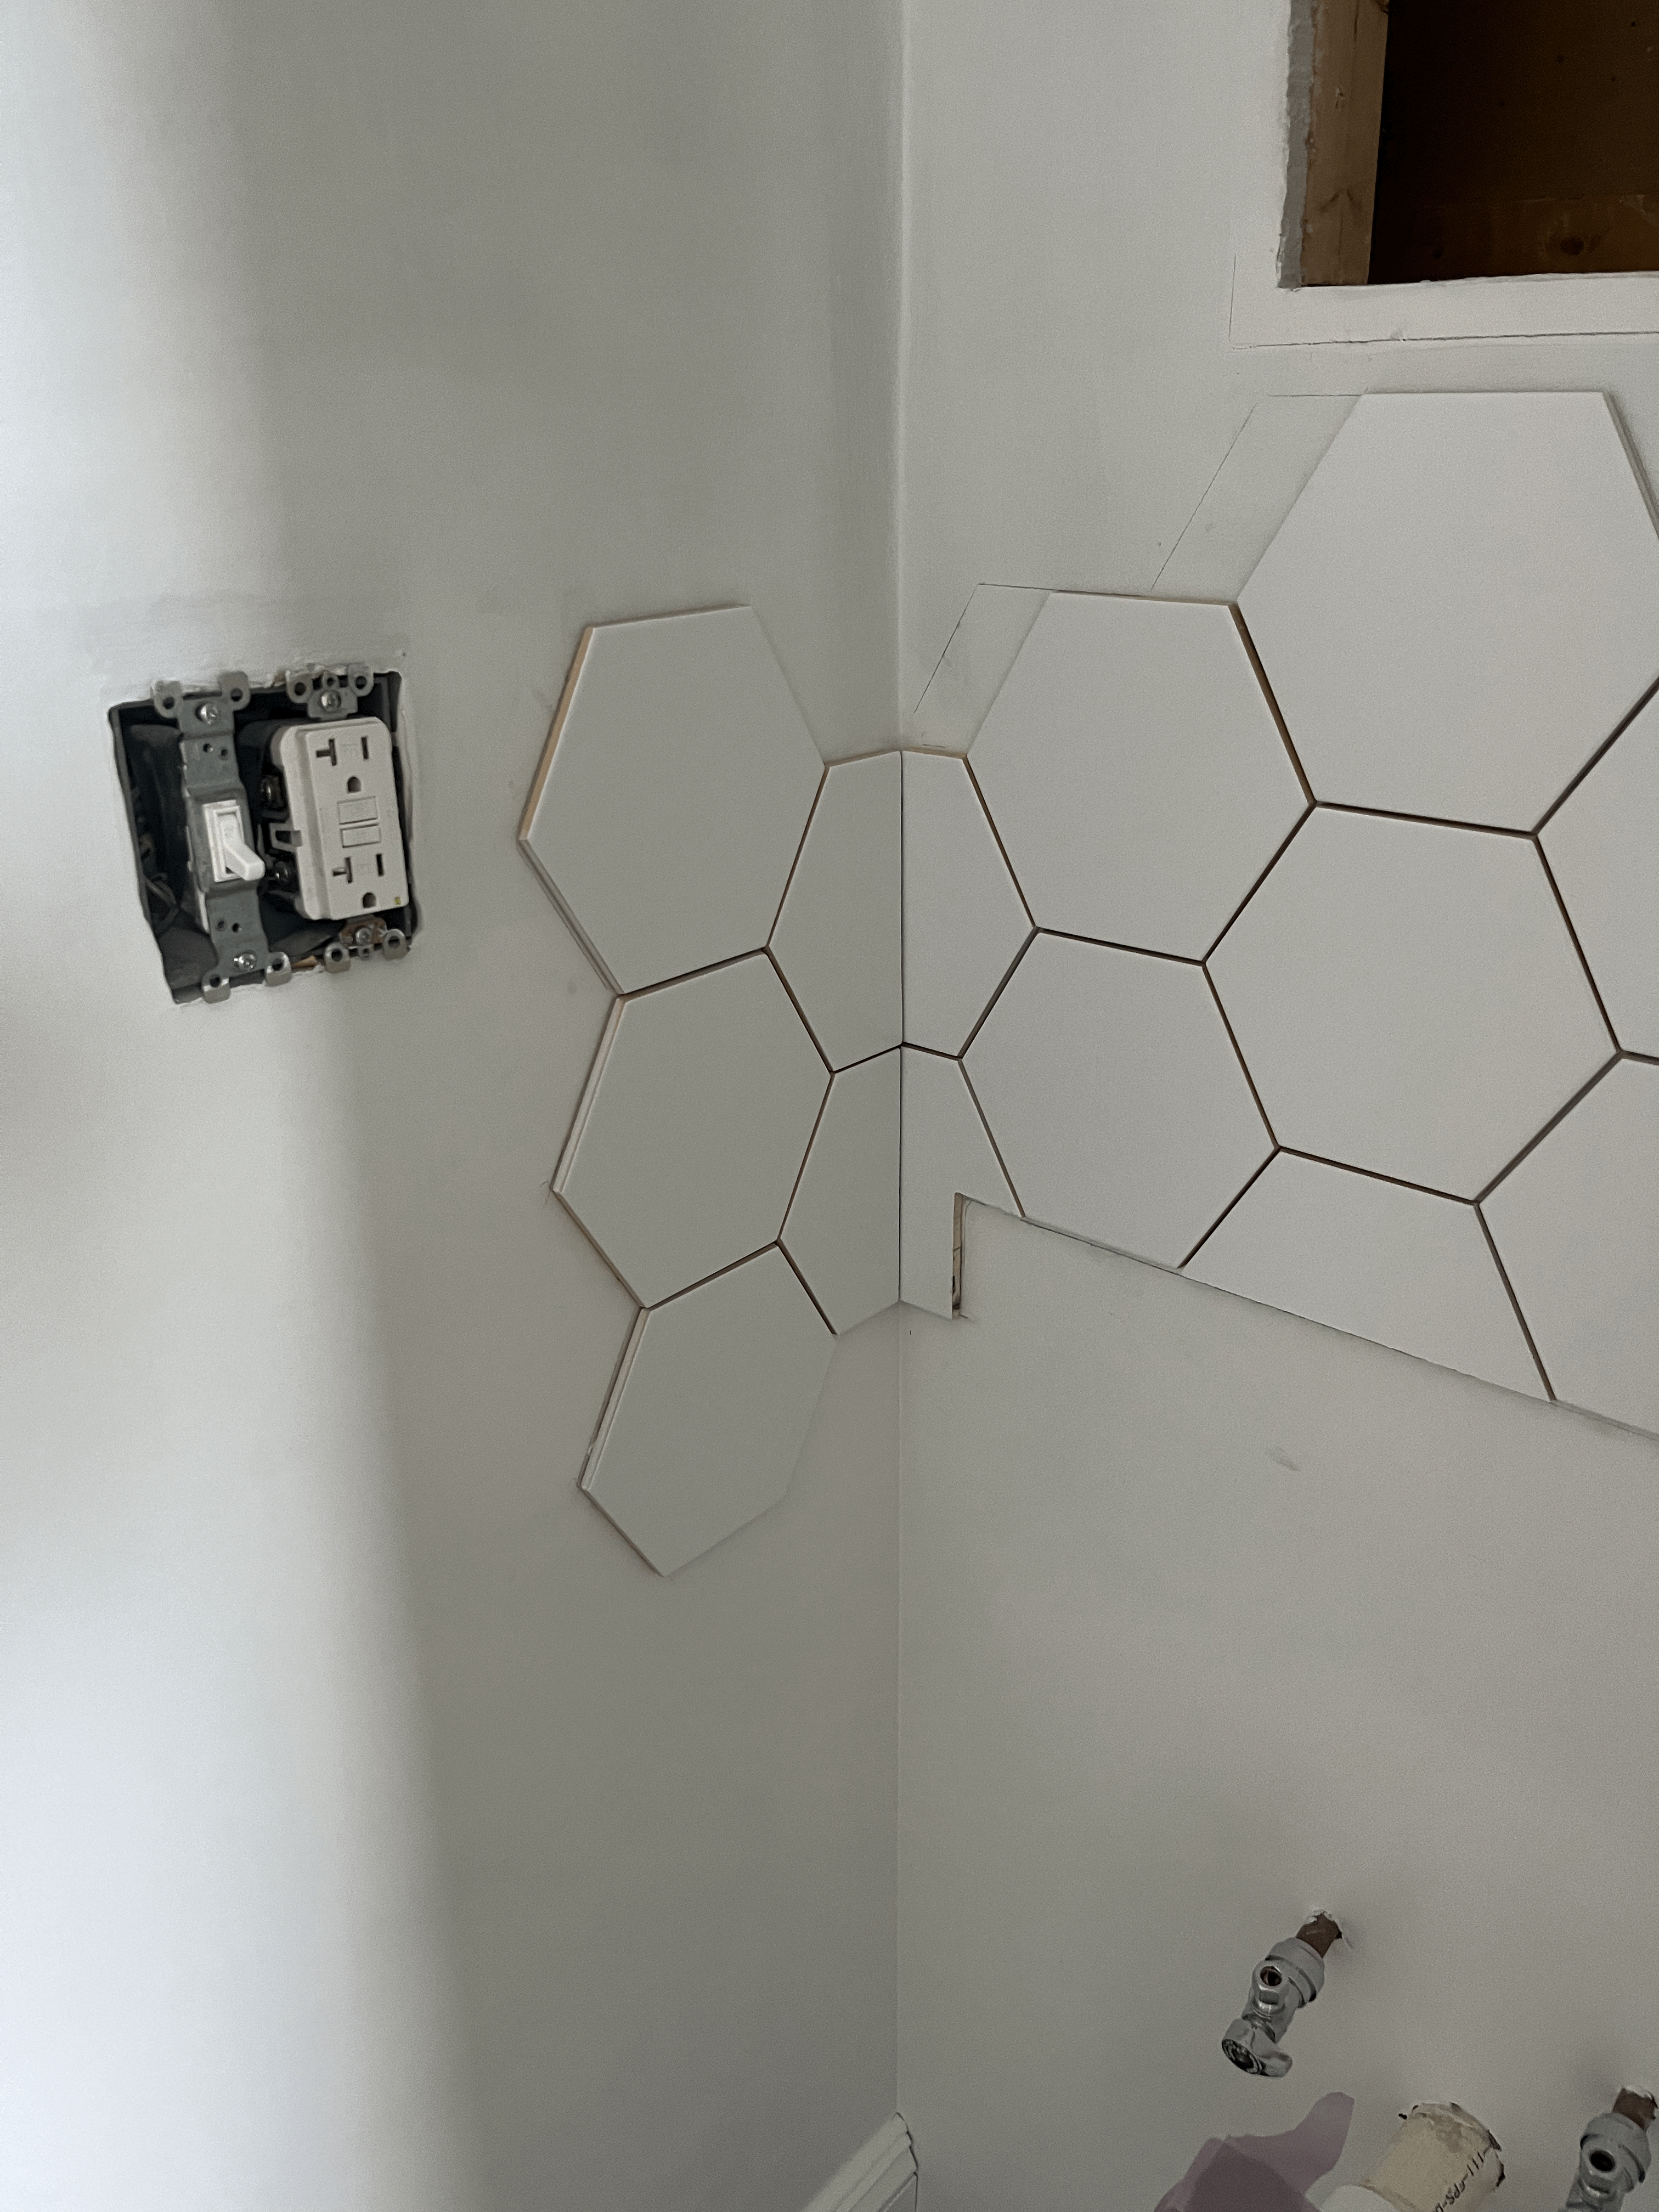
코너까지 채우고 난 모습이다.
This is after I filled the corner.
그리고는 타일 바깥 쪽의 공간을 처리해야했다.
Next, I had to figure out how to fill the outline gap of the tiles.

내가 우리 집 공사하면서 가장 많이 사용하는 caulking이다. 이걸로 타일의 바깥 테두리와 코너 타일 사이의 공간을 채우기로 했다.
바르기 너무 쉽고, 닦아내는 것도 너무 좋은 제품이다.
사실은 렉셀을 사용하고 싶었으나... 그렇게 물이 많이 닿는 곳이 아니니 그냥 쉽게 작업할 수 있는 방법을 택했다.
I have used this caulking the most while renovating my house because it's very easy to apply and clean up. So I decided to use this caulking to fill the outline gap.
I considered using the Lexel sealant, but didn't want to deal with that since it's not a water-exposed area.

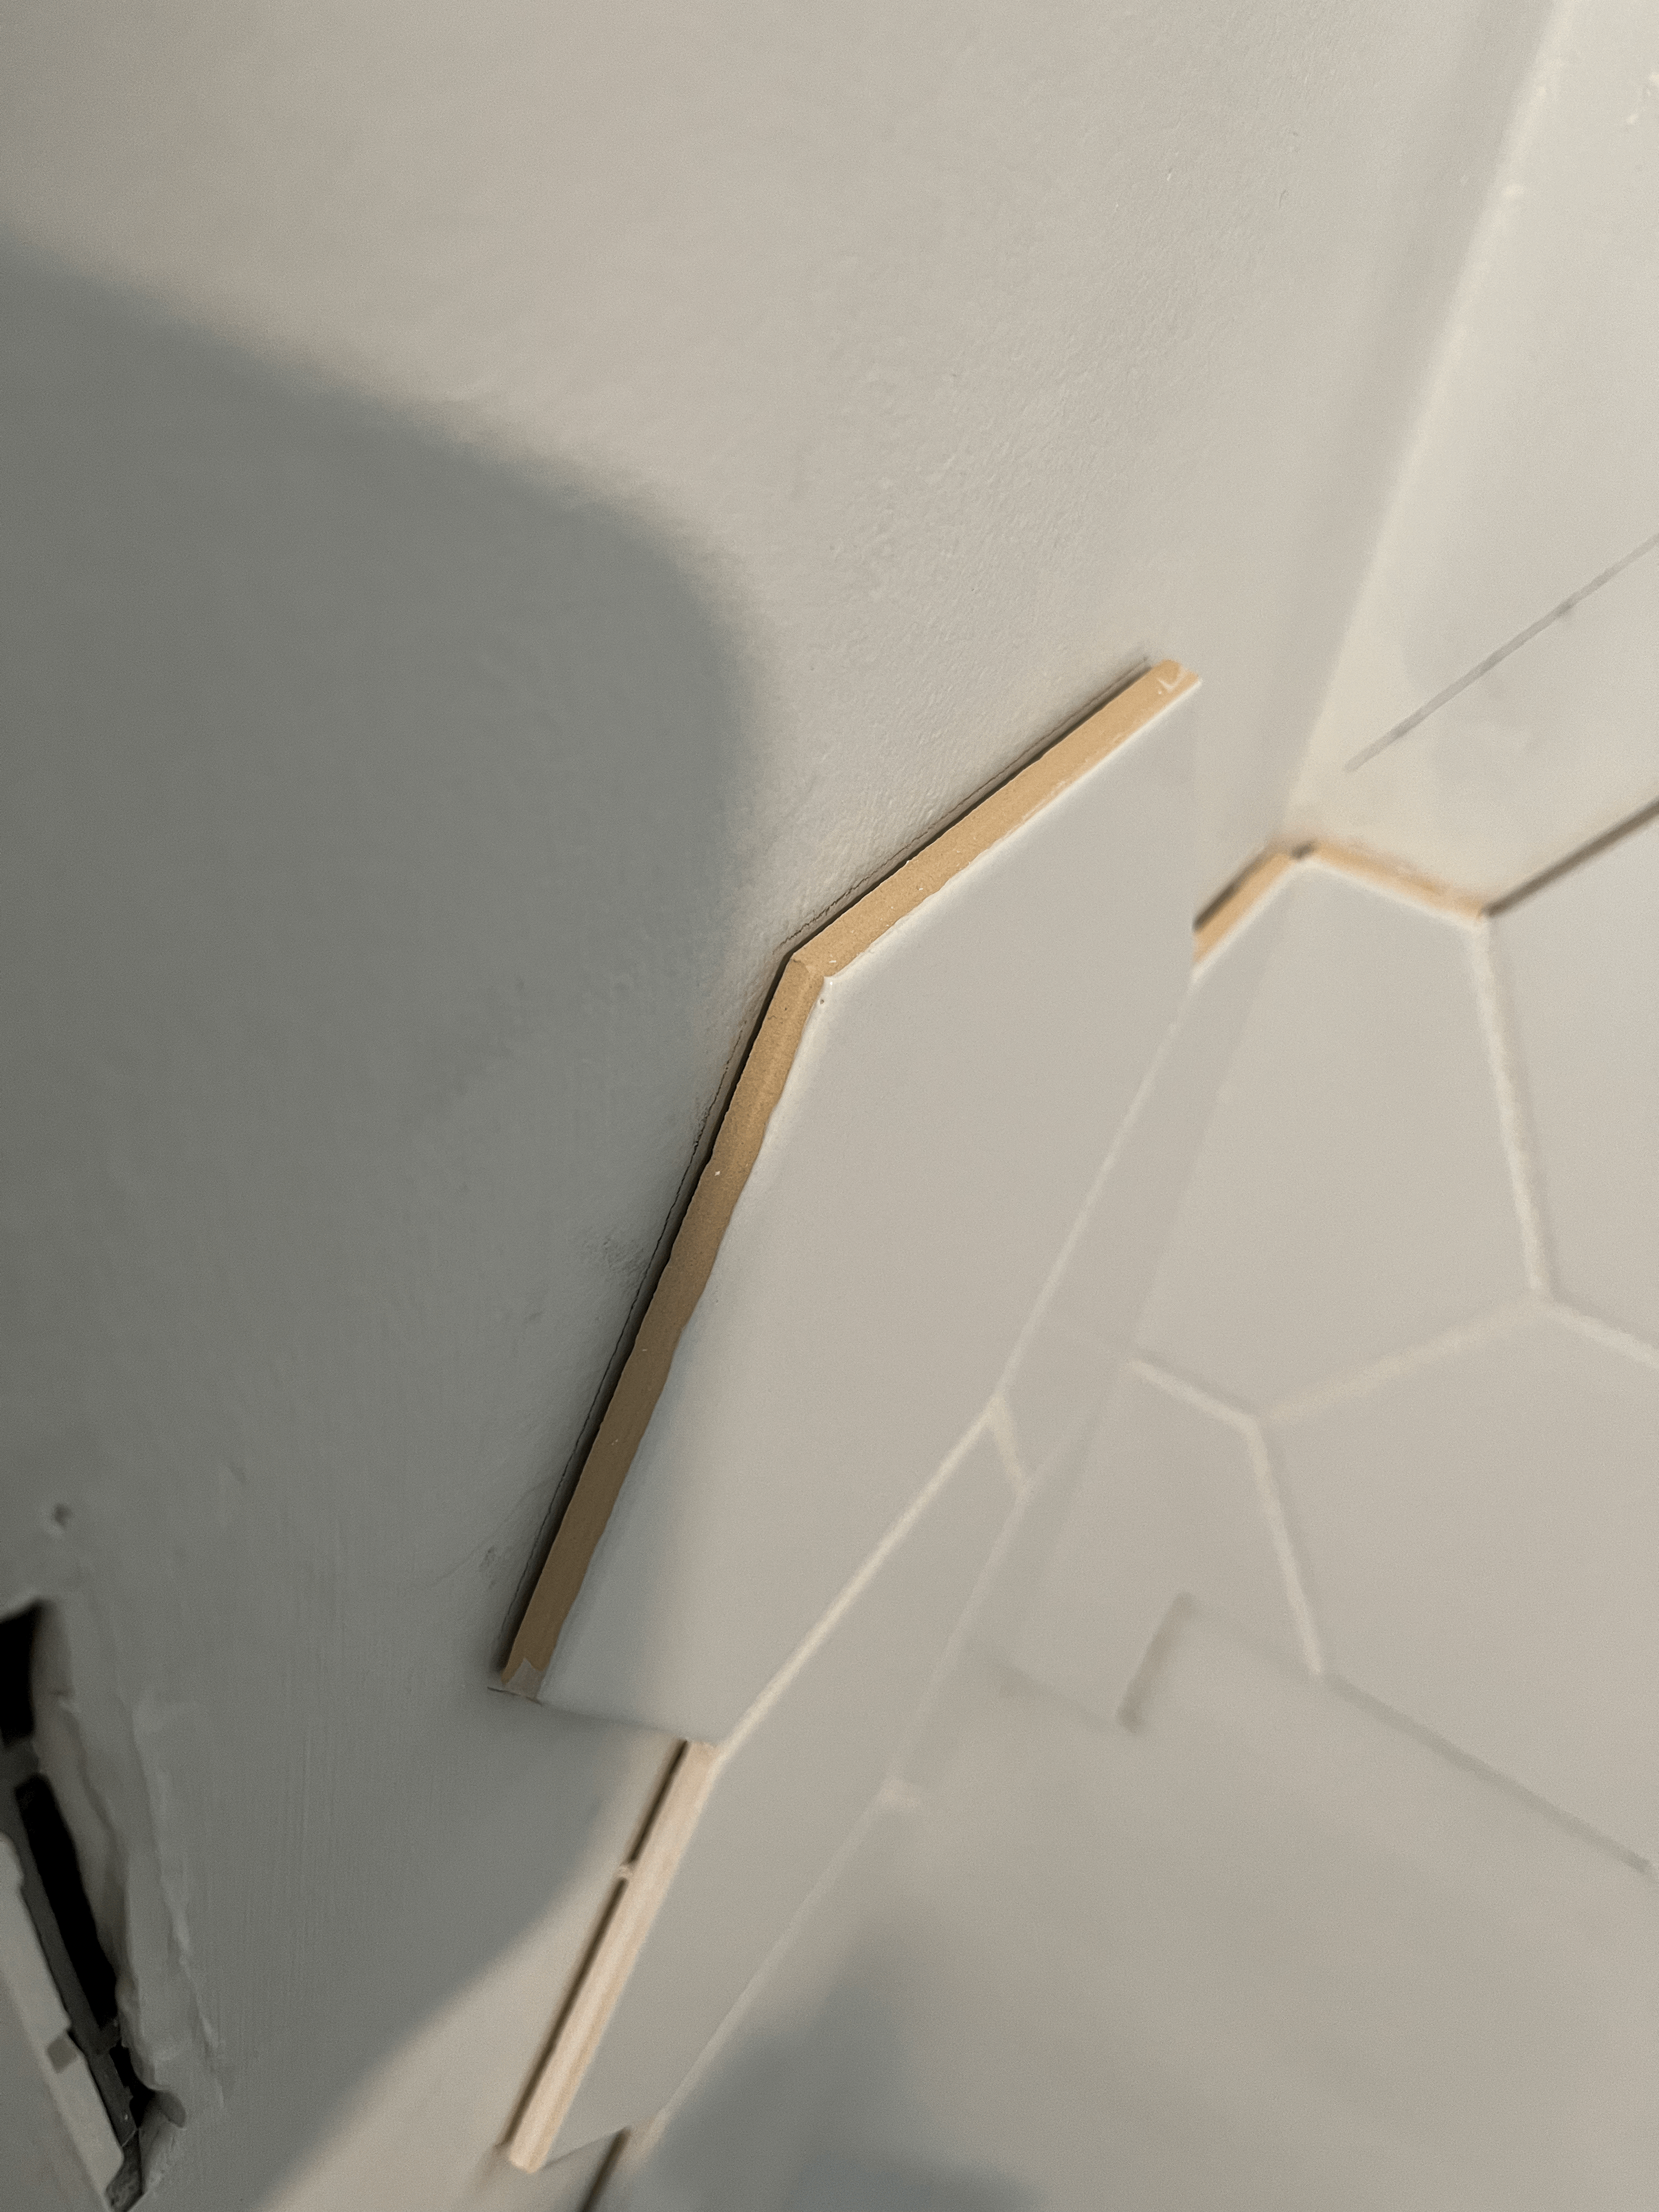
작업을 다하고나니, 저 누런 테두리가 눈에 좀 거슬렸다.
벽에 칠할 페인트가 베이지라 그냥 저렇게 둘까하다가... 어떤 테두리는 이미 하얗게 코팅 처리된 부분도 있어서 통일성을 주고 싶었다.
After filling all the gaps, I couldn't ignore the yellowish edge of the tiles.
I was gonna leave the edge as it was since the paint color I chose for the wall was beige. But some of the edges of the tiles were already coated white, so I just wanted to have them all consistent.

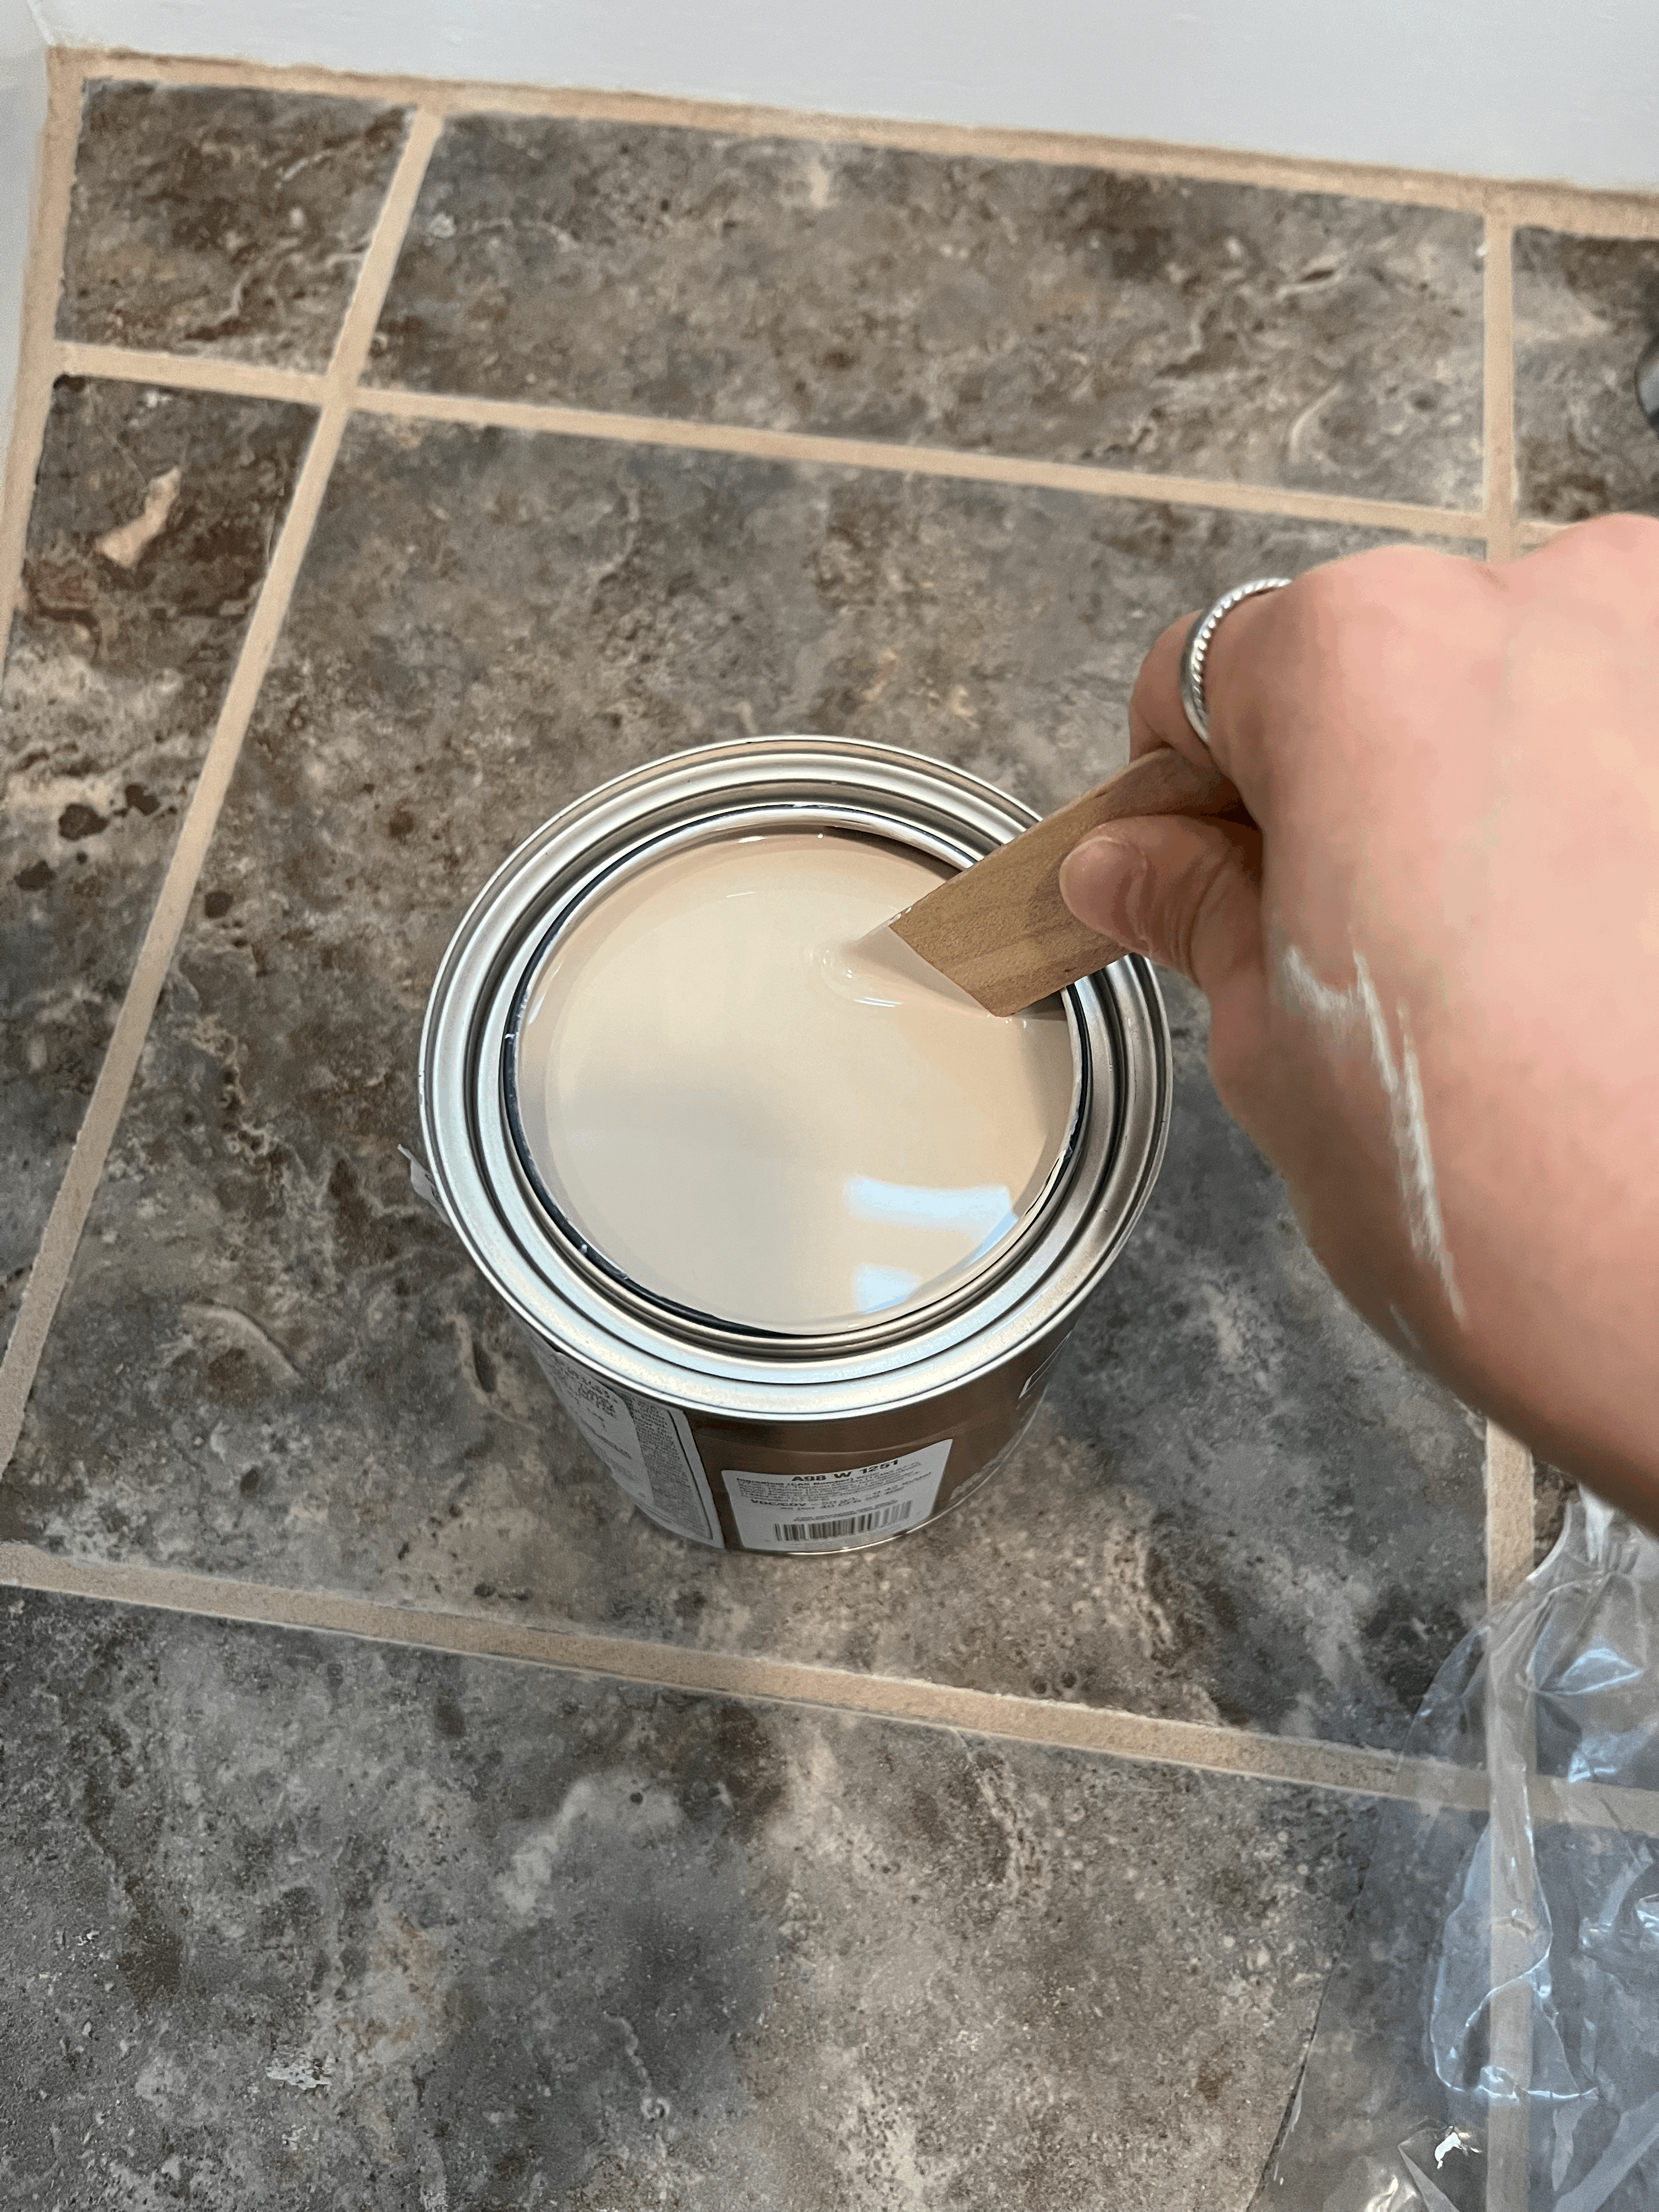
그리하여 캐비넷에 사용한 페인트를 칠하기로 했다.
어차피 페인트 색깔을 타일과 비슷하게 맞춰서 산거라 딱 좋았다.
I decided to paint the edge with what I used for the cabinet because I picked the color to match the tile.


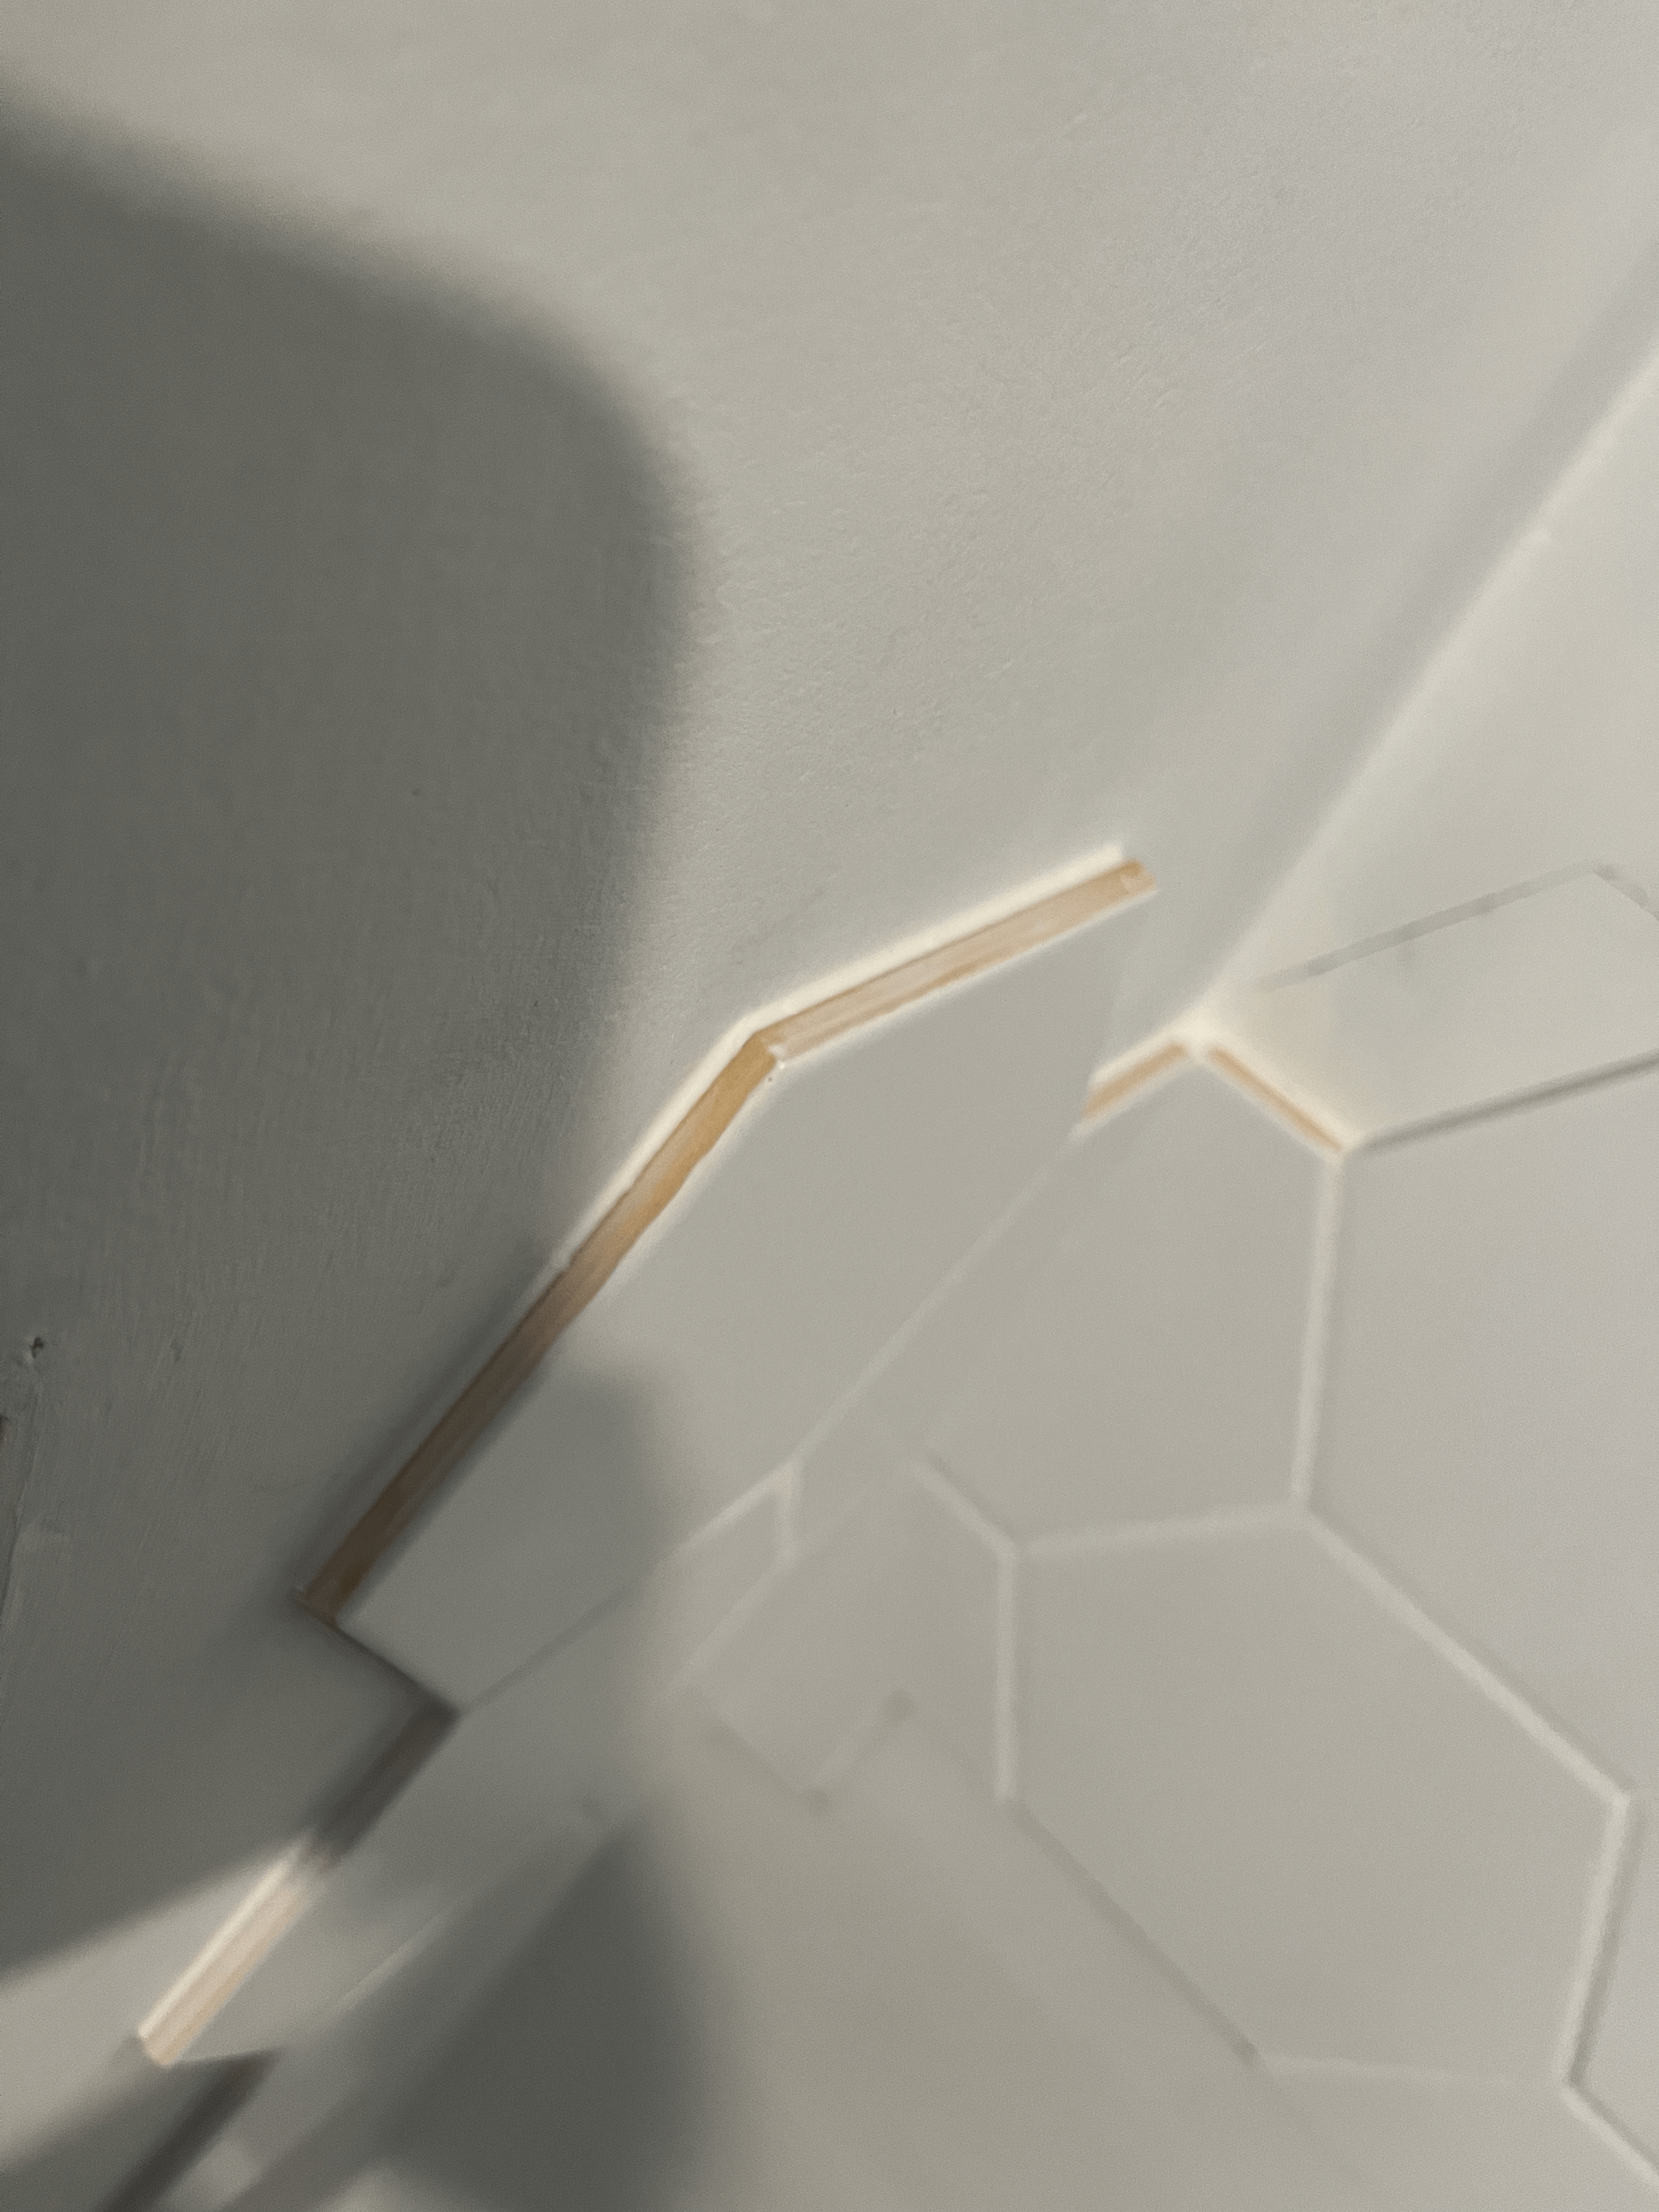
이게 페인트를 한번 칠하고 난 뒤의 모습이다.
근데 조금 부족한 것 같아 한번 더 칠했다.
This is after one coat of paint.
I could still see some yellow, so I went ahead and did another coat.
그랬더니 훨씬 나아보였다.
이렇게 타일작업을 끝낸 뒤에야 나머지 벽의 페인트를 칠할 수 있었다.
After the second coat, it looked much better.
Now it was time to paint the wall.

역시나 셜윈 윌리엄즈의 듀레이션 페인트를 선택했다.
I again chose Sherwin Williams paint - Duration.
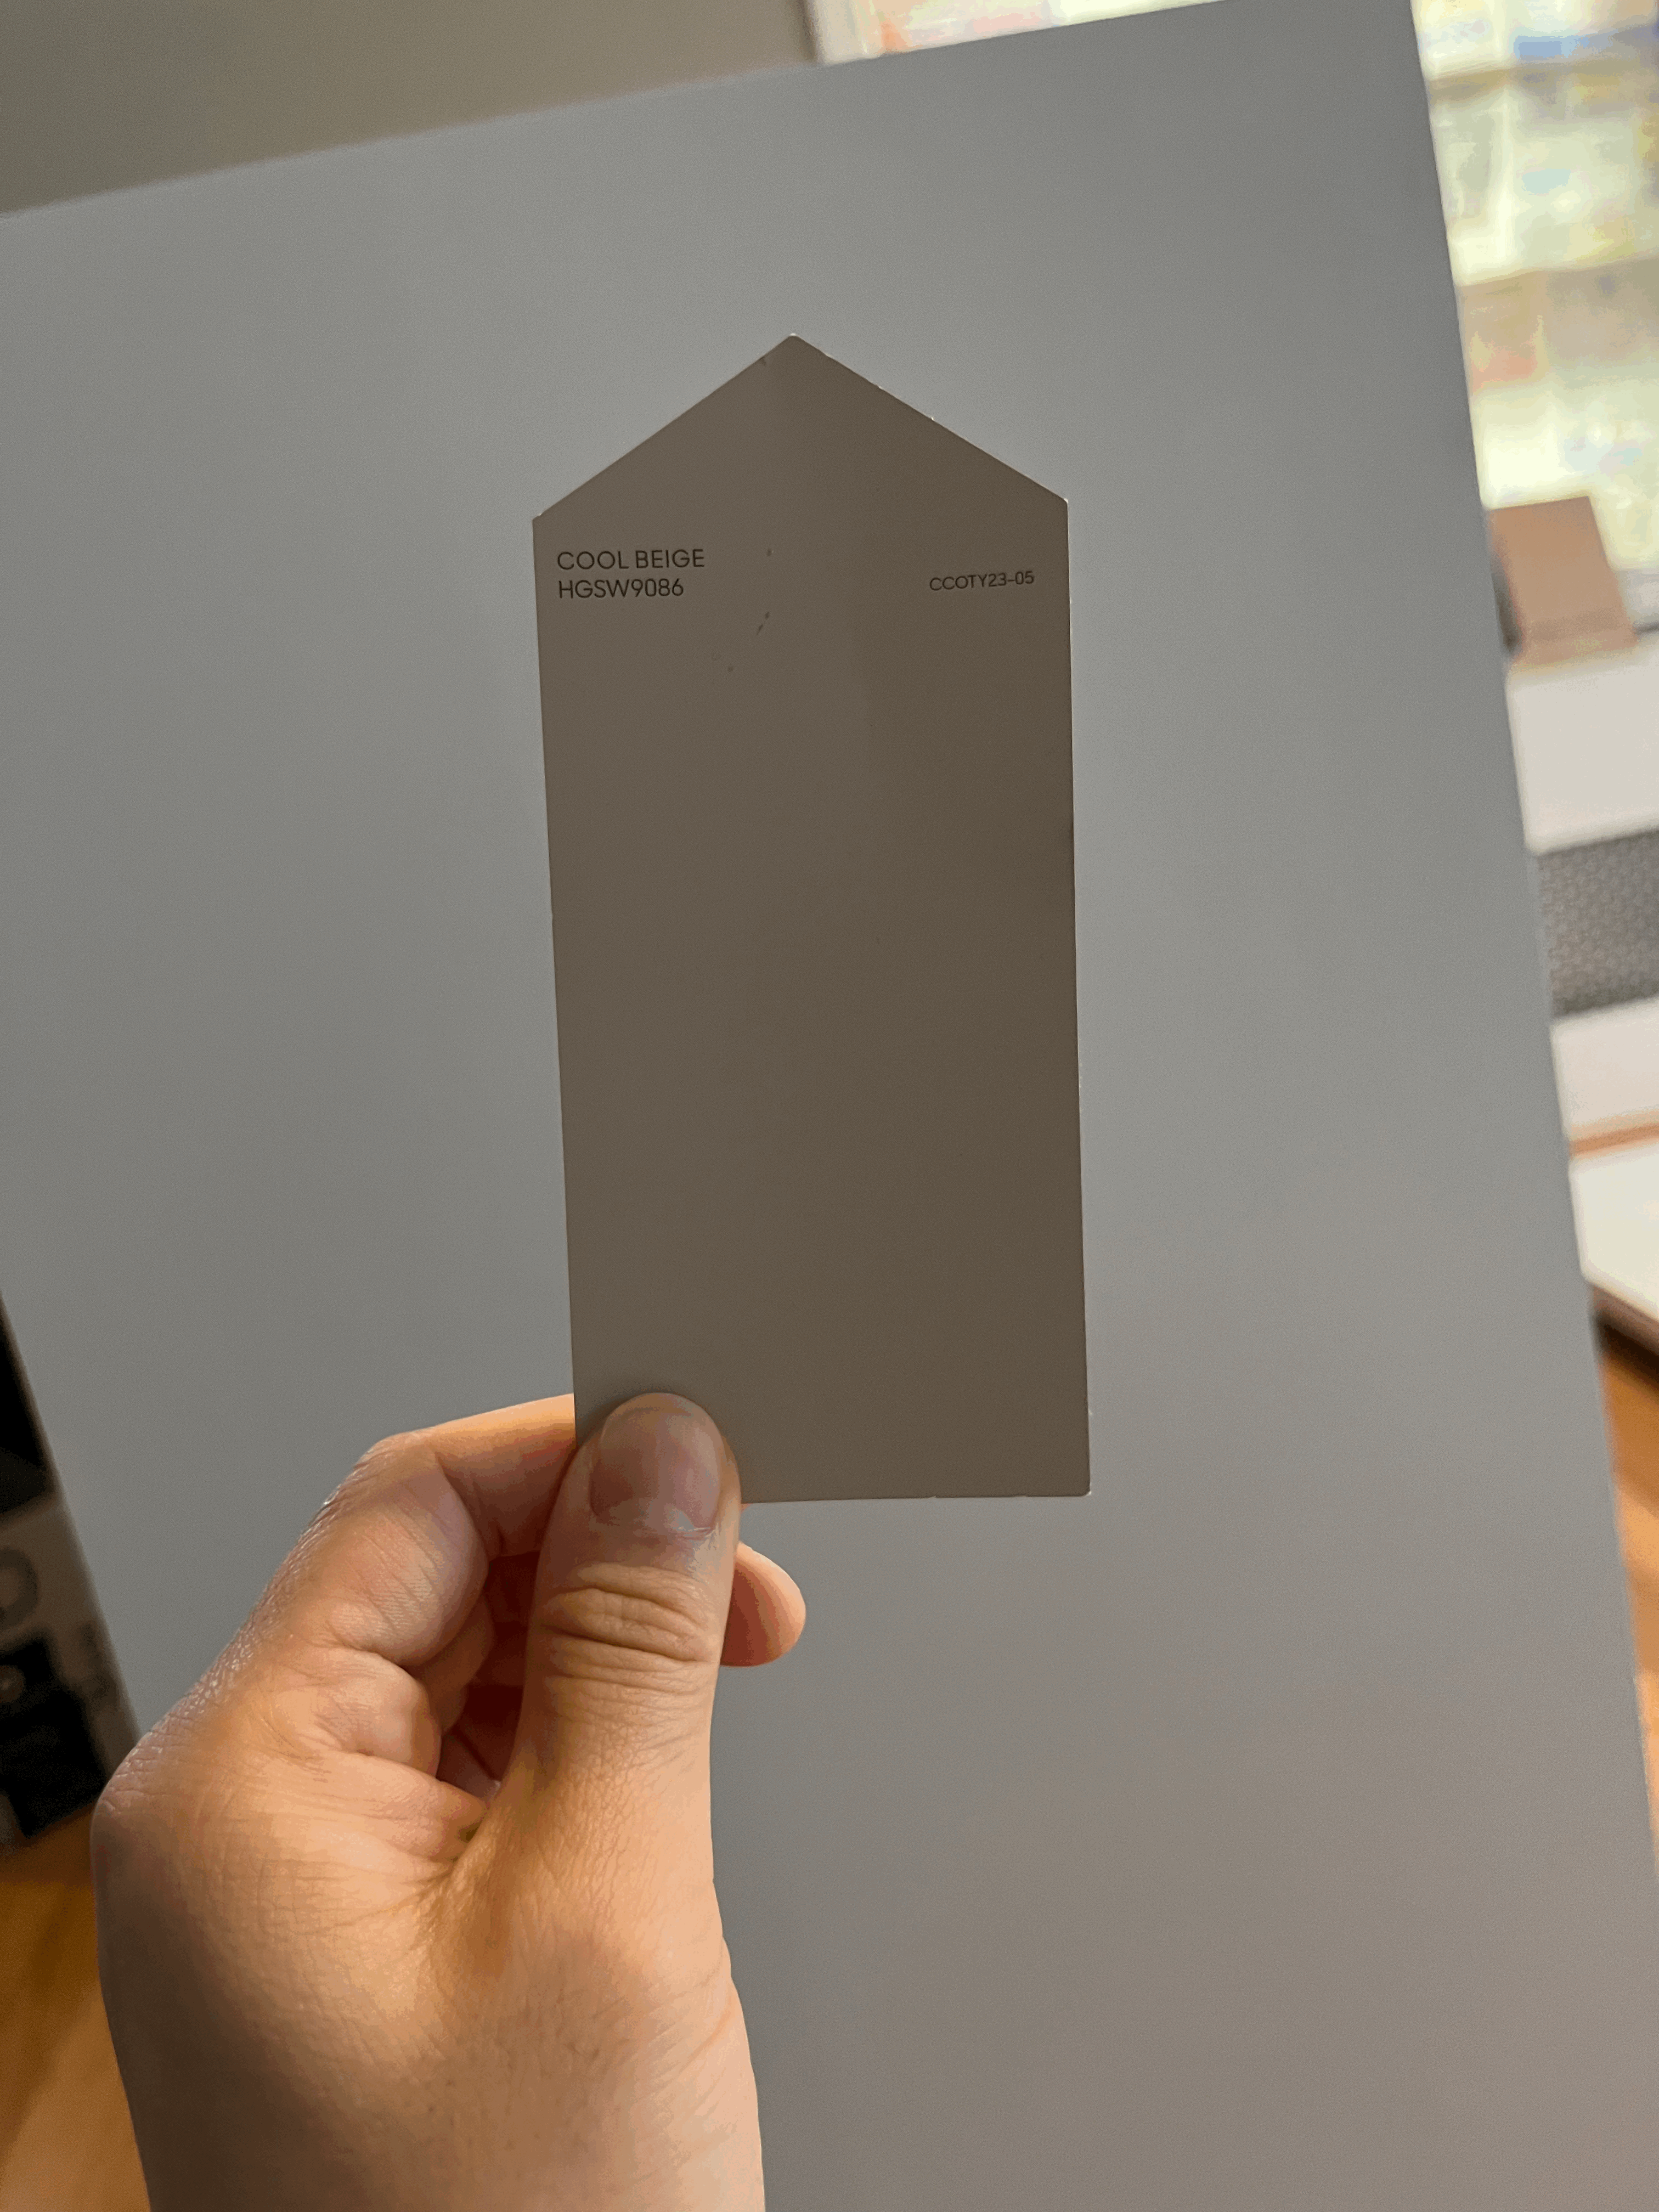
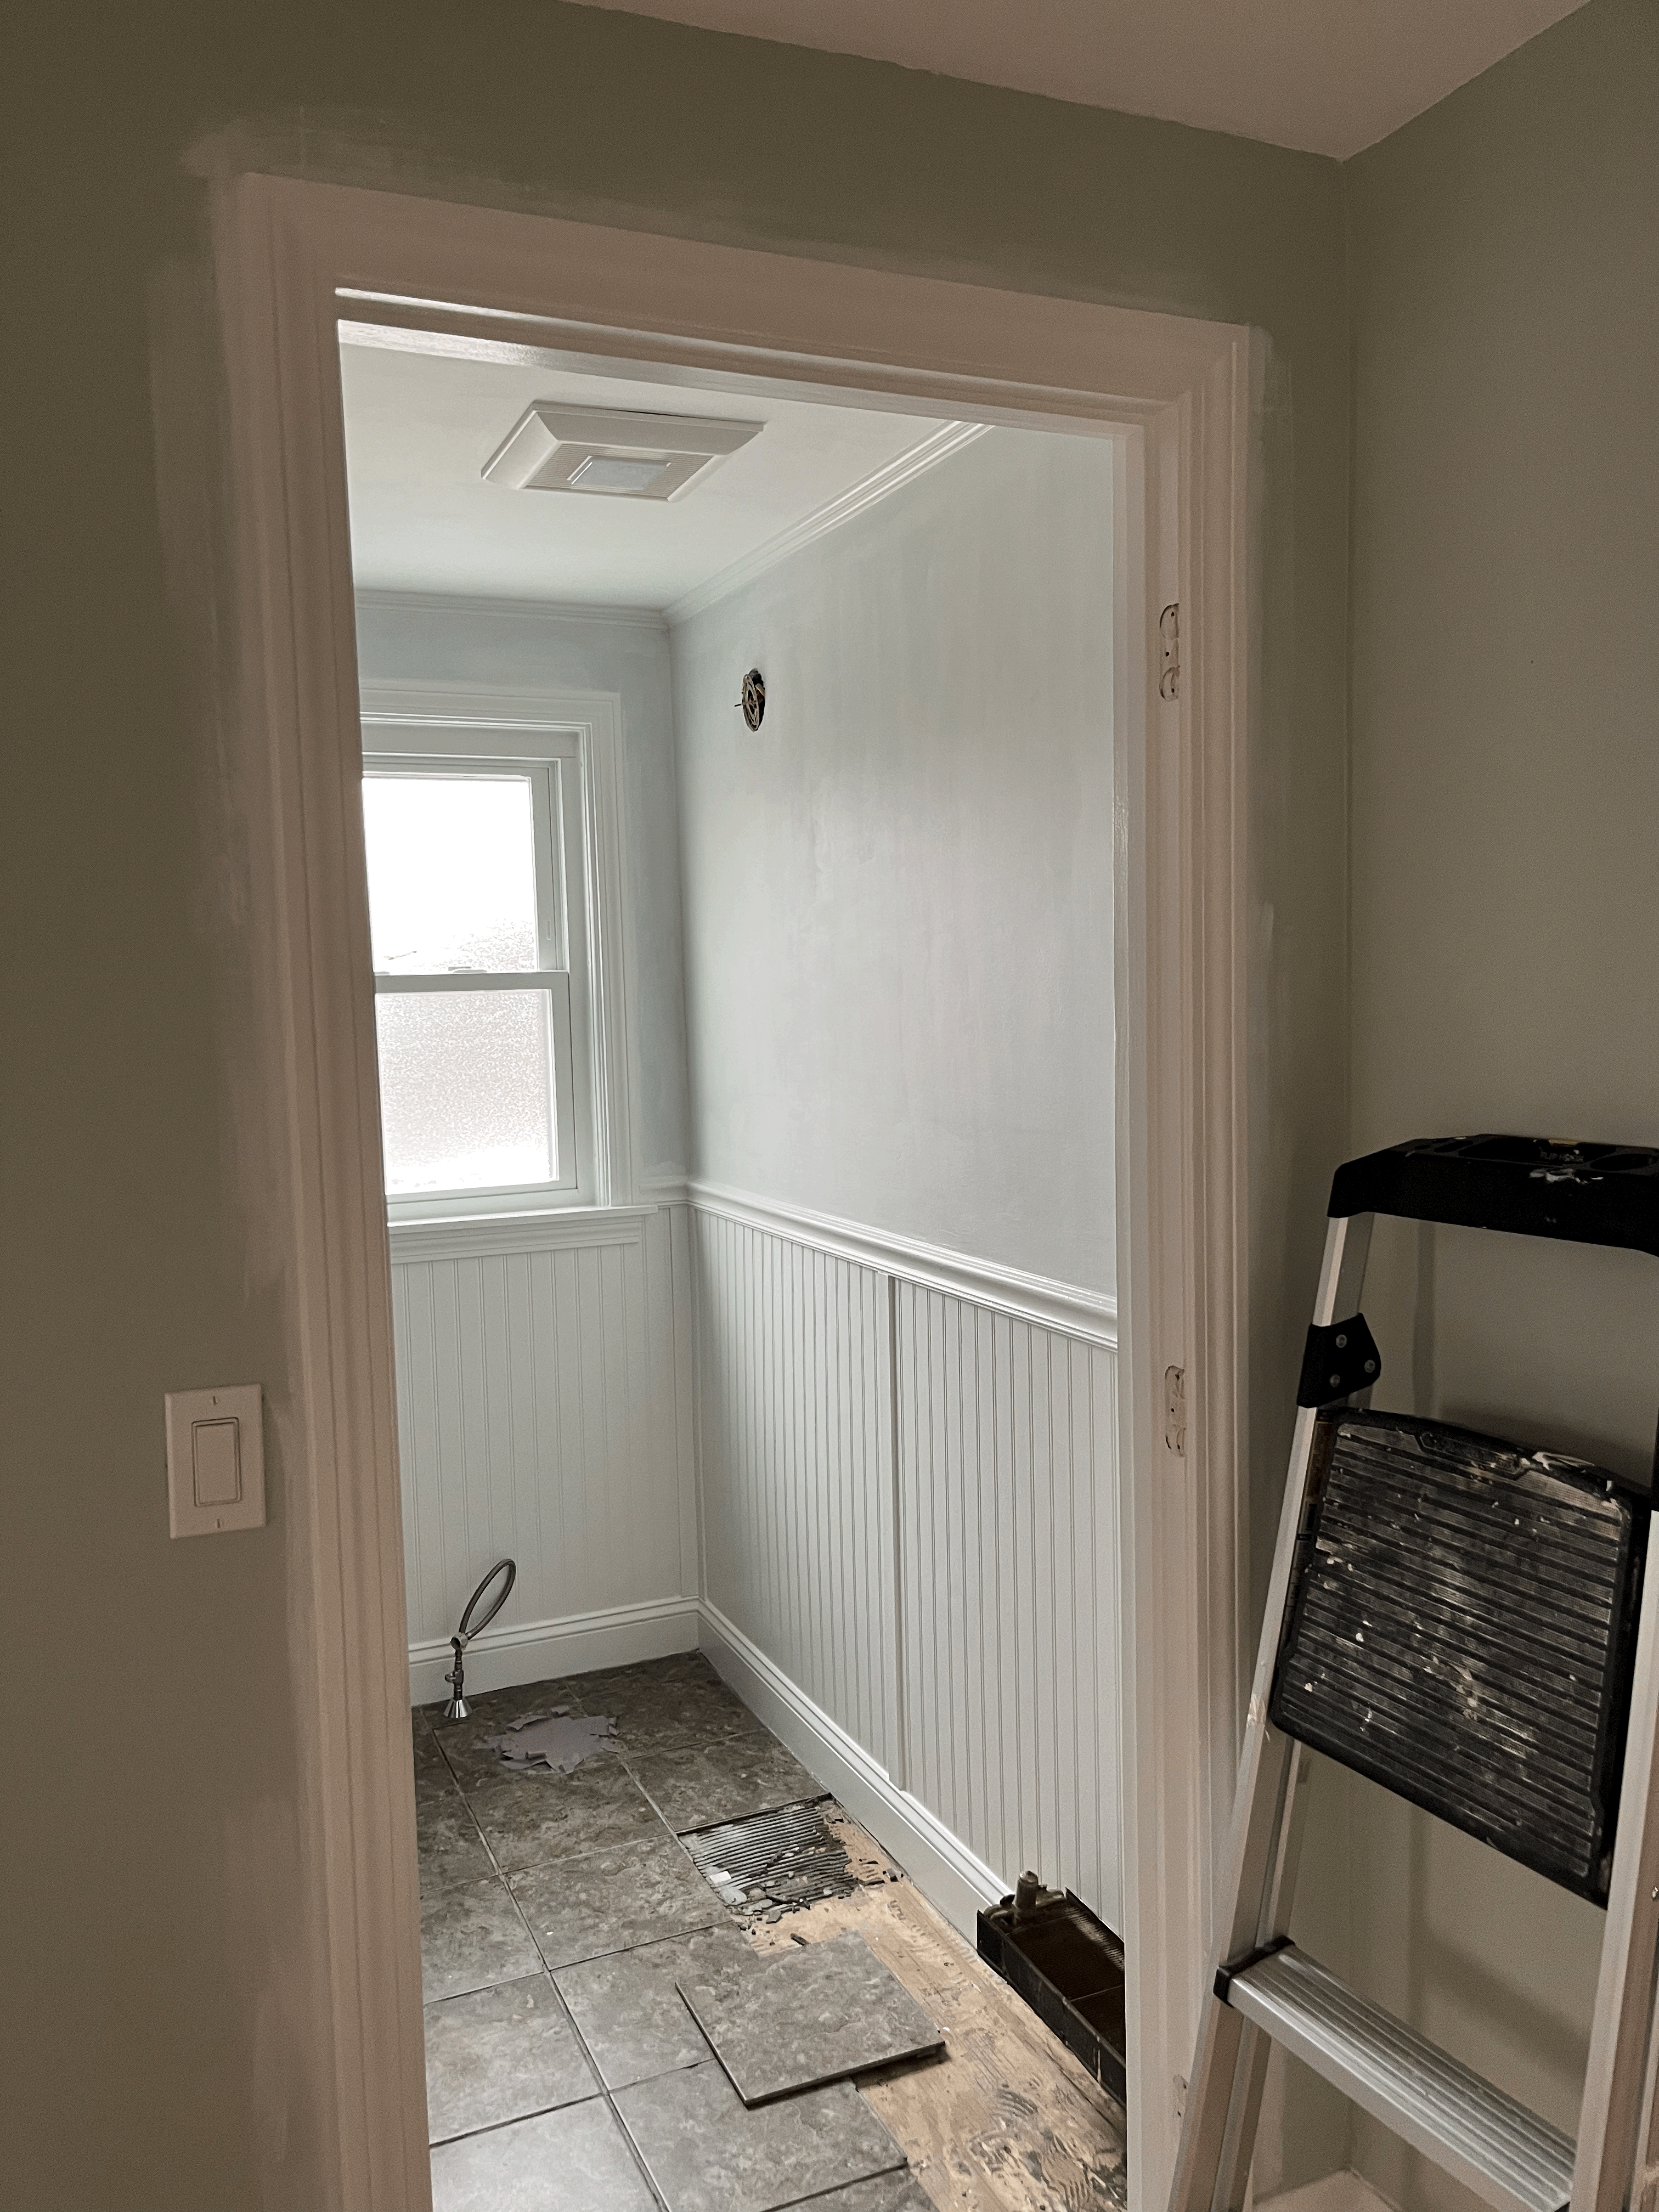
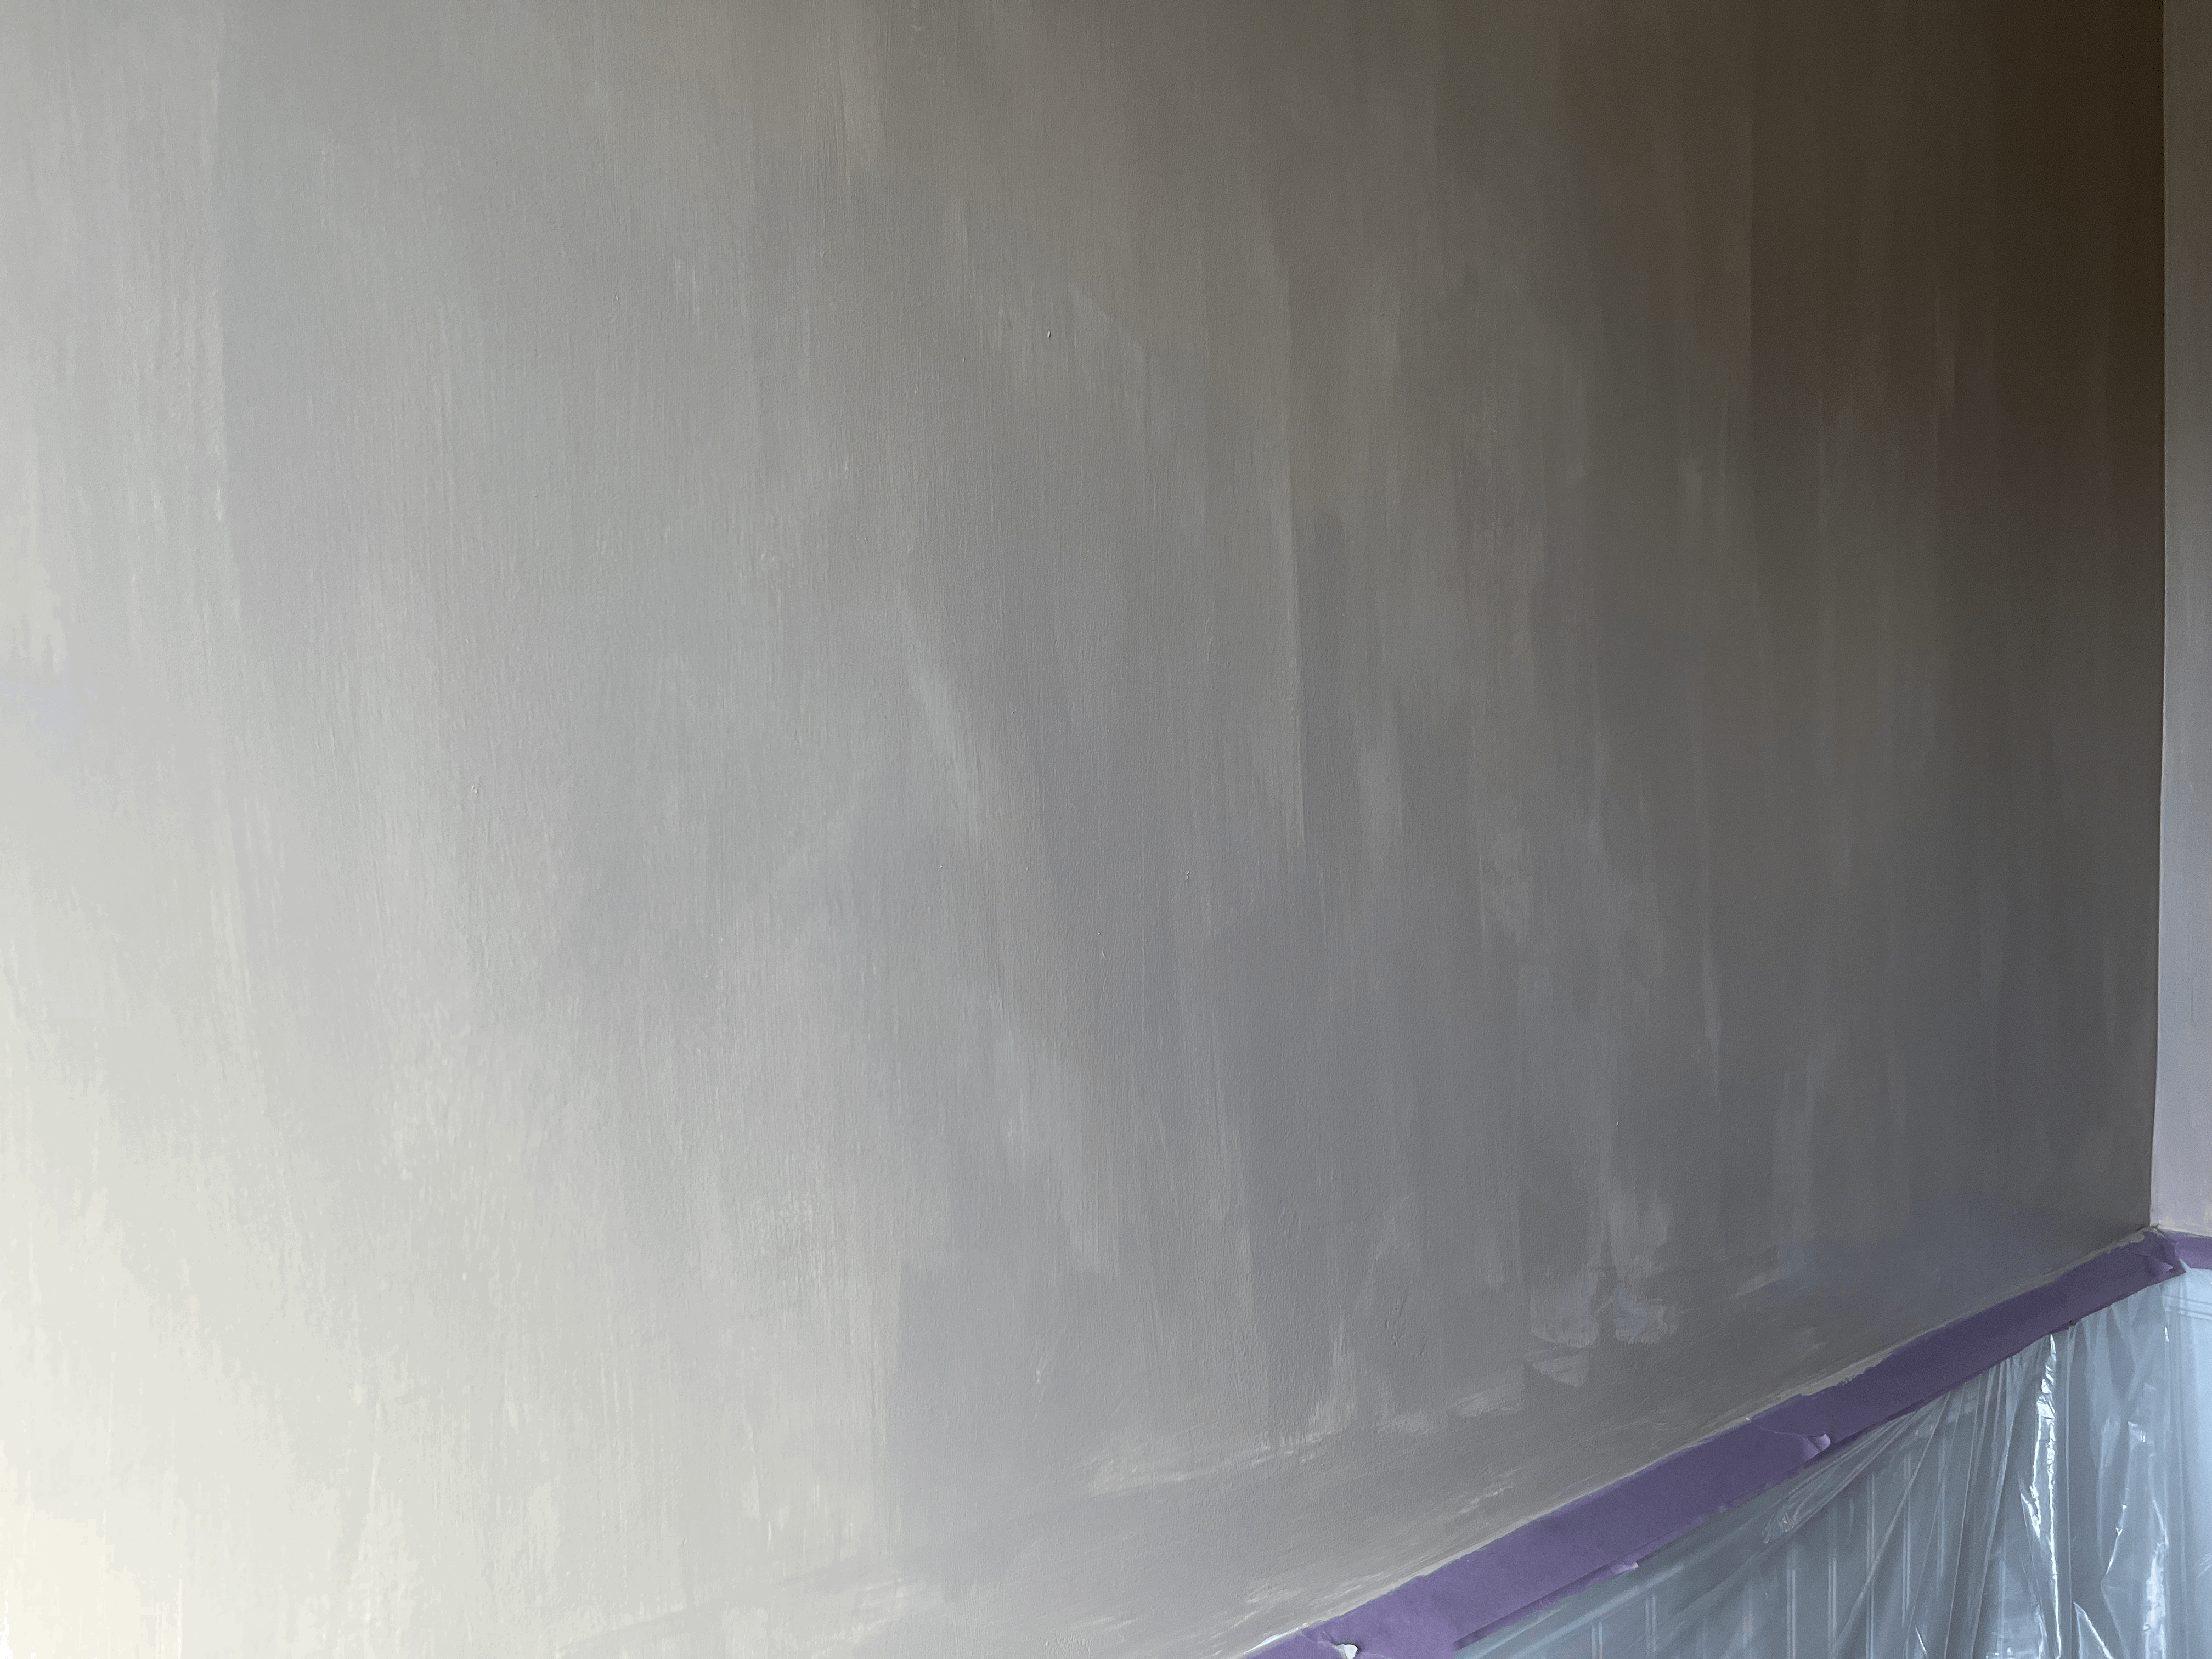
화장실 벽을 위해 내가 선택한 색깔은 쿨 베이지이다.
우리 화장실에 이미 깔려있던 타일 때문에 벽 색깔을 어떤 걸로 해야할지 정말 고민 많이했다.
하얀색은 너무... 재미가 없어보여서 고려 조차 하지 않았다.
그렇게 인터넷을 검색하다보니 우리처럼 누리끼리한 타일의 화장실을 베이지나 그레이지로 맞춘 이미지들을 꽤 발견할 수 있었다.
The color I chose for the bathroom wall was Cool Beige.
Because of the tile color on the floor and in the shower, It was pretty challenging to choose a matching color.
I didn't consider white at all because it was too boring.
From lots of online searching, I could see some beige or greige wall with beige or brown tile bathrooms like ours.
게다가 우리집 바닥과 샤워실 타일의 grout도 베이지로 바꾼 참이라, 벽도 베이지로 하면 뭔가 세트처럼 통일성도 있고 예쁠 것 같았다. 그리고 화장실에 하얀색 부분도 많으니 베이지로 해도 그렇게 어두워보이지 않을 것 같아 베이지로 결정한 것이다.
Additionally, we recently changed our bathroom floor tile grout color to beige. That's why I deicded to go beige for the wall too. I was a little concerned if the beige would make the space too dark. But since half of our bathroom was white, I thought it would be fine.
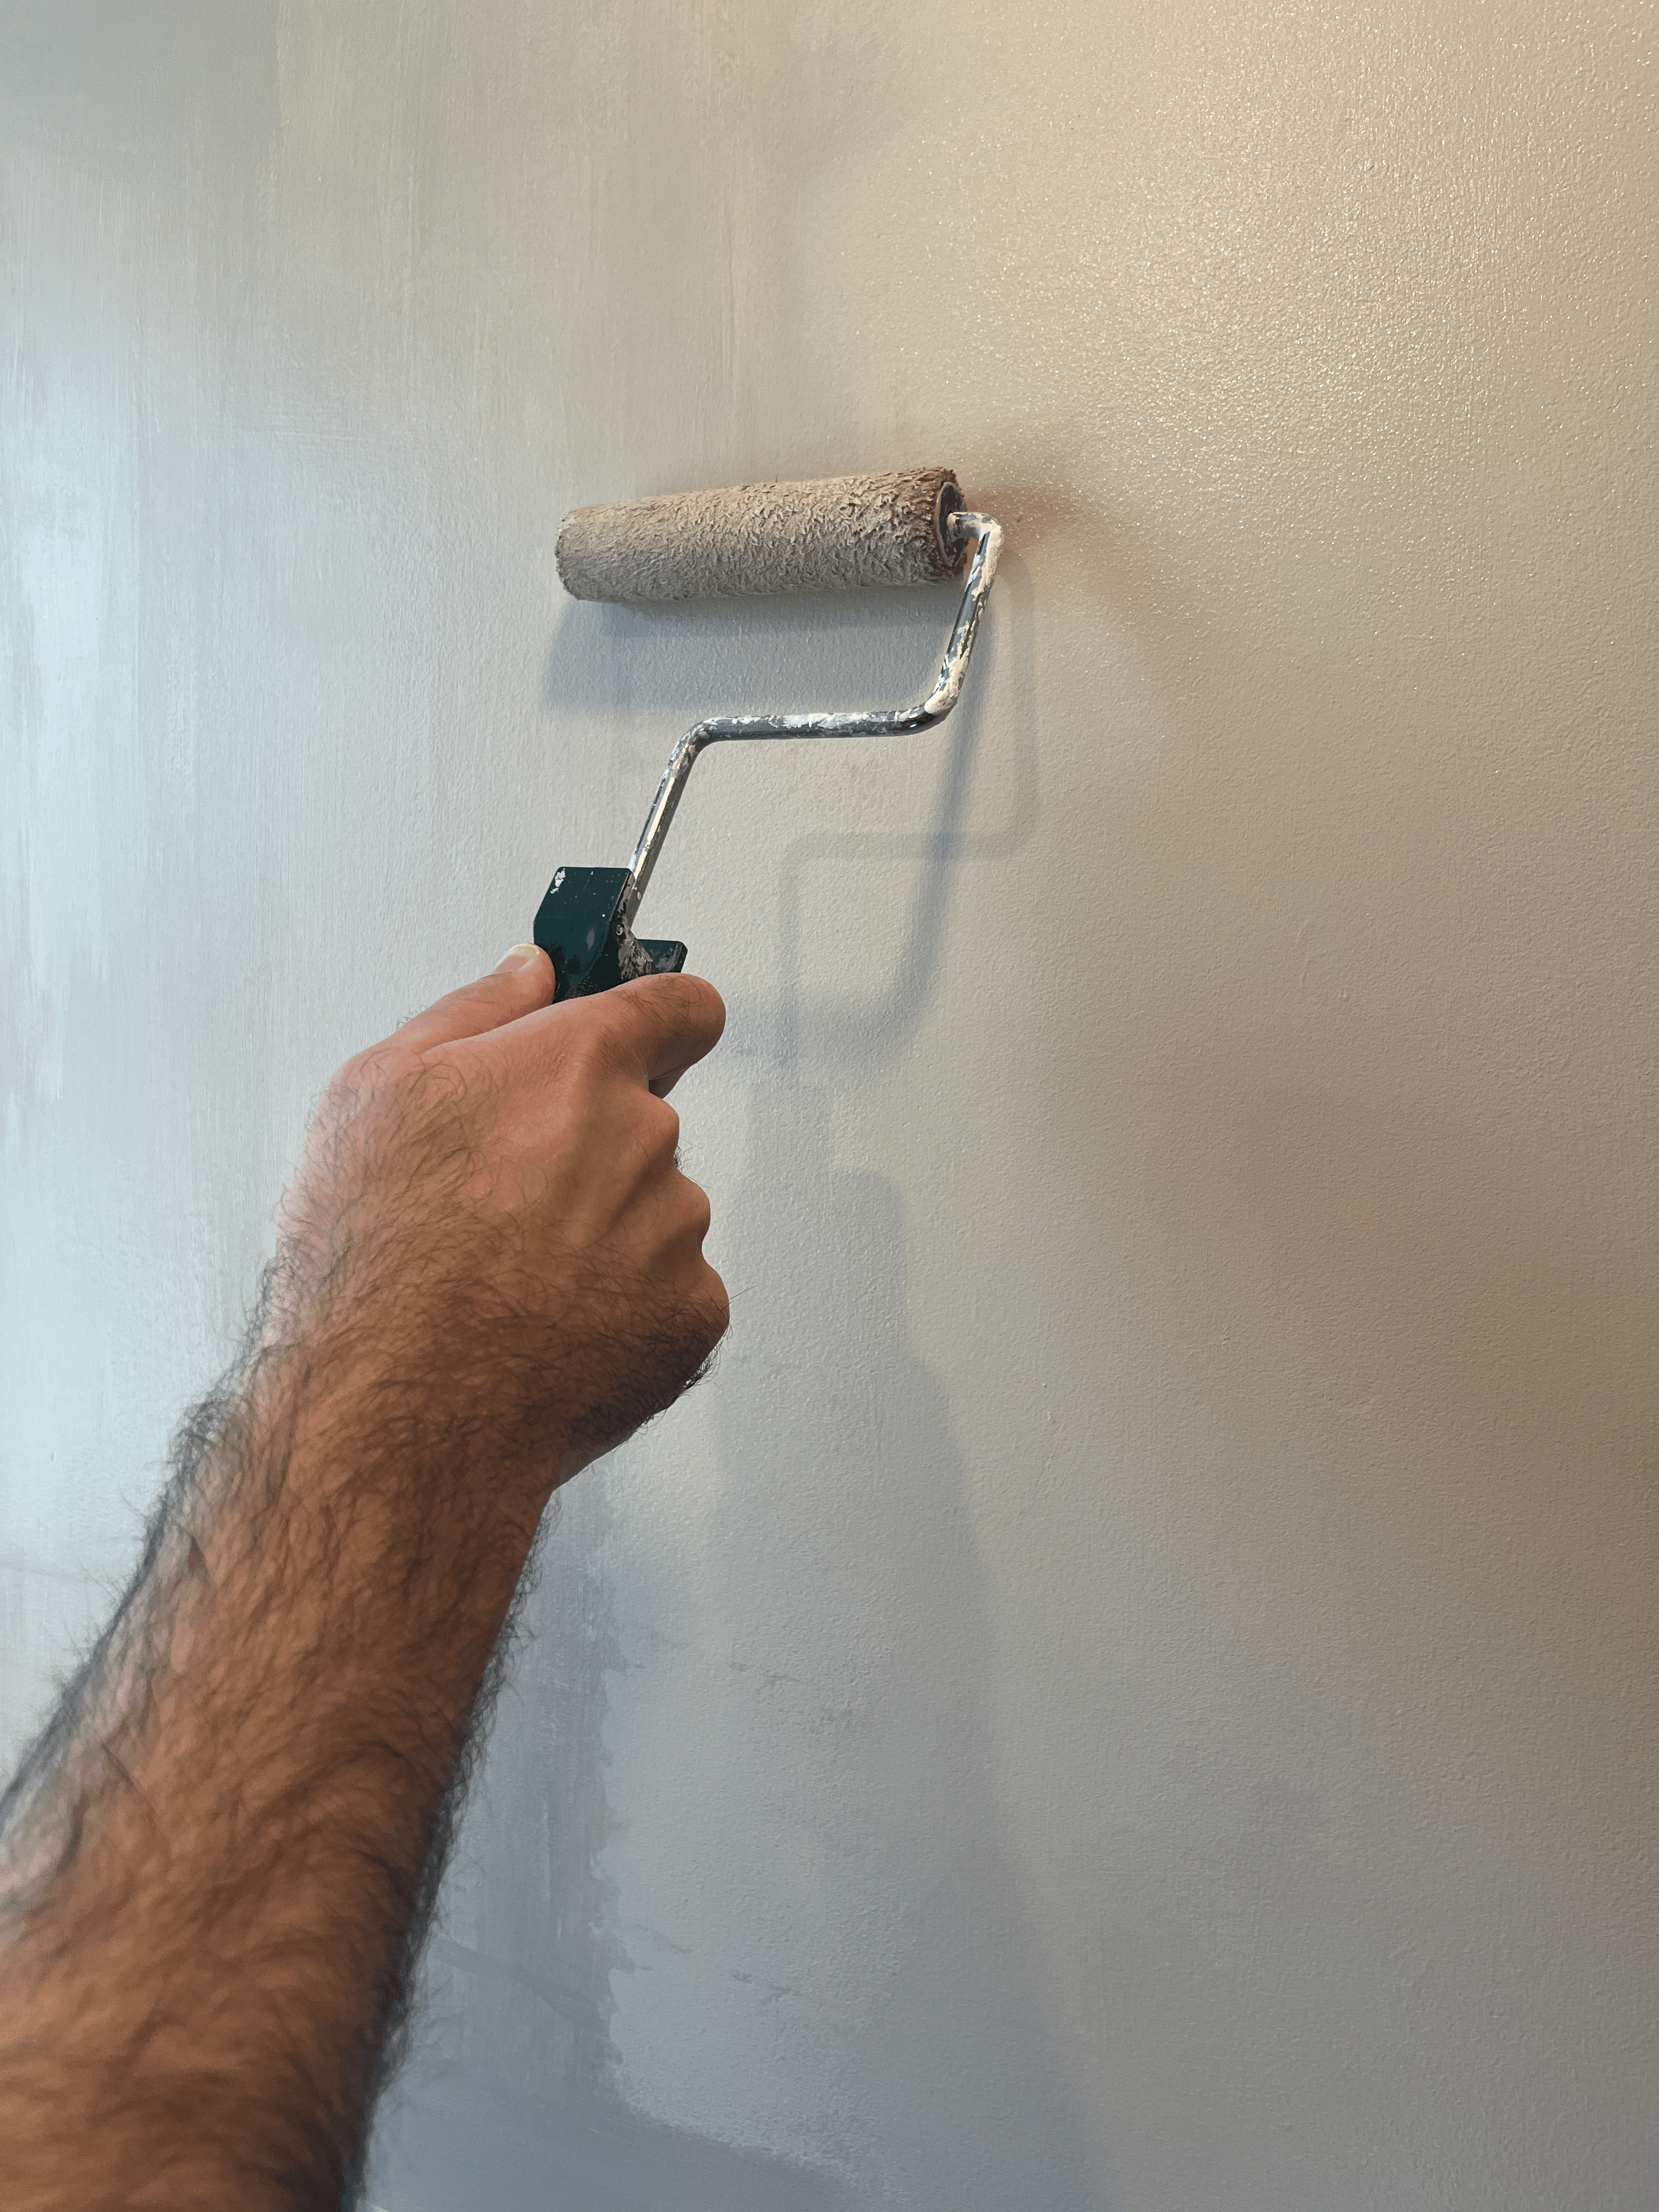
페인트 작업 전에 여기저기 튐을 방지하기 위해 drop cloth를 놓아주었다.
브러쉬로만 사용하면 괜찮은데 롤러는 어쩔 수 없이 많이 튄다...
Before painting, I placed a drop cloth on the floor to prevent splashes and drips.
첫코트를 시작하는데 벽에 바르면서 약간 당황했다.
여태 하얀색 아님 밝은 색의 페인트만 칠해봐서, 이렇게 색감이 뚜렷한 페인트가 내 눈앞에 보이니 좀 놀랐던 것 같다.
일단 그렇게 겁없이 1차 코트를 테이핑하지 않고 브러쉬로 그냥 칠해봤다.
근데 너무 조심하다보니 시간도 많이 걸리고, 내 맘대로 잘 되지도 않았다.
While starting the first coat of paint, I felt nervous.
Since I've only experienced white or bright color paint, I think I was overwhelmed by the darker color.
Anyway, I tried to cutout without masking at first.
But it took a long time to finish because I was too careful.


결국 테이핑을 해야했다.
So I ended up masking after the first coat.


근데 페인트를 바를 면적이 적다고 생각해서 브러쉬로 다 칠해봤는데 커버력이 영 벌로였다.
컷아웃만 브러쉬로 하고 나머지는 롤러로 했어야했는데, 왜 힘들게 다 브러쉬로 작업했는지 모르겠다..;;
I tried painting with only a brush because I thougth the area was small enough to do that. But the result was so bad.
I don't know if it was because I painted with a brush or it was the first coat.
I feel like I should've used a roller after the cutout.
그래서 2차 코트는 롤러로 작업을 했다.
So I used a roller for the second coat.

백스플래쉬 타일 주변은 작은 브러쉬로 터치업이 좀 필요했다.
We had to do a little touch up around the backsplash tile with a small brush.

다행히도 롤러를 사용해서였는지, 2차 코트라 그랬는지 몰라도 이때는 훨씬 커버가 잘됐다.
맘 같아선 한번 더 바르고 싶었는데, 너무 힘들어서 그냥 2차로 마무리했다.
Fortunately, the second coat covered much better.
I wanted to do another coat but settled with two.
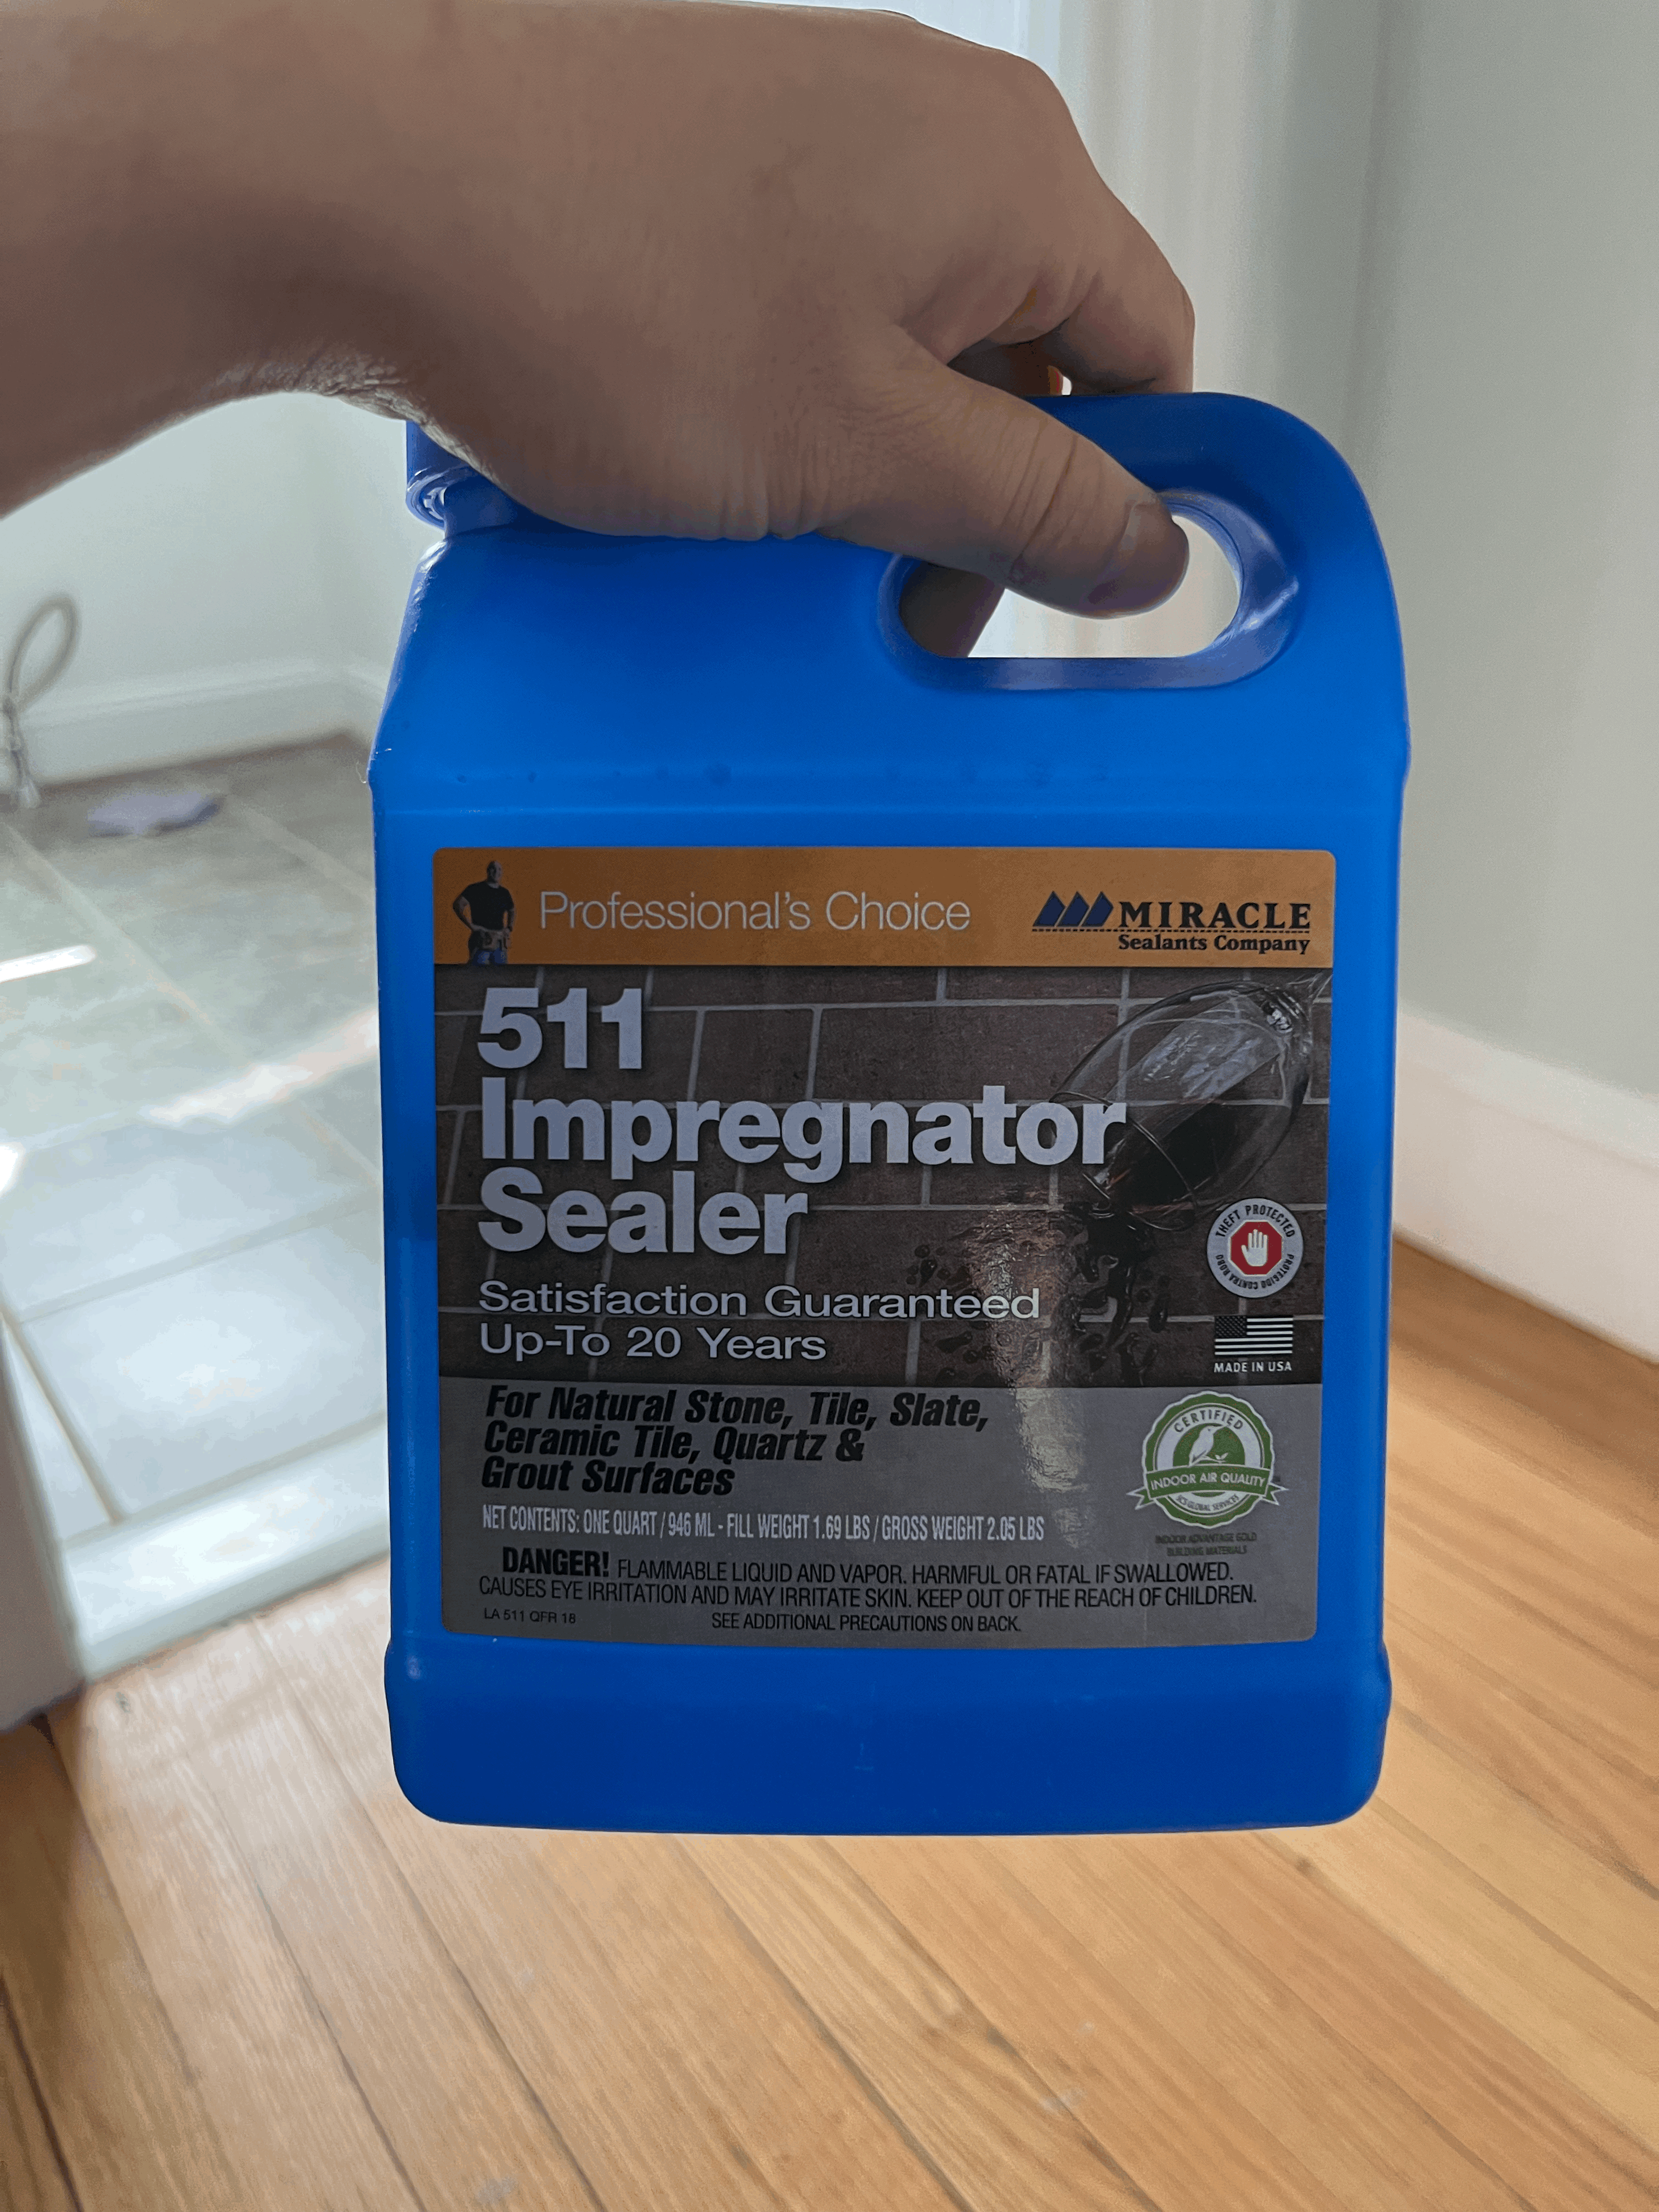
페인트를 바르고 몇일을 더 기다린 뒤, 백스플래쉬 타일의 sealer를 발랐다.
A few days after painting, I applied a sealer to the backsplash tile.

수명이 다 한(?) 페인트 롤러로 바르면 뚝뚝 흐르지도 않고 잘 발린다.
It's good to use a worn paint roller which you won't be using anymore.
이렇게 페인트와 타일까지 완성된 모습은 영상으로 만들어봤다.
You can check the completed job from the video below.
2023.03.20 - [미국 일상] - 화장실 셀프 리모델링 3 Patching and Priming Walls for Bathroom Renovation
화장실 셀프 리모델링 3 Patching and Priming Walls for Bathroom Renovation
현재 화장실 천장을 끝내고는 벽 작업을 진행 중이다. After finishing the ceiling I began working on the bathroom wall. 2023.03.01 - [미국 일상] - 화장실 셀프 리모델링 1 How to Fix Bathroom Ceiling Paint Peeling and Cracking
akoreaninamerica.tistory.com